A woman's project: 1968 Mustang Fastback Eleanor

6686mustang;33802 said:
I only intend to do it once.. and I hope it sticks! I'll wait until a warm day - plenty of other items to keep me busy until then. So his Por15 was peeling right off the floor? I never used that product.


Yes that stuff is complete garbage.. I found out he used it on spots on the undercarriage and floor, So off to the blaster it went..
 
Over the last few days we put on the other side stripe, installed the FatMat on the roof along with new insulation and Scott Drake headliner and visors. We also started on the wiring and Aaron insisted we put on the tail light panel emblem. I told him if he keeps this up we're going to run out of "fun" things to do when the frustrating parts kick in!

Lauren

C0164810-90E7-4E7B-BC56-8D7706CB85F2_zpswlps0q38.jpg


9EC886CD-F71D-4F60-97AC-F8BCF5769337_zps9bfnz3rt.jpg


CFB8F7C0-EDE5-43F2-9003-0904D79C0B89_zpsf2jddrpr.jpg


- - - Updated - - -

And I don't know why my pictures are huge. Huge and poor quality. Sorry we'll have to work on that.
 
headliner looks nice! I do my best not to mess with those, I usually send them to the interior shop. The last one I had was to short to even use.. not sure how that happens.
 
Well maybe then on a classic Mustang it isn't that bad, just time consuming. I could see if it was too short you could have serious problems!! lol I had a harder time being patient with the side stripe decals because at least with the headliner you can take breaks.

We installed the windshield, roof rail weather strip channel, and sash molding. Everything fit fine.

Lauren

2545841D-A1DF-4BB5-9608-3CB39AF95B28_zpsjezzcyfp.jpg


C7579EA8-80DB-4FB1-B83F-F29C70C0E953_zpsj368dqrk.jpg


736D1D5A-D1B2-459D-91D8-57985FAC60F2_zpssjaulgru.jpg


33993647-2F63-4140-B763-FAE33A35B47A_zps42mqn7td.jpg


And there was light! There is just something about that rear end :eek:

171653CD-C9AB-40CA-B89C-E96BA76315C1_zpshv5mwauy.jpg
 
82firebird;34082 said:
Well maybe then on a classic Mustang it isn't that bad, just time consuming. I could see if it was too short you could have serious problems!! lol I had a harder time being patient with the side stripe decals because at least with the headliner you can take breaks.

We installed the windshield, roof rail weather strip channel, and sash molding. Everything fit fine.

Lauren

2545841D-A1DF-4BB5-9608-3CB39AF95B28_zpsjezzcyfp.jpg


C7579EA8-80DB-4FB1-B83F-F29C70C0E953_zpsj368dqrk.jpg


736D1D5A-D1B2-459D-91D8-57985FAC60F2_zpssjaulgru.jpg


33993647-2F63-4140-B763-FAE33A35B47A_zps42mqn7td.jpg


And there was light! There is just something about that rear end :eek:

171653CD-C9AB-40CA-B89C-E96BA76315C1_zpshv5mwauy.jpg

Awesome!!
 
Nice work Aaron and Lauren! Did you go with the sequential LEDs? I am looking into those. Might as well spend the extra money at this point considering the difference they make! Can you please take a picture of what they look like from the inside of the trunk for me? Thanks!:encouragement:
 
Christopher;34124 said:
Nice work Aaron and Lauren! Did you go with the sequential LEDs? I am looking into those. Might as well spend the extra money at this point considering the difference they make! Can you please take a picture of what they look like from the inside of the trunk for me? Thanks!:encouragement:

Thanks! Yes they are the sequential LEDs. What exactly are you looking for in the picture as remember the sequentials do not require the tail light panel to be cut. They were a pain in the butt to install because the openings in the fiberglass tail light panel were more narrow than the holes in the bezels and the LEDS. Lets just say that having to file into freshly painted fiberglass is not fun. But, it wouldn't be an Eleanor without so much fun, right? ;)

65068DC2-63AB-4EEC-A7F7-91055C06BAAC_zps0otk1irp.jpg
 
oh! My taillamp panel is already hacked out on the backside. I guess ill order them, see how they fit, and go from there.
 
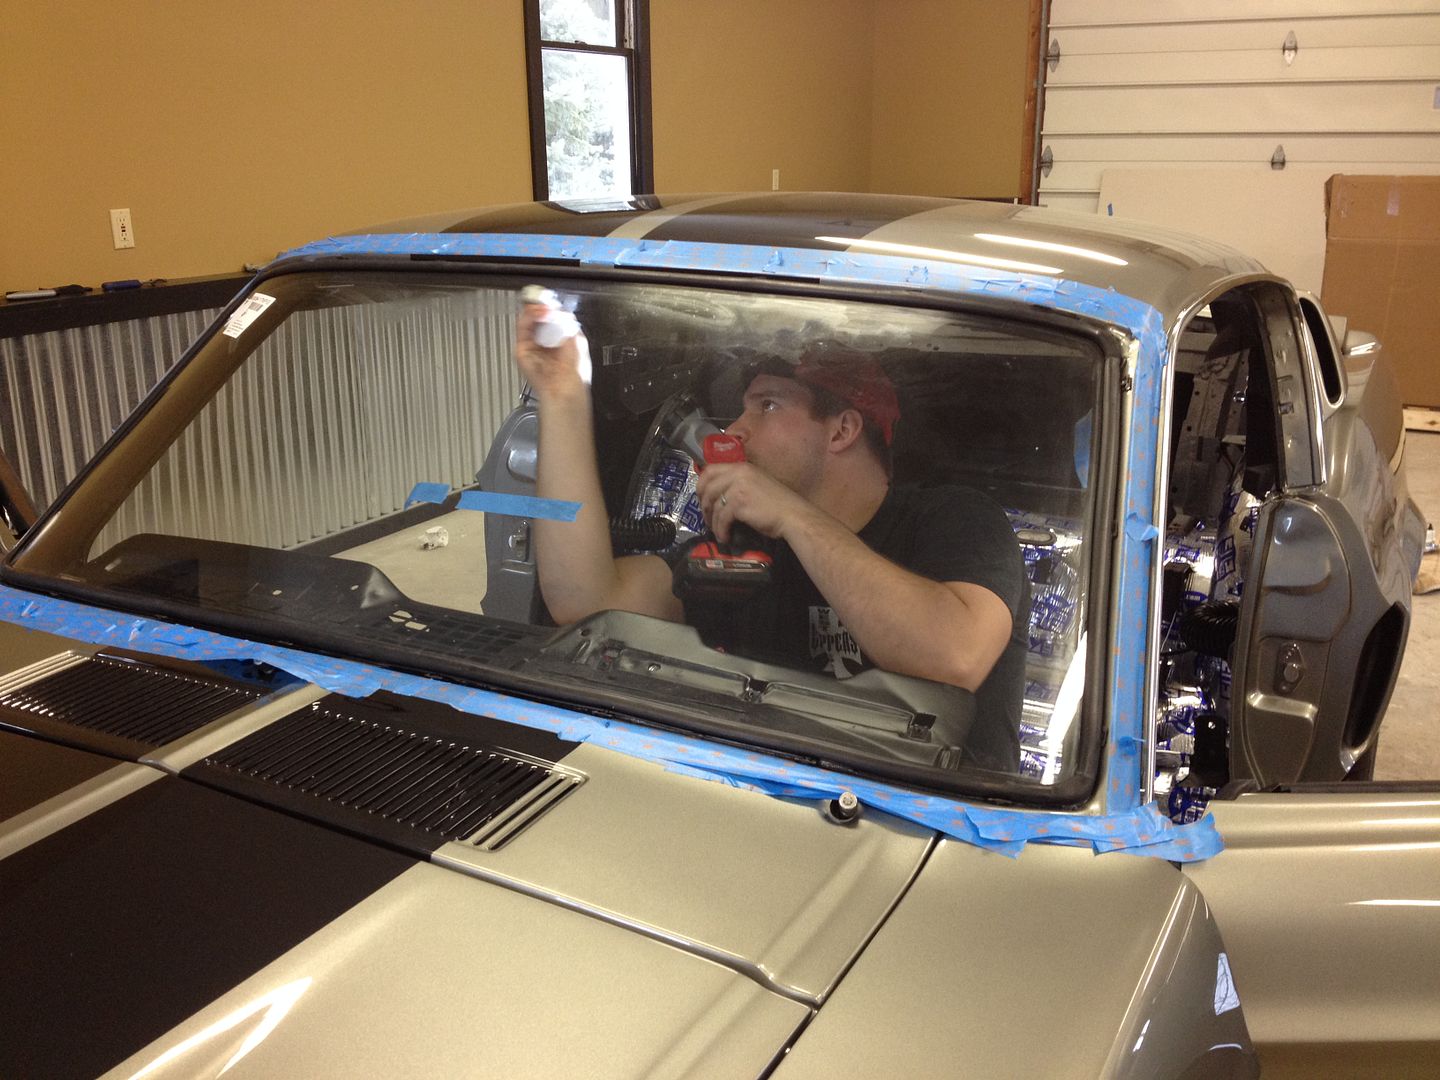
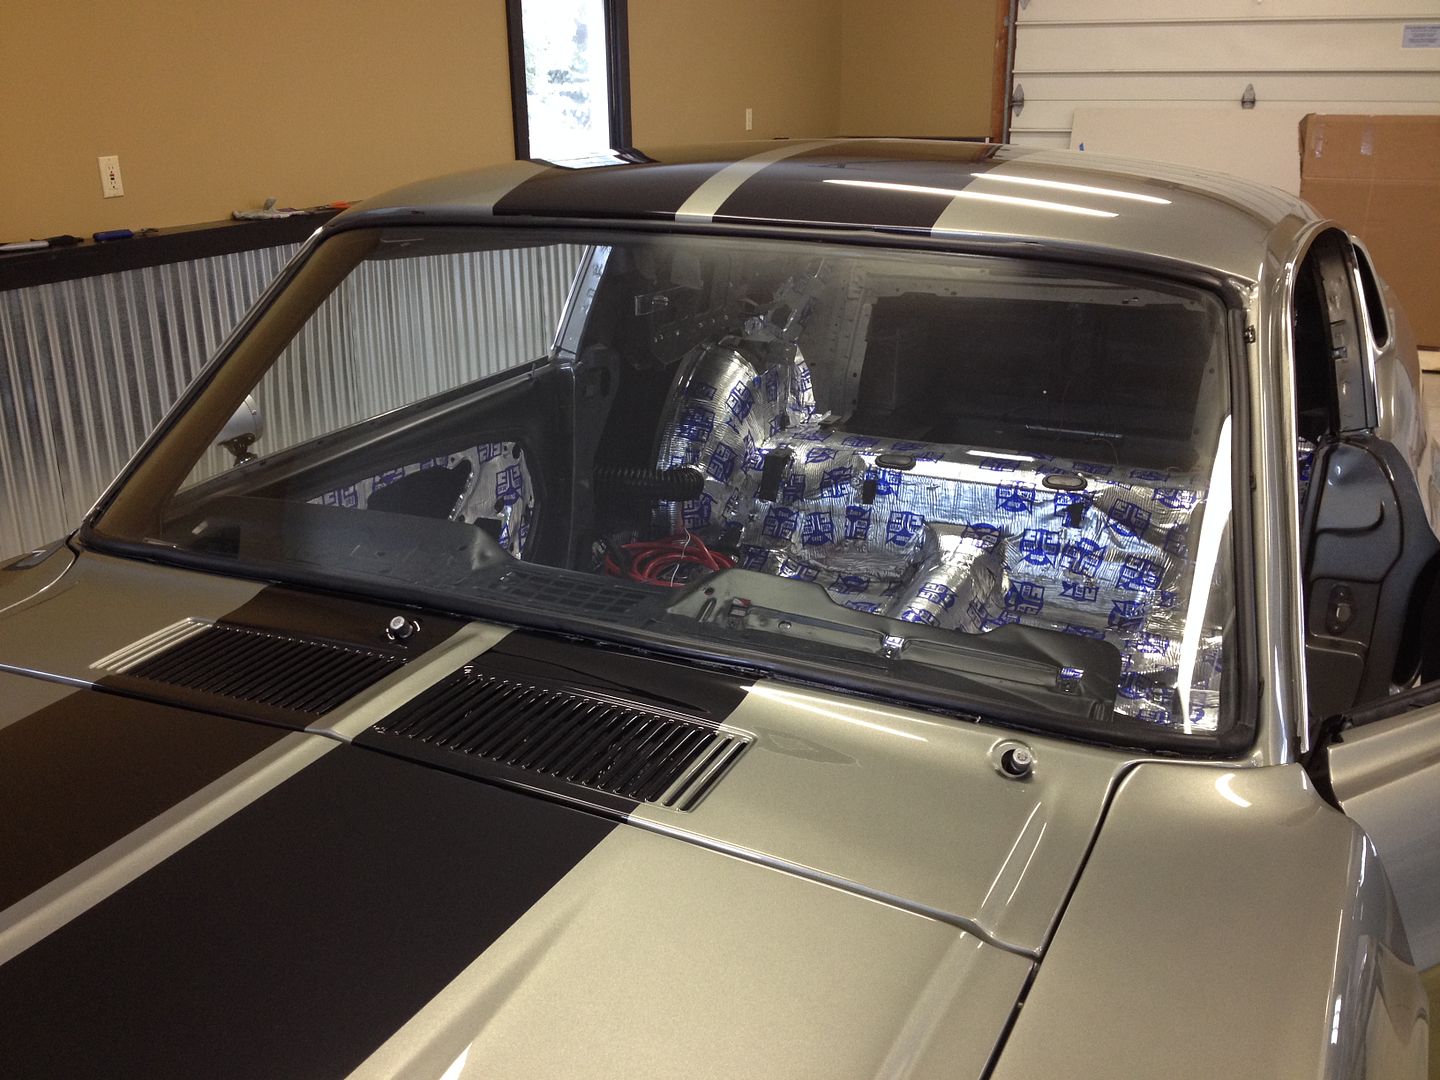
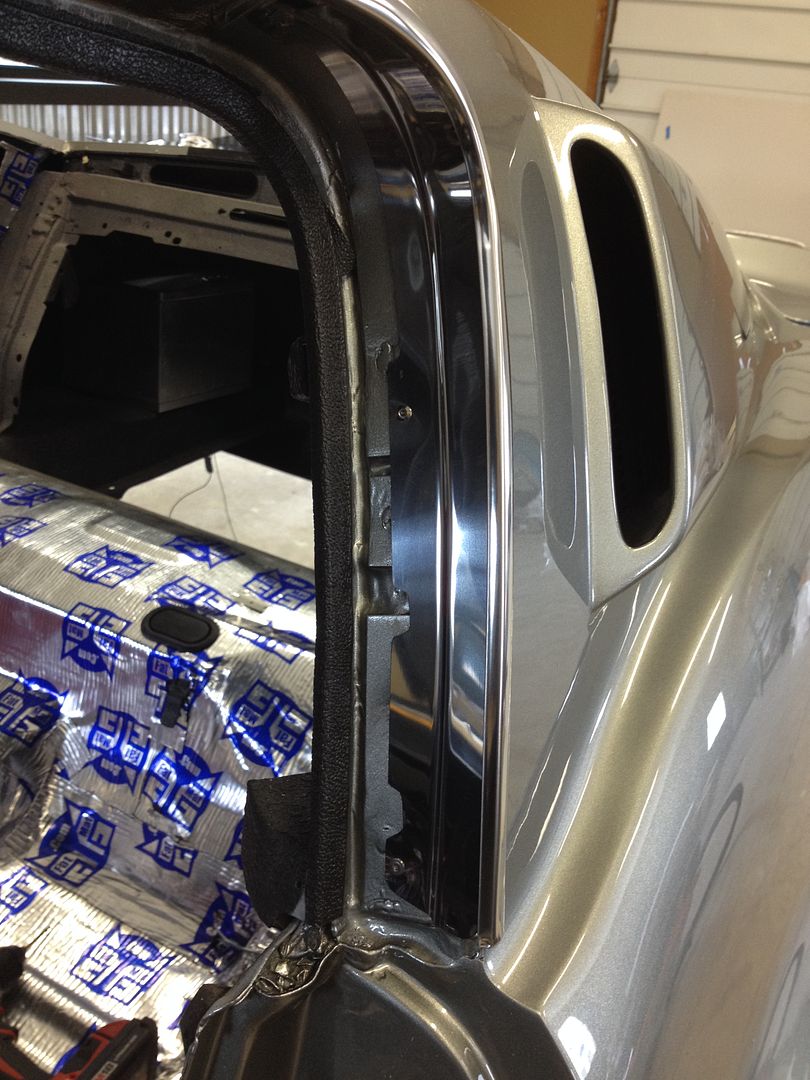
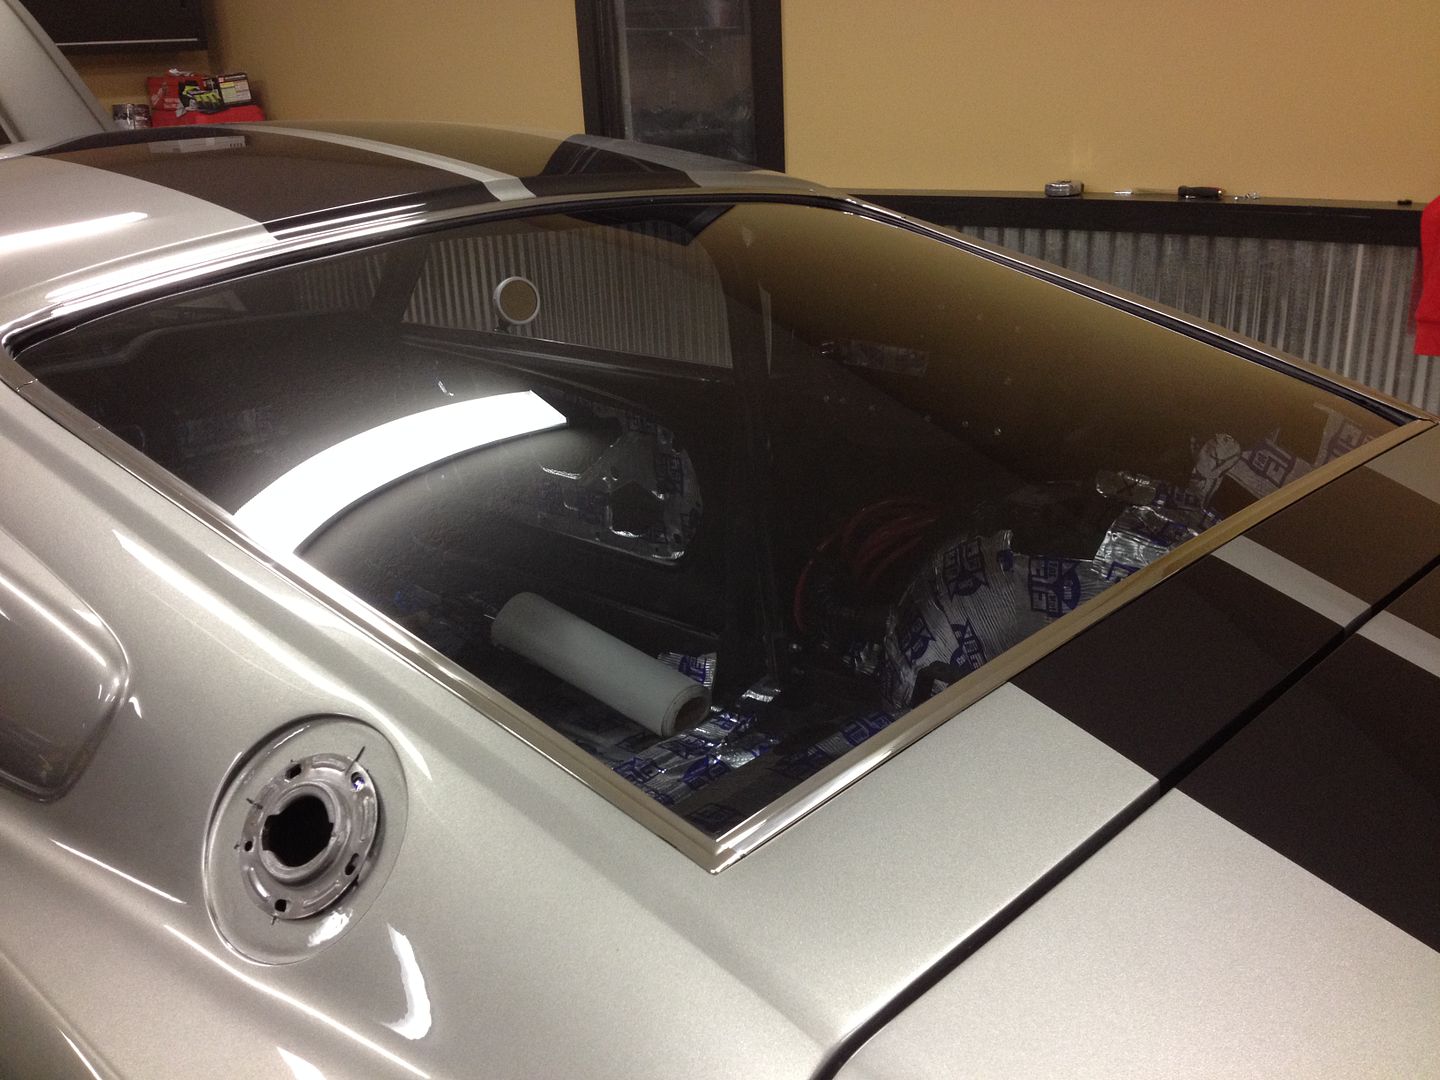
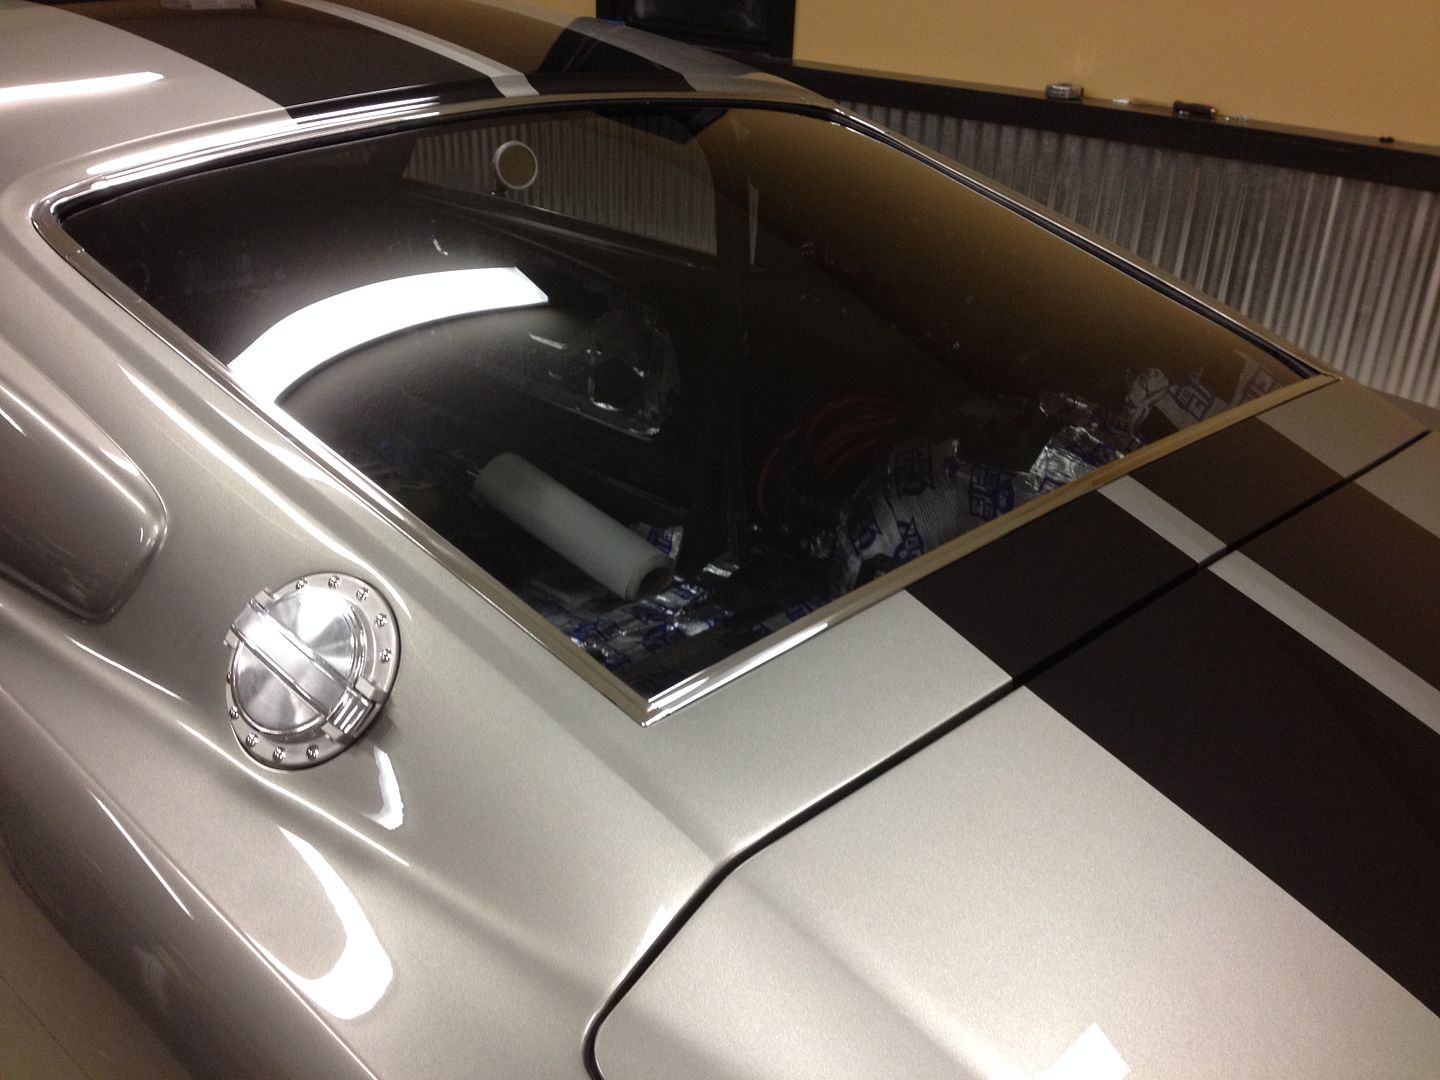
Last weekend we installed the smoked rear glass and trim. We had a friend polish our original stainless and it came out great. We discovered that the greenish tinted winshield trim clips (AMK) are MUCH better than the black clips from the parts store.

730084F5-3877-43FA-91C7-9246B9F96C76_zpsgpwxmqkm.jpg


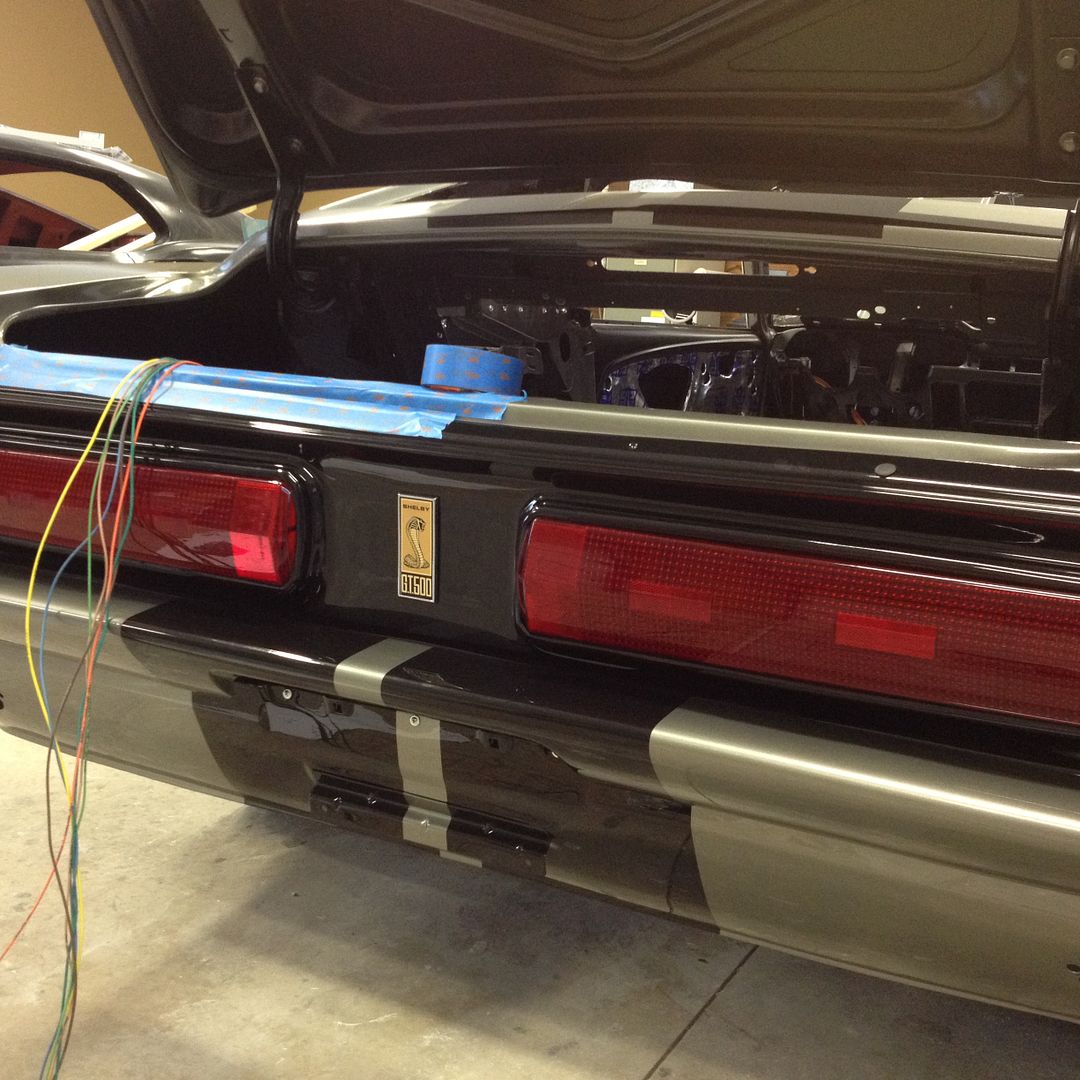
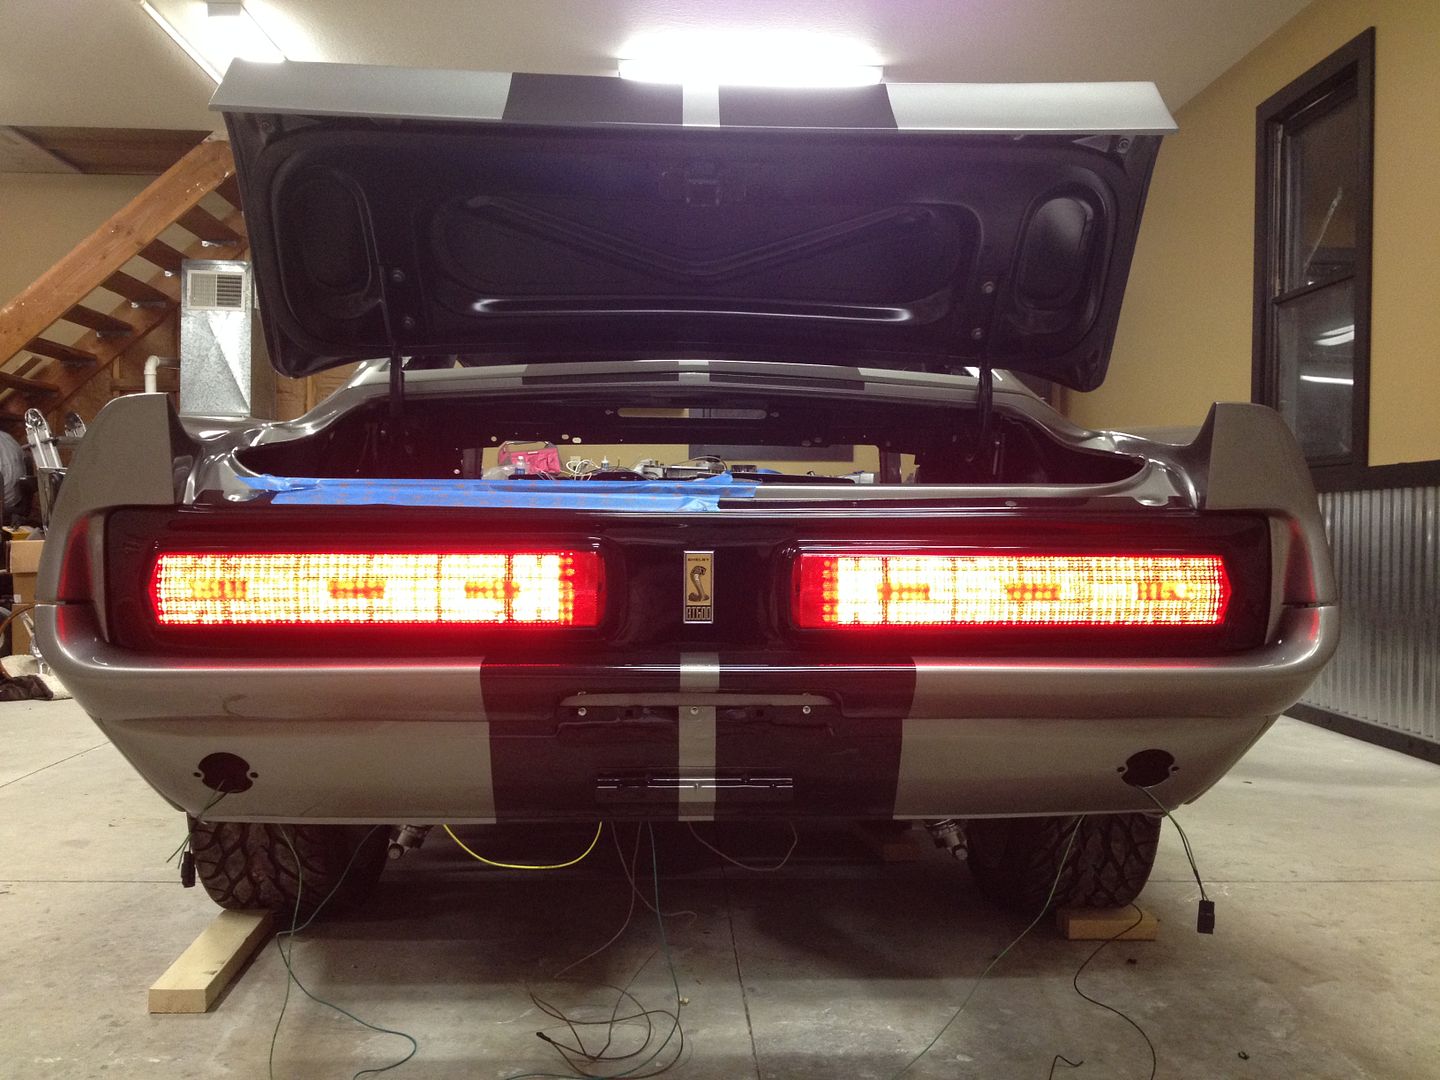
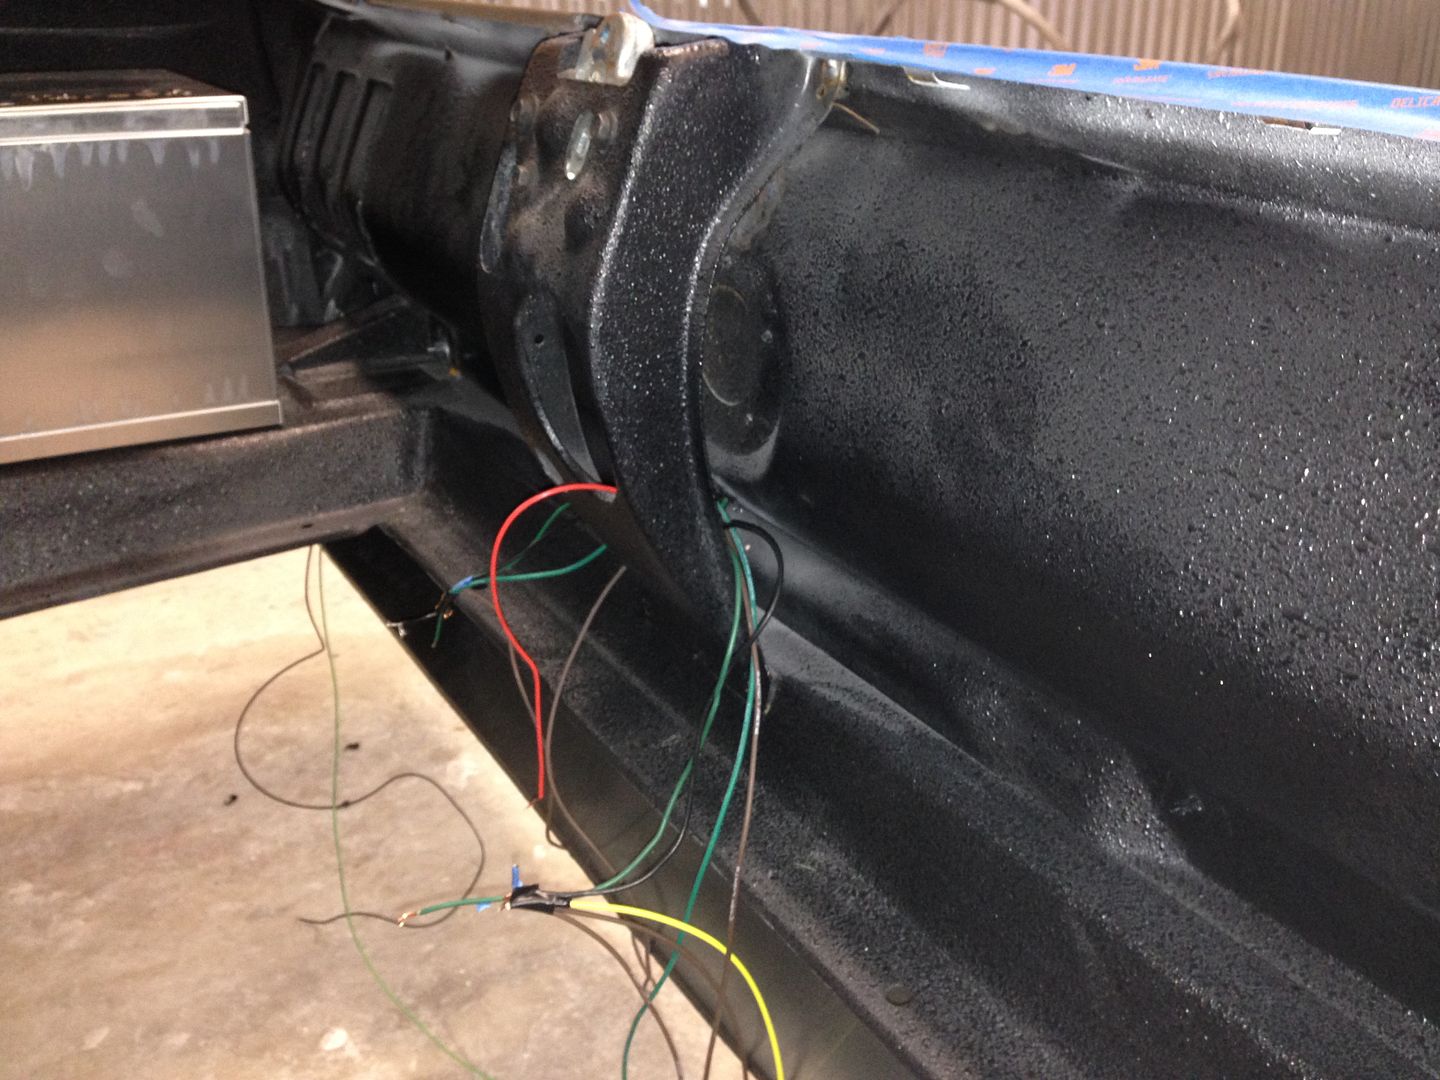
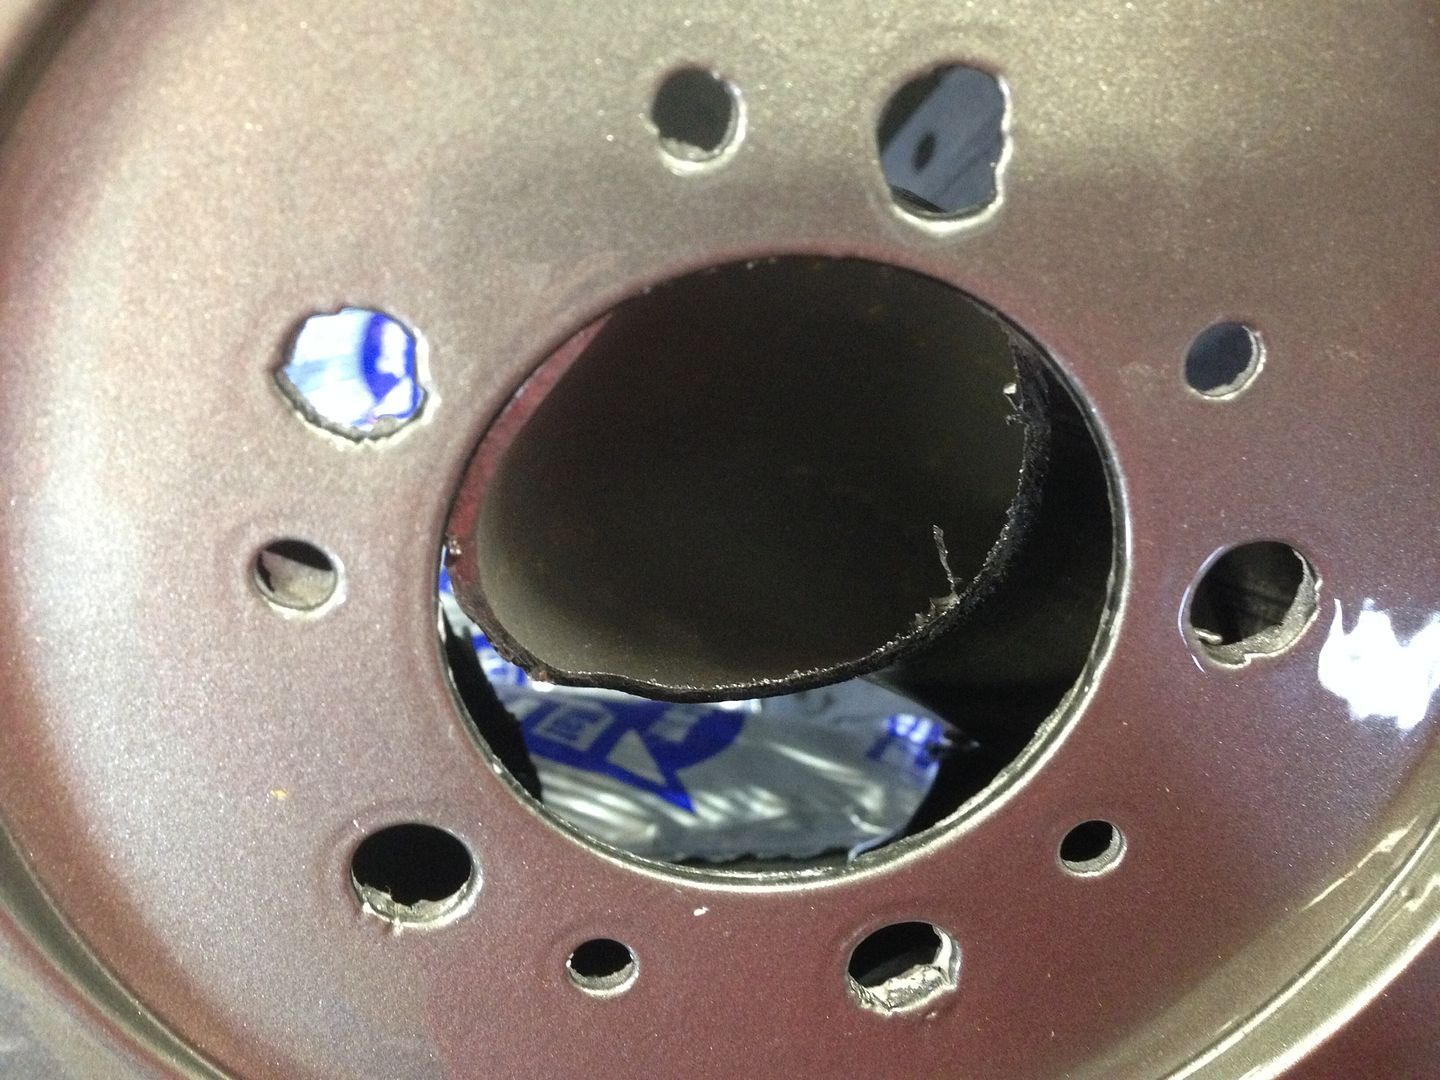
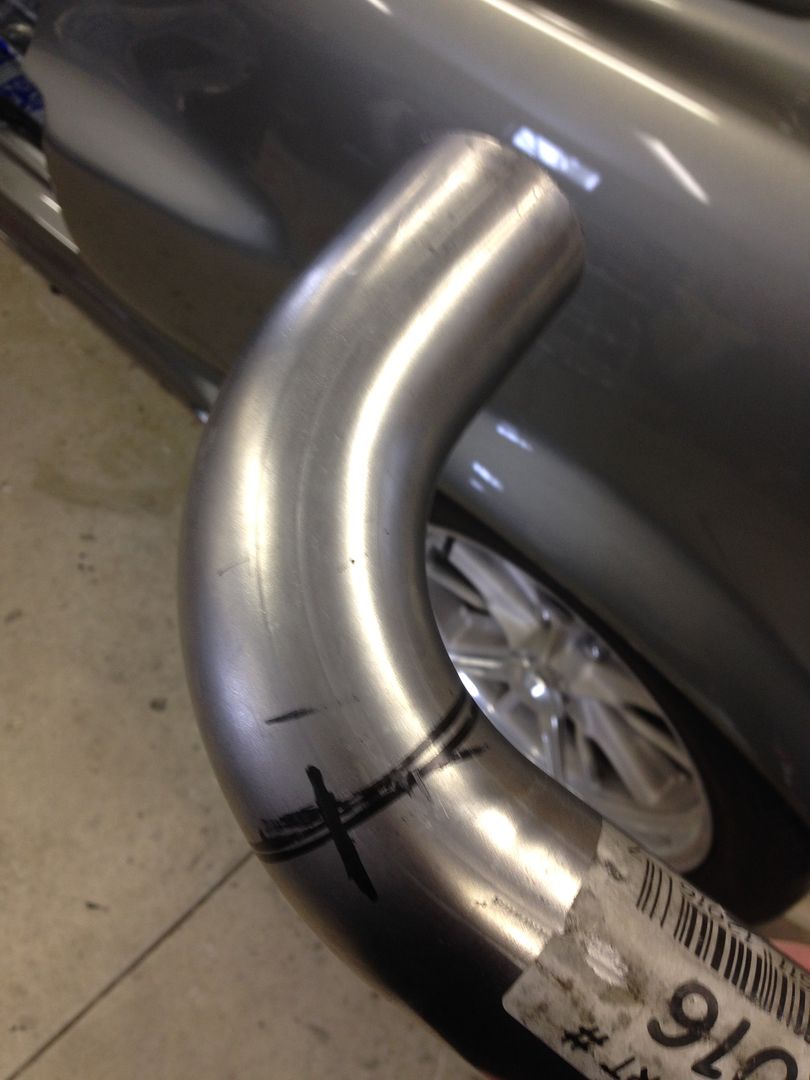
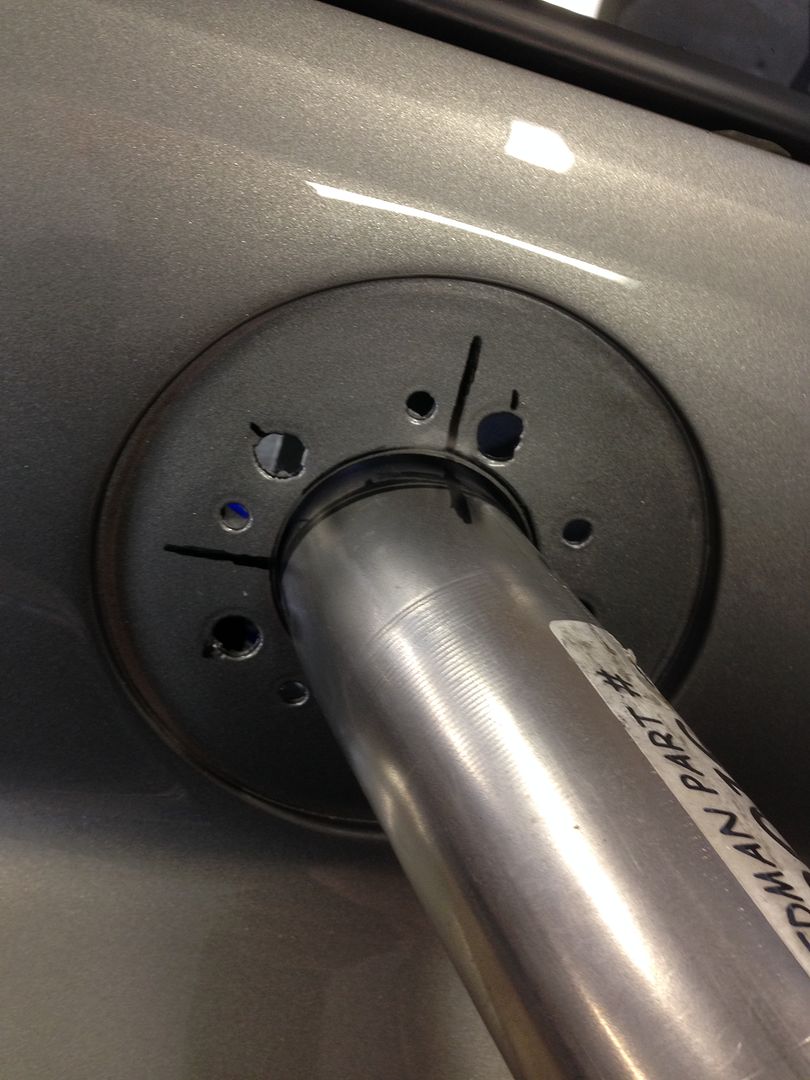
One thing that we decided on when we started building this car was that we wanted every element as "functional" as could be. Often times on cars we would see, the side scoops would be non-functional, side exhaust was non-existent and most of all, the side fuel filler would be simply a cap mounted on the side of the car with no filler tube in place. There are a few places selling the side fill kits, but they are either for the LeMans type mount (much lower to the trunk lid) or in the wrong spot completely. I had an exhaust shop bend a few pieces, which I ultimately destroyed through trial and error.

DC1A84A9-40F7-444D-89B2-21B122610948_zpsccfgjbbb.jpg


Finally, we found the tightest radius mandrel-bent pipe at Summit Racing. After fishing it though the hole and with some trimming, we marked where it needed to be cut, then we cut the flange off the original filler tube and silver soldered it to the new pipe. Inside the car, we will be able to connect the next pipe to the fuel tank.

54124D67-885C-465B-A193-34CD93CBC1D7_zpsslup62dp.jpg


9FDE6F2D-16A7-481B-8DFF-05BEE56C043D_zpsygqj35rz.jpg


22364AB2-3988-4CF0-96EB-8CE5826EB0C6_zpsr3sia6uy.jpg


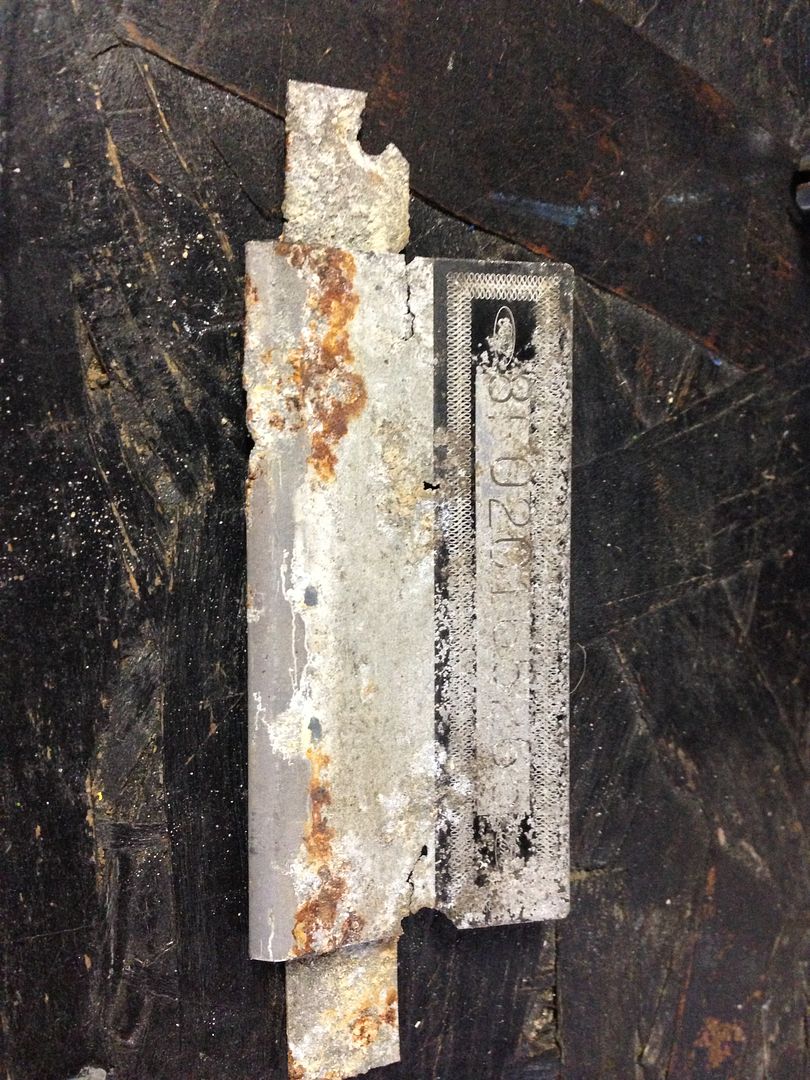
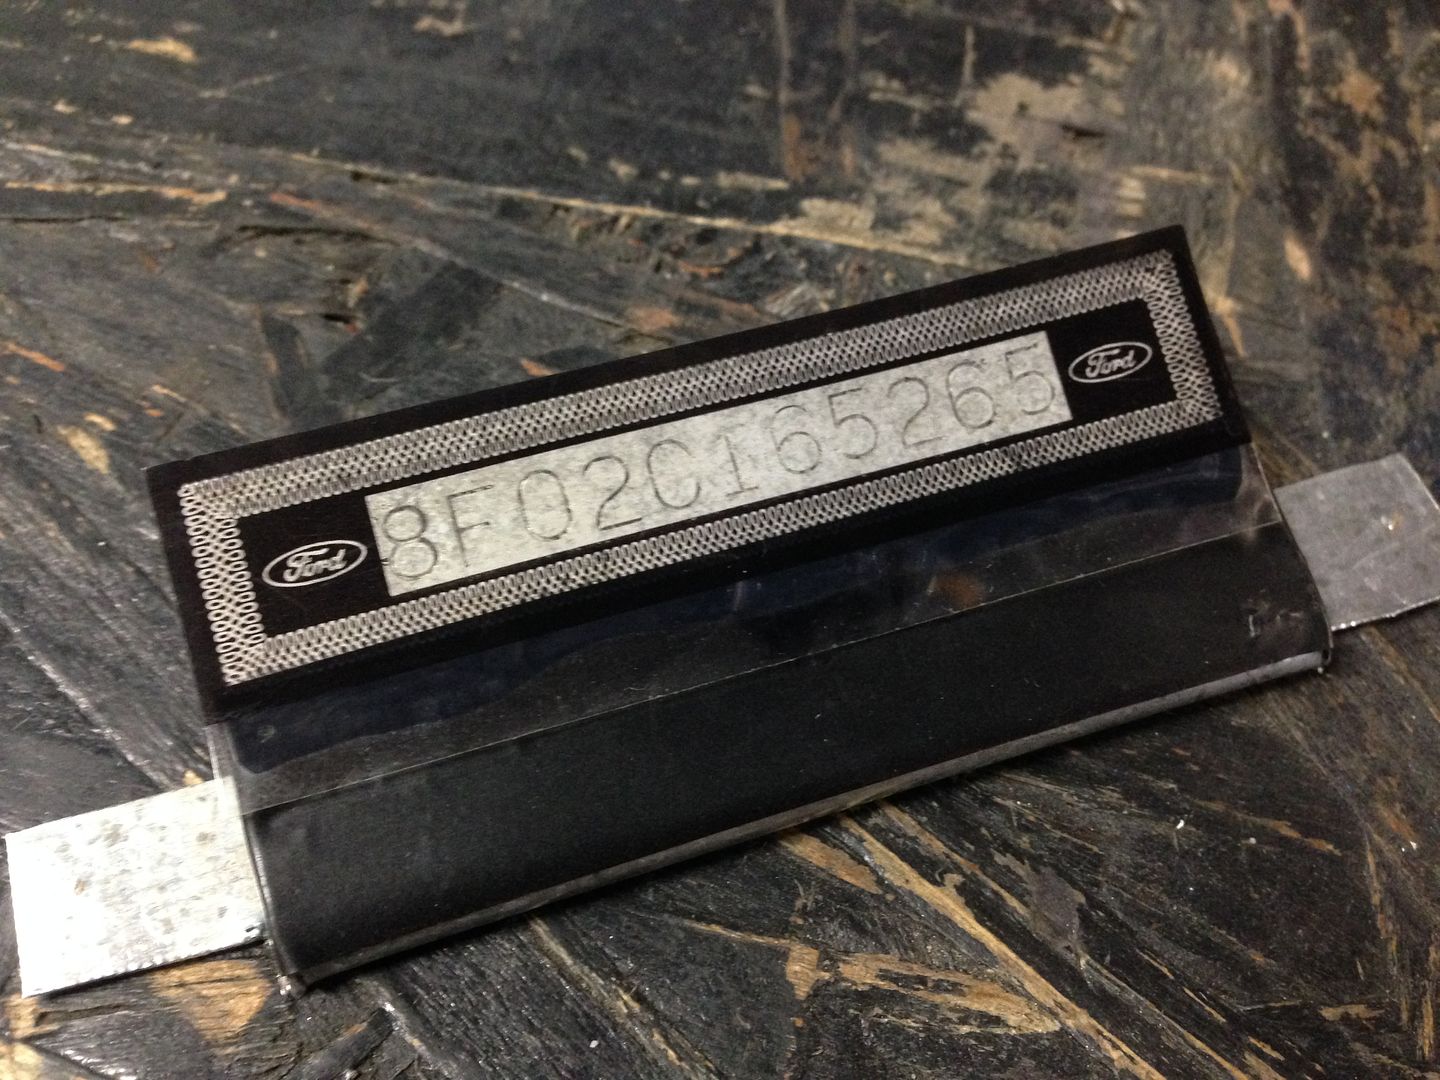
Before we installed the windshield, we had to rivet the VIN plate back in place. This VIN plate was not used in 67, but came about for the 68 cars. After looking through the boxes and having that, "I know it's here somewhere!" thought go through my head 100 times, I finally found it. I thought it needed some refurbishing, but this was more than I expected!

Before

1AA4BBC6-B347-4ECD-B7E0-C18D5804ED4A_zpsaunsfrxq.jpg


After
05543833-7D8F-47B8-A050-00345C5D70EF_zps2d9w64g8.jpg


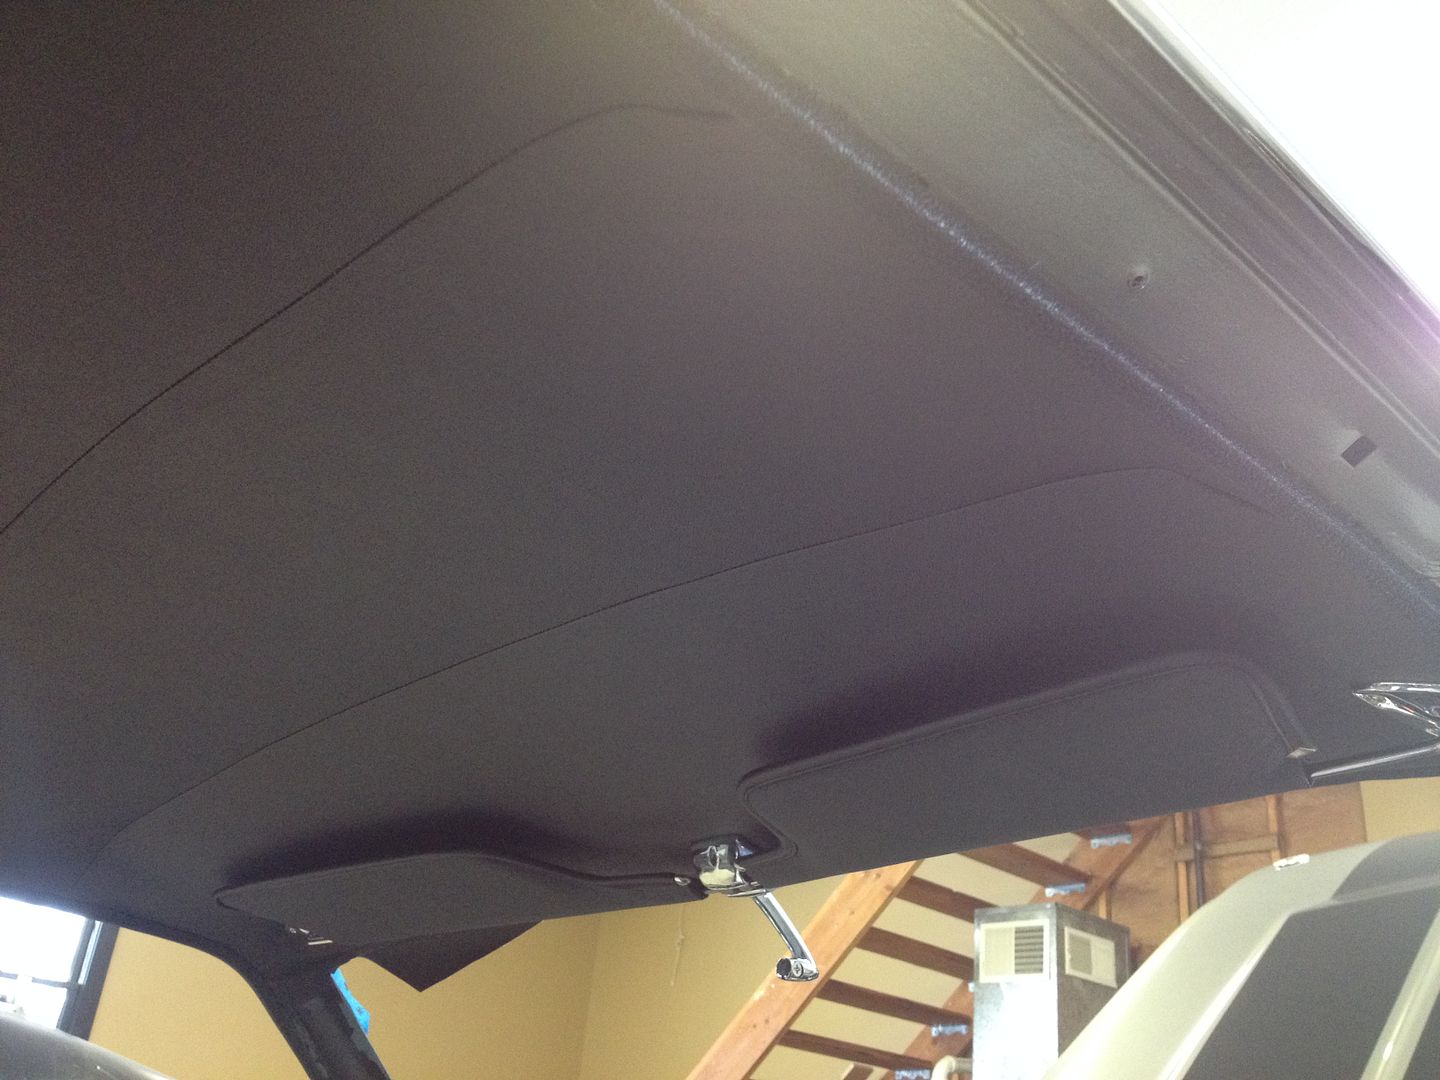
After the dash was installed, we wanted to put the lower dash knee pad and padded upper A pillars on the car. We quickly discovered that we had holes for neither! We came to find that late 68 cars did not have these parts installed after the Ford strike. "Christopher" was kind enough to take measurements to help us with the lower dash pad. We looked at our other 68 to see if it had the mounting holes for the A pillars. Next we will have to transfer these holes over to Eleanor unless anyone else has a better idea to mount these pads?

F957CE89-7827-47B6-A64F-5D37151105BE_zps15i7sctn.jpg


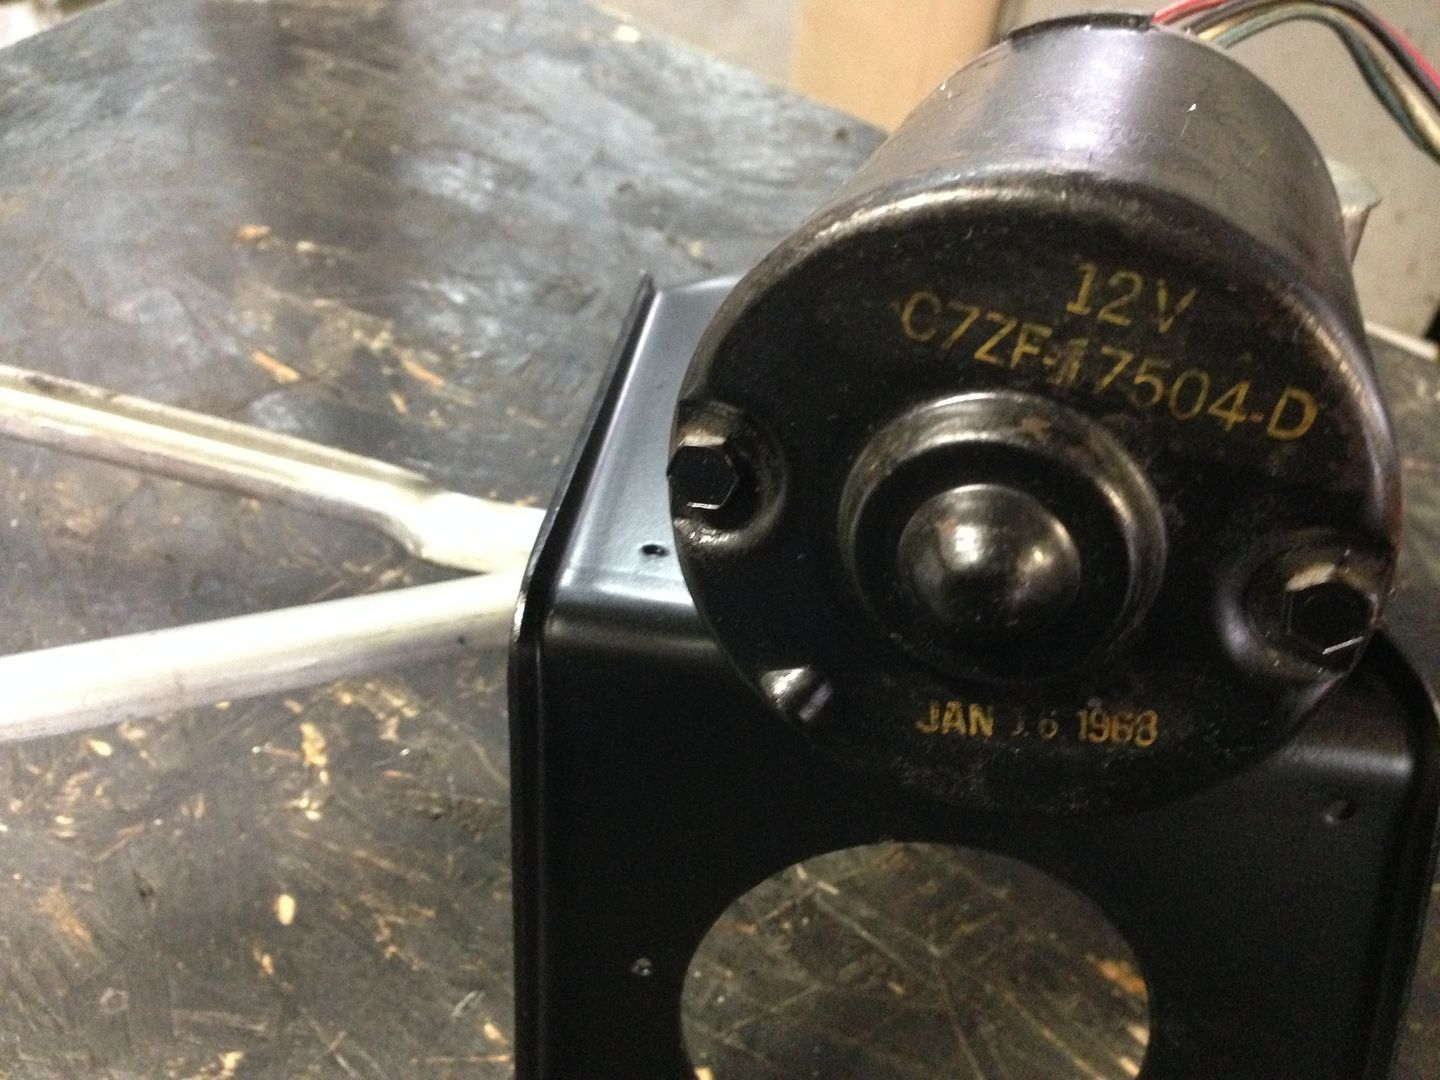
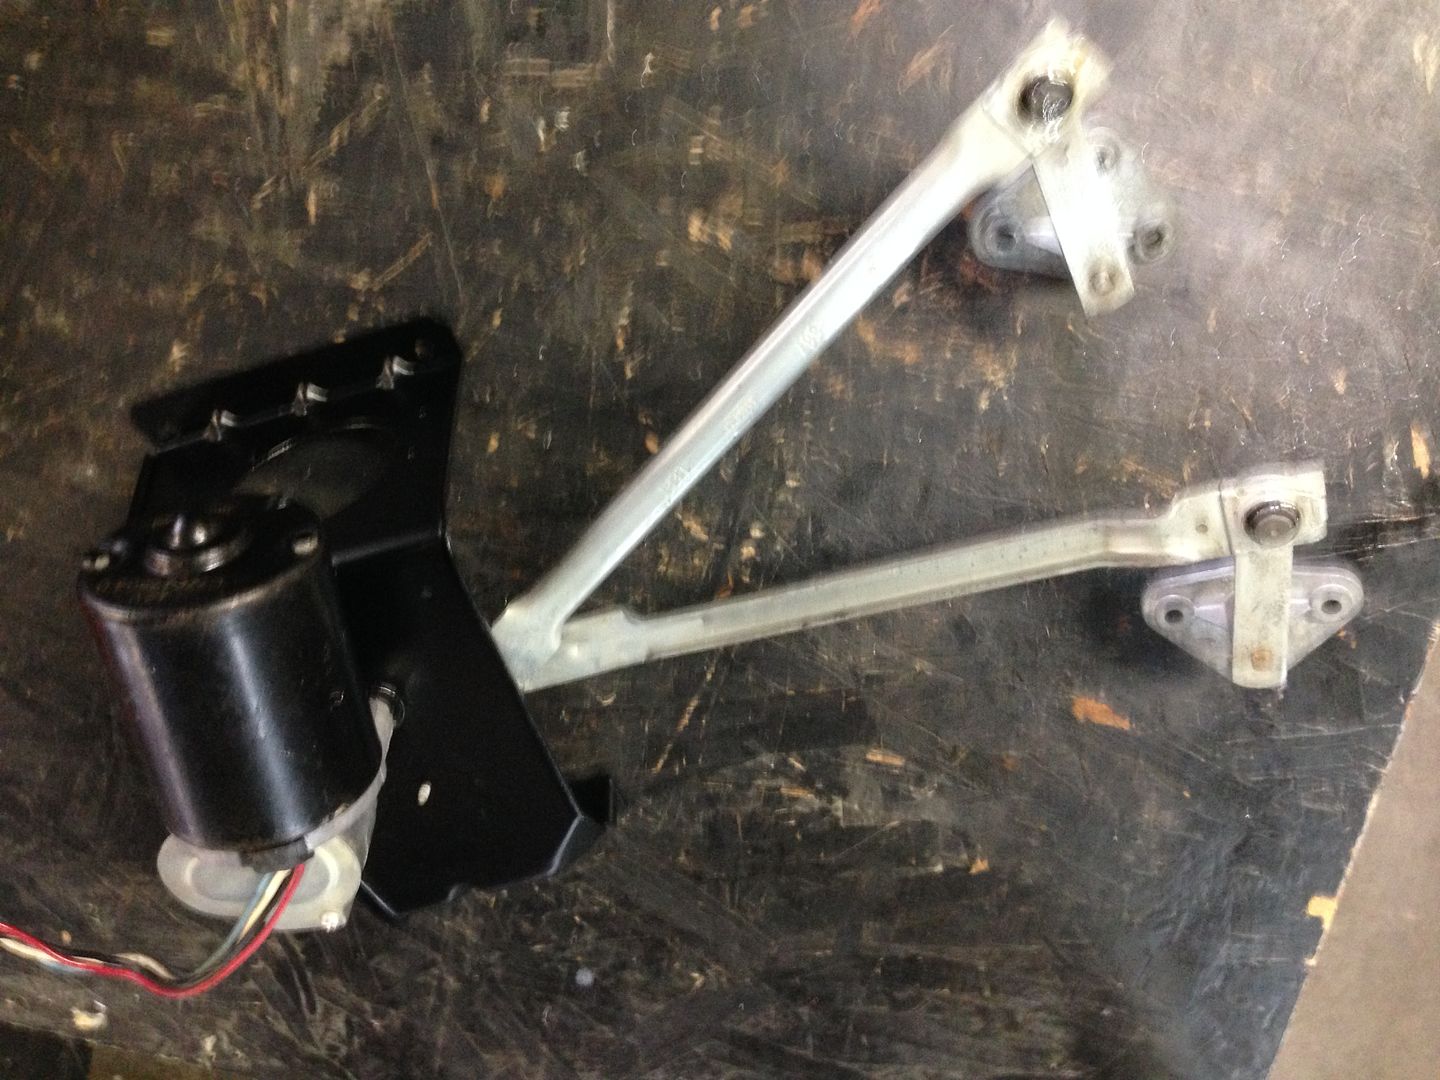
We also restored and repainted the wiper assembly and bracket before installing it. Yes that is the original motor and it works like a charm!

15B1EBB6-D299-4E78-B543-FB797F986995_zpsnnwqkyhz.jpg


B690F3A1-7DC7-4E99-98D3-03C9D7384DA3_zpsgnhckz4t.jpg
 
Thanks guys!

Another unique feature to "Eleanor" that you may have never noticed is the use of PIAA fog lights in the reverse light housings. To accomplish this, I started with the factory back up light housings and cut out the bulb retainer so the new fog light could be fitted. I painted the housings body color and installed the lights last night.

B8C71E1F-B479-4D98-A368-CE9D4C7C4072_zpso3novew8.jpg


D36697BF-E196-4526-A8E7-E6D9D66E33BD_zpsebbngbui.jpg


I went to install the clutch master cylinder and found the finish on it was pretty banged up right out of the packaging. It was an aluminum color and did not look very nice. I scuffed it, primed and painted it and then used 400 to break through the Wilwood lettering. We are going with a Wilwood black master cylinder so I think the complement will be well-worth the effort.

C17237F8-980A-4397-9915-A02E5730513A_zpse1fyrr2t.jpg


32CC421C-D2DF-4320-BAD2-3C0878C30B19_zps6xahjkfo.jpg
 
Very nice! It's all about the small details! Which hydraulic clutch set up did you end up ordering?
 
Thanks! We got it all from Modern Driveline. The one we bought from you is on the Mach 1.
 
Oh yeah, i totally forgot about the one i sold y'all last year, or was it the year before...i cant keep up anymore. Who am i? I wish i had kept that kit, my pedal assembly, and spent the extra money on ABS electric brakes. Hindsight!
 
I never noticed the reverse light. but I do like the idea.. I hate backing up in any car and not having much light.. I will have to remember this one!!!
 
Looking great ! So who made the new VIN plate for you ? Pretty close match to the original.
 
Well done then ! Also meant to ask regarding the rear lights, do you find the sequential LEDs flash much quicker than the originals ? I seen some set-up on a display at the World of Wheels and they seem to flash really fast from what I remember. Can't remember the brand that was displayed.
 
Back
Top