You are using an out of date browser. It may not display this or other websites correctly.
You should upgrade or use an alternative browser.
You should upgrade or use an alternative browser.
8
82firebird
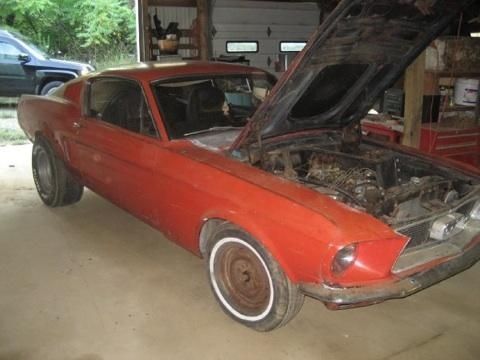
Thanks for the before and after pic, Bob! Love it. Yes she certainly cleaned up well. Just for the record, if any newbie DIY-ers are lurking and thinking about taking on a project, just one word of advise...If someone tries to sell you a car and says, "All she needs is two quarters and a paint job," RUN in the other direction. Fast! Mercy.
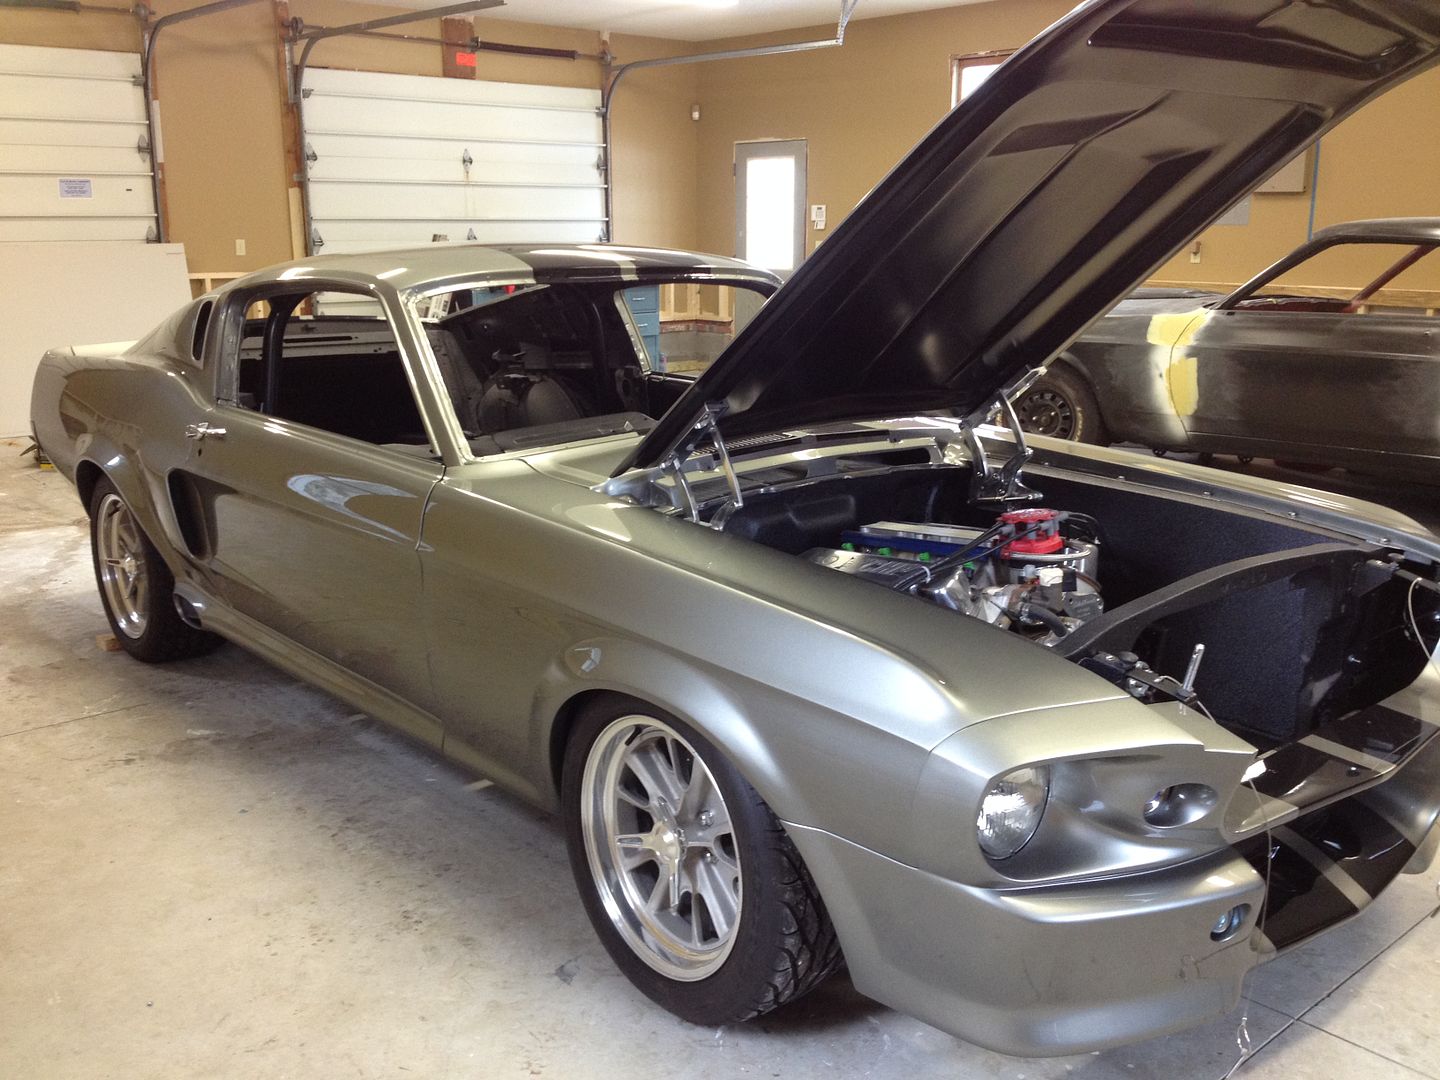
Here's another before and after picture I took a few days ago. Yes the garage looks different because we recently moved. We now have 1200 square feet, and it's heated. It was insulated only, so we wanted to finish it with dry wall and put up some better lighting. I drew up a rendering and we went to town.
Lauren
We put up the steel yesterday and framed and painted it today. Can you see the wall?")
Here's another before and after picture I took a few days ago. Yes the garage looks different because we recently moved. We now have 1200 square feet, and it's heated. It was insulated only, so we wanted to finish it with dry wall and put up some better lighting. I drew up a rendering and we went to town.
Lauren
We put up the steel yesterday and framed and painted it today. Can you see the wall?
D
DavidL
It really turned out great. Is that Eleanor's little sister in the background in this shot? Maybe called "Rigby" so you can have Eleanor Rigby?
S
Senile Old Fart
DavidL;33584 said:It really turned out great. Is that Eleanor's little sister in the background in this shot? Maybe called "Rigby" so you can have Eleanor Rigby?
Maybe its name is Roosevelt ?
8
82firebird
Her name is Martha. We'll get back to her someday but we need to section off a "dirty" area before doing anymore bodywork.
http://www.spiuserforum.com/showthread.php?2635-1969-Mach-1
http://www.spiuserforum.com/showthread.php?2635-1969-Mach-1
B
black88coupe
Awesome!
8
82firebird
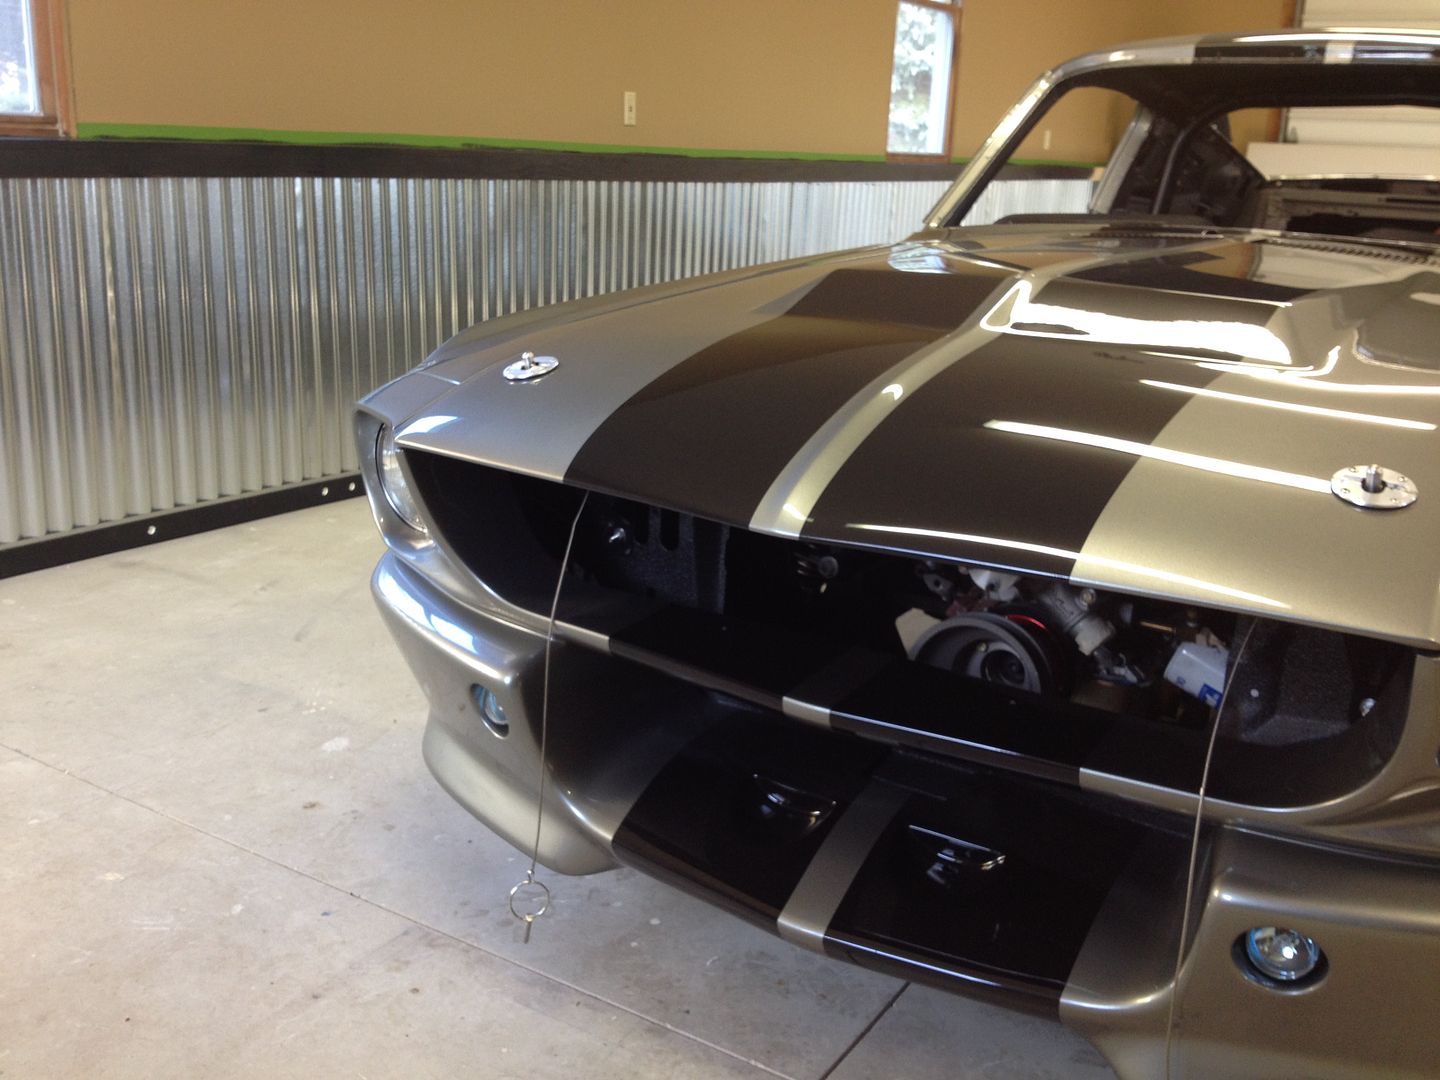
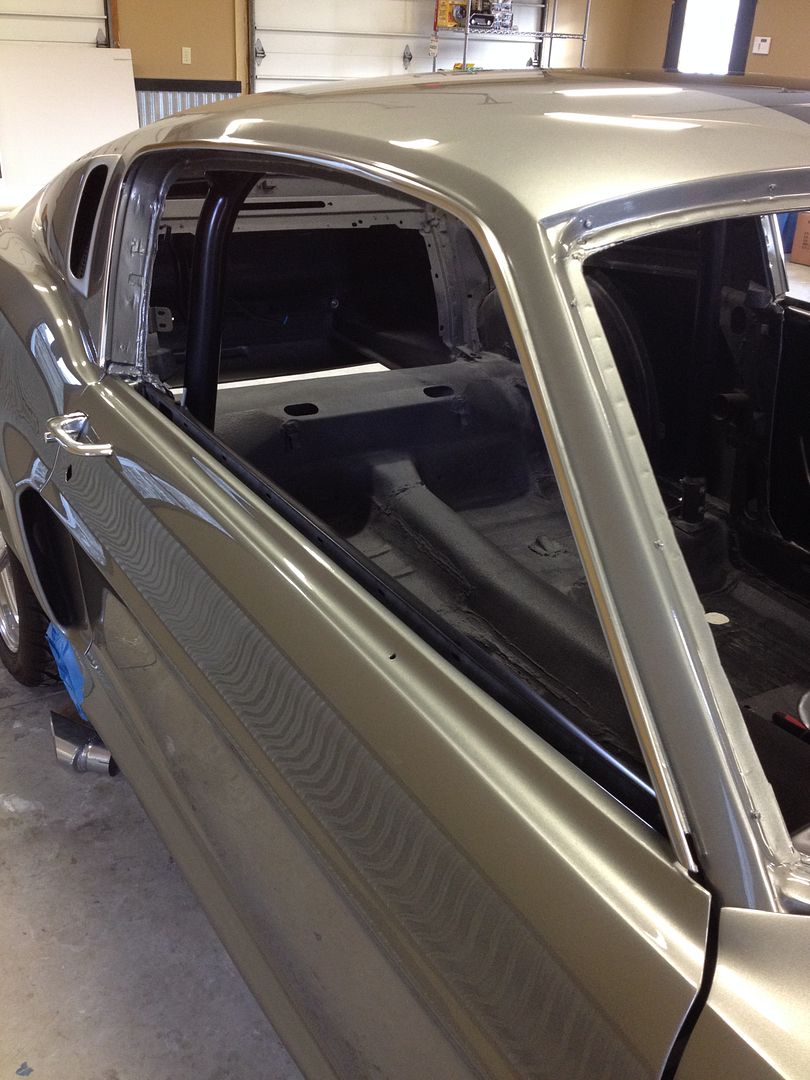
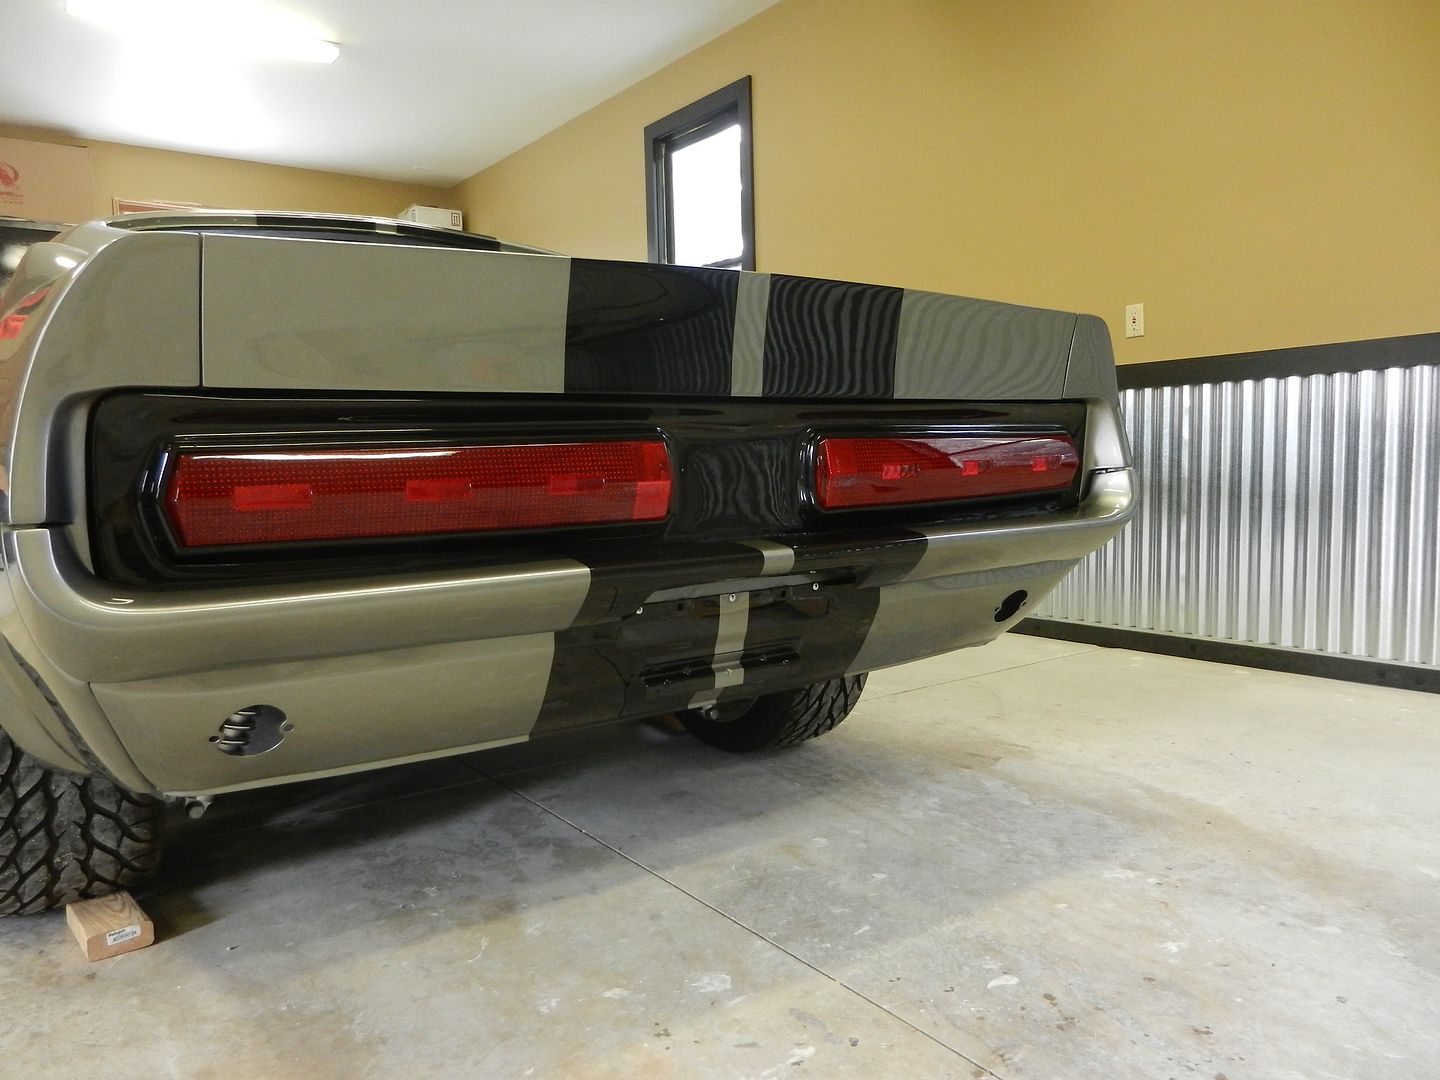
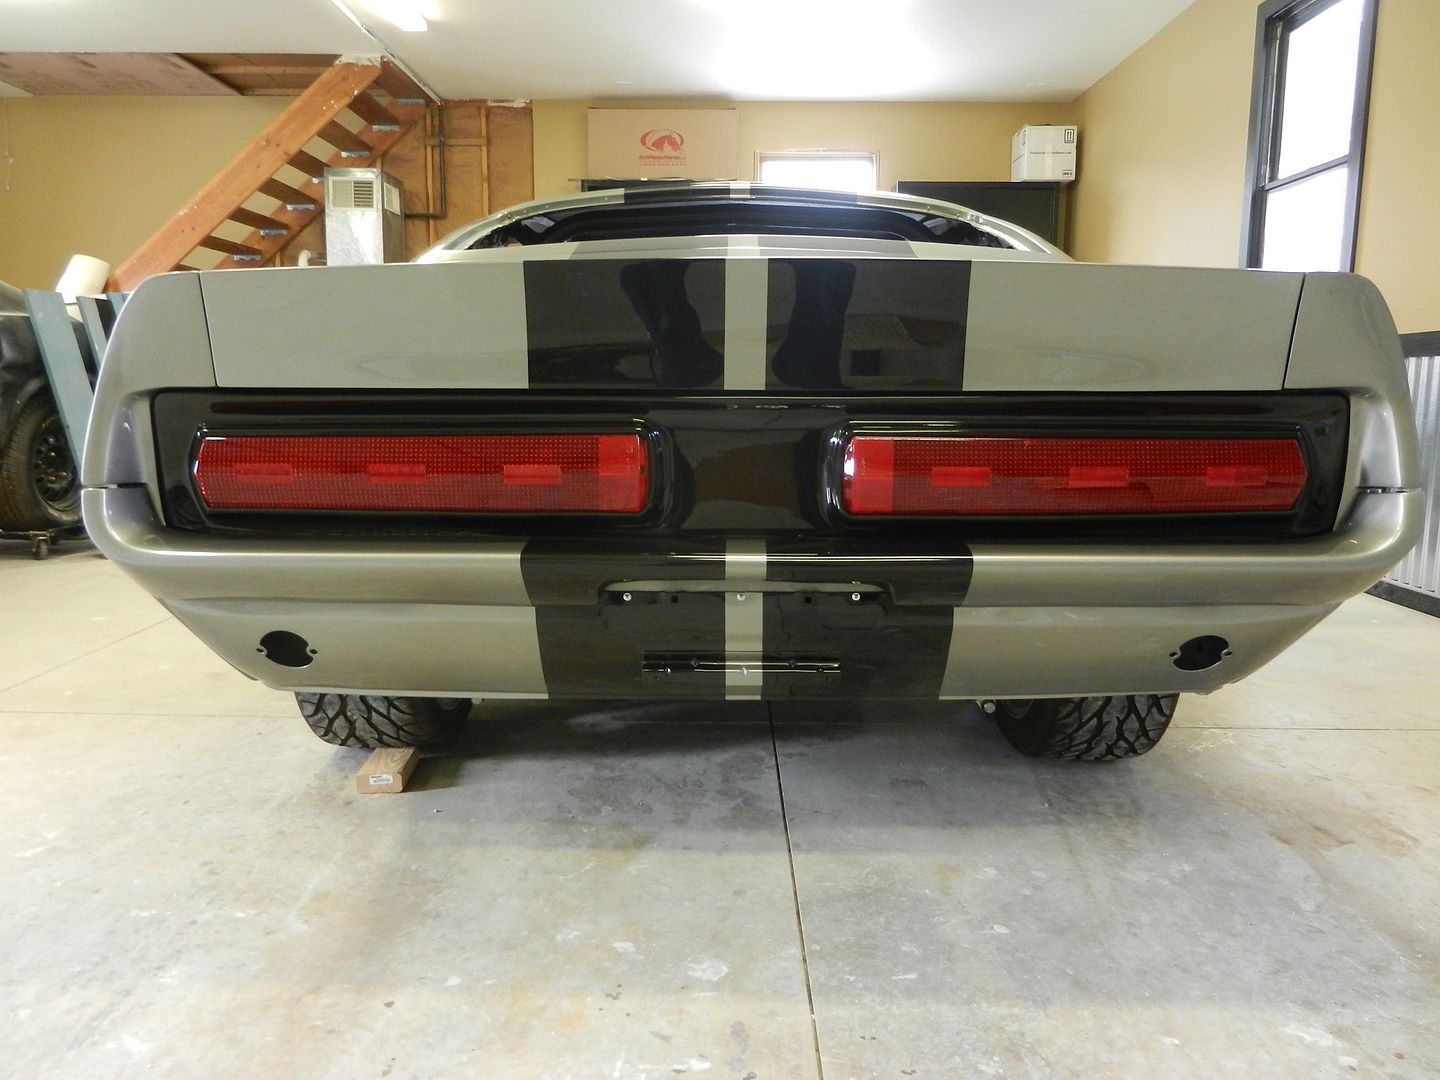
While we wait for the wiring harness to arrive, we will begin to put on some of the parts we already have. Yesterday we installed the tail lights, drip rail moldings and mirrors. The tail lights were a pain and took way longer than expected. The repro drip rail moldings fit great, we don't know what the fuss is all about. For $63 a pair from CJ Pony, in my opinion you can't beat that.
B
black88coupe
Looks great!
J
jeremyb
Looks great! Glad you had good luck with those repo moldings for yours. The 69 Mach 1 I did, I went through 2 sets. Still aren't the best but hey, when you don't have any and the ones that were on it were already repo and beat to death, I guess it is ok.
6
6686mustang
The car is beautiful - as is the new shop - I'm jealous (of both). What are you doing for heat?
8
82firebird
Thanks! The garage has it's own natural gas furnace. We turn it up to about 58 to 60 degrees when we're in there and we're plenty warm. It's amazing.
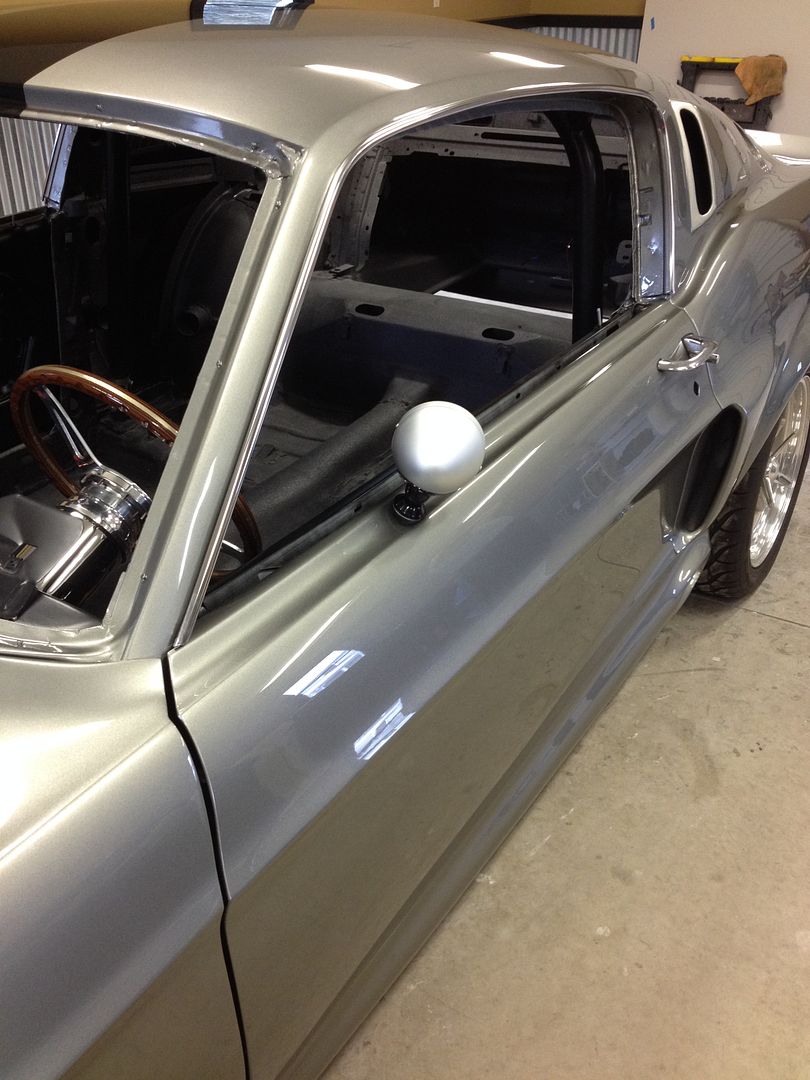
Still waiting on some parts so we installed the FatMat a few days ago and then started on the side stripes last night.
Lauren
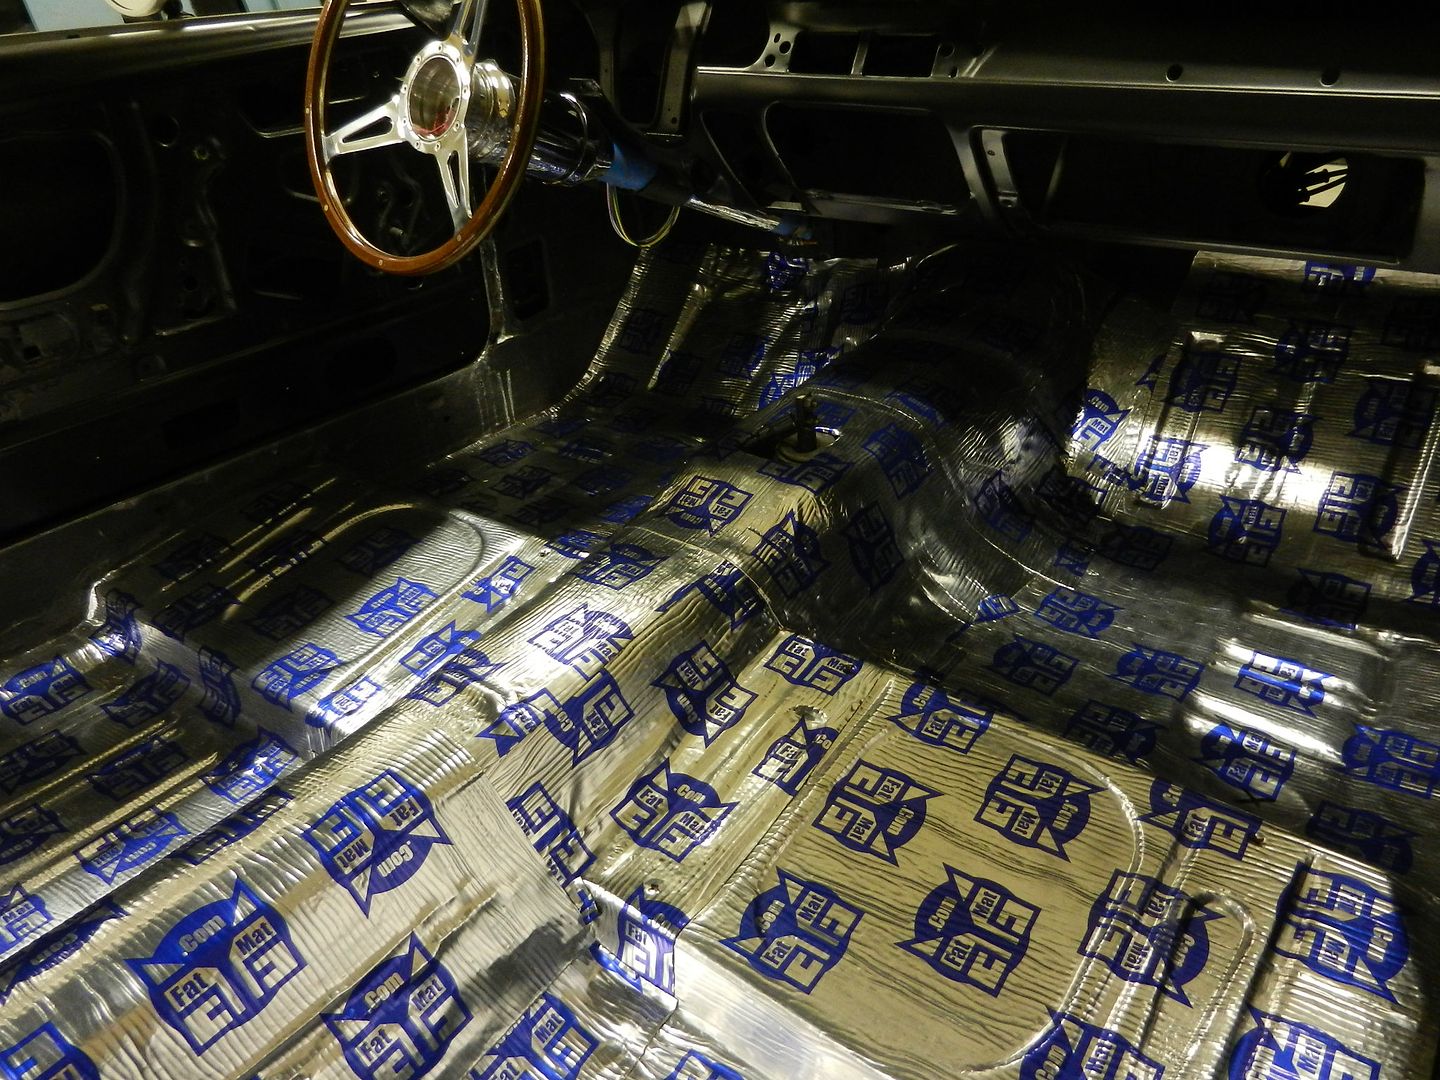
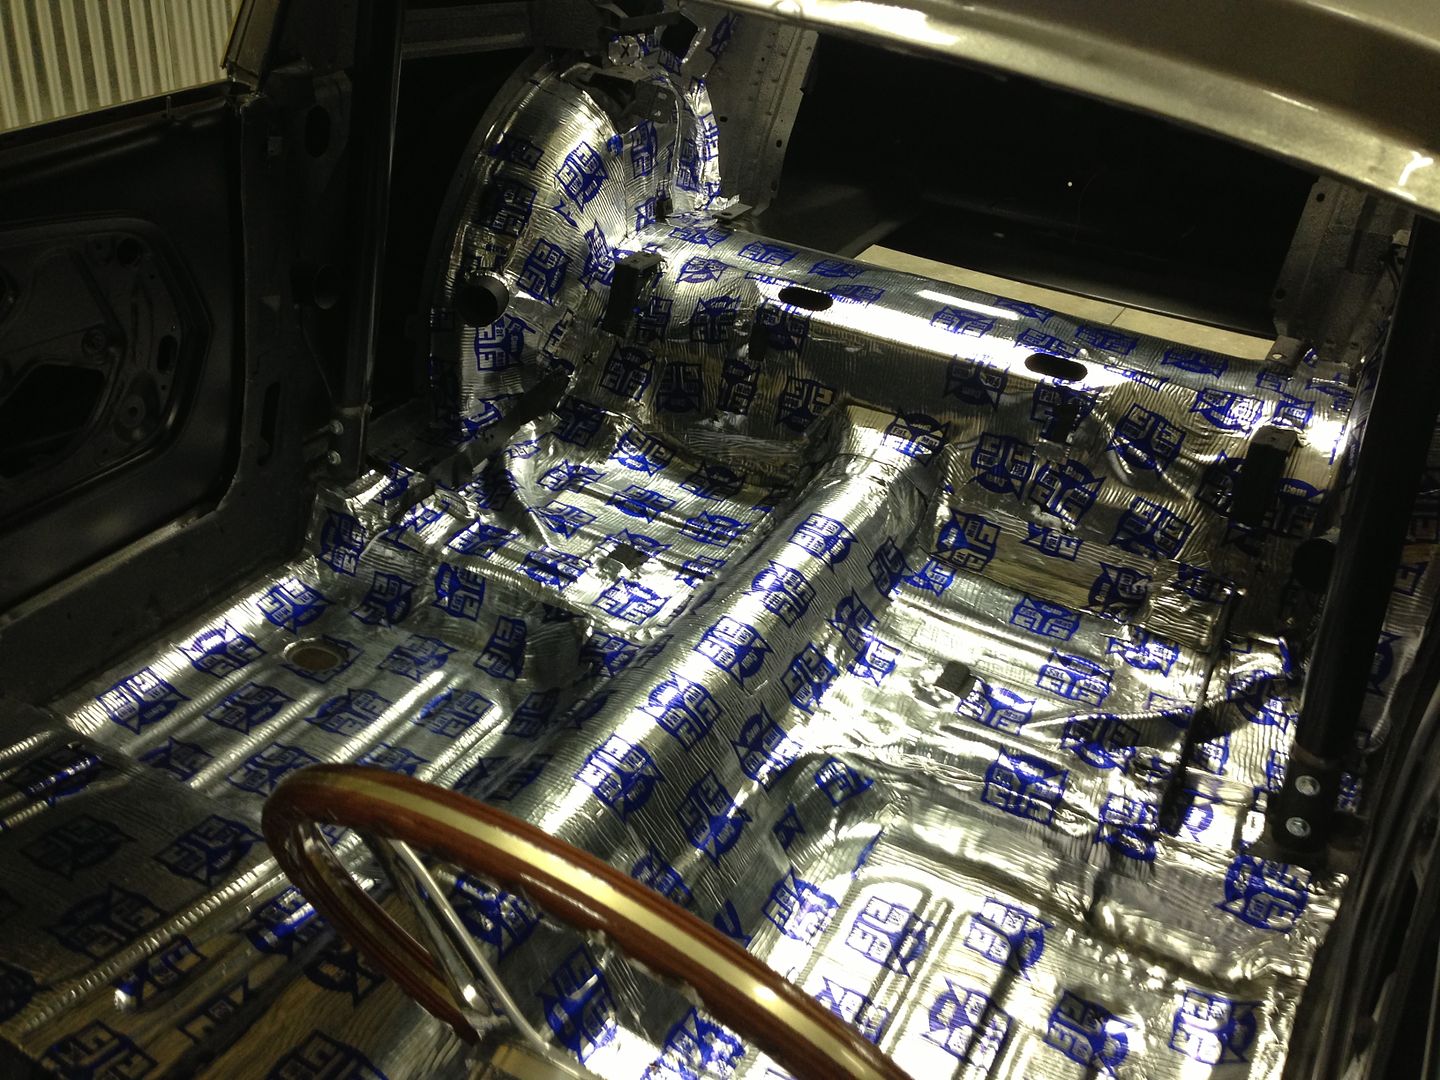
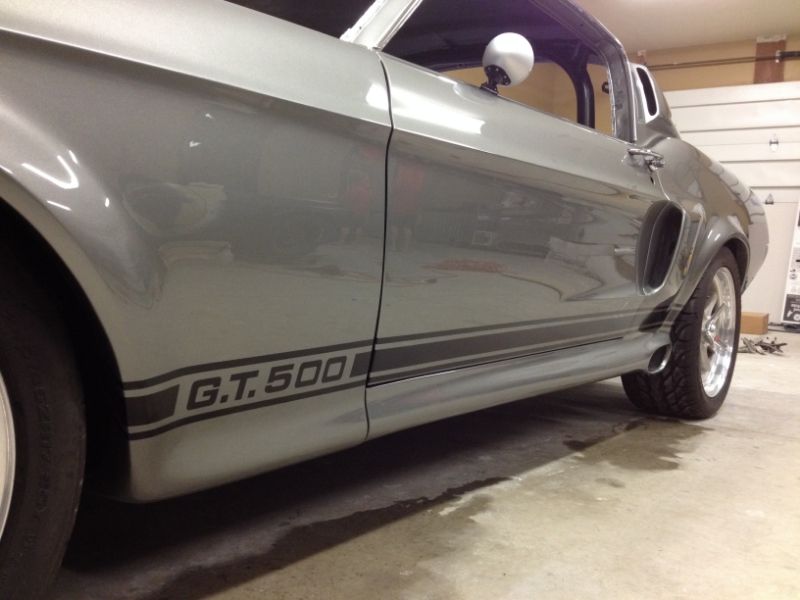
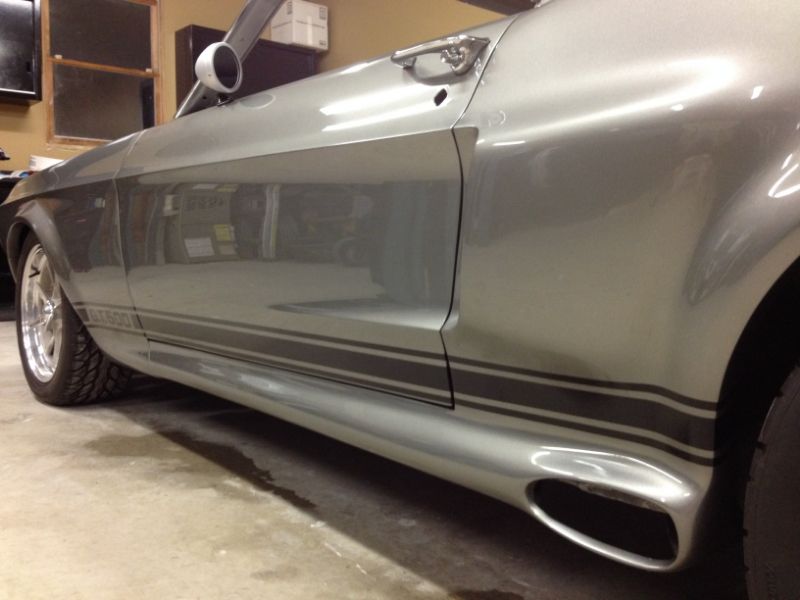
Still waiting on some parts so we installed the FatMat a few days ago and then started on the side stripes last night.
Lauren
6
6686mustang
The car is an amazing transformation. How did the Fat-Mat go down? Good adhesion? I am at the point of doing the floor in mine and looked at the Dynamat. Doing the entire floor can get pricey. Looked like the Fat-Mat was priced better. Looking forward to seeing the final progress! If I'm ever down that way I have to stop and see Rusty's shop. His attention to the smallest detail is what makes one car stand out from another - you made a great decision working with him.
8
82firebird
6686mustang;33792 said:The car is an amazing transformation. How did the Fat-Mat go down? Good adhesion? I am at the point of doing the floor in mine and looked at the Dynamat. Doing the entire floor can get pricey. Looked like the Fat-Mat was priced better. Looking forward to seeing the final progress! If I'm ever down that way I have to stop and see Rusty's shop. His attention to the smallest detail is what makes one car stand out from another - you made a great decision working with him.
The FatMat went down really well and is significantly less expensive than Dynamat. 1 roll will do the entire floor. You'll need 2 rolls if you want to do roof, quarters, doors, etc. Make sure your surface is clean of dust and dirt. We used Sprayaway and a microfiber towel to clean it. Also, the metal and the FatMat cannot be freezing cold or you will have major problems with it sticking. Roll it very well and make sure you push it into all the contours of your floor.
Lauren
6
6686mustang
Well - I'll have to wait for warming trend here. We had 15'' of snow dumped on us yesterday and temps wont be above 15-20 degrees for a while. Thanks for the info!
Chad.S
Oldtimer
I just had to take about that much fatmat out of a car.. lol..
- - - Updated - - -
The stuff we removed came right out, I couldn't believe how bad it was sticking, I was pretty disappointed in it until I realized it was sticking to the paint he had on the floor, after discussing with him I found out that it was Por15 and that was not sticking to the floor..
- - - Updated - - -
The stuff we removed came right out, I couldn't believe how bad it was sticking, I was pretty disappointed in it until I realized it was sticking to the paint he had on the floor, after discussing with him I found out that it was Por15 and that was not sticking to the floor..
6
6686mustang
I only intend to do it once.. and I hope it sticks! I'll wait until a warm day - plenty of other items to keep me busy until then. So his Por15 was peeling right off the floor? I never used that product.
8
82firebird
DON'T use it. Use only SPI Epoxy. The adhesion is fine with the UPol Raptor we used on the interior but in the future we will NOT be using any other product but SPI epoxy and SPI bedliner.
6
6686mustang
The floor pans in my 86 are in decent shape - thought of a bed liner on em.. Then some white over it. Without grinding all the paint off the floor pans and coating with epoxy - but just scuffing, would the SPI bedliner stick?