You are using an out of date browser. It may not display this or other websites correctly.
You should upgrade or use an alternative browser.
You should upgrade or use an alternative browser.
57 Chevy Nomad
- Thread starter chevman
- Start date

K
kerristallax
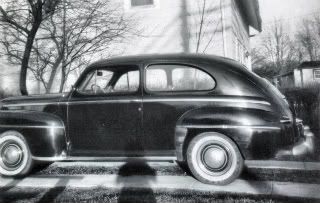
Pardon my lack of knowledge, but... what car is that? Looks like a neat project.
Installing 1/4 panels
There was a problem with one 1/4 panel. I had done some welding on the front flange with a mig welder and didn't get good penatration, so with handling the panel so much on and off the car, the area cracked. I thought about just leaving it alone and bond it on the car, but I still needed to do more to it which involved more putting on and taking off. So with the panel clamped on the car and perfectly lined up, I spot welding some bracing to hold it in line.

Then cut out the mig weld area and made a patch

And used the tig welder this time


Each of the 1/4 panels were first treated with an acid, scrubbing it in with a wire brush to remove any sign of rust residue, then throughly rinsed with water, and washed with a bucket of hot water and soap, then rinsed again.
Epoxy primer was sprayed on before installing them on the car and sanded to make sure that there were no high spots that needed shrinking. Just trying to make sure those areas got cleaned and reprimed on the inside of the panel. I also wanted to be able to consistently remove and replace the panel, and have it line up the same each time, before permanently installing them.

After sanding and making repairs, I reapplied the epoxy on the outside and this red oxide epoxy on the inside. With the 1/4 panel on the car, I marked where I could put the insulation without obstructing anything, and installed it off the car and then it was rolled flat.

I used bonding adhesive instead of spot welding, and I have been doing everything I can to make sure that everything was just the way I wanted it, and all the trim fit the way I wanted it to, before attaching the 1/4s.
So all the prep work paid off, and I'm very pleased with it.
There was a problem with one 1/4 panel. I had done some welding on the front flange with a mig welder and didn't get good penatration, so with handling the panel so much on and off the car, the area cracked. I thought about just leaving it alone and bond it on the car, but I still needed to do more to it which involved more putting on and taking off. So with the panel clamped on the car and perfectly lined up, I spot welding some bracing to hold it in line.
Then cut out the mig weld area and made a patch
And used the tig welder this time
Each of the 1/4 panels were first treated with an acid, scrubbing it in with a wire brush to remove any sign of rust residue, then throughly rinsed with water, and washed with a bucket of hot water and soap, then rinsed again.
Epoxy primer was sprayed on before installing them on the car and sanded to make sure that there were no high spots that needed shrinking. Just trying to make sure those areas got cleaned and reprimed on the inside of the panel. I also wanted to be able to consistently remove and replace the panel, and have it line up the same each time, before permanently installing them.
After sanding and making repairs, I reapplied the epoxy on the outside and this red oxide epoxy on the inside. With the 1/4 panel on the car, I marked where I could put the insulation without obstructing anything, and installed it off the car and then it was rolled flat.
I used bonding adhesive instead of spot welding, and I have been doing everything I can to make sure that everything was just the way I wanted it, and all the trim fit the way I wanted it to, before attaching the 1/4s.
So all the prep work paid off, and I'm very pleased with it.
The front fenders were next. I want to get everything mounted securely in front and behind the doors before I pull them off, because they are so hard to get lined up when the 1/4s and fenders have so much adjustment and are so easily moved.
The fenders have been cleaned, primed, and sanded the same way as the 1/4 panels.


I keep finding more ways to use the G&W remover


It took awhile to get the fender to fit on the car the same each time I tried. The problem turned out to be that the brace just wasn't flat enough where it bolts on to the body, so it could roll around and change the number of shims needed. But a flat washer solved that problem.


Now that the 1/4s and fenders are solidly mounted, I have started working on the door gaps. The factory assembly manual shows the clearance should be from .060 to .180. With everything adjusted the way I want it, it leaves the gap at the hood to cowl, and hood to fender at .140. So I am shooting for .140 everywhere in bare metal, and after painting, it should be about .120 or 1/8 inch.

The fenders have been cleaned, primed, and sanded the same way as the 1/4 panels.
I keep finding more ways to use the G&W remover
It took awhile to get the fender to fit on the car the same each time I tried. The problem turned out to be that the brace just wasn't flat enough where it bolts on to the body, so it could roll around and change the number of shims needed. But a flat washer solved that problem.
Now that the 1/4s and fenders are solidly mounted, I have started working on the door gaps. The factory assembly manual shows the clearance should be from .060 to .180. With everything adjusted the way I want it, it leaves the gap at the hood to cowl, and hood to fender at .140. So I am shooting for .140 everywhere in bare metal, and after painting, it should be about .120 or 1/8 inch.
B
Bob Hollinshead
Nice work! Make sure your door hinges are tight if you're working for 1/8" gaps.
I wasn't happy with the door fender match up on the upper part around the high crown area, and I must say, it would have been a lot easier to leave it alone.
Also, welding the edges caused it to shrink a little toward the middle of the door, which just moved the panel outward, so it needed some more shrinking.


Also, welding the edges caused it to shrink a little toward the middle of the door, which just moved the panel outward, so it needed some more shrinking.
B
Bob Hollinshead
Nice work, definately a good area to use body solder.


C
cjetmech
The whole job looks great but I really like the lead work. Ive been thinking about trying it myself. When would you guys recomend using lead vs filler?
If you have never used lead before it can be a lot of fun to use, but when you get away from the edges its a lot better to get the metal as straight as you can and todays fillers will be a lot easier to work with and when properly applied will last as long as you need them to.
If you have to do it just remember lead work is very dangerous like a lot of other things we do, so if you do it, check up on the precautions. Also the tinning butter doesn't always give good adhesion, so I use Stay Clean tinning acid from Harris.
With the panels on this car so straight, its not a good candidate for lead anywhere away from the edge, except I will be using some on the rocker panels. The factory twisted them when installing back in 1957, I guess something else was off a little and they twisted these to compensate for that.
'68 Coronet R/T
Oldtimer
So how many hours have you got in that car? Your work is first rate and that takes a lot of time - at least for me.
The owner is only paying for normal body and paint work, so I haven't kept track of time. Its just something that I wanted to do and he said knock yourself out, so I'm trying to do just that. The time problem is that I had to do so much research and trail and error, because a lot of it was new to me. I ruined 3 excellent front fenders and a 1/4 panel, its a good thing I have parts. I actually have several other jobs I could be doing, but they'll wait until this is done, I'm retired.