You are using an out of date browser. It may not display this or other websites correctly.
You should upgrade or use an alternative browser.
You should upgrade or use an alternative browser.
Wagon Progress
- Thread starter MP&C
- Start date
Whitesnake
Newbie
So much good firewood! Lol
MP&C
Member
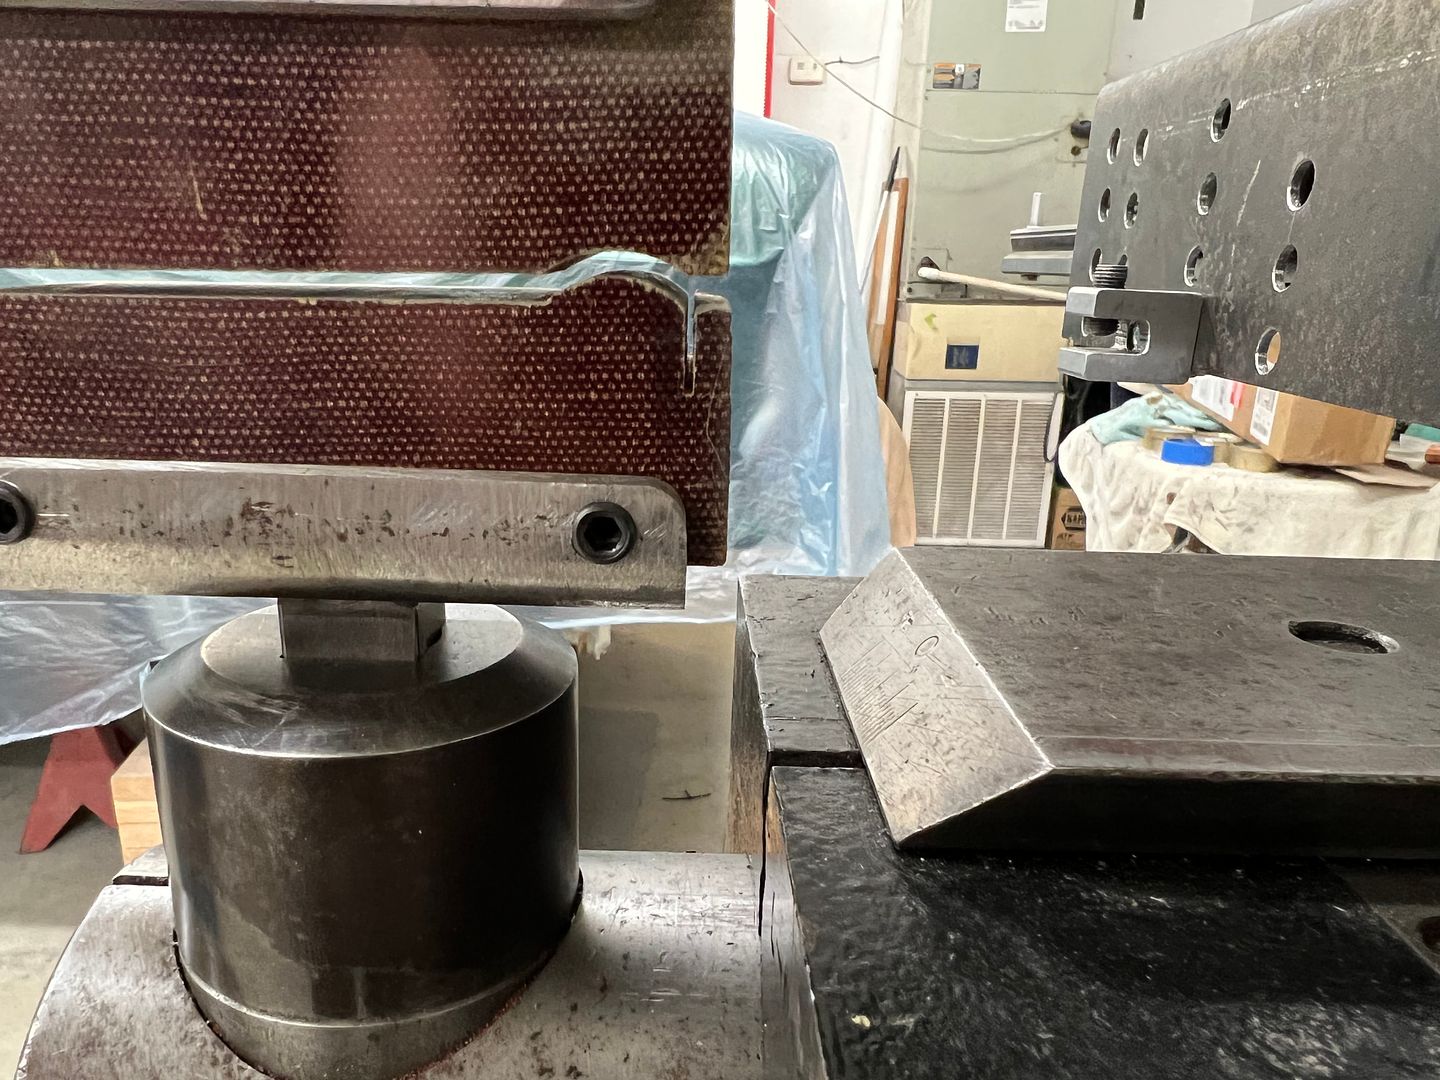
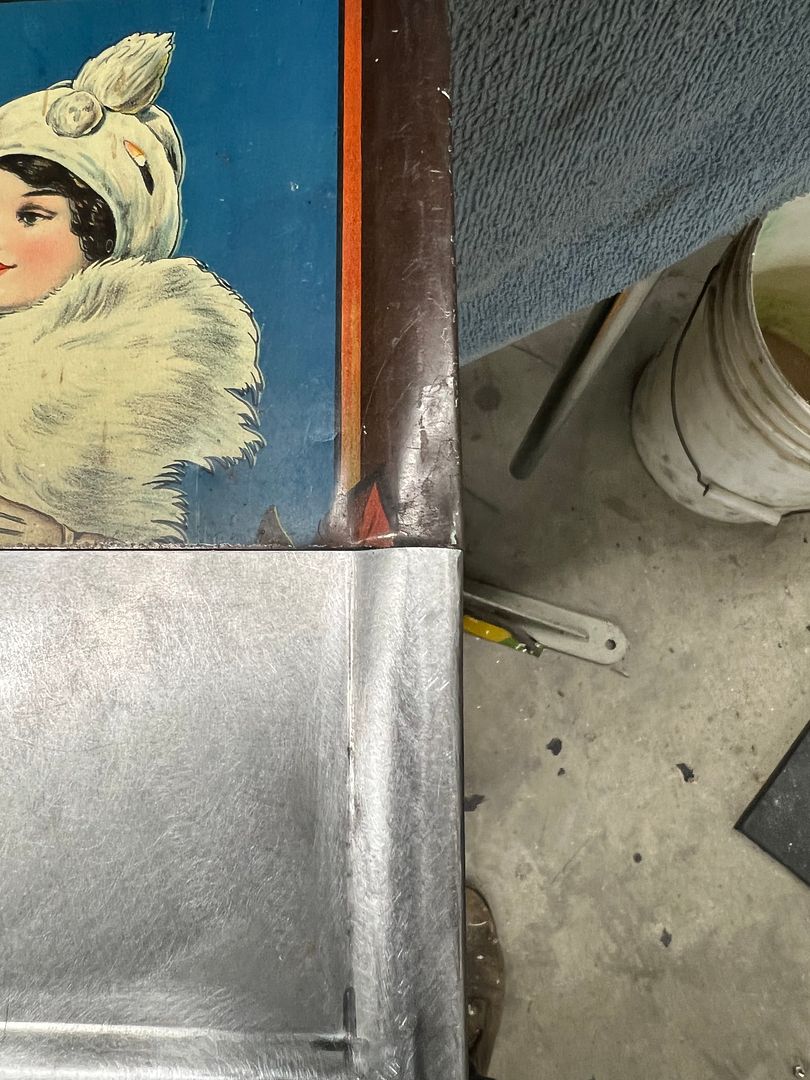
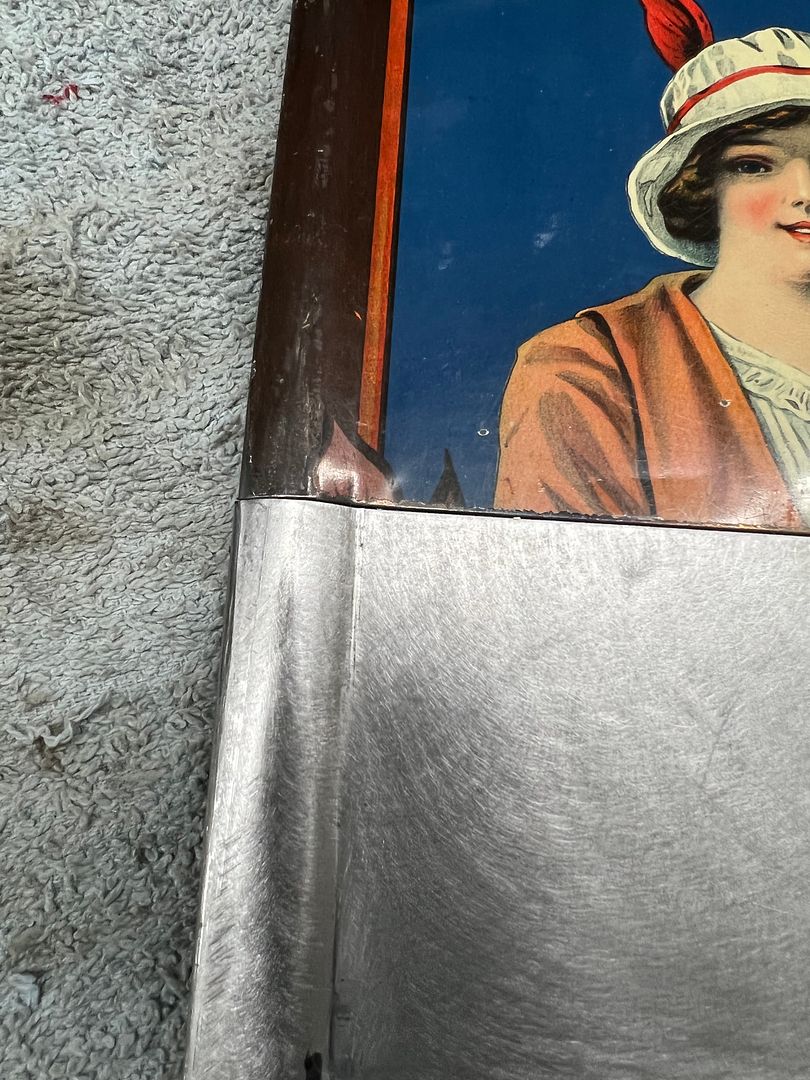
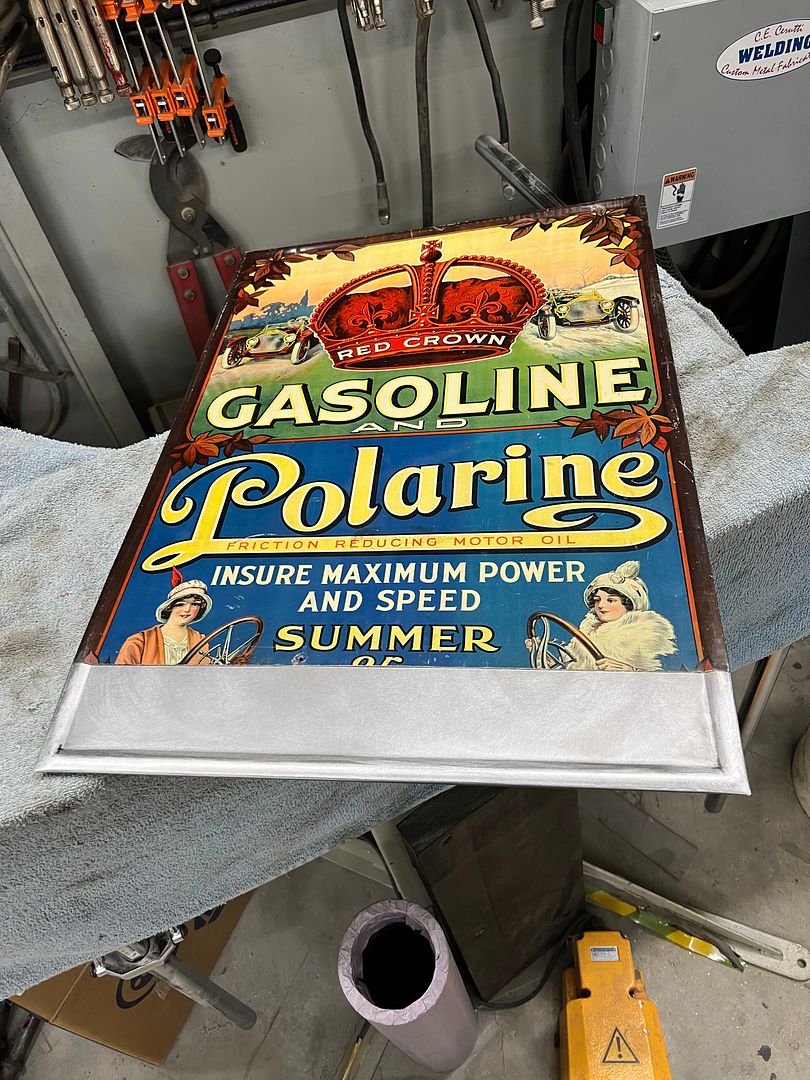
We've all seen the rusted out floor pans in old cars with a sign screwed or pop riveted in place to keep your feet from falling through. As a first for me, now I've repaired one of those signs. We needed to make some dies for the Lennox to produce the "picture frame" border...
[video=youtube;4jHXHTfZsG0]
[video=youtube;lwfCSv58raE]
The owner plans on using panel adhesive to attach, in order to save as much of the original paint as possible. We made some splice plates for the back side to use with the panel adhesive. He has an artist lined up to re-create the bottom portion.
MP&C
Member
He had another that was pristine and still intact that sold two years ago for about 20K. He is fixing this one to keep in his garage. The seam should be invisible when completed, i don't know if that will be done with the panel adhesive or a bit of filler. ??That sign is probably worth more than my car. Will the seam be visible, or will it be fill with some artist mastery?
MP&C
Member
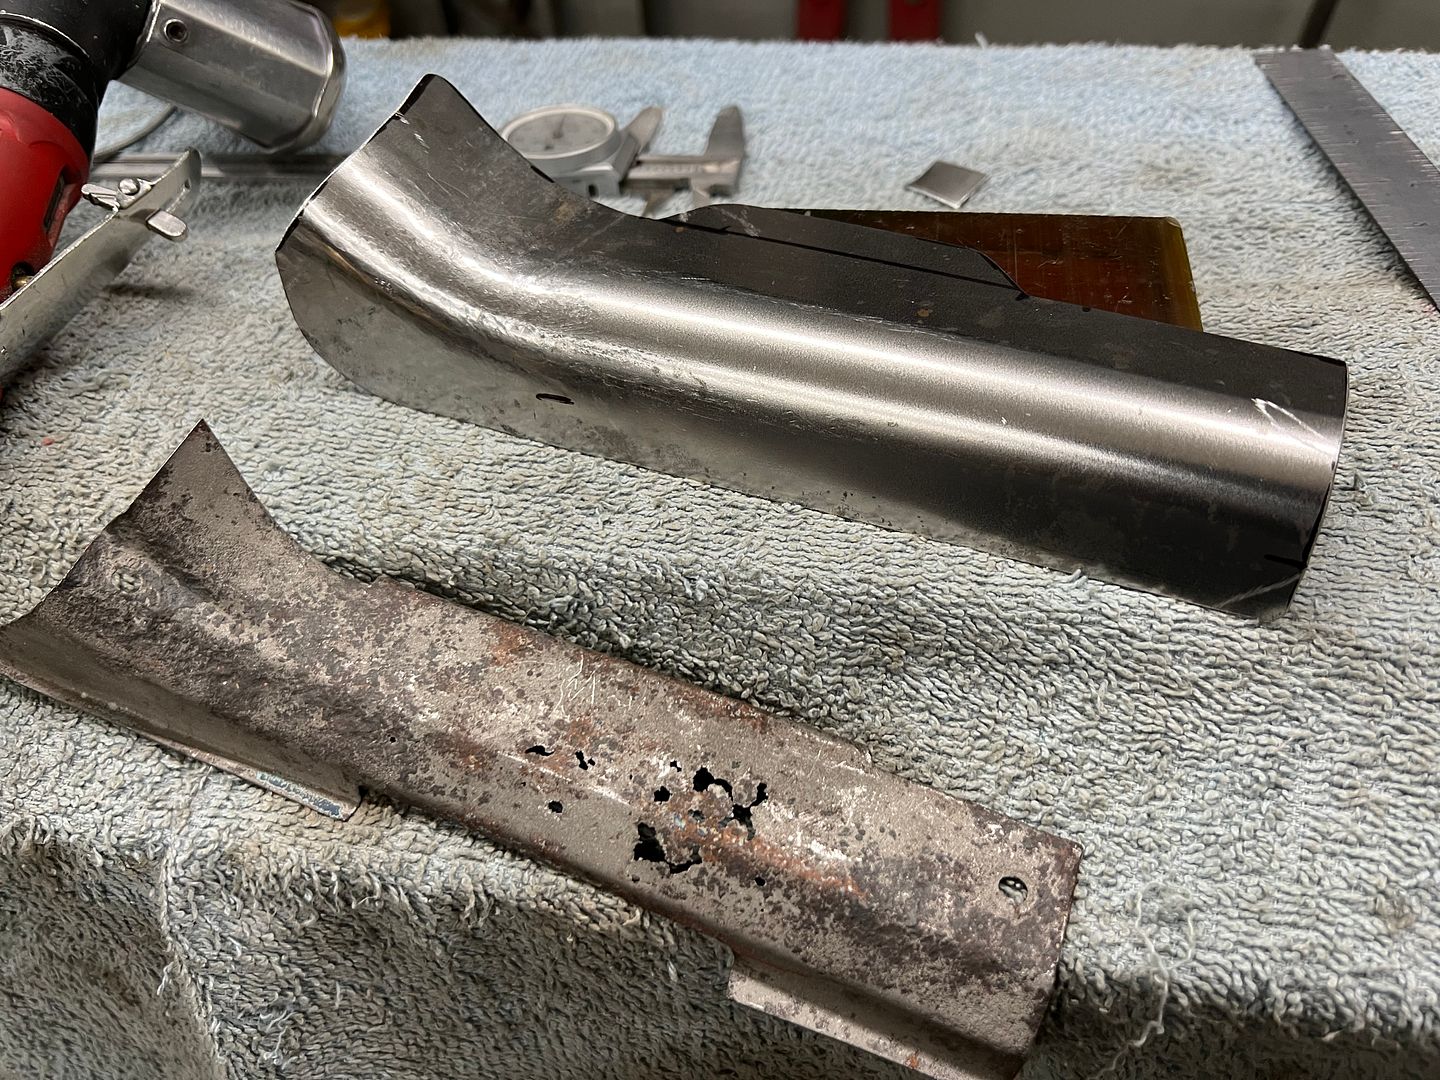
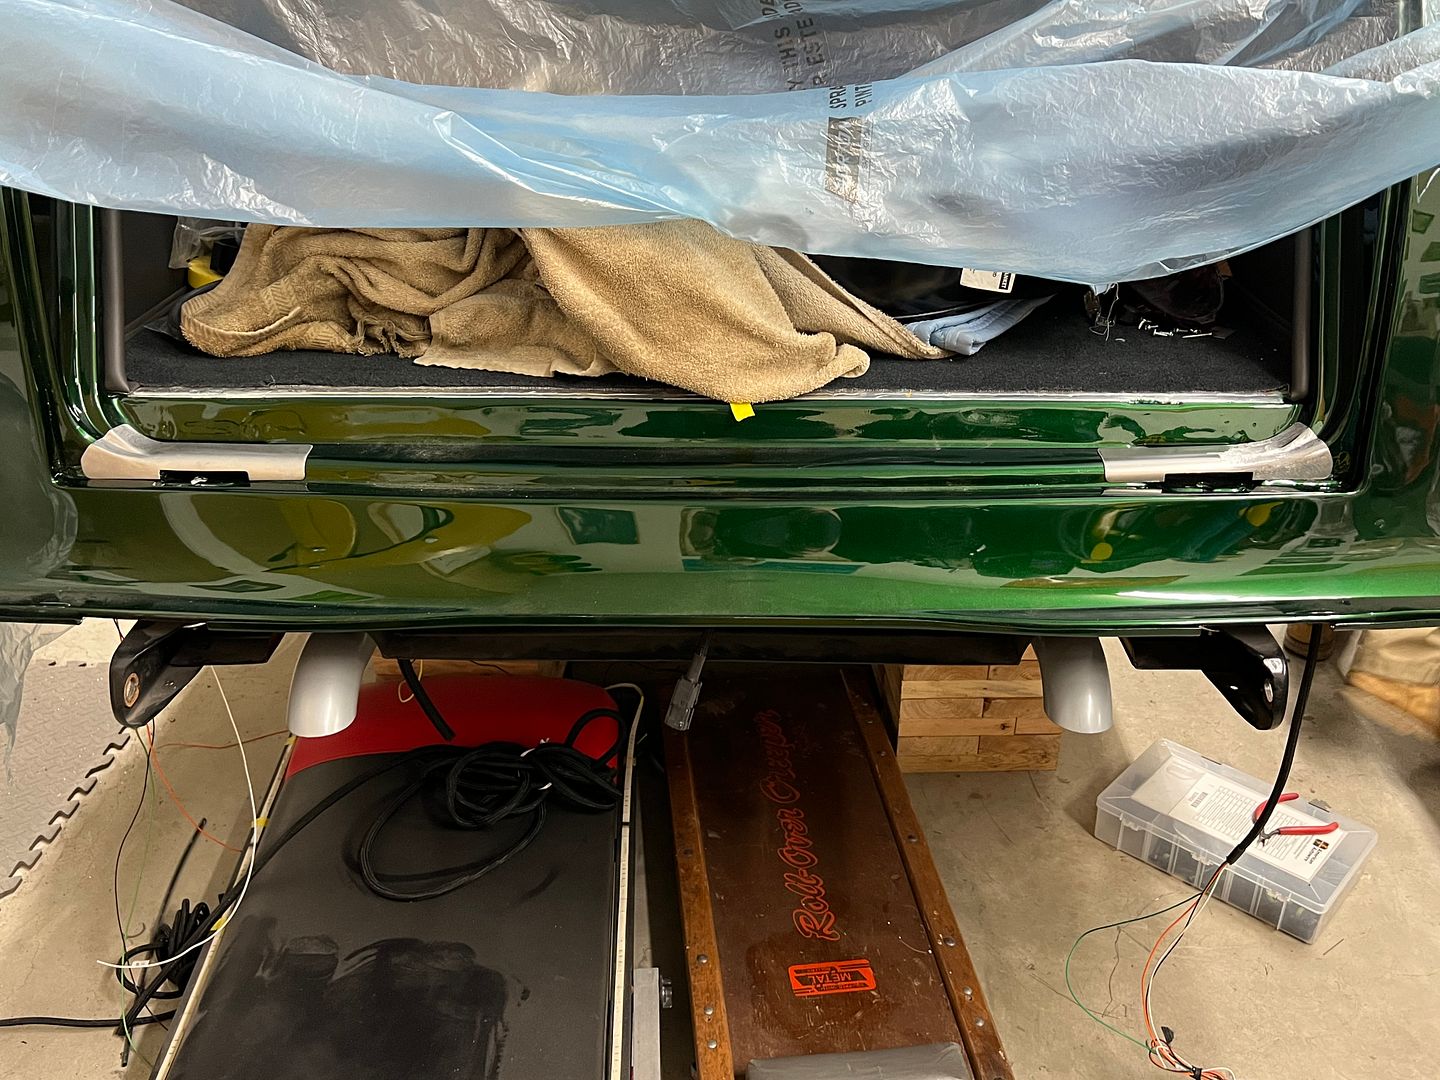
The hinge covers for the wagon is one of the many loose ends we have left to address, quite a bit of rust...
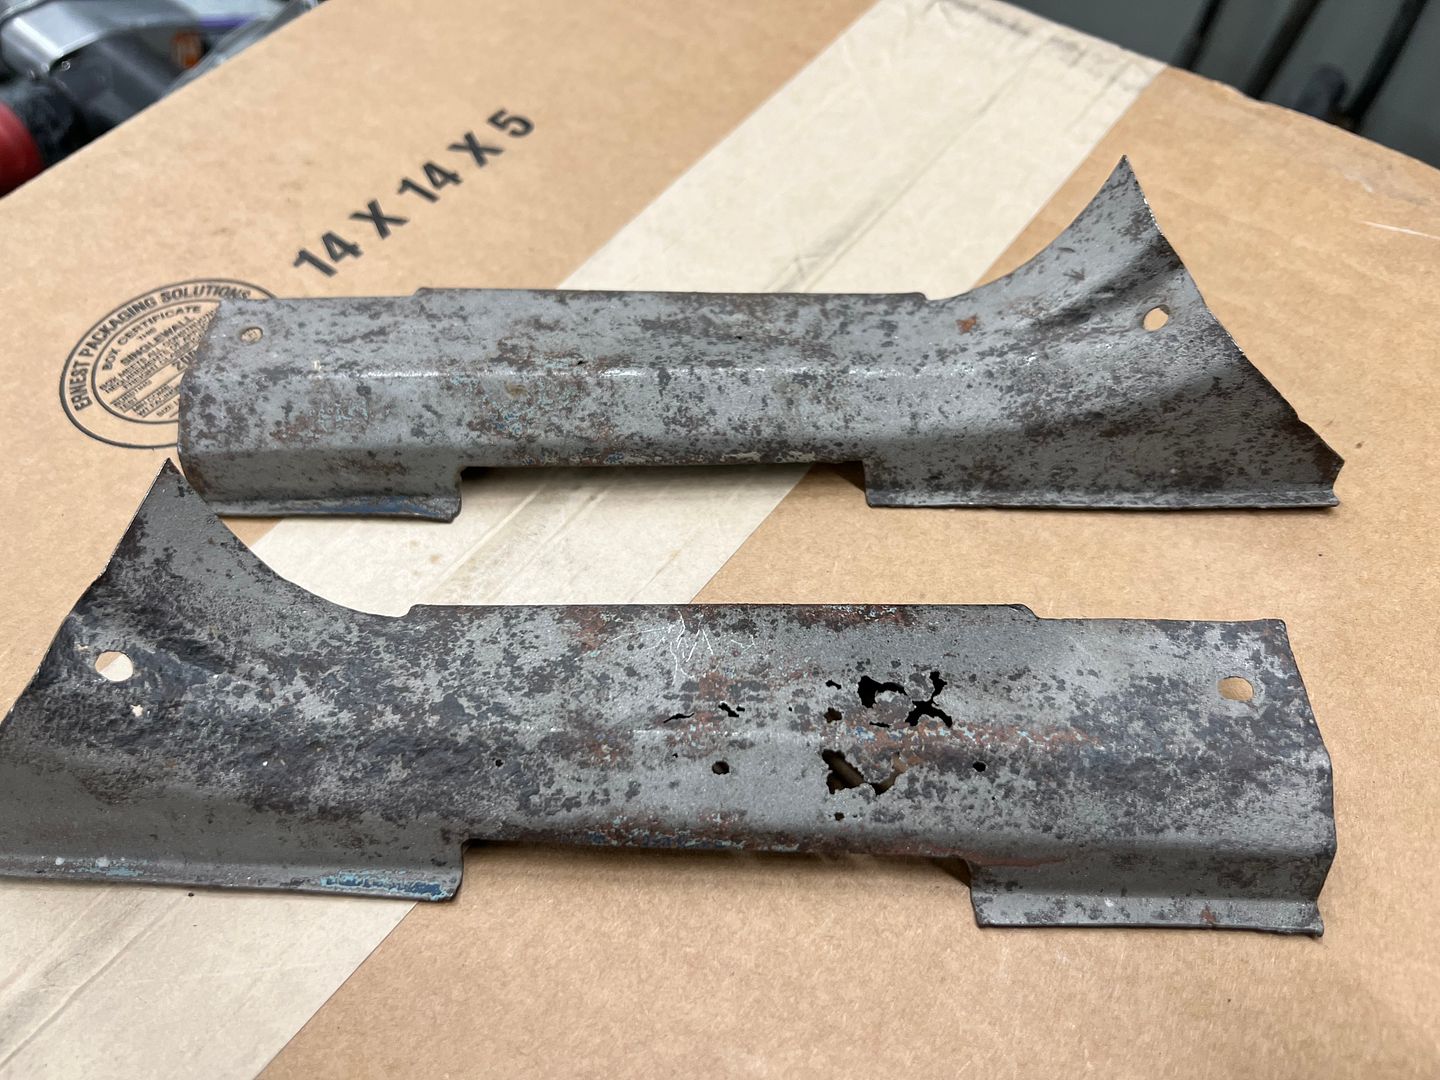
A quick test fit before we go off fabricating anything shows these factory original parts are no better than many of the reproduction parts you get today.. I had planned on fabrication work, didn't know we needed a redesign.
We ordered a piece of round stock to match the radius to use on the Magnetic brake, that should arrive Tuesday.
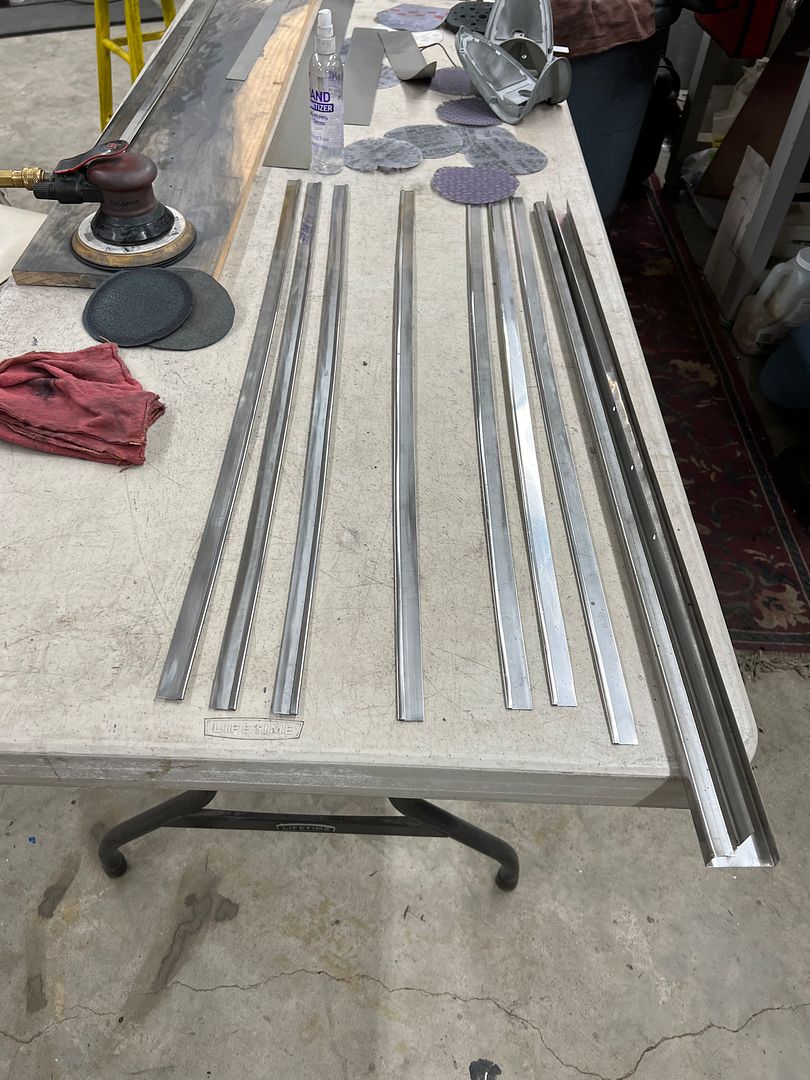
Next, we need to fold a hem for our stainless edge trim we plan on using for the ribbed stainless dash insert. The magnetic brake leaves a bit to be desired in having balls enough to hem a short return flange, so we packed up our sheet metal strips we had cut to size and went to another local metalshaper's shop to make use of his apron brake.
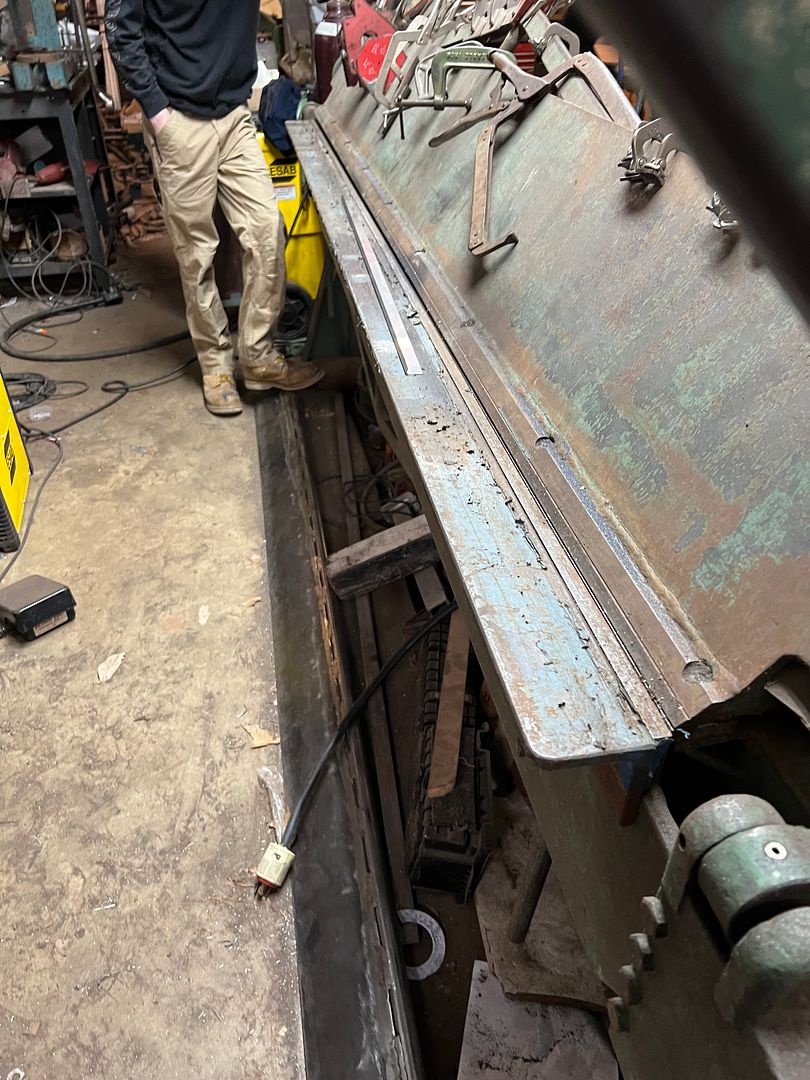
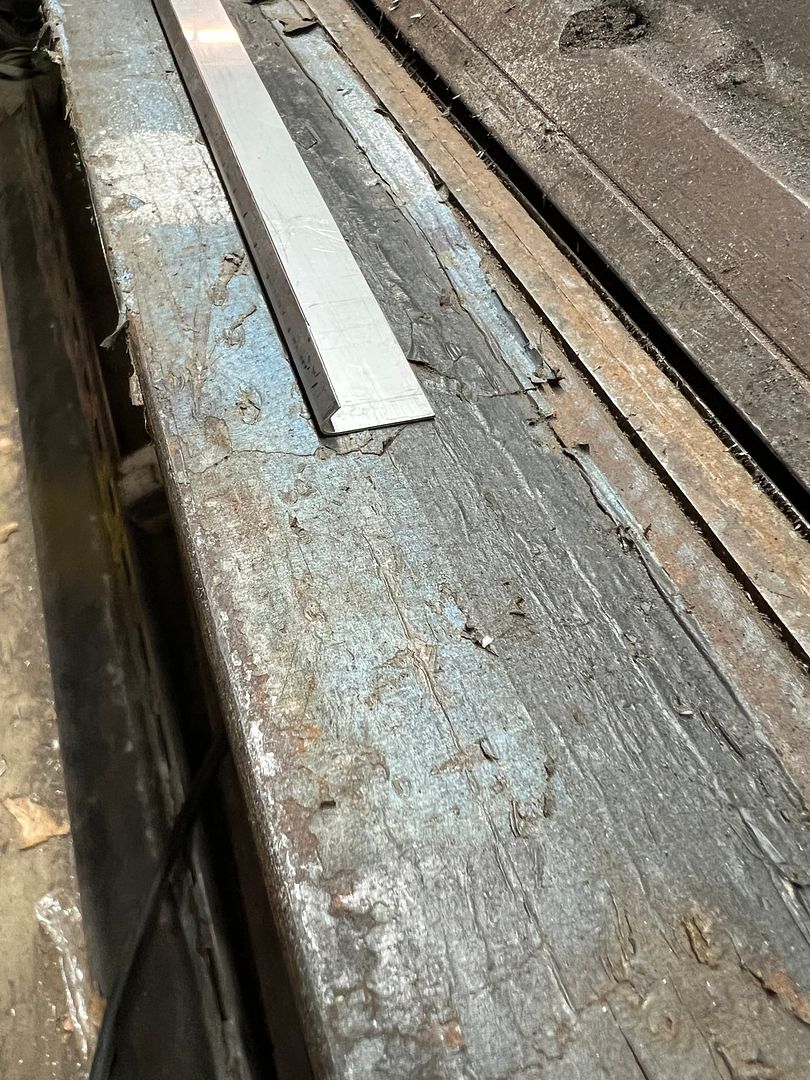
A piece of .030 aluminum acted as a spacer to maintain our hem gap. The brake worked well but the parts needed a bit more flatness to provide nice crisp details. Since he also had a powered Mittler Bros. bead roller, we used some flat dies and ran through all the bent pieces.
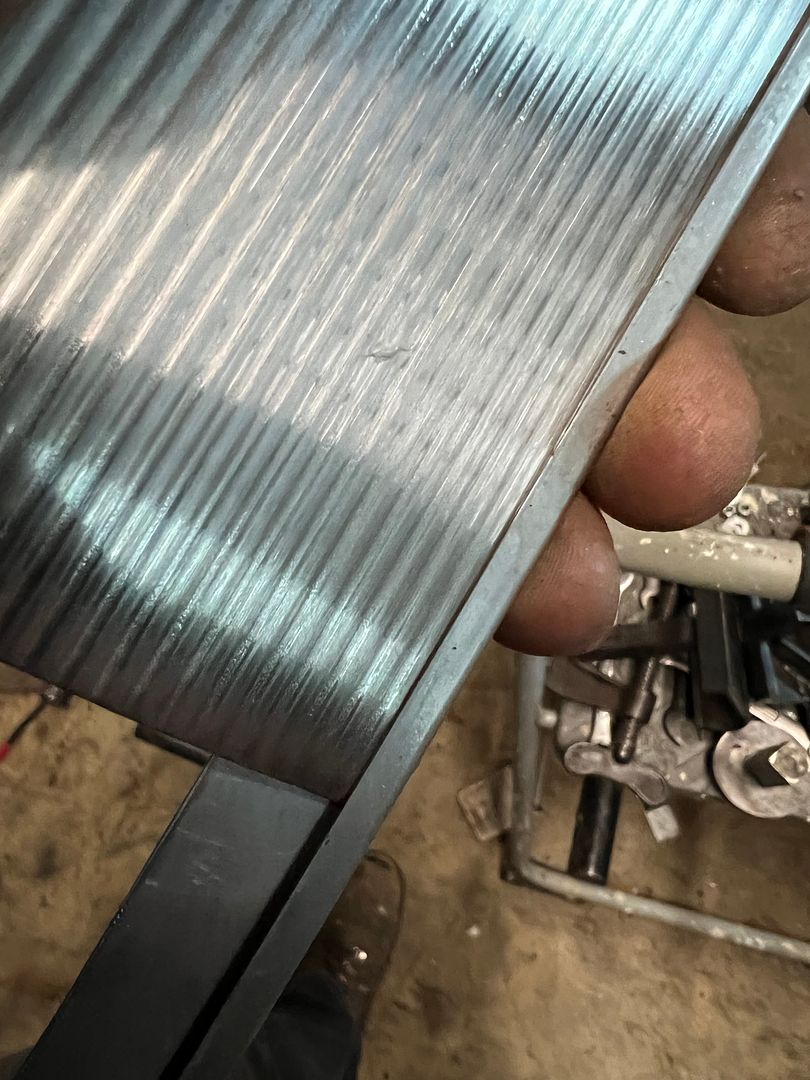
test fit of the ribbed stainless....
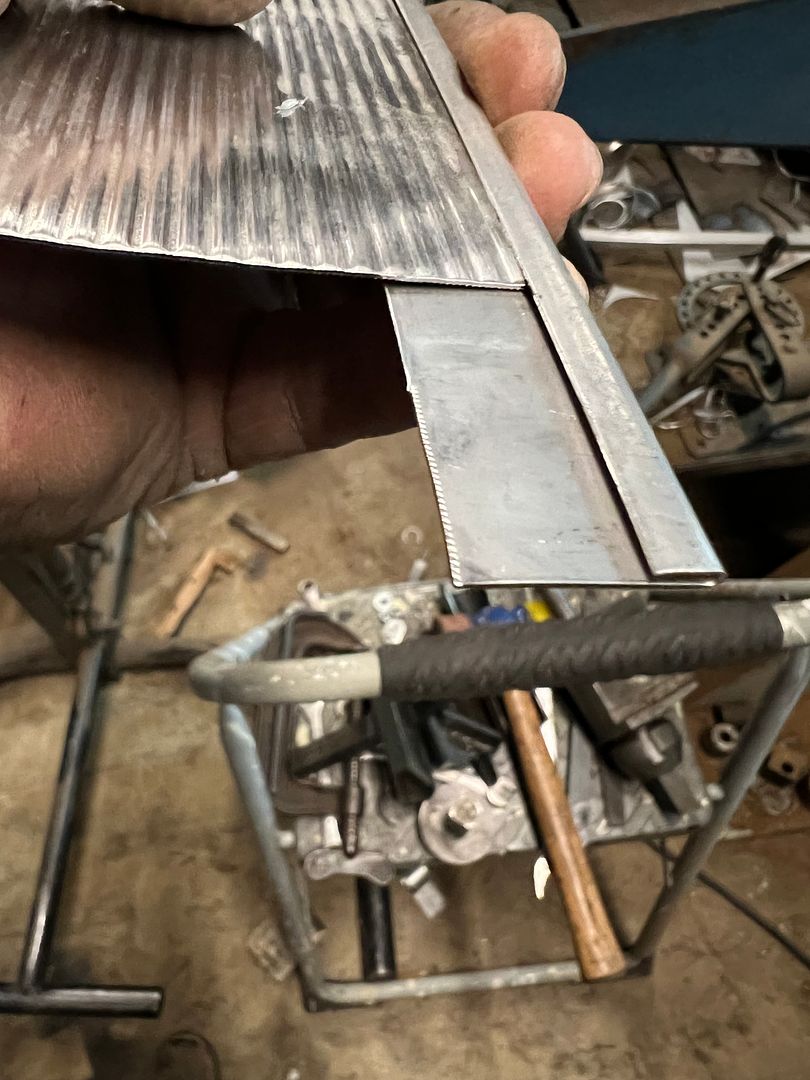
And for a teaser of how it will look after polishing....
A quick test fit before we go off fabricating anything shows these factory original parts are no better than many of the reproduction parts you get today.. I had planned on fabrication work, didn't know we needed a redesign.
We ordered a piece of round stock to match the radius to use on the Magnetic brake, that should arrive Tuesday.
Next, we need to fold a hem for our stainless edge trim we plan on using for the ribbed stainless dash insert. The magnetic brake leaves a bit to be desired in having balls enough to hem a short return flange, so we packed up our sheet metal strips we had cut to size and went to another local metalshaper's shop to make use of his apron brake.
A piece of .030 aluminum acted as a spacer to maintain our hem gap. The brake worked well but the parts needed a bit more flatness to provide nice crisp details. Since he also had a powered Mittler Bros. bead roller, we used some flat dies and ran through all the bent pieces.
test fit of the ribbed stainless....
And for a teaser of how it will look after polishing....
MJM
Promoted Users
Gotta know people for the stuff you don't have..
The only person I know is SPI member Dean, and he requires a tool rental deposit.
MP&C
Member
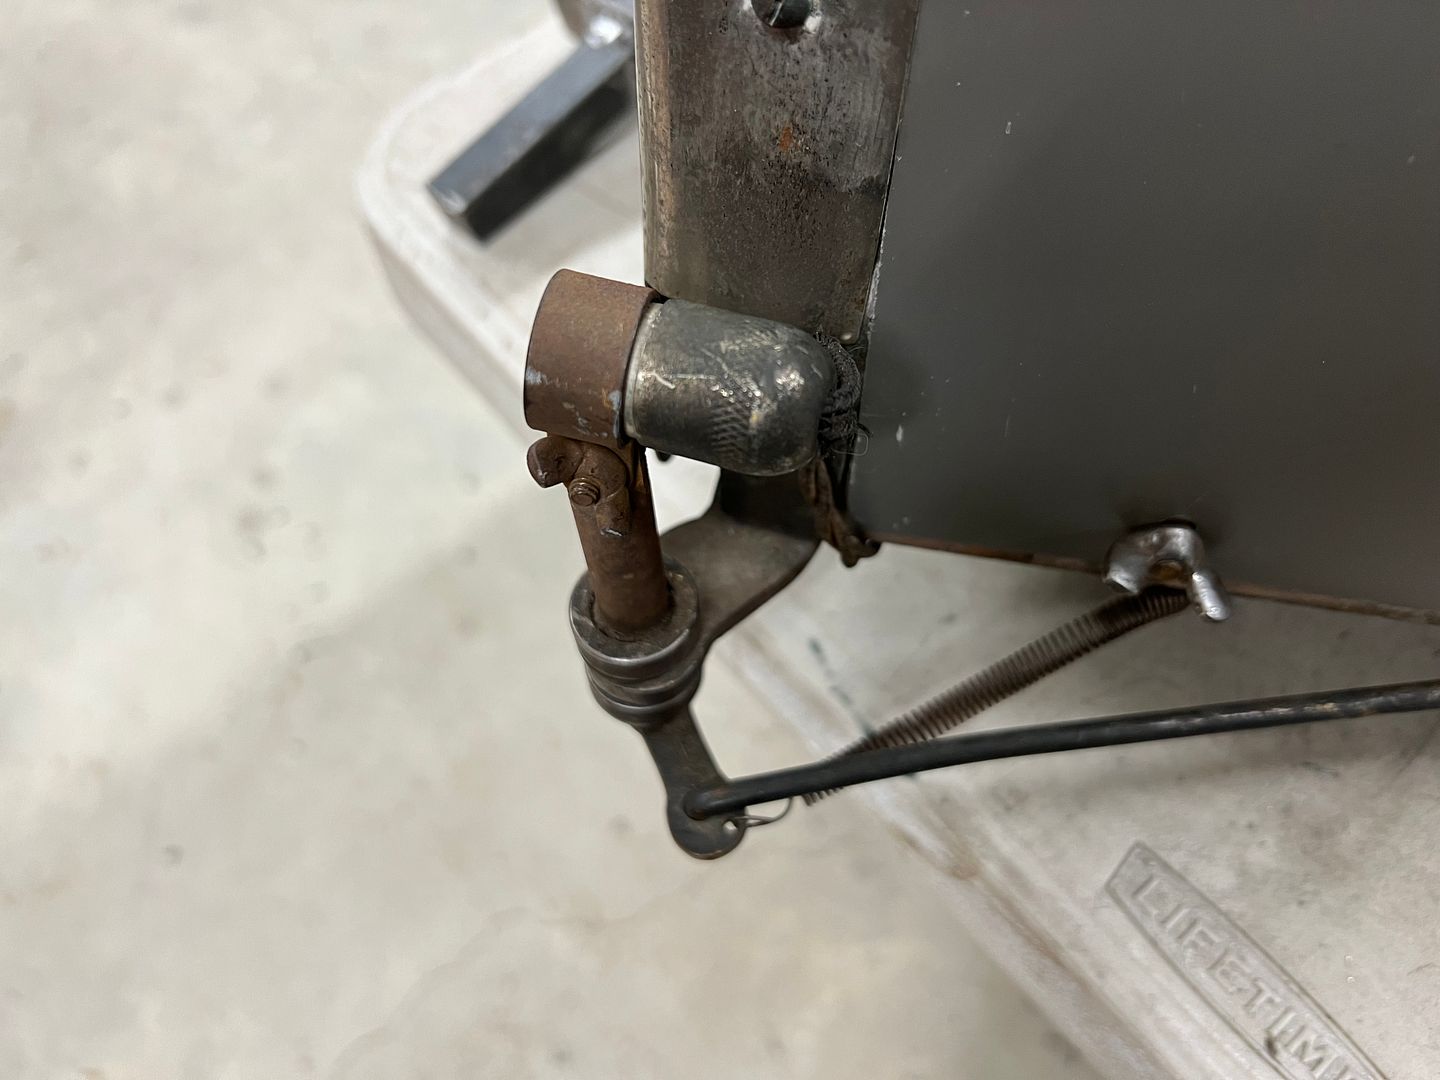
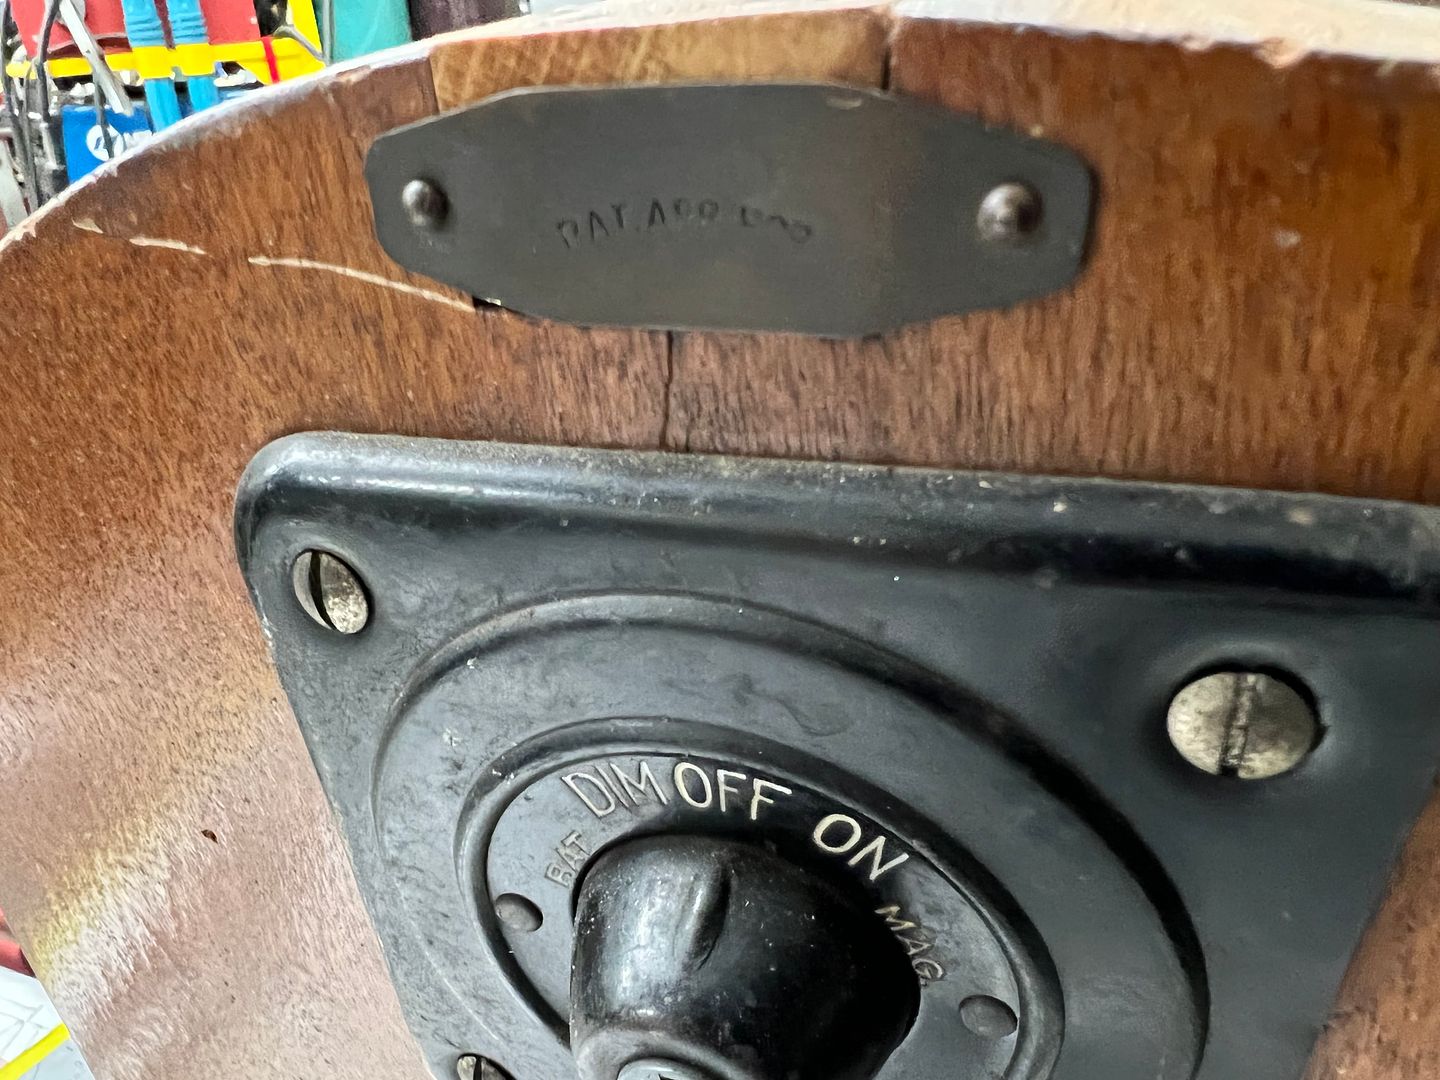
Same guy with the sign repair also brought in a "Patent Idea Display". This had a battery pack inside that powered the headlights (headlight bezels not shown) and featured a rod down the bottom that would oscillate the left headlight, and I believe would flash that headlight as well (based on linkage tied to a relay inside). The control switch is actually the left half of a Model T instrument cluster.
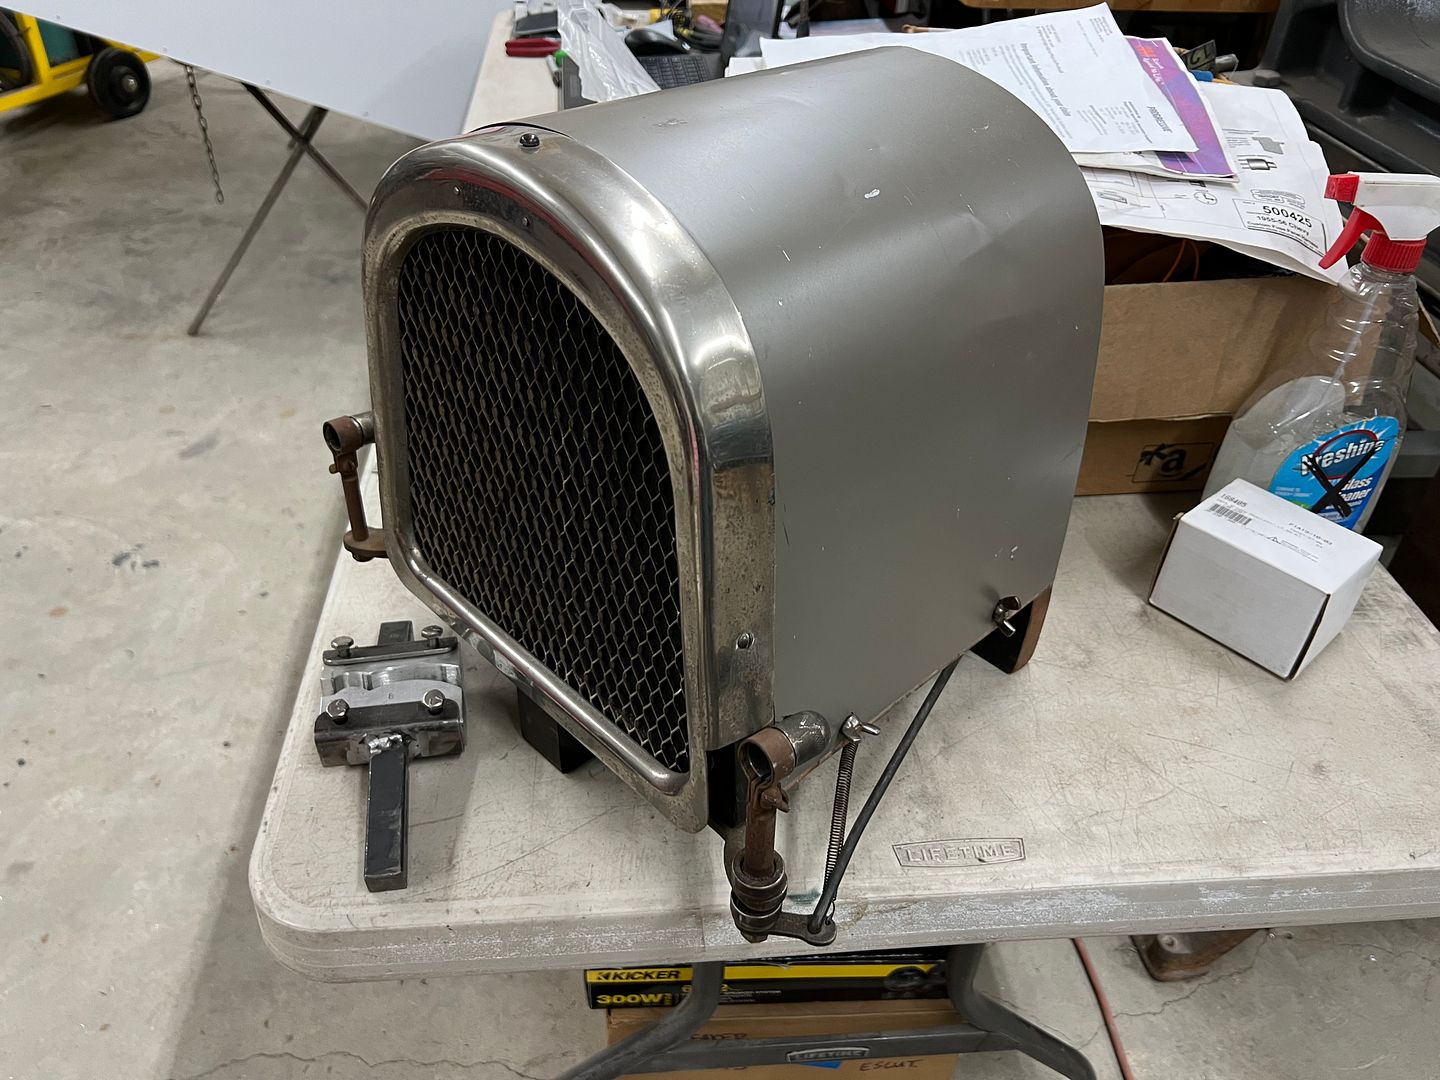
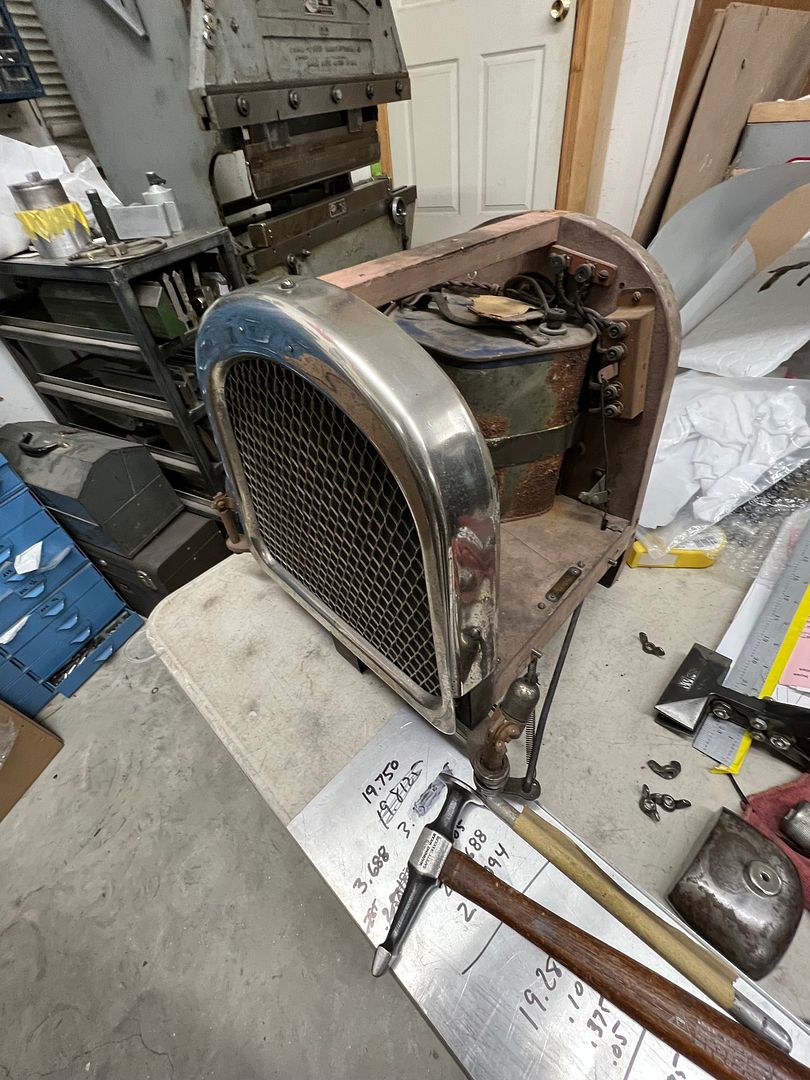
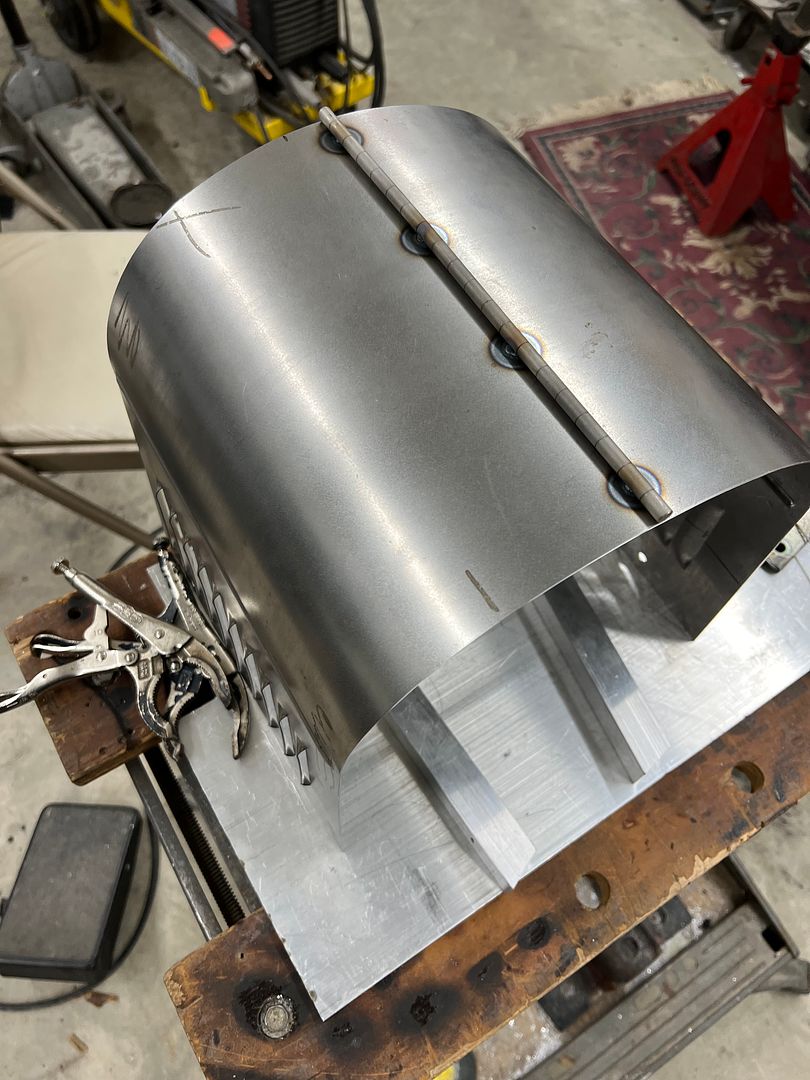
It has obviously had parts (hood) that went missing over the years and an aluminum flashing replacement had been added. He wanted a hood fabricated that looked more period correct, so we offered to do louvers and a faux hinge at the top.
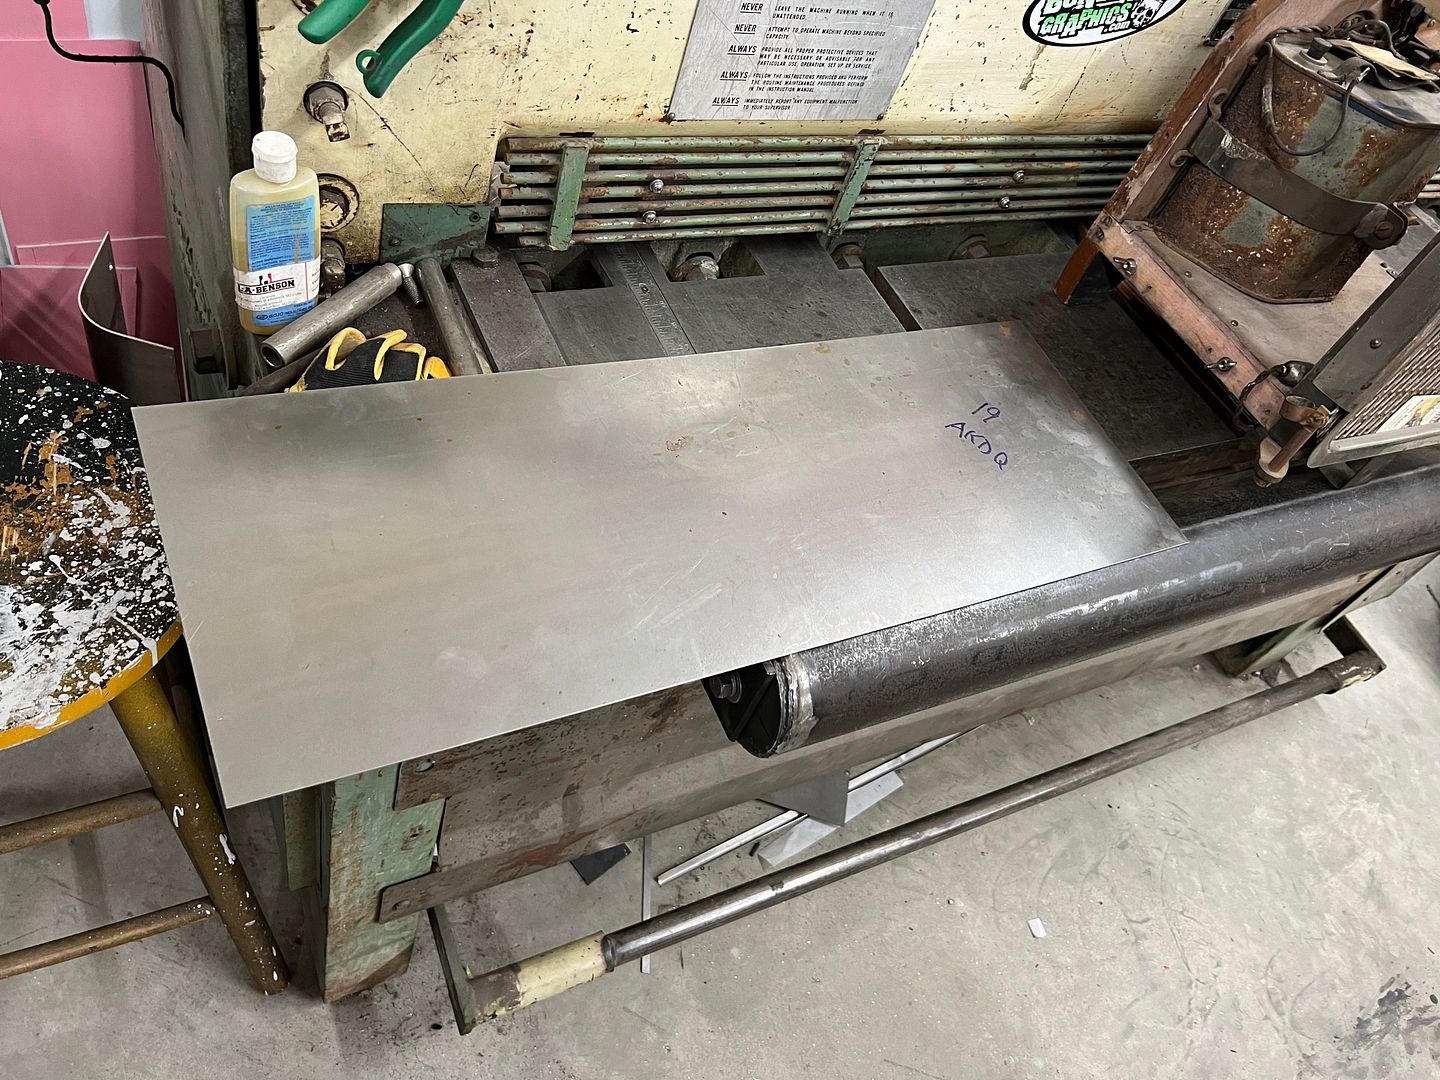
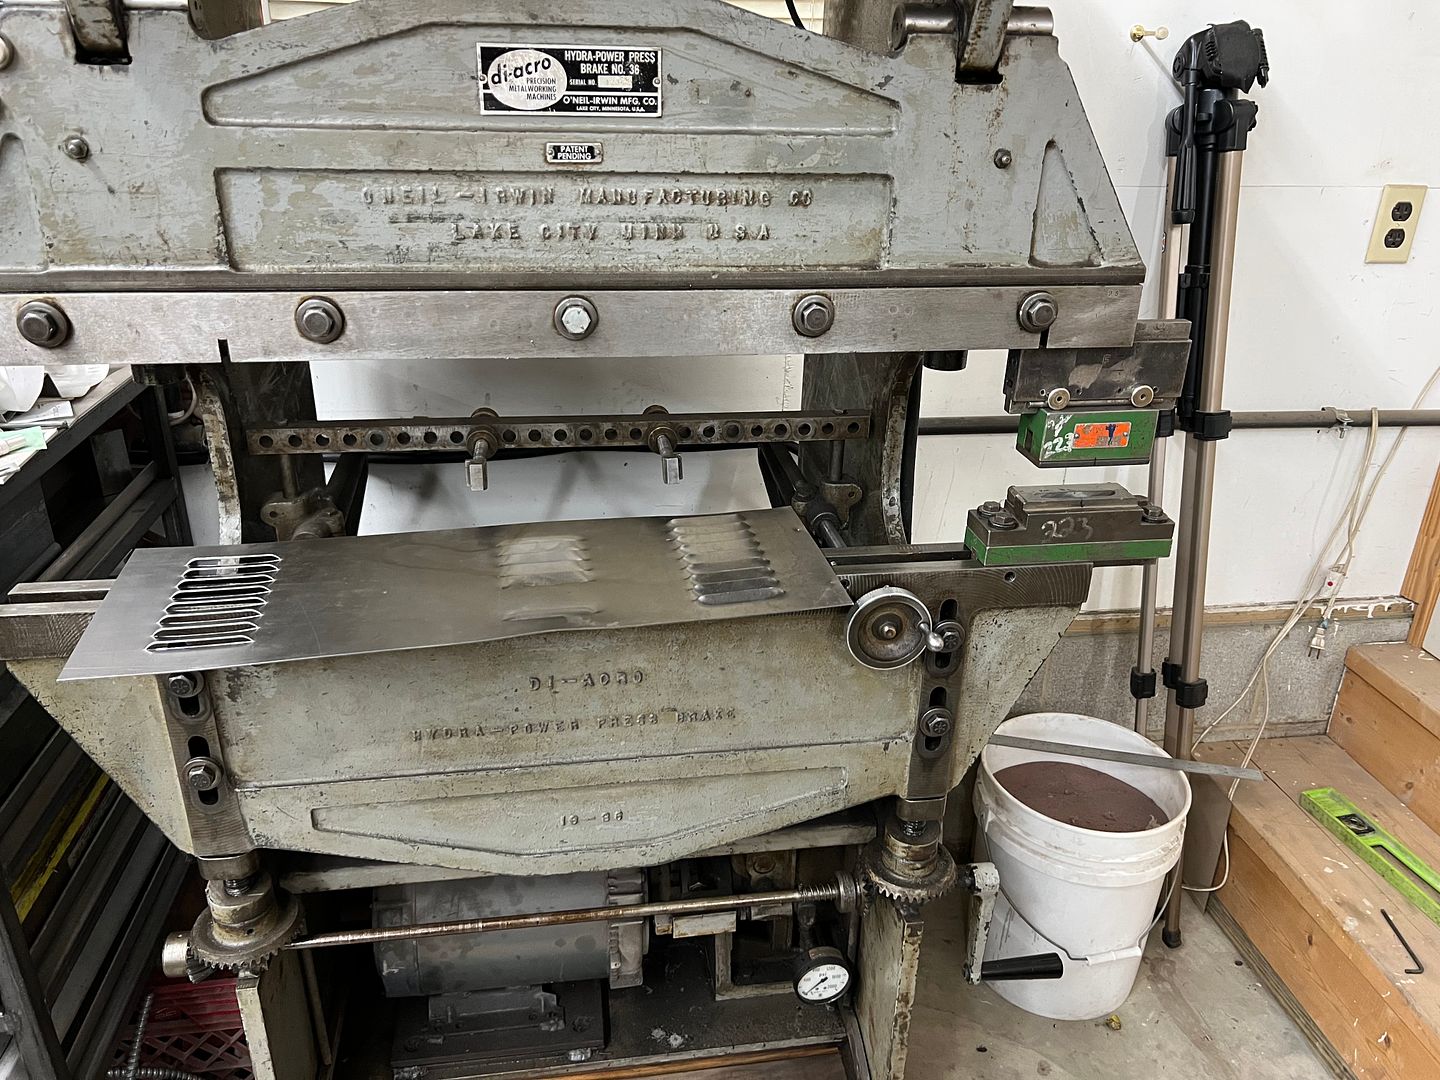
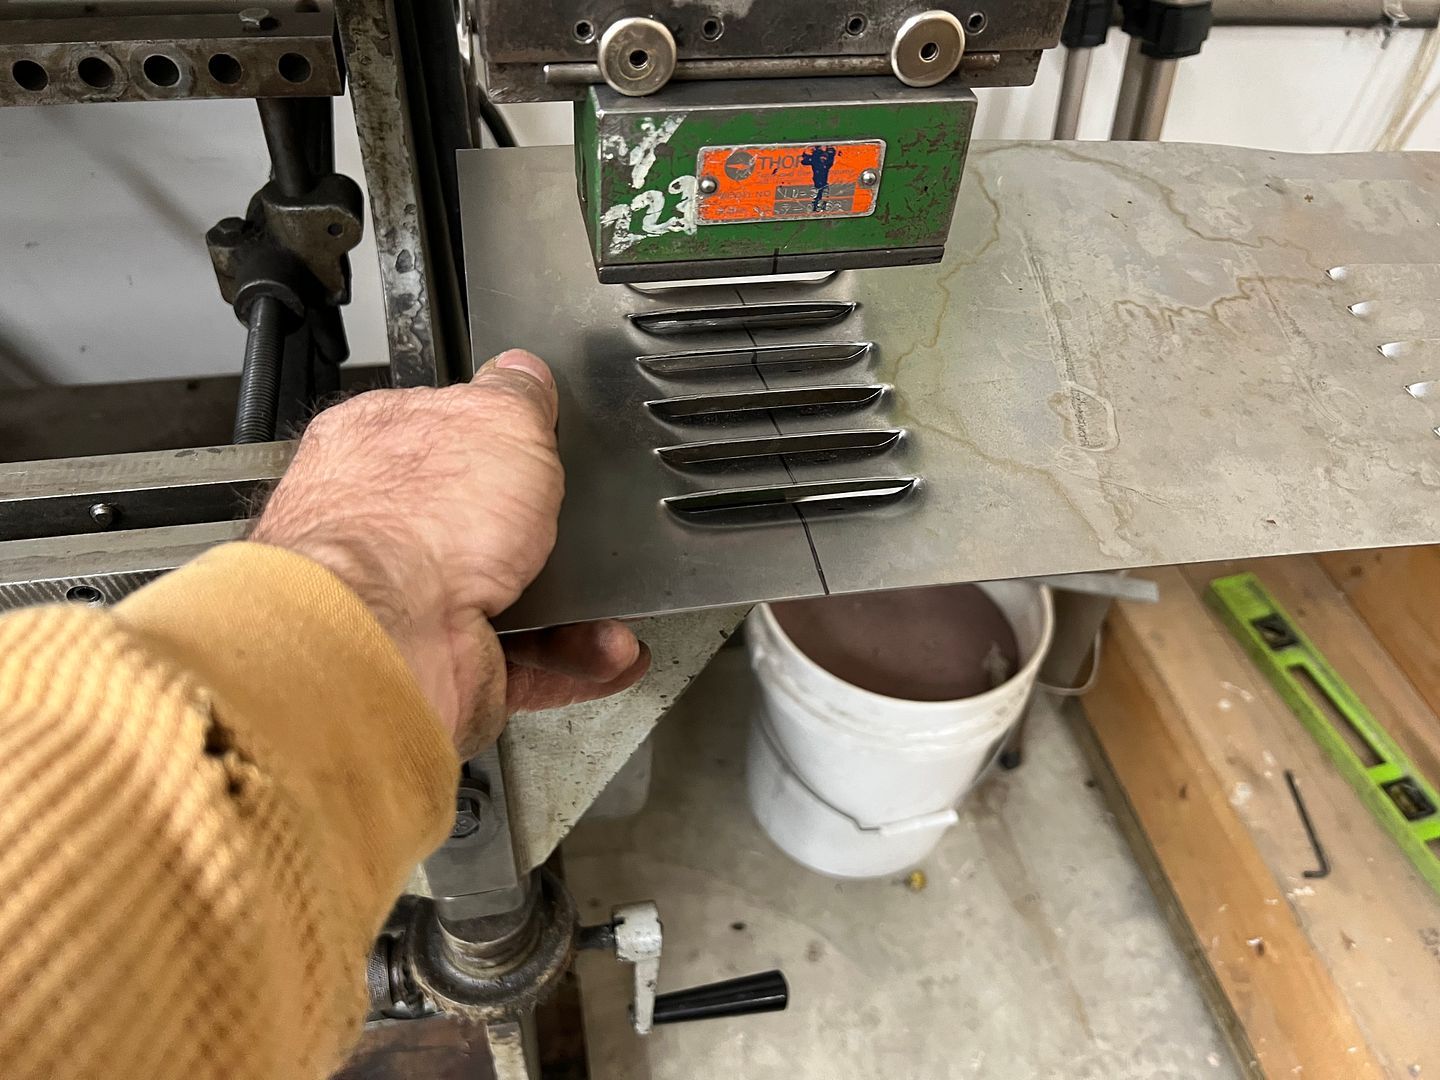
For the hood we used 19 gauge AKDQ, and for the louvers we are using the Diacro press brake. The louver dies weren't tall enough for the Diacro, so an adapter was used at the top to make up the difference.
Our practice punches worked fine, but the machine did not have enough depth to the vertical supports of the press brake for the size of our hood. We would need to get sketchy. Real sketchy.
With only about half of each die in the machine, and two set screws holding on for dear life....
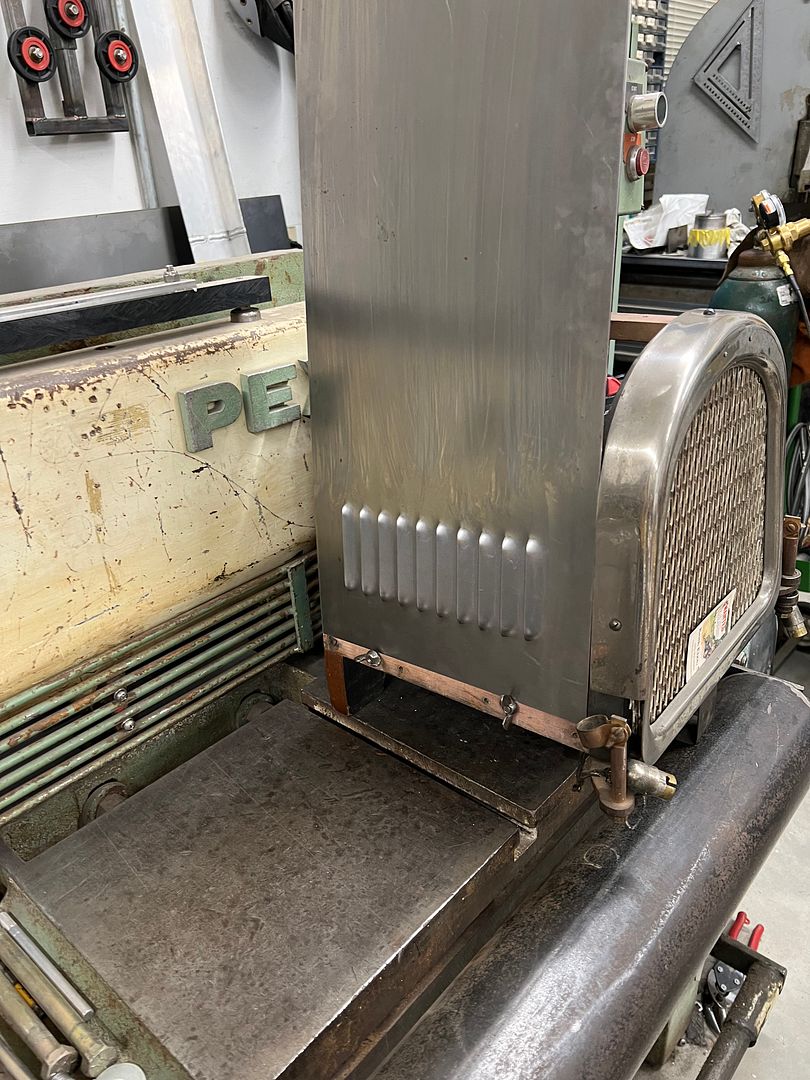
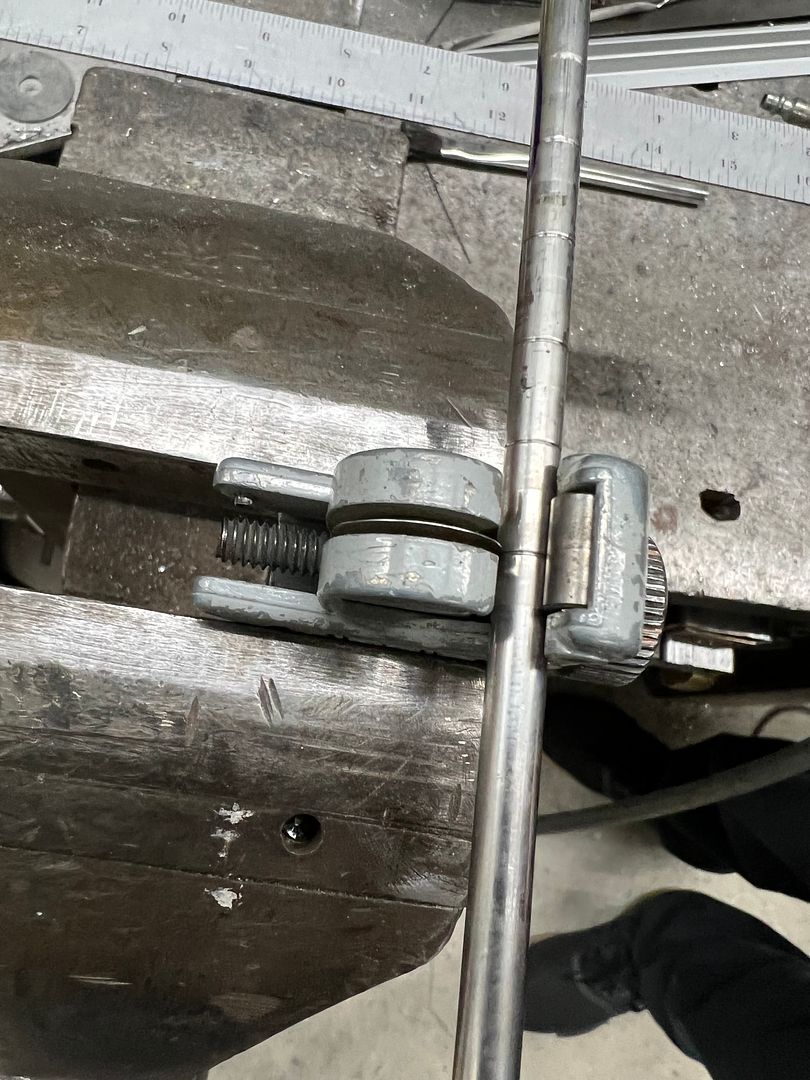
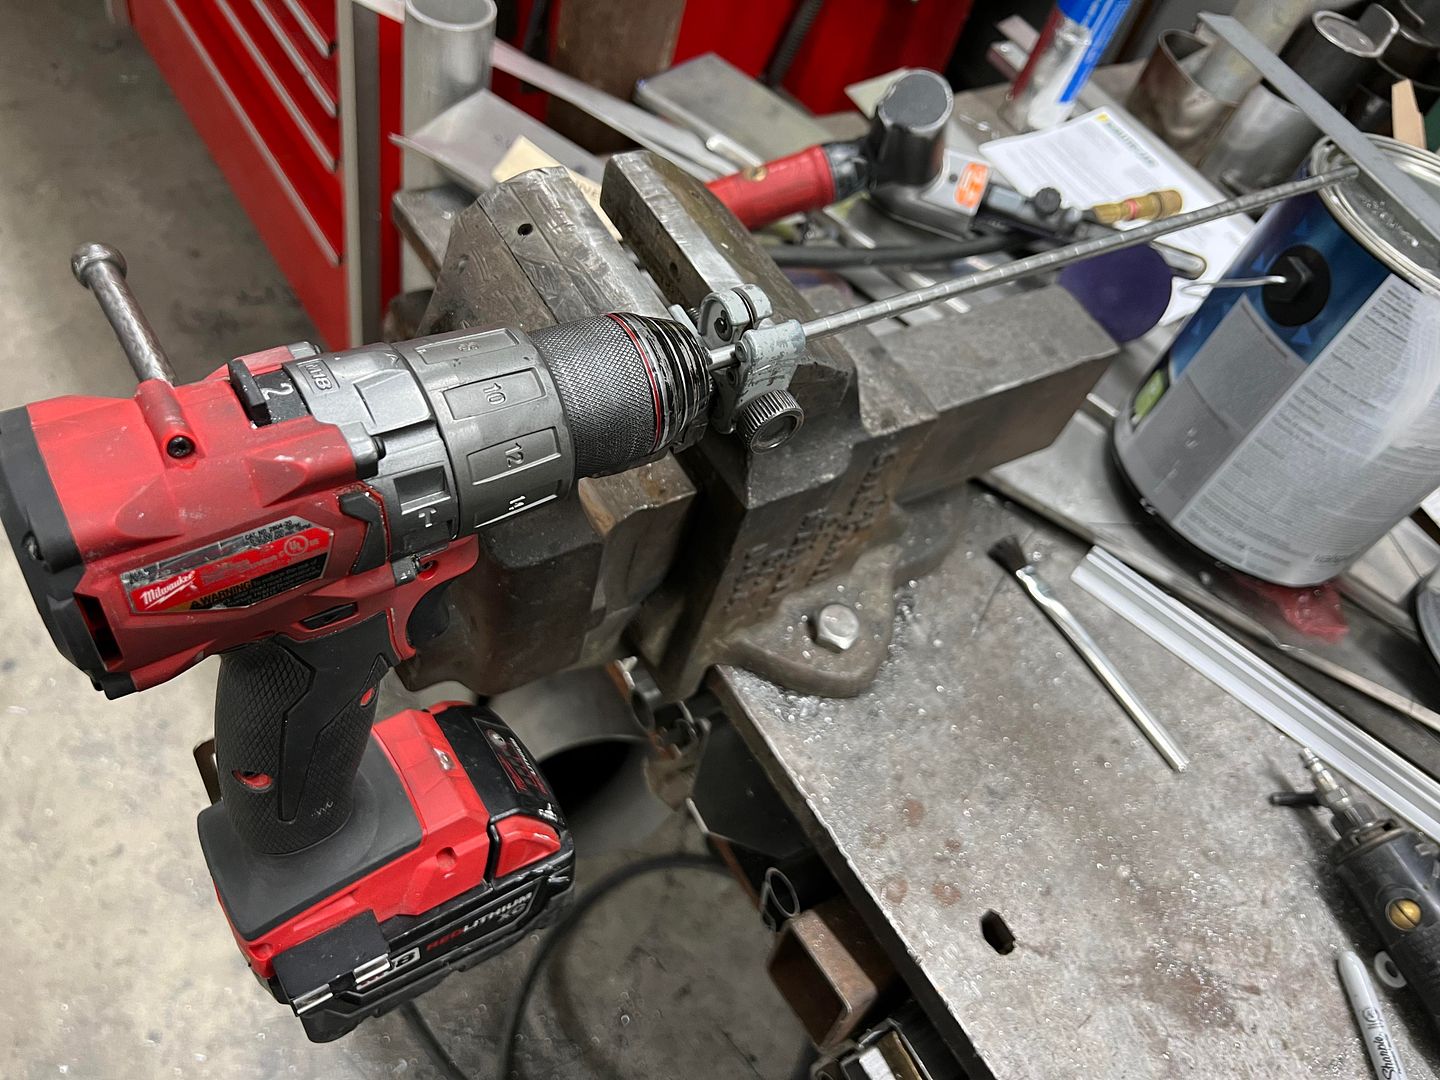
With louvers punched, we used the highly technical argon bottle radius brake to add our hoop. next on the list was to make our hinge using a piece of 1/4" stainless tubing.
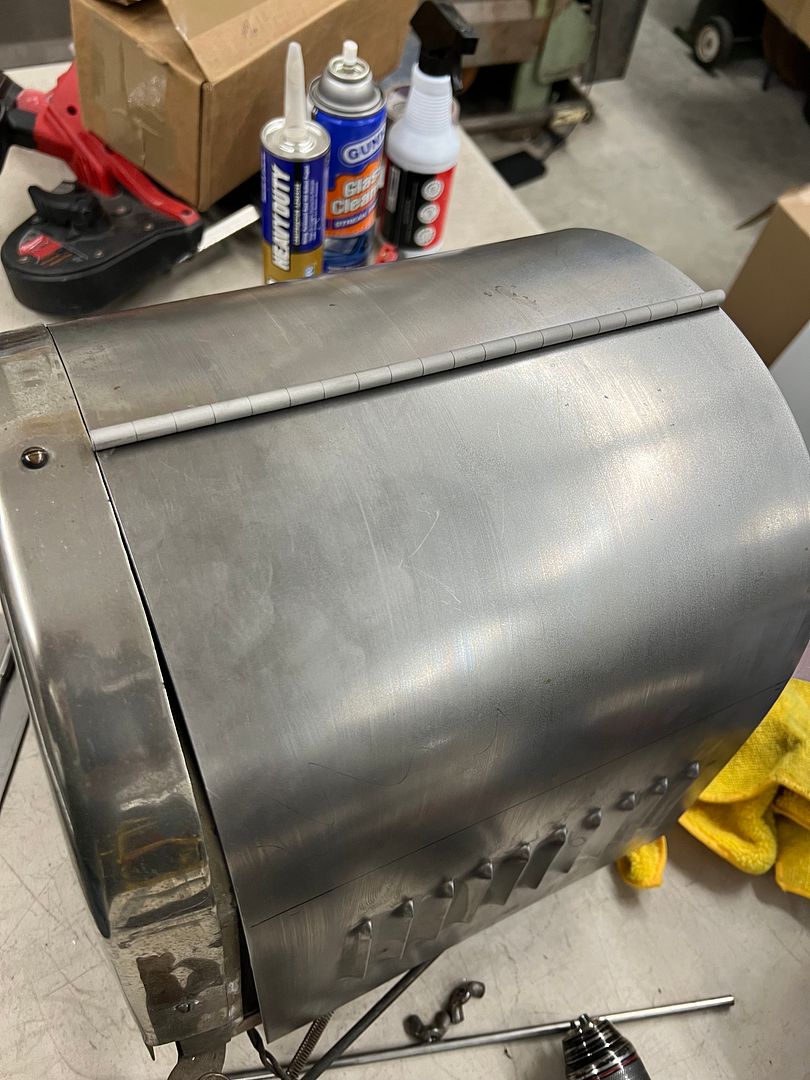
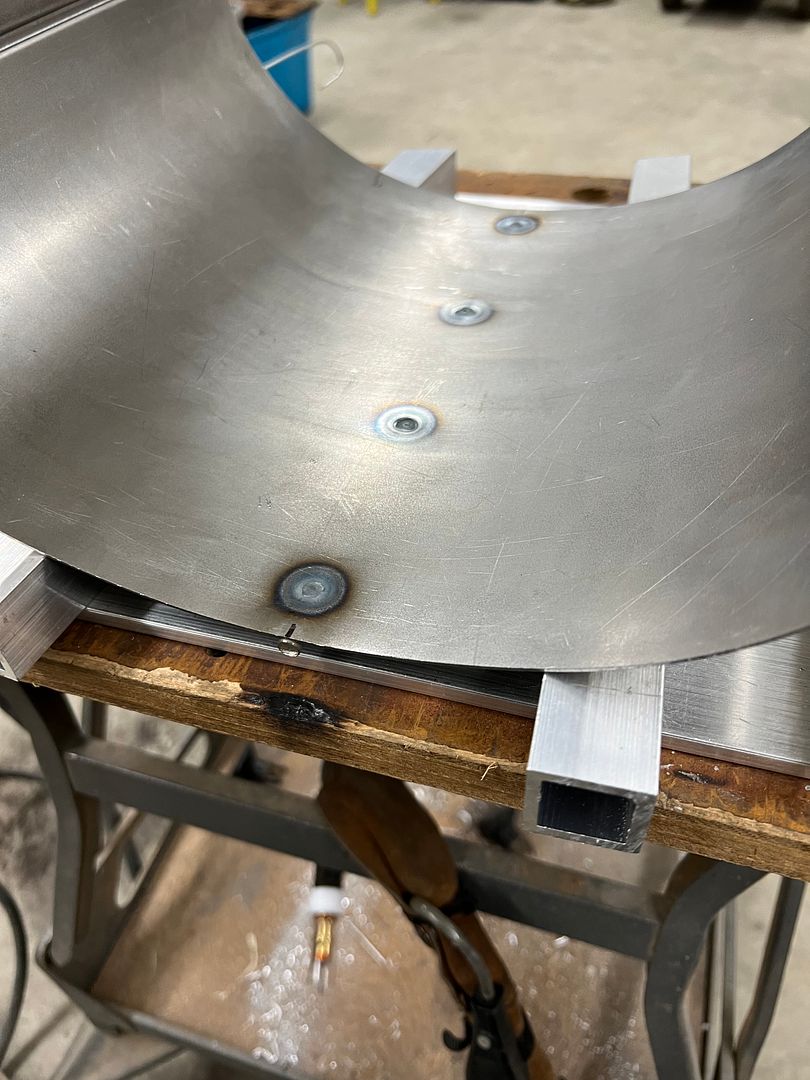
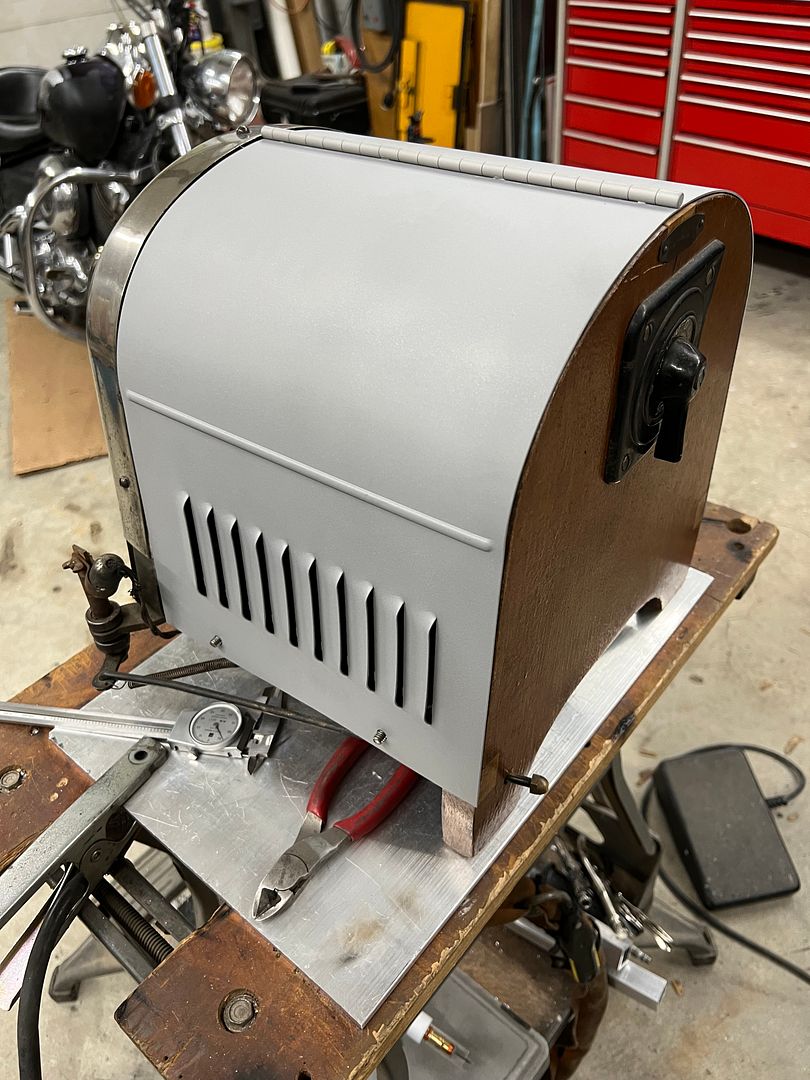
Next, our hood needs the beltline bead to match cars of the era, and to simulate the hidden hinges for the hood sides.
Our "hinge" was plug welded in place...
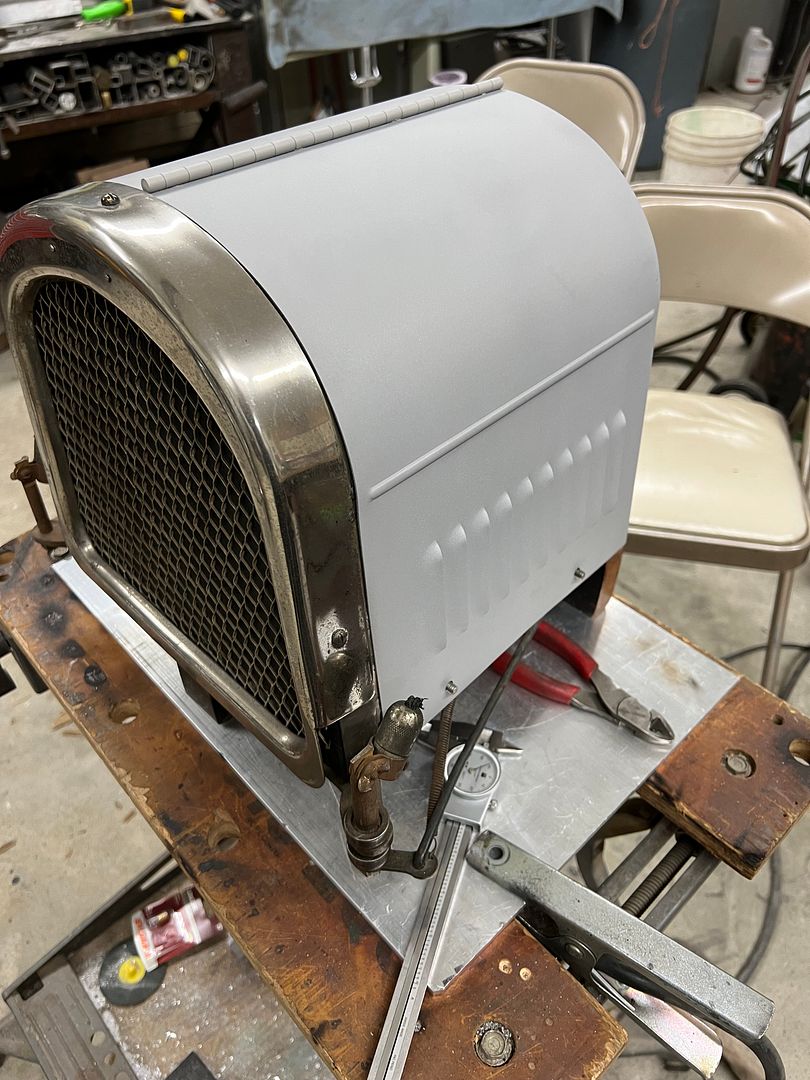
Media blasted for better paint adhesion, and ready for delivery..
It has obviously had parts (hood) that went missing over the years and an aluminum flashing replacement had been added. He wanted a hood fabricated that looked more period correct, so we offered to do louvers and a faux hinge at the top.
For the hood we used 19 gauge AKDQ, and for the louvers we are using the Diacro press brake. The louver dies weren't tall enough for the Diacro, so an adapter was used at the top to make up the difference.
Our practice punches worked fine, but the machine did not have enough depth to the vertical supports of the press brake for the size of our hood. We would need to get sketchy. Real sketchy.
With only about half of each die in the machine, and two set screws holding on for dear life....
With louvers punched, we used the highly technical argon bottle radius brake to add our hoop. next on the list was to make our hinge using a piece of 1/4" stainless tubing.
Next, our hood needs the beltline bead to match cars of the era, and to simulate the hidden hinges for the hood sides.
Our "hinge" was plug welded in place...
Media blasted for better paint adhesion, and ready for delivery..
Last edited:
'68 Coronet R/T
Oldtimer
Truly amazing.
MP&C
Member
Thanks for the comments guys... Yeah, advertising hype from the day I suppose.. 
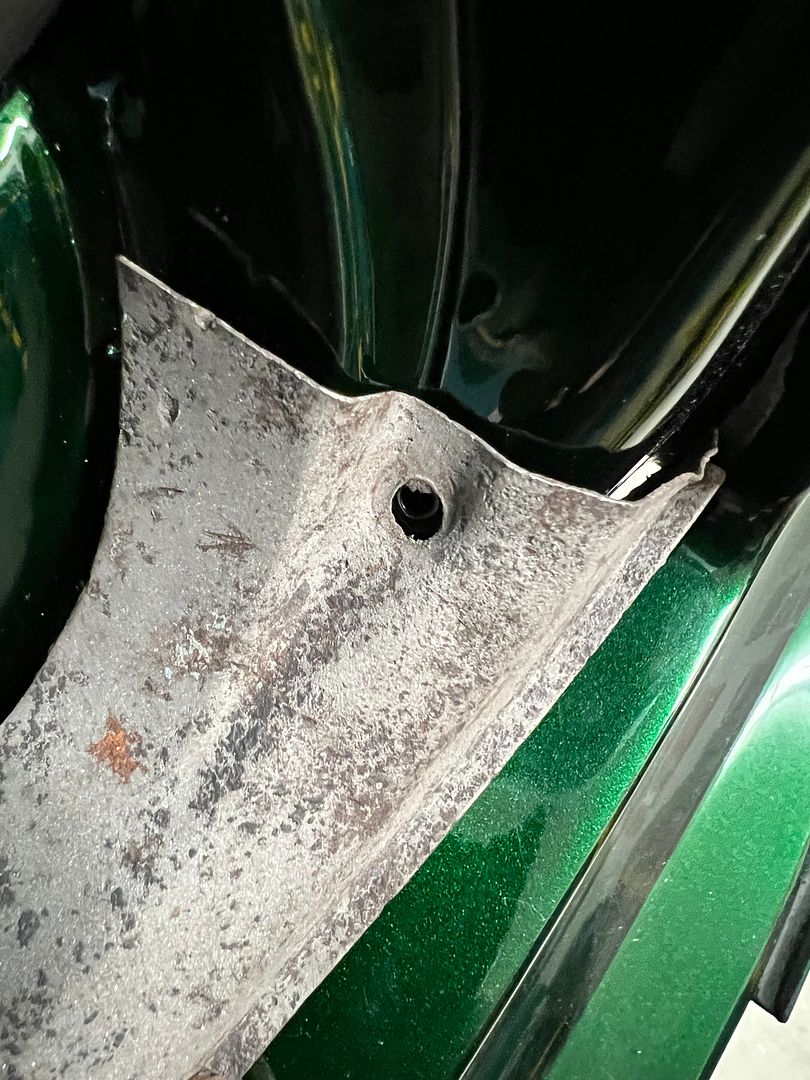
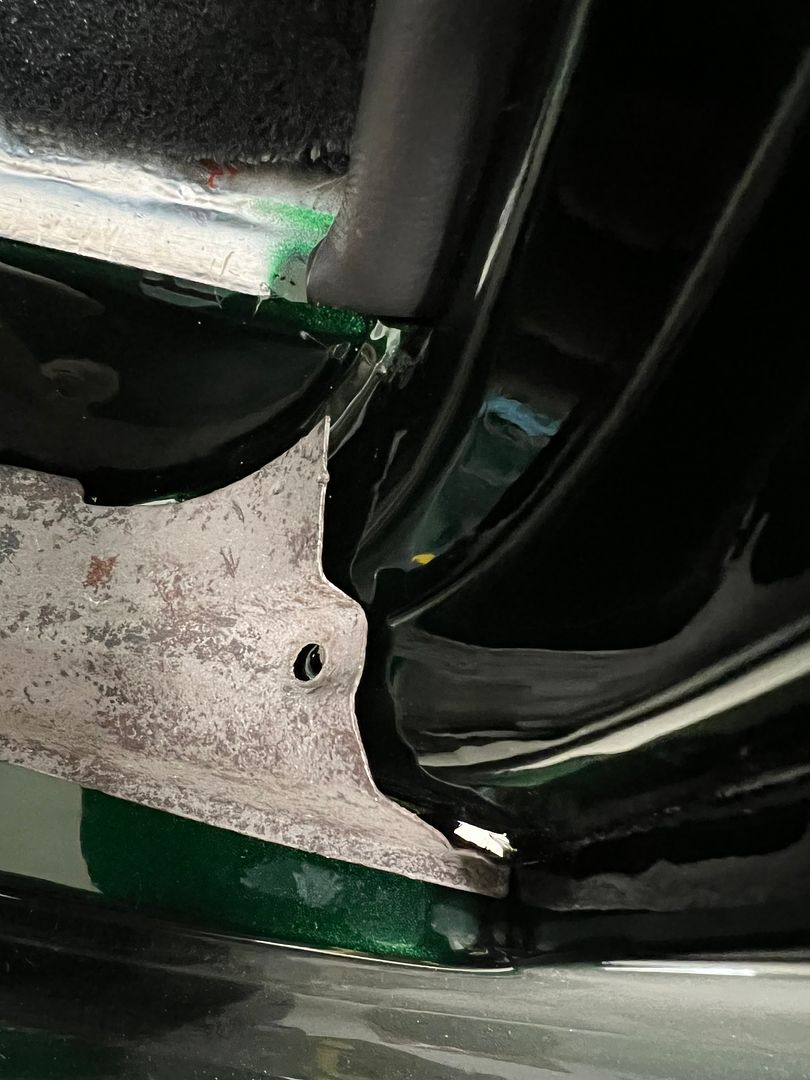
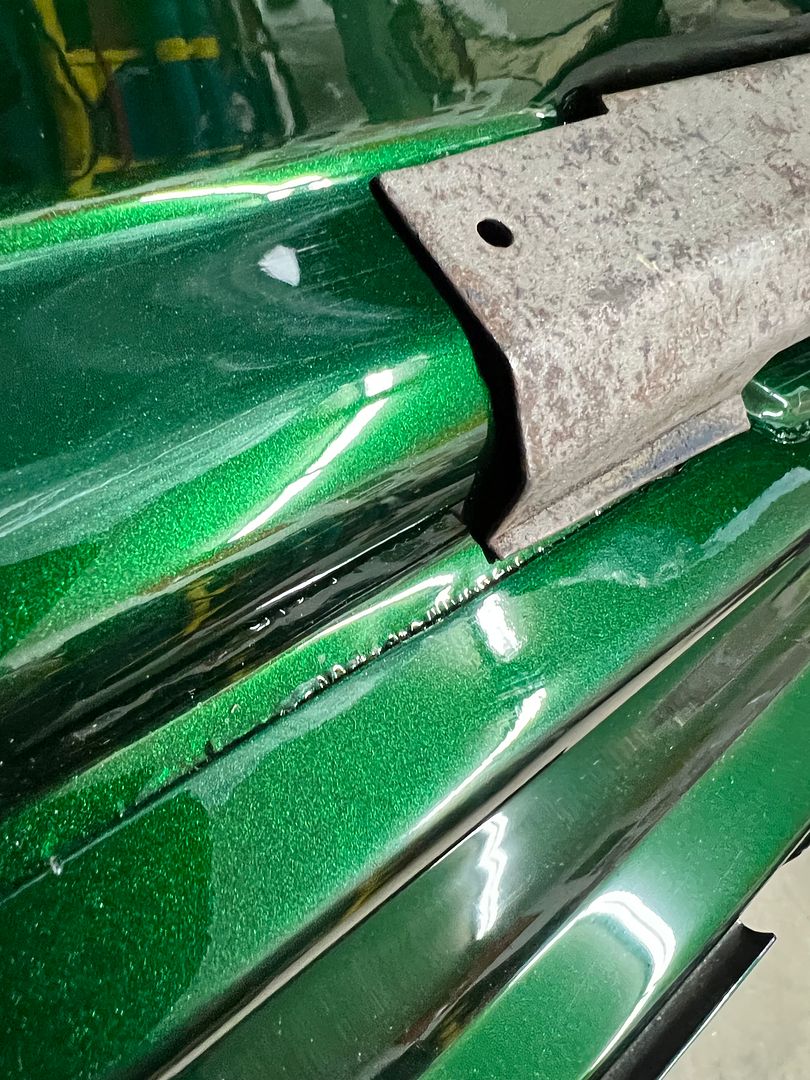
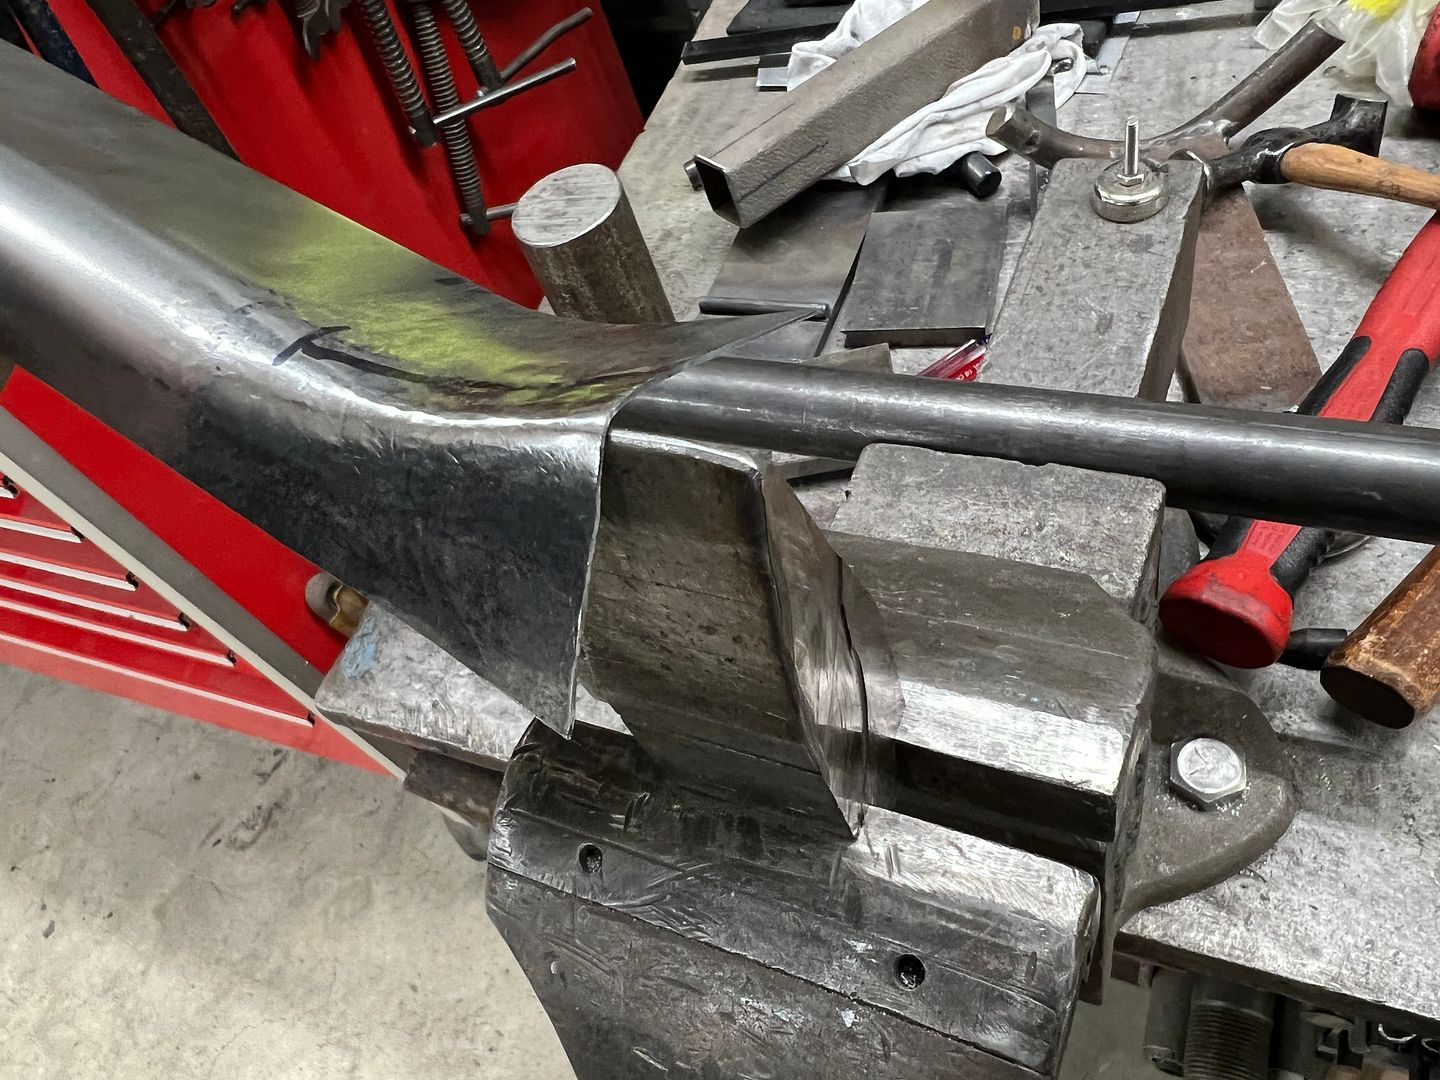
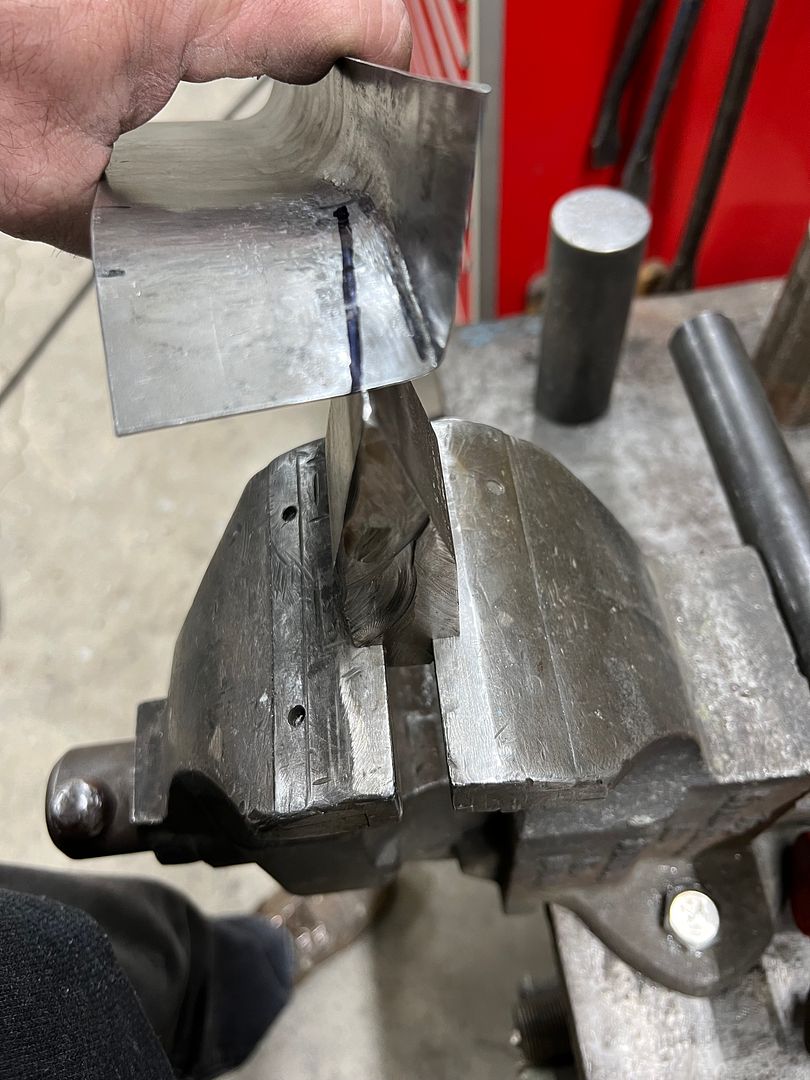
Here's the fabrication of our hinge covers for the wagon, since the originals didn't fit well at all. Some 1-3/16 round stock was used on the magnetic brake to provide a much closer matching radius profile, and some severe stretching was done along the bottom flange and up into the radius.

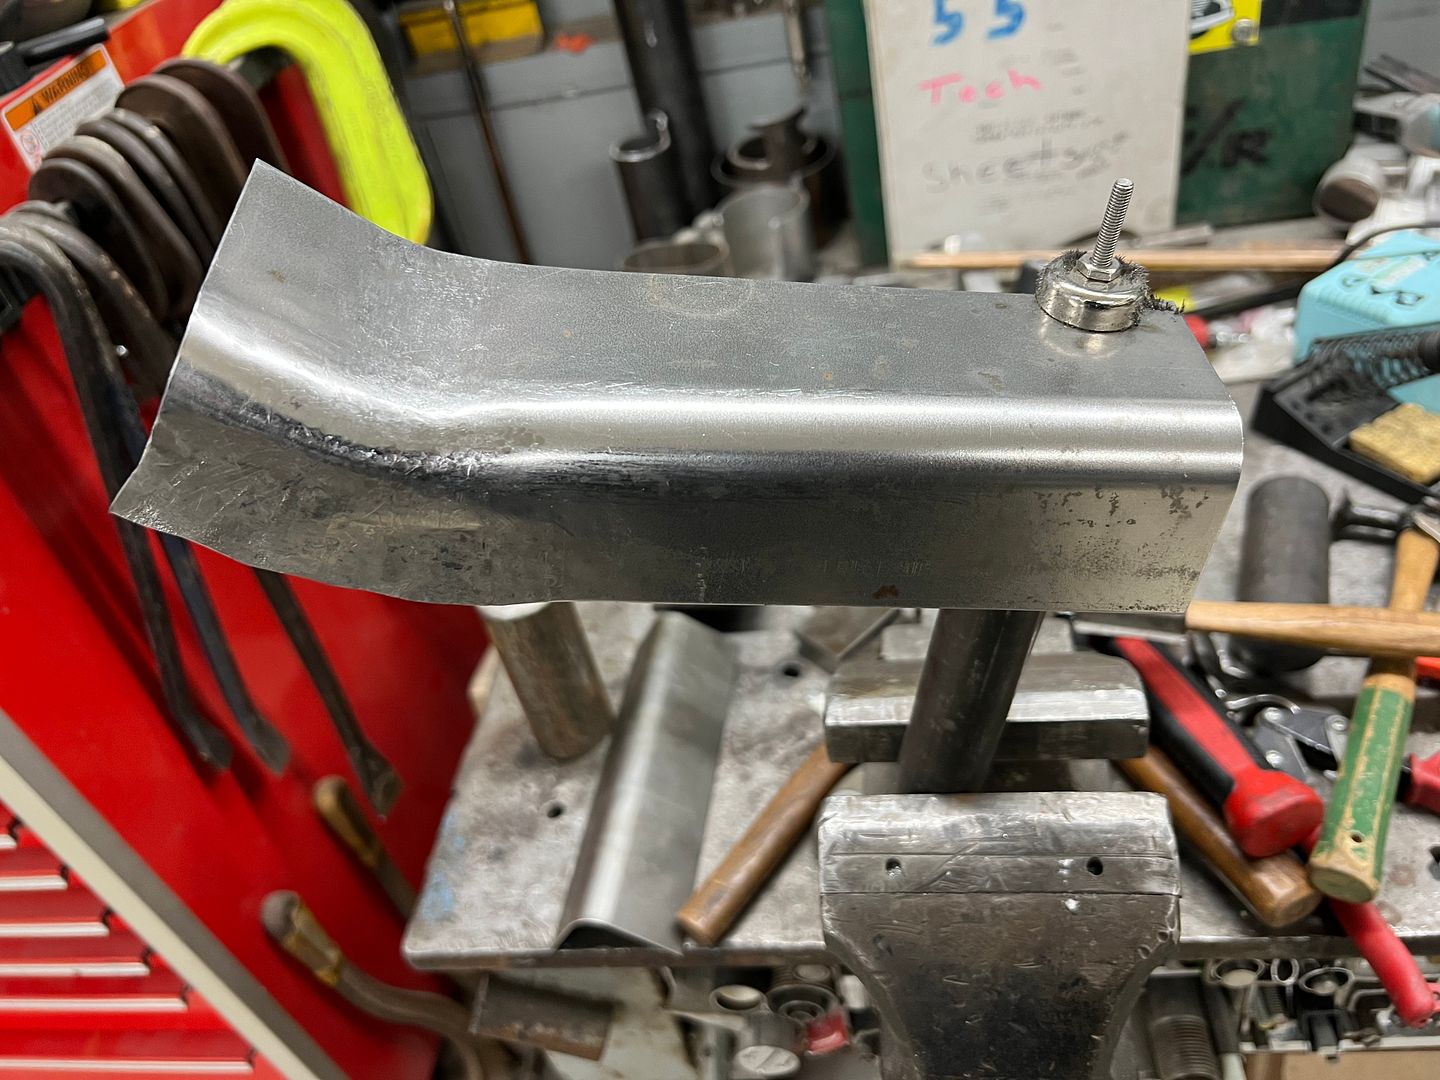
The reverse crease was added using a dulled and rounded press brake die section as an anvil.
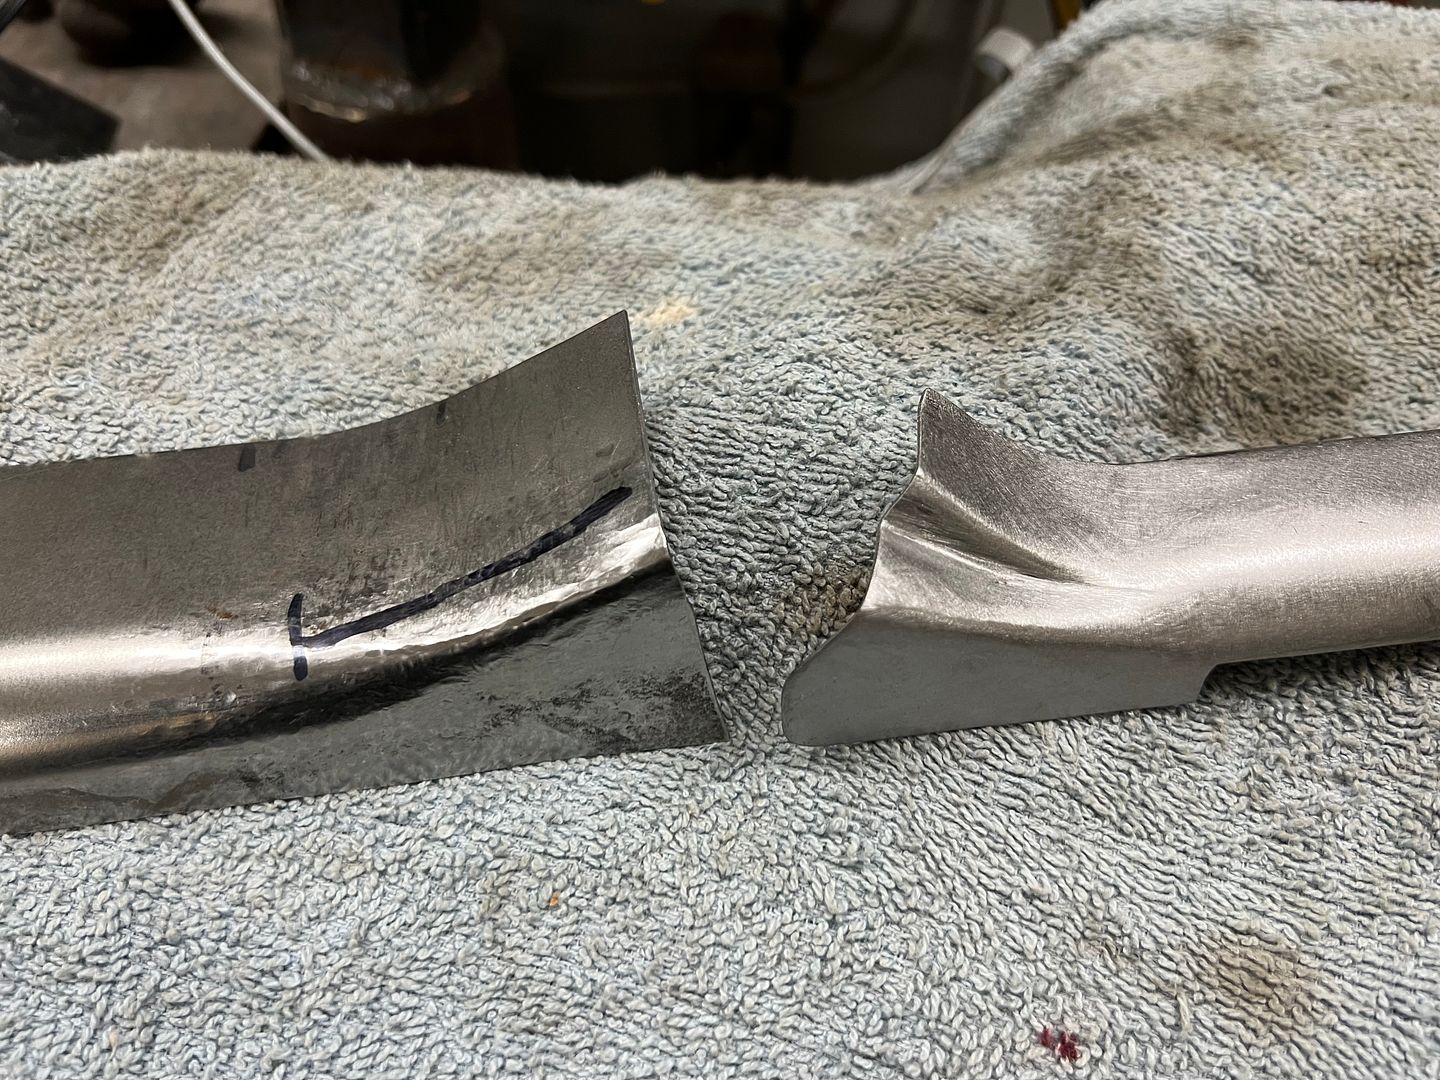
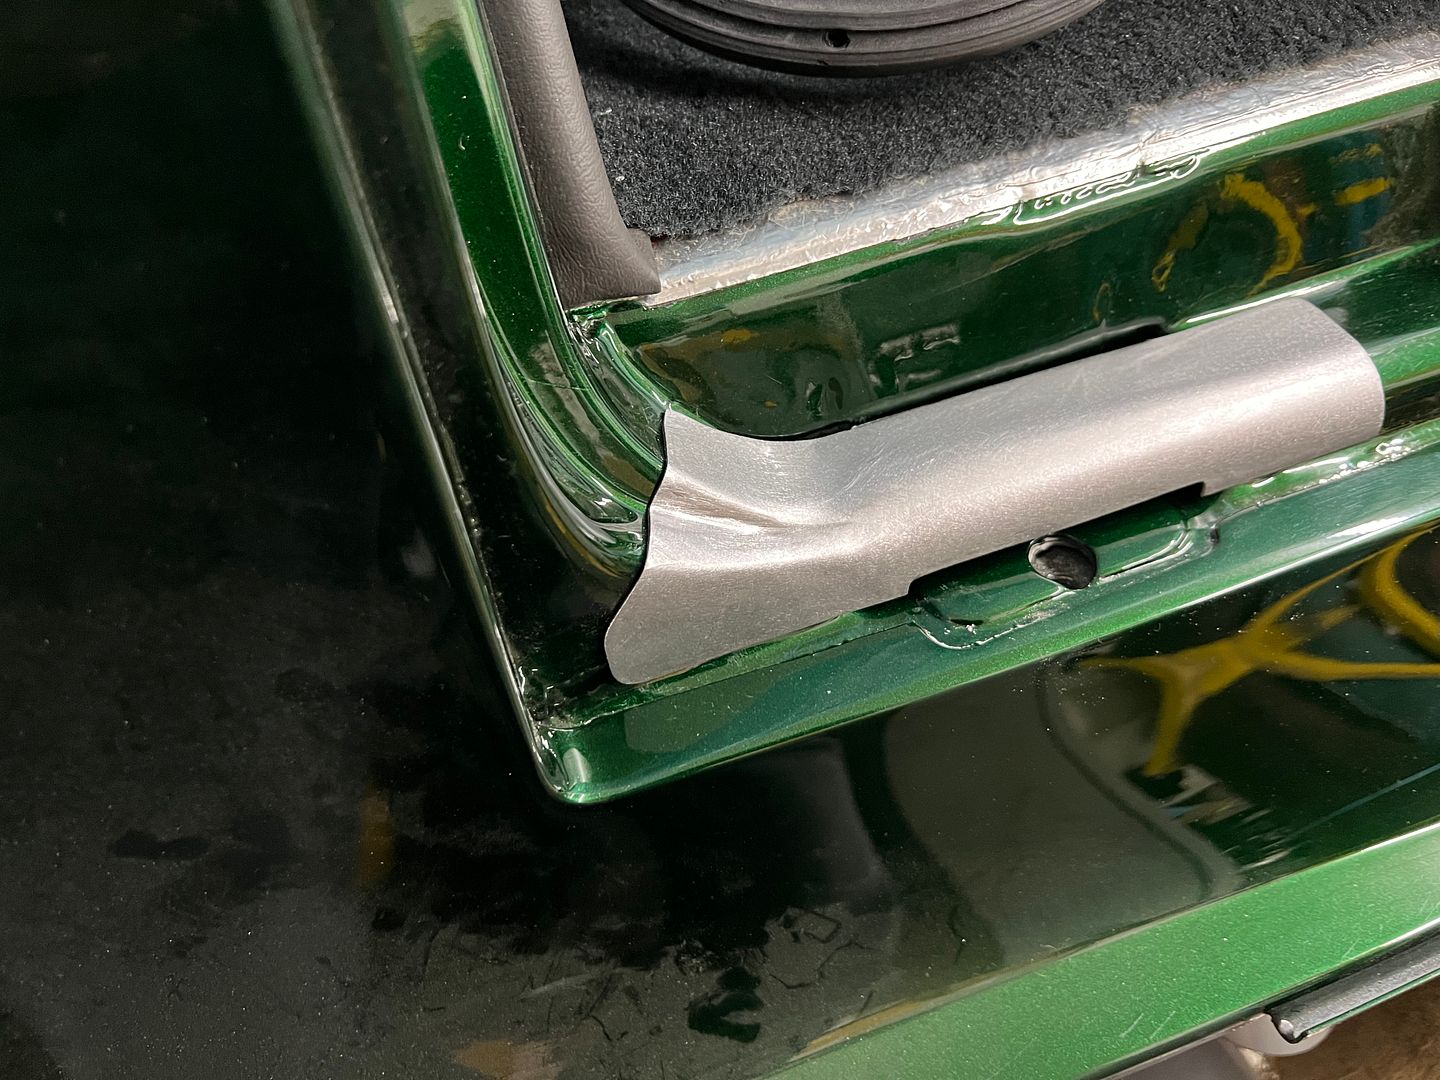
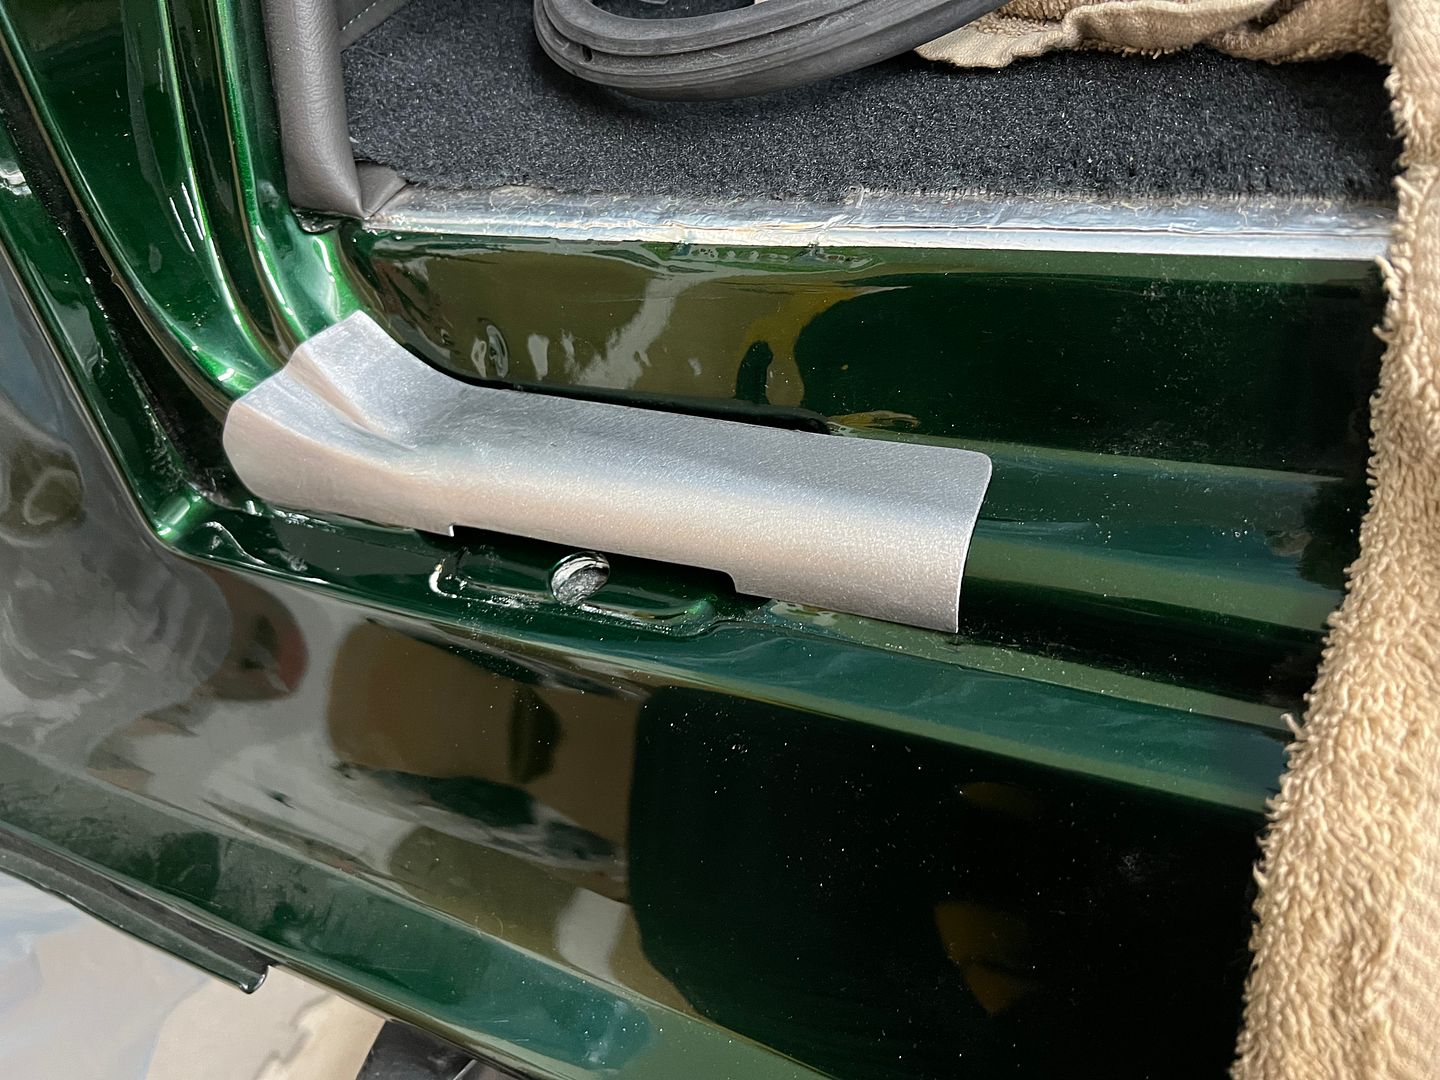
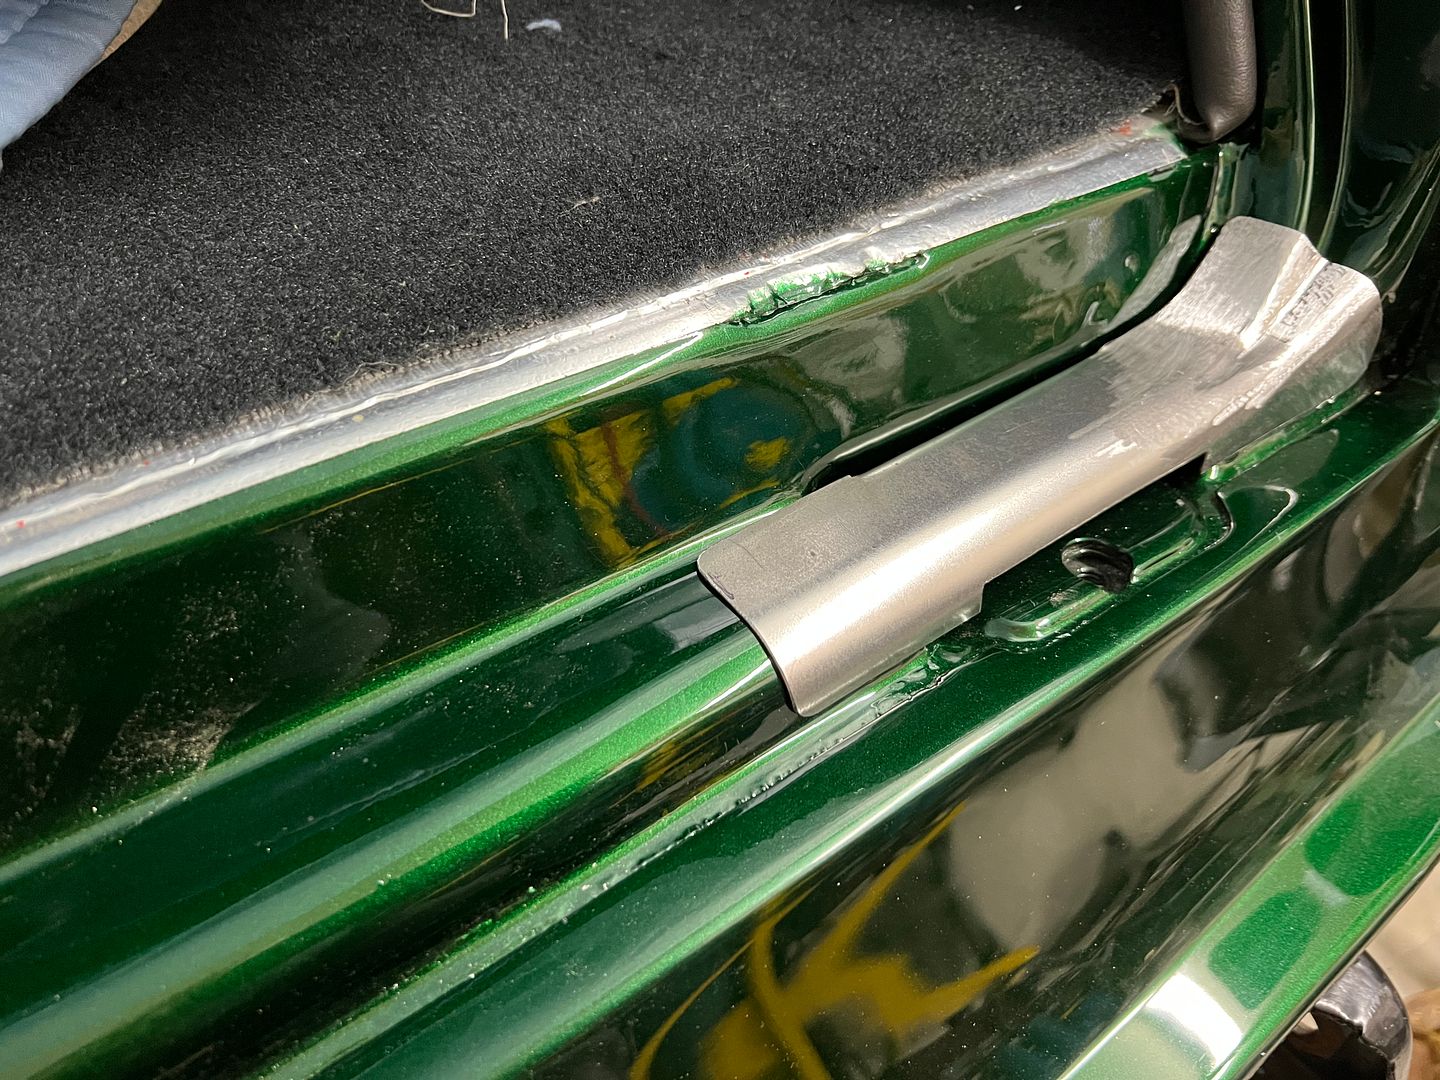
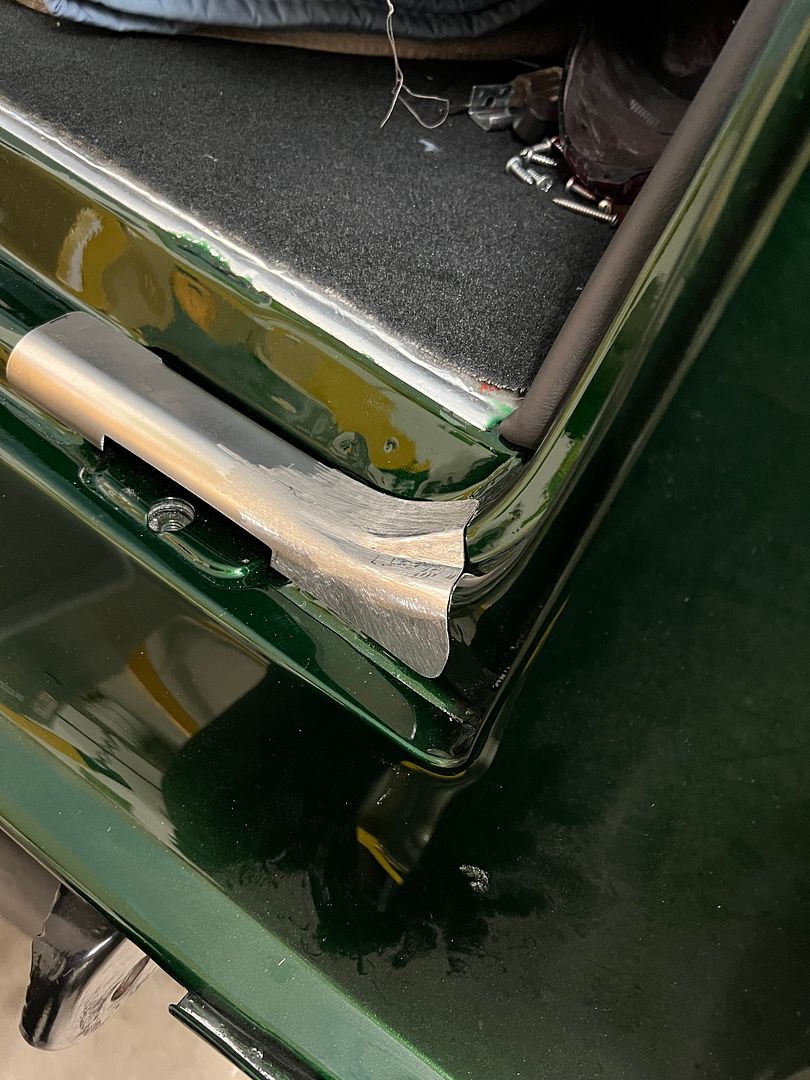
Much nicer look over the stock ones. While I was working on those, Jared has been prepping our stainless trim parts for polishing/buffing...

Here's the fabrication of our hinge covers for the wagon, since the originals didn't fit well at all. Some 1-3/16 round stock was used on the magnetic brake to provide a much closer matching radius profile, and some severe stretching was done along the bottom flange and up into the radius.
The reverse crease was added using a dulled and rounded press brake die section as an anvil.
Much nicer look over the stock ones. While I was working on those, Jared has been prepping our stainless trim parts for polishing/buffing...