You are using an out of date browser. It may not display this or other websites correctly.
You should upgrade or use an alternative browser.
You should upgrade or use an alternative browser.
68 Firebird 428
- Thread starter Sparky
- Start date
AAE
Learner
These are nice for smaller parts. Not sure if they'd meet your needs though.
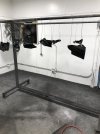
Dent Fix (DENDF-PC203) Magnetic Paint Clamp https://www.amazon.com/dp/B00JRPE0L...abc_R5RC31YAWKHWX7XTSAGM?_encoding=UTF8&psc=1
Dent Fix (DENDF-PC203) Magnetic Paint Clamp https://www.amazon.com/dp/B00JRPE0L...abc_R5RC31YAWKHWX7XTSAGM?_encoding=UTF8&psc=1
Sparky
Promoted Users
Have a few days off from the day job this week, so gonna get some work done on the FB.
Newbie alert!!! This is my very first attempt at blocking vehicle panels, so if you pros see something wacky I’m doing feel free to give me a boot. I’m here to share my blunders and hopefully learn.
I have a set of dura blocks in different shapes. I also invested in a set of true blox to give them a go. There are many different lengths and thicknesses to provide just the right amount of flex to follow the contour of a panel. From what I’ve researched on this site anything can be used as a block to fit into odd shaped areas.
My plan is to do some rough blocking, filler, and epoxy applications to on each panel, and fender off the car, finish removing the paint off the quarters, jams, and inside the car and epoxy all that, then fit everything together on the car, using weather stripping, shims, etc to get everything lined up, the start the final blocking working towards BC/CC.
I’m still unsure when or if I should paint the insides of fenders, hood, rear deck, etc, or just leave in epoxy.
Some initial blocking of the epoxy primer on the hood is showing where my highs and lows are. Theses were pesky hood pins someone welded in and warped this area. Fay Butler helped me correct the shrinkage, and now I can see where I need to skim with rage filler I have.
I understand the concept of using as long of a block to take down high spots and show lows, and using contoured blocked in convex areas, but what I am struggling with is the order of operation. Do I do the flats first and then use contour block in the convex shaped areas to blend into the flats? Or start with the convex areas first.
There is lots of instruction online with how to use different blocks, but I can’t find how to approach a panel as a whole, the order of operations. Any insight would be much appreciated, especially from this SPI crew. I know enough to tell this is a very knowledgeable group.
Sparky
Promoted Users
Using 3M 180 on 3 different blocks I started on half of the hood. Used the
1/8” x16” block on the areas with little shape, the 6” dura flex block on the convex areas and front edge of the hood where there was too much shape for the longer block to flex and get, and the round block on the concave areas on the scoops, and convex areas of the center feature of the hood.
I can see where all the highs and lows are. I tapped some highs down with a body hammer. My concern now is the lows on the edge. I’m contemplating whether I should leave those until I fit the hood and fenders and do those areas together on the car to produce a flat match between them.
'68 Coronet R/T
Oldtimer
Well I guess that will depend upon your plans for it. Are you going to sell it or keep it?
If you're going to keep it, ask yourself how comfortable you'd be driving around in a Pink car today?")
If you're going to keep it, ask yourself how comfortable you'd be driving around in a Pink car today?
Sparky
Promoted Users
Yeah, I’m not a pink guyWell I guess that will depend upon your plans for it. Are you going to sell it or keep it?
If you're going to keep it, ask yourself how comfortable you'd be driving around in a Pink car today?
Plans are to keep. I’ve had plenty of people tell me it a rare car and I should restore to factory and sell, as I have all the original drivetrain saved in a trailer. But my question is how rare is it, and what is someone willing to pay for a factory pink car? Guess I’ll find out in January when the pink FB goes to auction.
There's money in those unicorns. I'm not a 100% originality guy but you've got something that they quit making a long time ago and might just keep it that way. At the end of the day it's yours and do what you want but I think a factory pink FB is more unique and remarkable than black....
Just my 2 cents for what its worth.......
Just my 2 cents for what its worth.......
Sparky
Promoted Users
My plan was to paint it one of the other 4 factory spring special colors offered during those 3 spring months in 1968. Carnival Red, which is more like Hugger Orange than a red. The other 2 colors were marigold yellow, and windward blue which is a metallic.There's money in those unicorns. I'm not a 100% originality guy but you've got something that they quit making a long time ago and might just keep it that way. At the end of the day it's yours and do what you want but I think a factory pink FB is more unique and remarkable than black....
Just my 2 cents for what its worth.......
My research uncovered that even with the tag and vin there is no way to tell which of the 4 special order colors it was. It was suggested to me that if I do change the color to leave some of the factory pink somewhere in the interior metal so if someone was tearing it apart again they would see what it was.
Like I said I will watch what the auction brings in January and if that pink car goes for some ridiculous amount, I will know have an idea on how to move forward. They are only estimating 40-50k for that pink car and it is better optioned than mine, it has factory air and pwr windows and locks, and a 400ci auto. Everything else is the same, parchment interior and conv top. Mine was originally a 350ci auto, but now has a built 1968 428 with all old school NOS Pontiac ram air performance internals, Dave Crane worked heads, 500hp on high test pump gas, tremic 5spd, and nova 4.11 12 bolt posi. I bought it as it sits, someone else started the project and then could not finish.
Sparky
Promoted Users
Just laid down 2 coats of epoxy on the hood and other small parts I had runs in, and used it all up, I have some more on order.
I sanded the runs out and reshot those parts. I coated the hood again because I sanded through to bare metal when I was looking for highs and lows, plus I was out of the 7 day window. Now I’m ready to find my lows with a light blocking, and start using the rage filler I have fill in the lows while in the 7 day window.
Time for a beer!
Attachments
Sparky
Promoted Users
Today lightly blocked the 48hr epoxy to find the highs/lows. Skim coat the lows with filler, and block sand with 80. I still have more to skim. I wonder if this hood would have been faster to shoot it with poly and block. I need filler practice


These are the two blocks I used. I found the 1/4” thick block cut the filler faster than the 1/8” thick block, and the small dura block was good in the tighter areas.

These are the two blocks I used. I found the 1/4” thick block cut the filler faster than the 1/8” thick block, and the small dura block was good in the tighter areas.
Sparky
Promoted Users
Well on to the fenders. Looks like it’s time to switch over to the metal work. I have found some pin holes with the awl in the areas of corrosion.


Time to correct this patch job too, plus I can see some more corrosion underneath the fender brace. They make patch panels for this car but I want to do a bit of learning here and try to fab up a new patch panel. Stay tuned…,


Time to correct this patch job too, plus I can see some more corrosion underneath the fender brace. They make patch panels for this car but I want to do a bit of learning here and try to fab up a new patch panel. Stay tuned…,
Sparky
Promoted Users
I’ve been working the last month on making tools, brushing up on my welding skills, shaping metal, and trying to learn and identify my shortcomings, in preparation to repair both my fenders.
First I realized I did not have and sand bags, so I made some up. They are rough but do the trick. Decades ago I got in to leatherwork to make wallets, belts, etc and mostly do it now when I am in need of a new one. I fired up the old Randall stitcher, oiled it & set it up, and stitched three bags out of some scraps I had. Used barge glue, stitched it, filled with sand, stitched closed and top stitched for strength.


Then I wanted to make some dies for my planish hammer. I used some mild steel to practice, and will order some tool steel and machine, heat treat, and temper new ones once I get it down. I used Fay Butlers book to guide me on building these. He even states the mild steel will work, but will mar eventually depending on what is being planisher.
Machined the blanks


First I realized I did not have and sand bags, so I made some up. They are rough but do the trick. Decades ago I got in to leatherwork to make wallets, belts, etc and mostly do it now when I am in need of a new one. I fired up the old Randall stitcher, oiled it & set it up, and stitched three bags out of some scraps I had. Used barge glue, stitched it, filled with sand, stitched closed and top stitched for strength.
Then I wanted to make some dies for my planish hammer. I used some mild steel to practice, and will order some tool steel and machine, heat treat, and temper new ones once I get it down. I used Fay Butlers book to guide me on building these. He even states the mild steel will work, but will mar eventually depending on what is being planisher.
Machined the blanks
Attachments
Sparky
Promoted Users
Then I made up a pattern of the lower fender, noting where the shrink and stretch areas were, and cut out a blank.


Now is where I quickly realized my lack of knowledge and experience. This factory stamped panel has many details that I simple did not know how to approach. I decided to start at the wheel opening details and work my way out with each jog detail towards the wheel opening.
I stretched the metal with the planish hammer to created a change in thickness to give me excess material in the area to shape the details.

Then I used hammer and dolly, rod slapper, and other tools to create the details. I was really struggling and after a day of playing with this and some of my ideas to get the metal to bend where I wanted it to started to really damage the metal in those areas.
I came to a fork in the road and had to make a decision. Do I continue to put the time in to learn how to make this part or do I buy the $55 replacement panels and move on for now. Well…I set a deadline to get this car painted this year, as the SPI products I bought are already a year old, so I decide to buy the replacement panels and move on. I will address my metal shaping skills another day and take some more classes from Fay Butler.
Here is where I got to. Very frustrating for me, but I learned where I’m weak.


Now is where I quickly realized my lack of knowledge and experience. This factory stamped panel has many details that I simple did not know how to approach. I decided to start at the wheel opening details and work my way out with each jog detail towards the wheel opening.
I stretched the metal with the planish hammer to created a change in thickness to give me excess material in the area to shape the details.
Then I used hammer and dolly, rod slapper, and other tools to create the details. I was really struggling and after a day of playing with this and some of my ideas to get the metal to bend where I wanted it to started to really damage the metal in those areas.
I came to a fork in the road and had to make a decision. Do I continue to put the time in to learn how to make this part or do I buy the $55 replacement panels and move on for now. Well…I set a deadline to get this car painted this year, as the SPI products I bought are already a year old, so I decide to buy the replacement panels and move on. I will address my metal shaping skills another day and take some more classes from Fay Butler.
Here is where I got to. Very frustrating for me, but I learned where I’m weak.
Sparky
Promoted Users
Today the panels came in. Took measurements of the old panel and where the highlights were on the fender on some masking tape. I will use this to be sure the highlight lines are in the right place when I make my final cut for the butt weld.


Next step is to figure the order I need to do things. There is a brace behind the patch panel, and the new panel came with a replacement brace. I cut out the old brace as it was welded to the old repair patch that someone did years ago, and it was corroded. I’m thinking I’ll need to use some copper in between the panel and brace when I weld to keep them from welding together. It’s only spot welded to the panel at the edges. I’ll be back at it tomorrow,
Next step is to figure the order I need to do things. There is a brace behind the patch panel, and the new panel came with a replacement brace. I cut out the old brace as it was welded to the old repair patch that someone did years ago, and it was corroded. I’m thinking I’ll need to use some copper in between the panel and brace when I weld to keep them from welding together. It’s only spot welded to the panel at the edges. I’ll be back at it tomorrow,
Sparky
Promoted Users
I need to get the inner brace out of the way so I can weld and deal with the shrinkage. I drilled out the spot welds along the edge and it easily pulled away enough to access the back side.


Found some light rust back there I can clean up too and epoxy back there when I’m done.
The replacement patch had a hollow in the lower portion that is not supposed to be there. After studying it for a bit, I realized a few small shrinks to the turned flange on the very bottom should correct it.


Problem solved
Found some light rust back there I can clean up too and epoxy back there when I’m done.
The replacement patch had a hollow in the lower portion that is not supposed to be there. After studying it for a bit, I realized a few small shrinks to the turned flange on the very bottom should correct it.
Problem solved
Sparky
Promoted Users
Last year I studied with Fay Butler and took his principles of shaping metal 3 day seminar. I quickly realized this man is a genius, and has probably forgotten more than I’ll ever know. He taught me how to tig weld (Specifically sheet metal), and explained to me what is going on at the atomic level when welding. I had been arc and mig welding since I was 10 but In one day learned I knew nothing.
Well I still know very little, but I will work at applying what I’ve learned here.
I clean everything with acetone until the no more grime shows on the towels. The metal, the filler rod, electrode, etc.


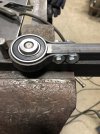
He suggested I purchase these gas lenses for my torch. The argon shielding gas envelopes the weld puddle much better, reducing oxide formation.

Next after careful registration of the panels, I tack from one end to the other, using filler rod to control the chemistry of the puddle (deoxidize)

Next I make a backing shield using aluminum heat tape and stove door gasket to trap the argon (that is heavier than air) that seeps through the seam, and shield the back side from our atmosphere to reduce oxide formation. The oven gasket keeps the tape from burning, and I tent it up to keep it off the weld.


Then I weld from one end to the other using filler rod (ER70S-6). Fay can weld from one end to the other non-stop like a robot, and the welds planish to invisible with no grinding. I’m not that good. I had two blow through holes, used too much filler in some areas, and need to start and stop numerous times. All of which will create more work for me, but hey I’m learning and enjoying the process.

Inside after backing tape is removed.


I clean the adhesive left behind with Acetone, and clean the welds, wire wheel the hard oxides off and clean again. I need to grind down areas i overused the filler rod, and can then start addressing the shrinkage. I’m glad that inner brace is out of the way.

Well I still know very little, but I will work at applying what I’ve learned here.
I clean everything with acetone until the no more grime shows on the towels. The metal, the filler rod, electrode, etc.
He suggested I purchase these gas lenses for my torch. The argon shielding gas envelopes the weld puddle much better, reducing oxide formation.
Next after careful registration of the panels, I tack from one end to the other, using filler rod to control the chemistry of the puddle (deoxidize)
Next I make a backing shield using aluminum heat tape and stove door gasket to trap the argon (that is heavier than air) that seeps through the seam, and shield the back side from our atmosphere to reduce oxide formation. The oven gasket keeps the tape from burning, and I tent it up to keep it off the weld.
Then I weld from one end to the other using filler rod (ER70S-6). Fay can weld from one end to the other non-stop like a robot, and the welds planish to invisible with no grinding. I’m not that good. I had two blow through holes, used too much filler in some areas, and need to start and stop numerous times. All of which will create more work for me, but hey I’m learning and enjoying the process.
Inside after backing tape is removed.
I clean the adhesive left behind with Acetone, and clean the welds, wire wheel the hard oxides off and clean again. I need to grind down areas i overused the filler rod, and can then start addressing the shrinkage. I’m glad that inner brace is out of the way.
Last edited: