1966 Mustang needs a little work

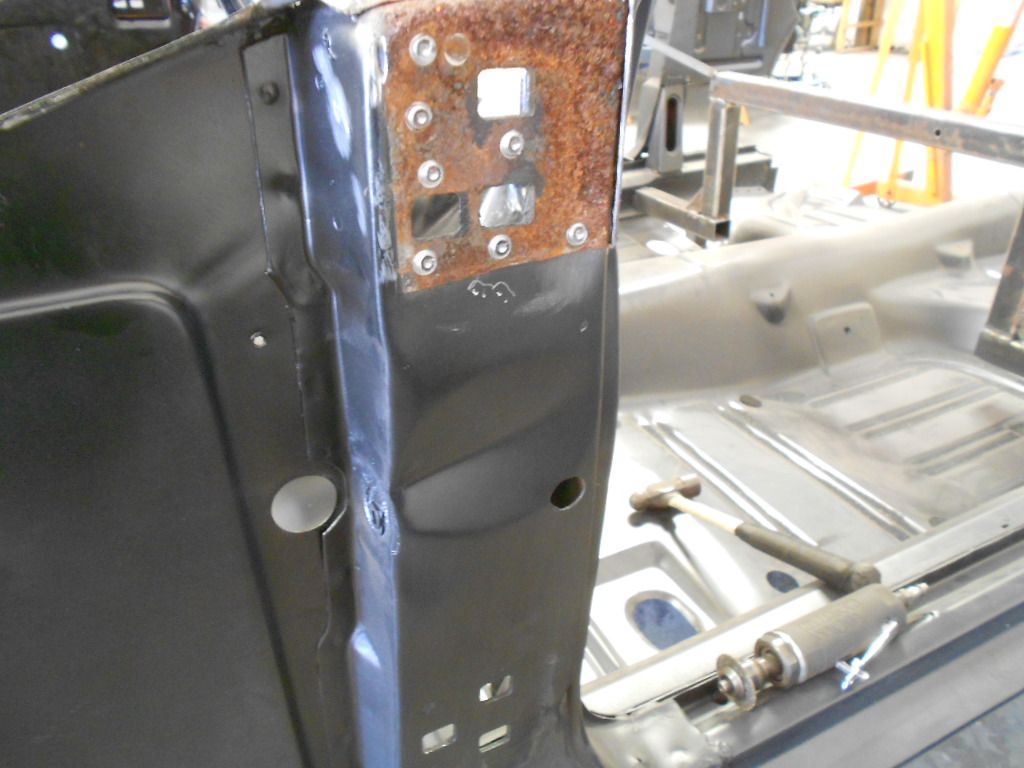
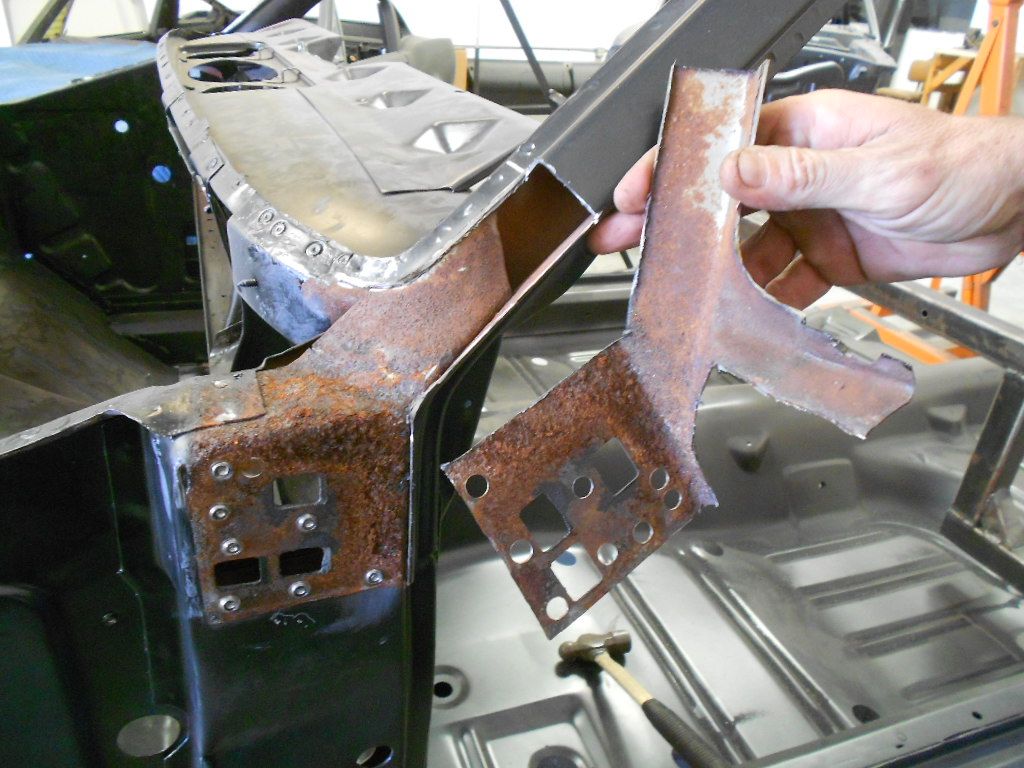
The A pillar was damaged in the accident and that is when we found the rust


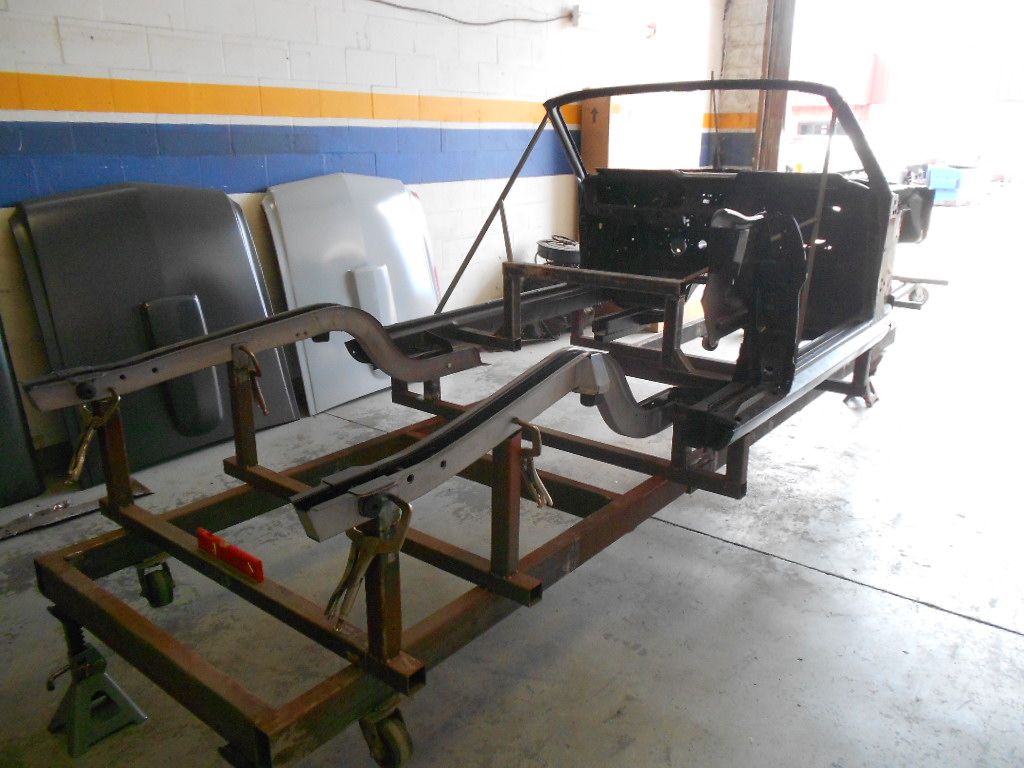
We used the other 1966 convertible we are restoring to make the jig needed for this project.

Test fitting the rear frame rails


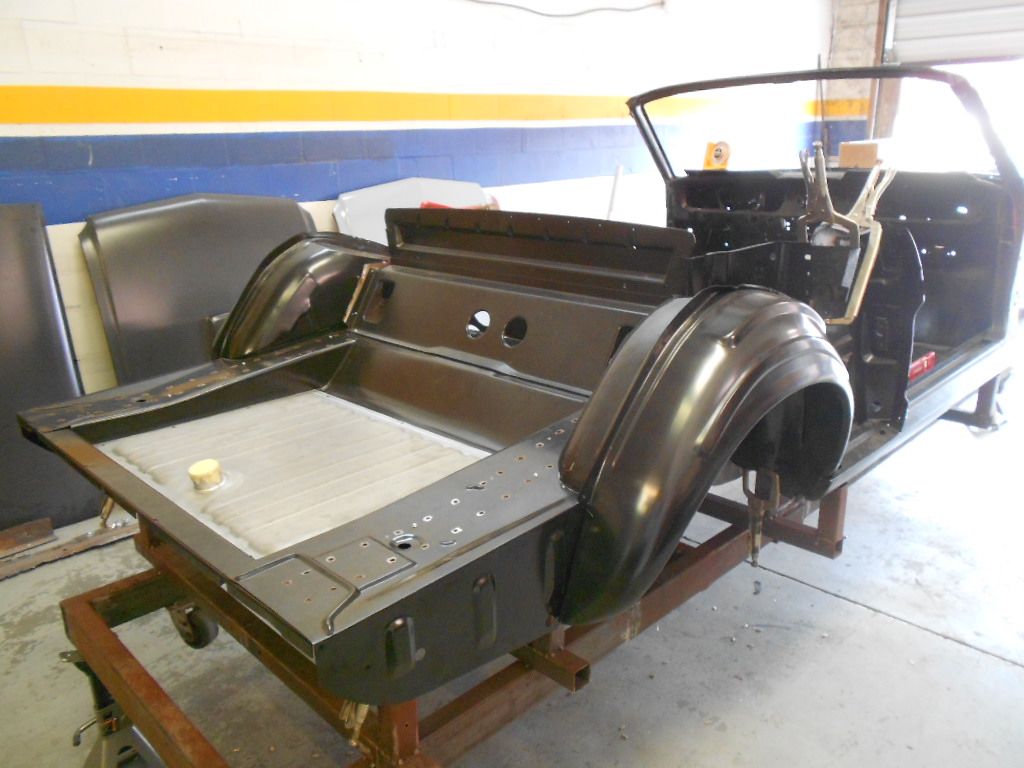
Fitting the trunk floor pan


Fitting the floor pan


The frame rails have been welded but everything else is just screwed together at this point.

 
That is one really lucky convertible! Im amazed at how much rust was in it, considering it looked like a pretty solid driver.
 
Nice work guys!

Makes me wish my 64.5 vert was that far along :)

I am no mustang guru like rusty with no where near the experiance he has.

that said, what I have seen in the 2 early mustangs I have is Ford did not prime very much of the car.
Vast areas are color over bare metal.
My 64.5 - there is no trace of primer in the cowl or a pillars, nor on the interior side of the rockers.

I think Ford cut one corner to many just to crank them out as fast as possible at the lowest cost.
 
Senile Old Fart;31513 said:
I think Ford cut one corner to many just to crank them out as fast as possible at the lowest cost.

It did cut their cost, but it also got the people to buy more often. I remember back then in Michigan that it was common for a three year old car to have a rust hole in the bottom of the front fender, and a ten year old daily driver was a rust bucket.
 
hey Rusty, what do you use for screws for mockup's?

Do you drill a hole, then put in a sheet metal screw, or do you just a self drilling screw?

I have done it both ways and find the self drilling are great for mock up, but they leave a little metal on the backside of the panel that has to be knocked off before final install & welding.

I would be of the drill school method if I had clecos, but have never spent the money for them.
Maybe it is time to get off the wallet and pull that dusty paper out of it and get some cleco's !

Also, have you stripped the coating off those new panels and shot them in epoxy already or ?

thanx :)
 
As it has been said so many times over this is just amazing work that you guys do. I was wondering if after all of this type of work is performed do you guys put the cars on a chassis table to verify they are square, etc? I would expect to see them on a table while under re-construction. Thanks, Mitch.
 
In some of your pics it looks like the cars you are repairing are just sitting on jack stands that is why I asked the above question.
 
We are back working on this project. Brian replaced the damaged A pillar


Replaced the lower cowl


Ground the welds on the A pillar


Upper cowl installed


Imagine the savings cutting corners with over 1 million sold by 66. Who would have thought 50 or so years later there would still be so many out there getting peeled apart for restorations.
 
Brian had the floor in and out a few times getting it to fit and drilled the holes for the plug welds


Floor in for the last time and welded


Sanded to bare metal


I sprayed two coats of SPI black epoxy


Starting to line up the sheetmetal


The dynacorn coating must really suck if you felt the need to sand it off the floor board as well. Part of me is surprised, but the other part isn't.
Car looks great! Very interesting to see it being completely stripped down and rebuilt. Glad I am not footing the bill!
 
I seem to see a difference between the E-Coat on restoration parts vs. collision parts.. The E-Coat on restoration parts doesn't feather out as well and scratches off a little easier.. But this also varies from part to part.. Not sure what the differences are.
 
rusty428cj;34065 said:
Brian had the floor in and out a few times getting it to fit and drilled the holes for the plug welds


Floor in for the last time and welded


Sanded to bare metal


Rusty, I'm working on putting a new one piece floor into my 69 Mustang and was looking back over some of your threads as reference. I can see you didn't remove the E-coat before welding it into the body. But what does Brian do for any overlapping areas and in between the welds? Does he epoxy the original metal at all? I know you epoxy inside the frame rails and similar areas, but what about the actual mating faces of the welded areas?

Cheers
 
Ash;34526 said:
Rusty, I'm working on putting a new one piece floor into my 69 Mustang and was looking back over some of your threads as reference. I can see you didn't remove the E-coat before welding it into the body. But what does Brian do for any overlapping areas and in between the welds? Does he epoxy the original metal at all? I know you epoxy inside the frame rails and similar areas, but what about the actual mating faces of the welded areas?

Cheers

Brian has bare metal where he is welding. He test fits everything than marks where he wants his plug welds, drills the holes, test fits again than marks the place where it will be plug welded, covers with a small piece of tape and epoxy prime. Once it is dry removes the tape and installs the new panel and welds it in place.
 
Excellent, that really clears that up. Thanks for the detailed description, Rusty. Much appreciated :encouragement:
 
The last time fitting the panels before taking apart and welding the inner structure


Brian welding an inner support


Before Brian could install the outer wheelhouse he had to modify the opening. This was taken before he ground the welds


One piece outer wheelhouse installed

 
The piece from the donor car had a little rust


Brian replaced the only new part we could get


He fabricated the rest and epoxy primed


Back
Top