Wagon Progress

The little wagon is gonna be pretty pricey with all that custom work you're doing.

I reworked some chrome trim on my signature car.
Had no idea what I was doing but sounds like the same procedure you followed, only not as spectacular results.

Went from this:

P1010003.JPG


To this:
P1010010.JPG


After looking at yours, I'm wondering if I should have sanded to a finer grit before buffing it?
 
The little wagon is gonna be pretty pricey with all that custom work you're doing.

I reworked some chrome trim on my signature car.
Had no idea what I was doing but sounds like the same procedure you followed, only not as spectacular results.

Went from this:

View attachment 27851


To this:
View attachment 27852

After looking at yours, I'm wondering if I should have sanded to a finer grit before buffing it?


What grit did you go up to? I’ve found that it’s similar to buffing clearcoat in that the next finer grit should remove the previous grits scratches or you need to back up a step. And it’s very unlike buffing clearcoat in that it takes MUCH longer doing stainless.
 
What grit did you go up to? I’ve found that it’s similar to buffing clearcoat in that the next finer grit should remove the previous grits scratches or you need to back up a step. And it’s very unlike buffing clearcoat in that it takes MUCH longer doing stainless.
To be honest, I can't remember the grits I used. 2000 comes to mind but it's been a long time ago now.
 
When polishing the stainless I used to start with the sisal wheel but upon closer look found it to be adding fine gouges in removing coarse ones. That’s what got me into looking for another method. With the wet sanding process we now skip the first two steps on the buffing wheels.
 
When polishing the stainless I used to start with the sisal wheel but upon closer look found it to be adding fine gouges in removing coarse ones. That’s what got me into looking for another method. With the wet sanding process we now skip the first two steps on the buffing wheels.

I tossed my sisal wheels.
 
I wonder what color buffing compound has been used.
Black Emory can be too aggressive for some stainless, at least that was my experience.
I have used black, gray, white ,green,blue and red.
It depends on ferritic content I suppose.
All done on sisal wheels, dressed if I saw any metallic appearance.
Some people wanted a polished weld, or dressed until you don’t see the weld area.
I did my stainless trim with white and red due to being out of green.
I guess it’s just whatever works for the application.


We were using green compound on the sewn wheel and gray on the loose one.
 
I can’t say , but the cutting action or grit if you will for the black and gray were considerably more
aggressive than the green.
This my be different from different manufacturers.
Red is the finest which get the most use on her silver jewelry. It’s always has to be easy to find.
IMG_8314.jpeg
 
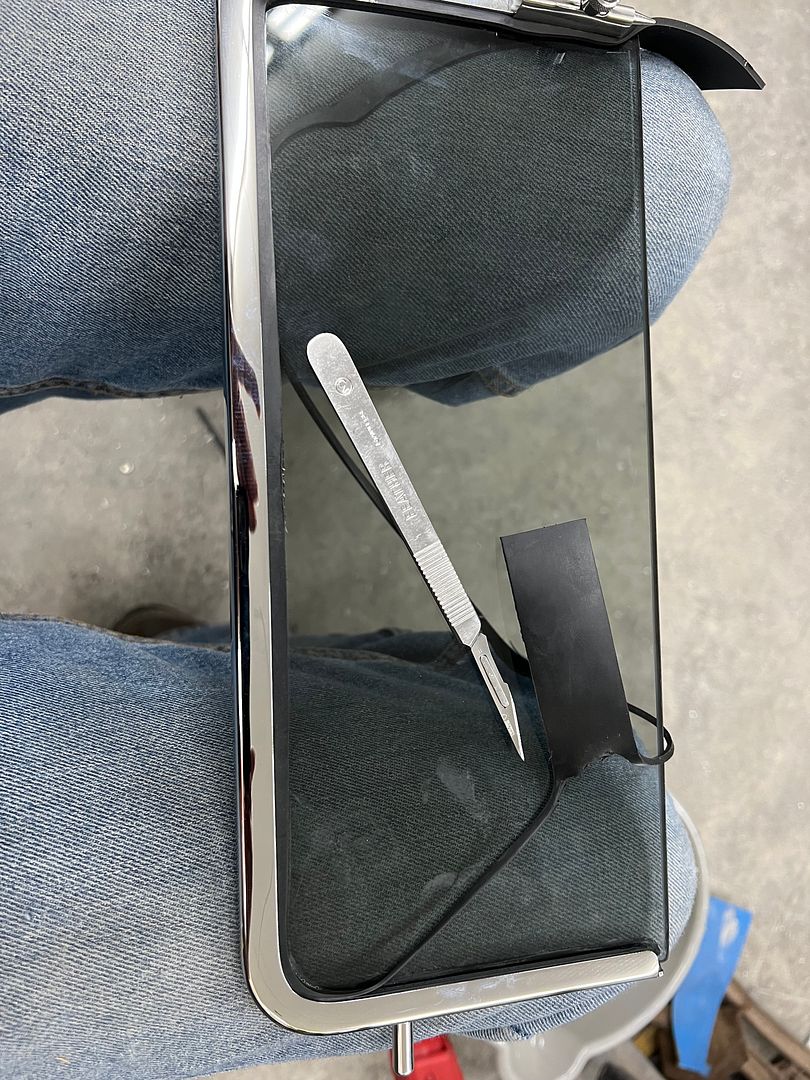
Thanks, yes, I can sit and watch her videos all day.


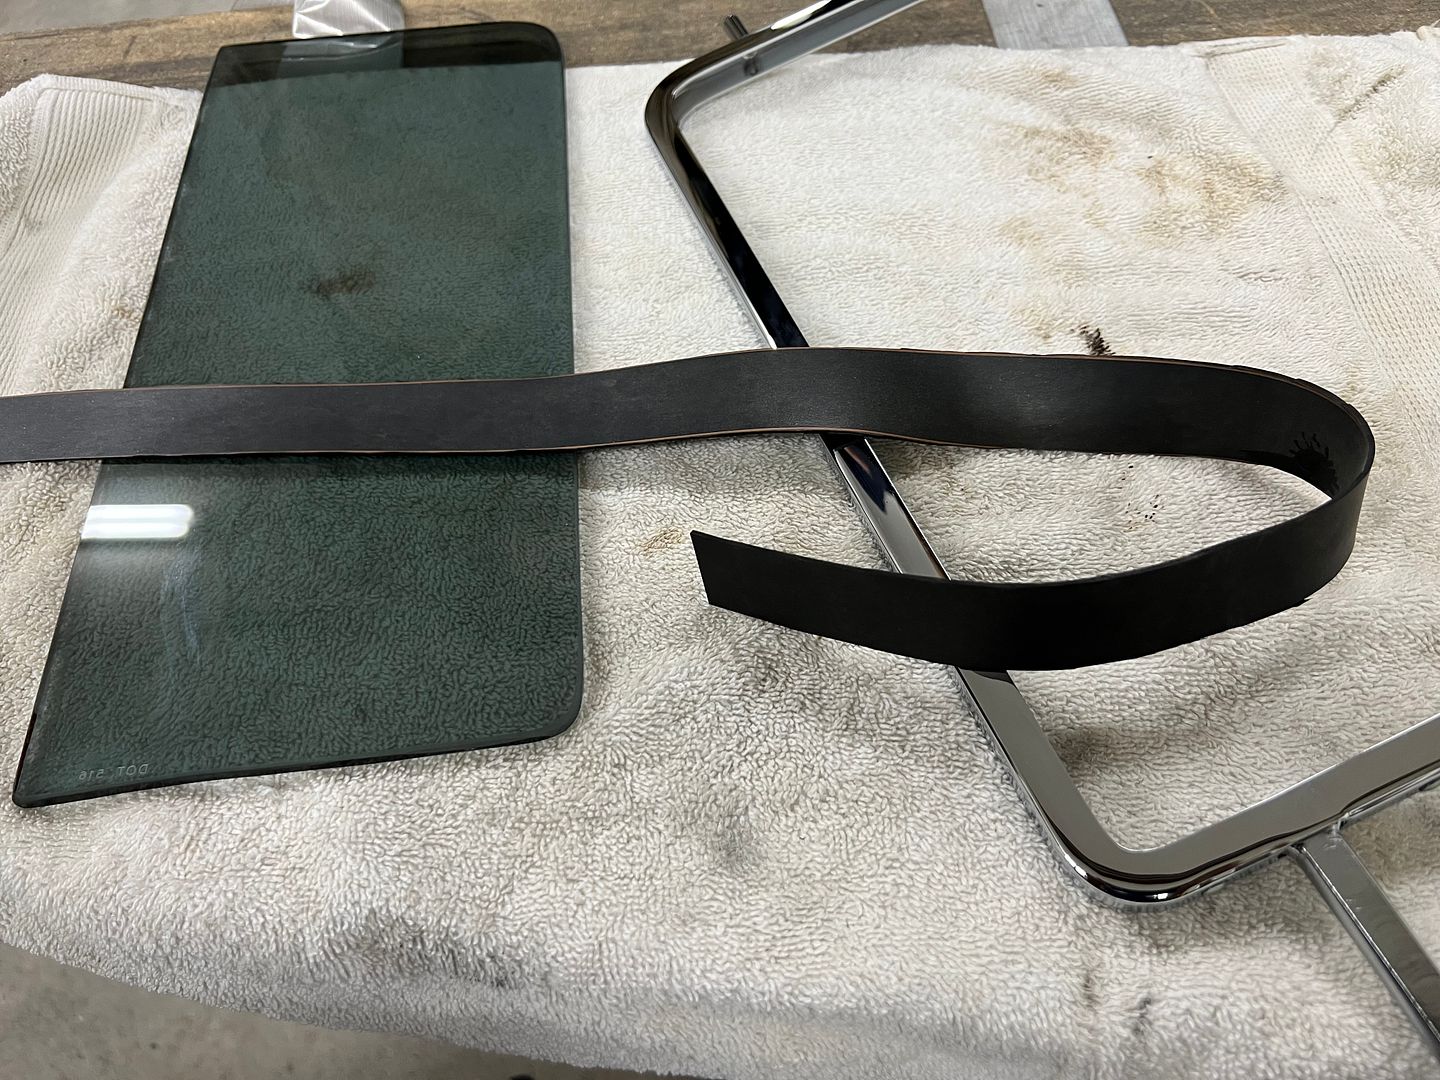
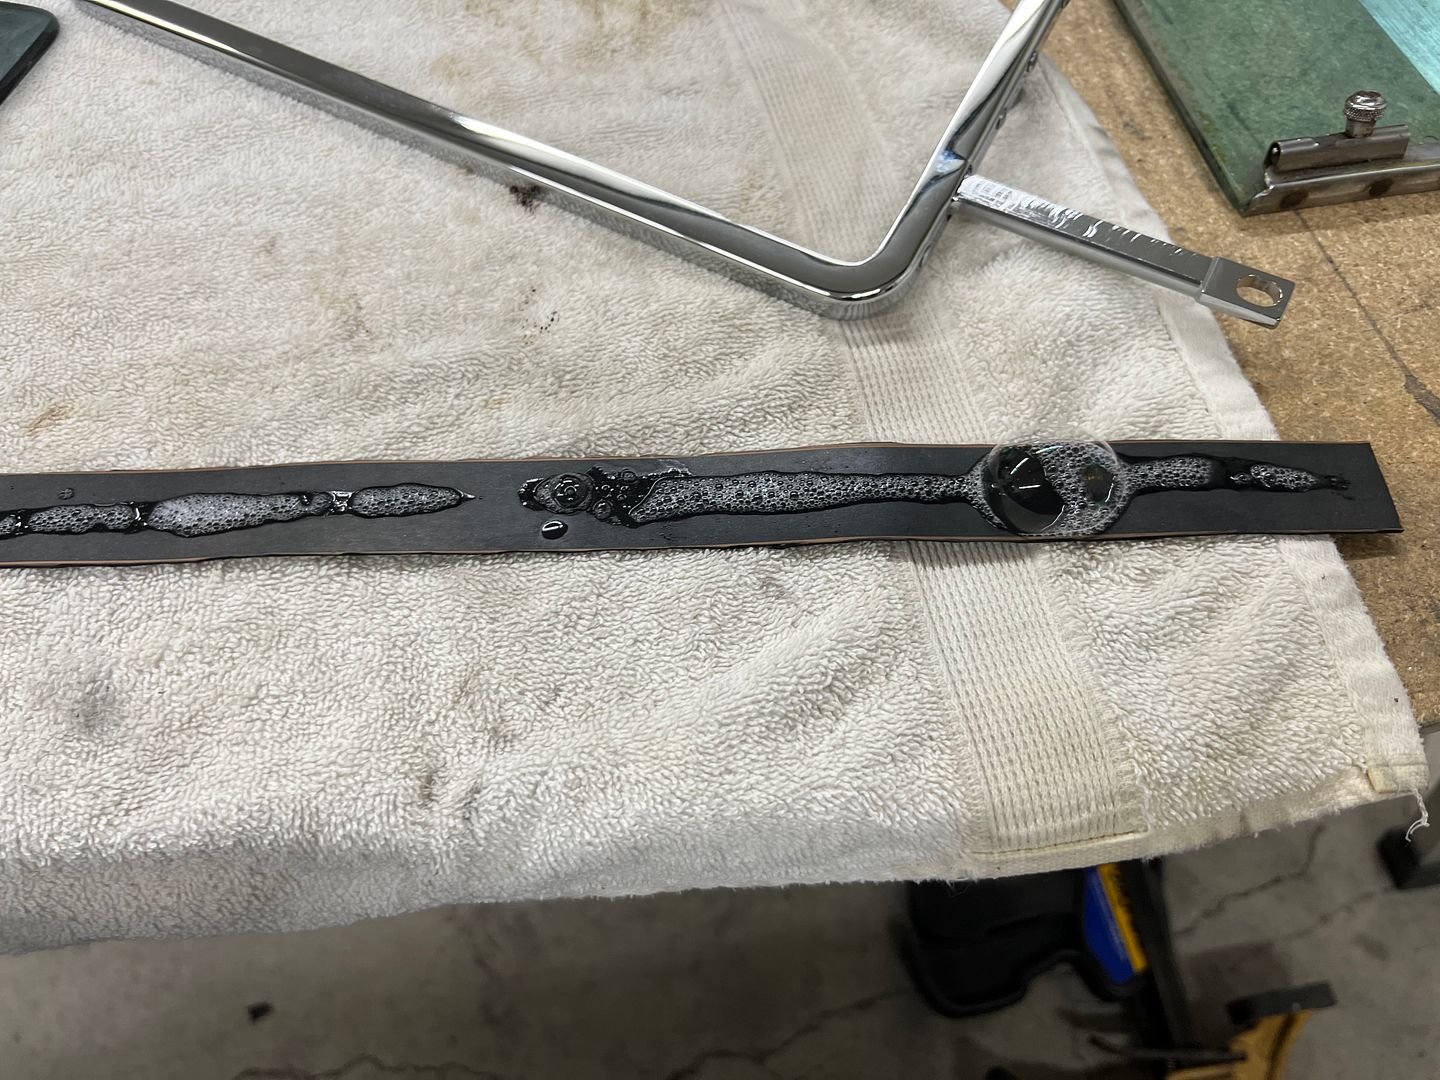
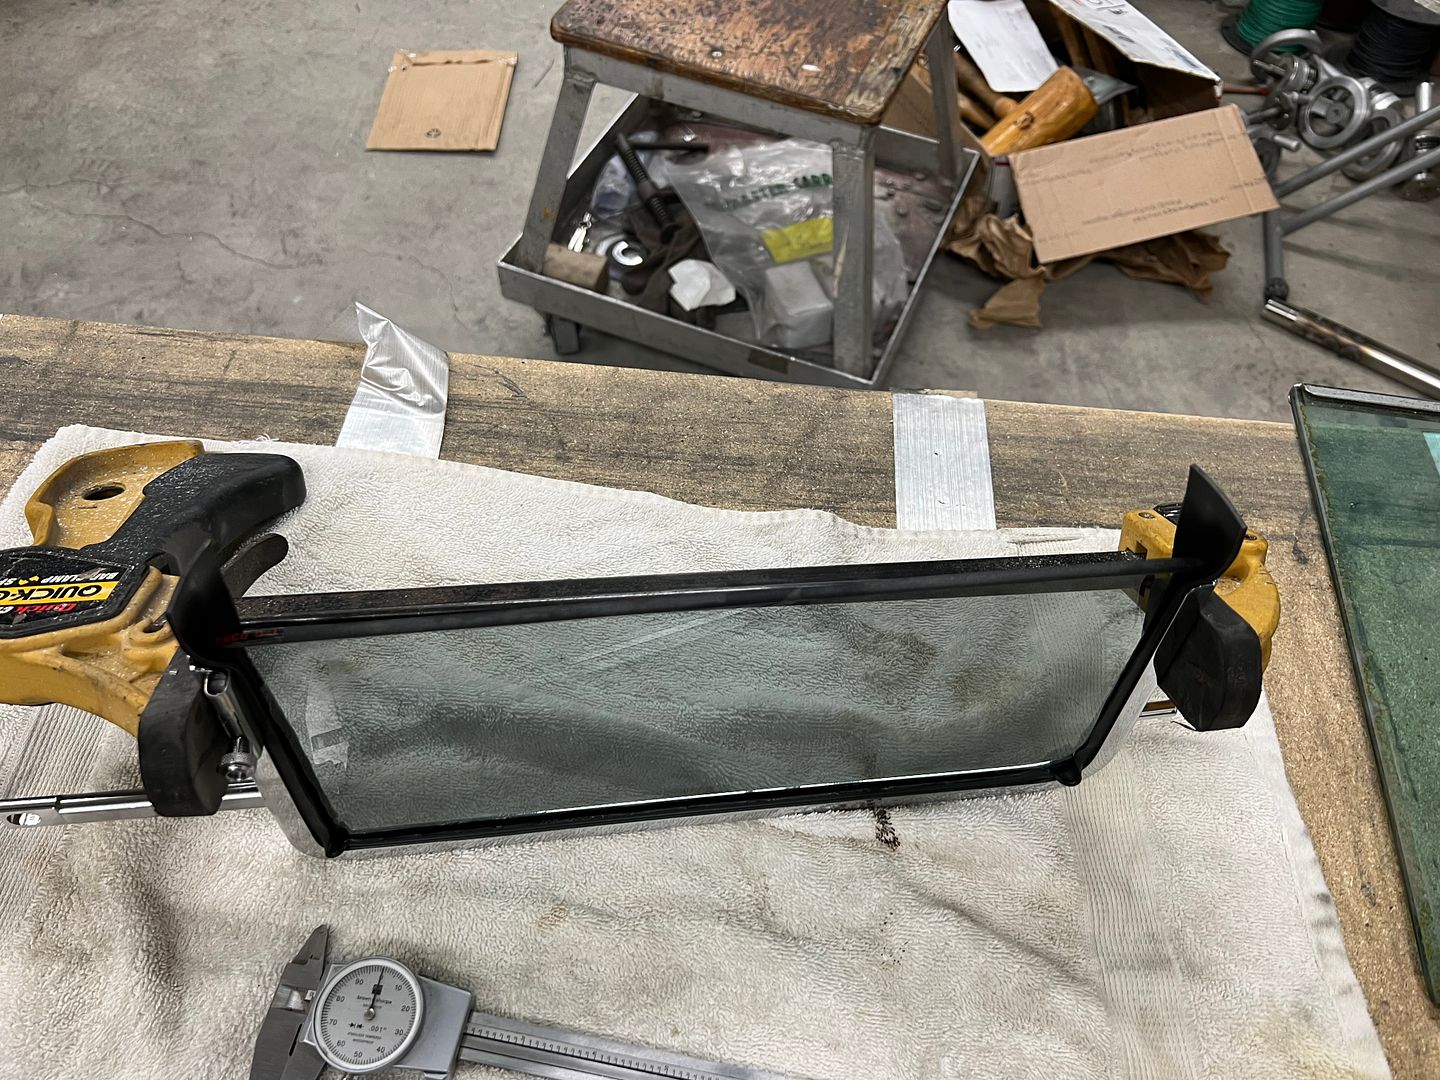
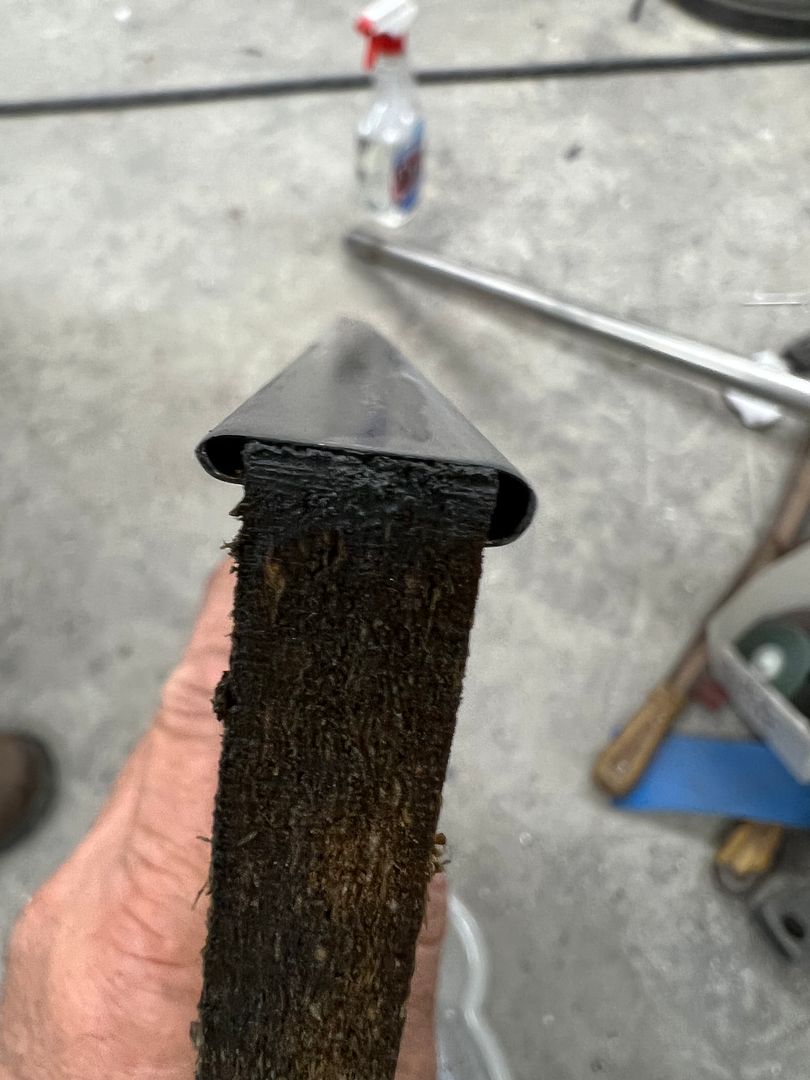
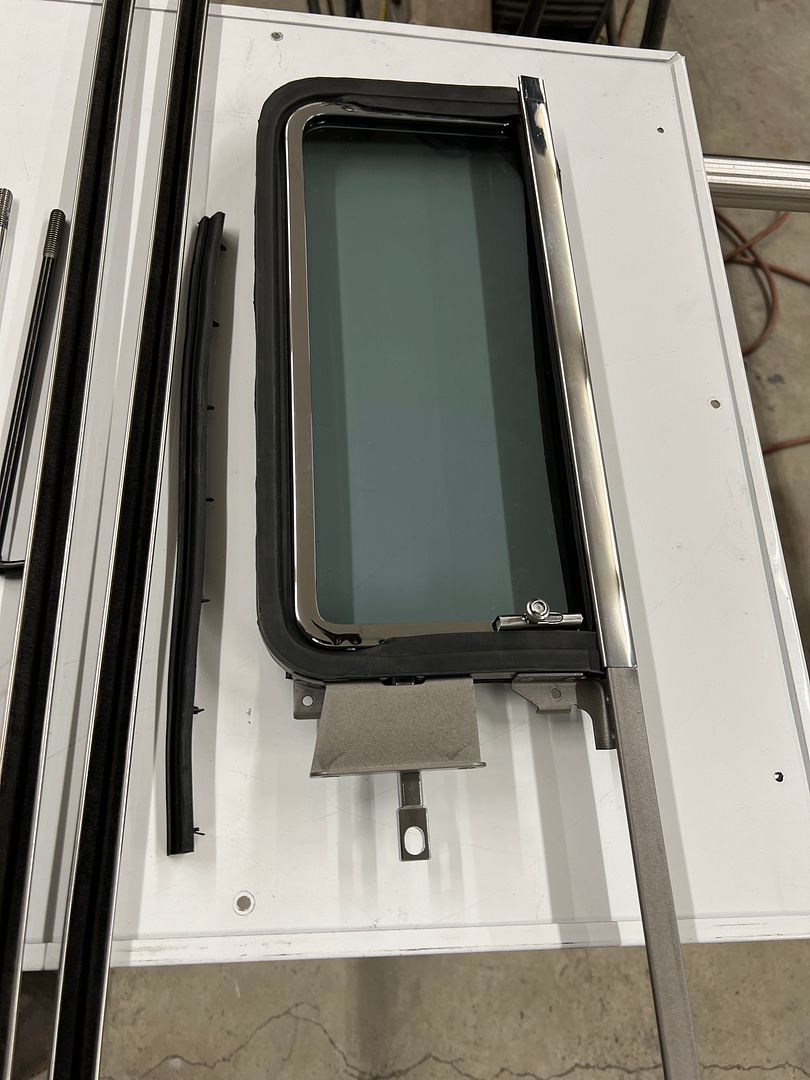
More progress on the wagon, (the green one) working on the parts so we can assemble and install the vent windows. For our glass installation, we did things twice as the 1/16 rubber did not give a snug enough fit. So here is our second round using 3/32 thick rubber. One inch wide strips were cut out of the sheet and lubricated with an Ivory/water mix.


IMG_7293_tudbsaJdKt3HeVPEeD1jbT.JPG


IMG_7295_bzEc6WjD3E51Xg7wEbJvzW.JPG


The rubber was wrapped around the glass and it was pressed down inside the frame by hand. Then a "slight" squeeze of the frame to ensure it wasn't sprung open from the installation process.


IMG_7297_pJVr11Z4ToHWdwjmtJPuKh.JPG


These got moved to the attic for a good heat baking (drying the soapy solution) and we'll trim the rubber flush with the chrome vent frame in a couple of days.

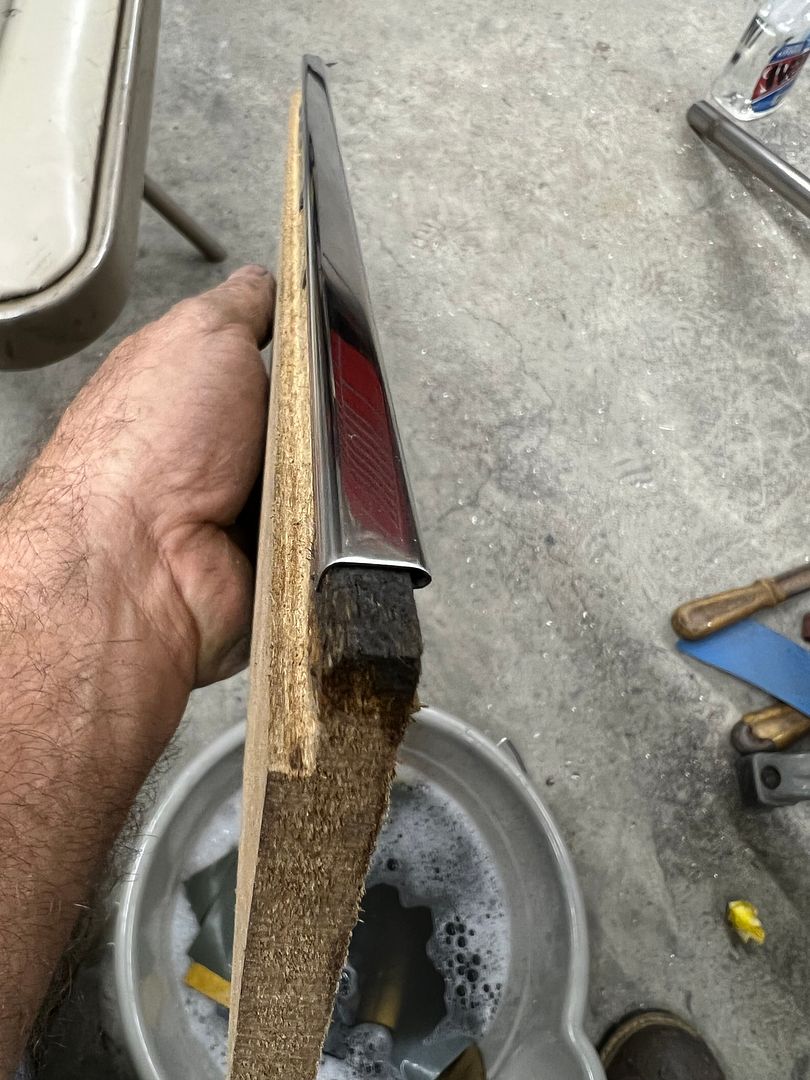
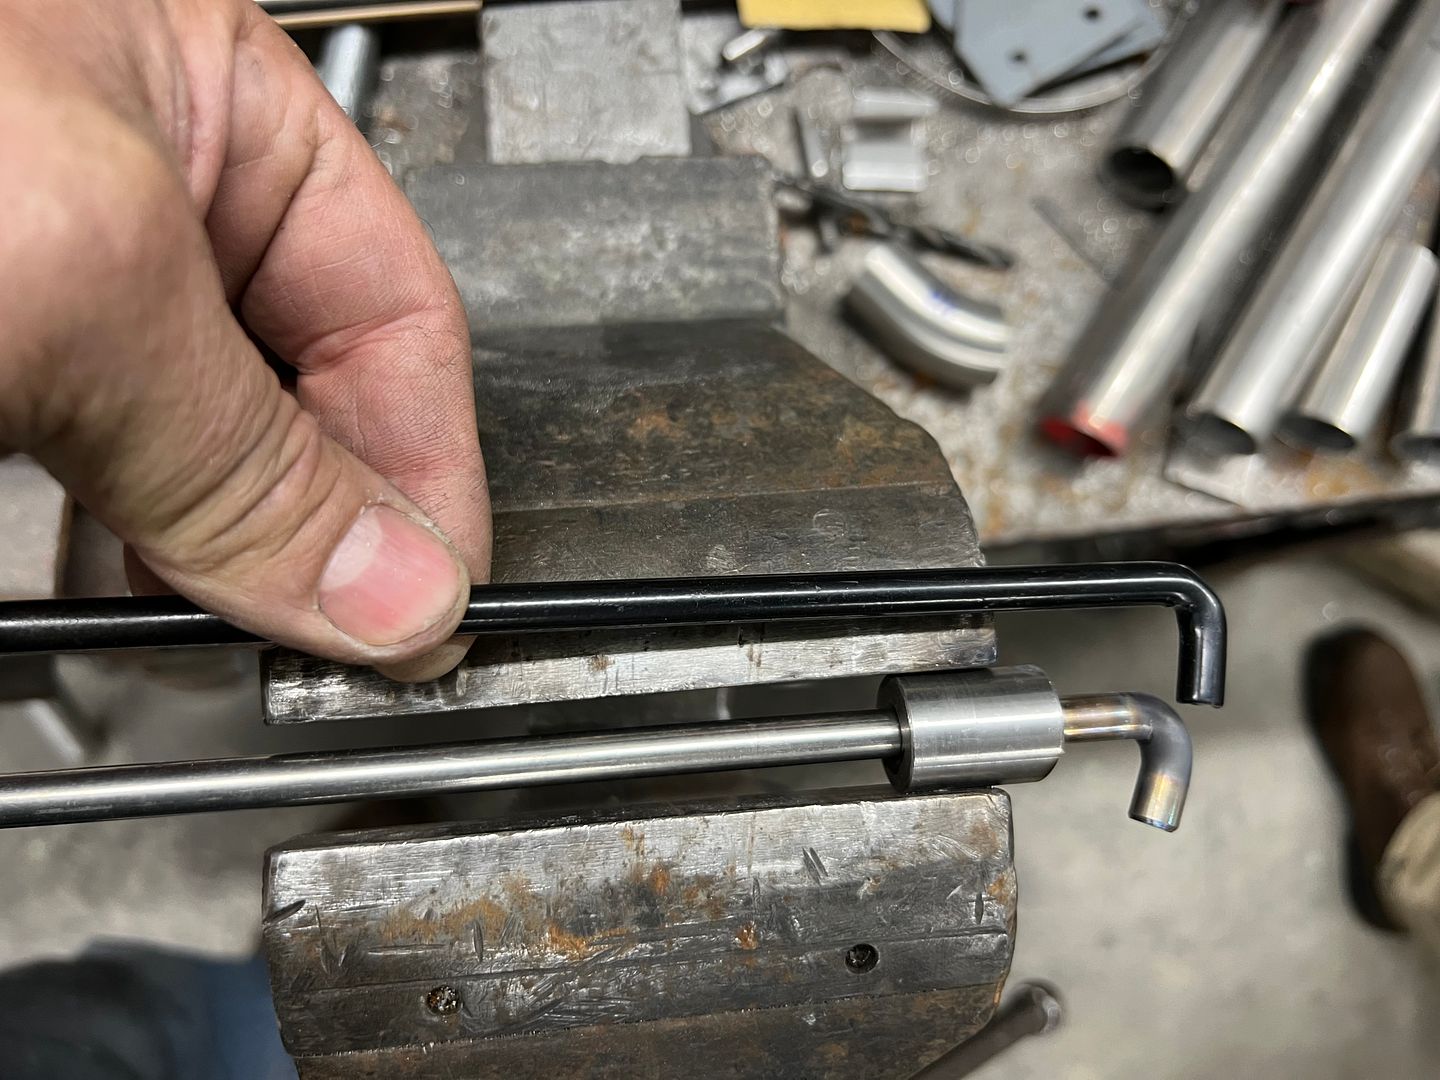
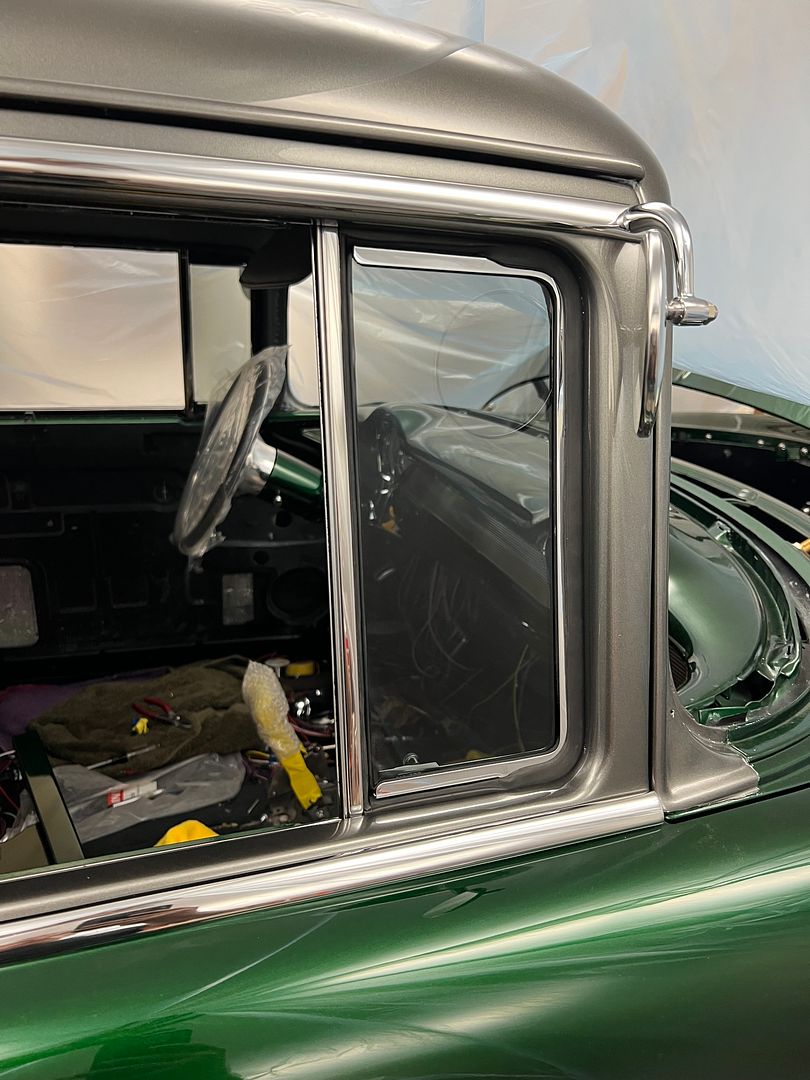
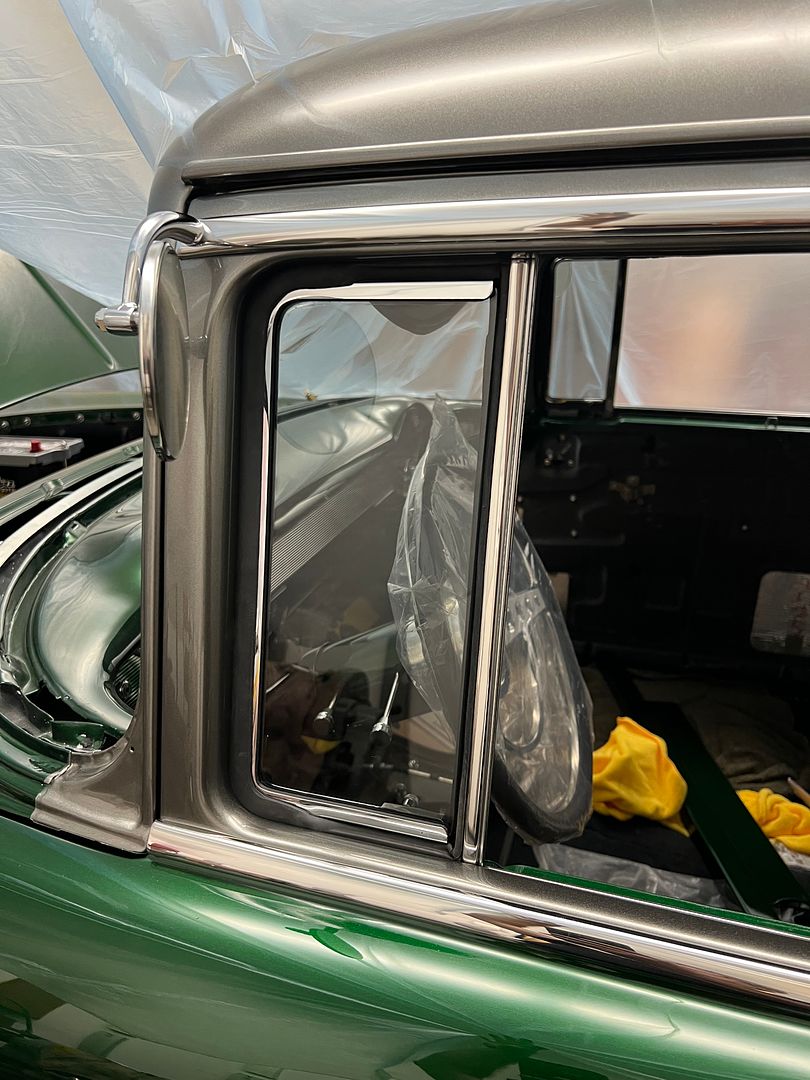
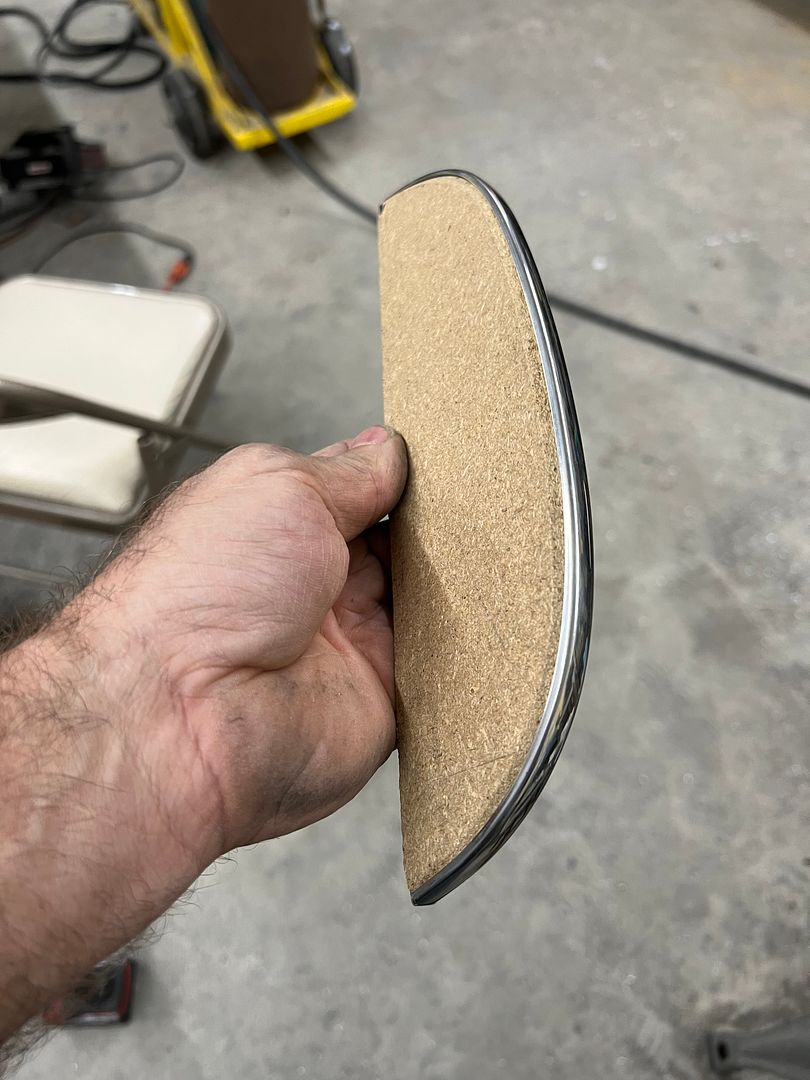
Next, onto prepping the stainless trim for the vent windows for buffing, refining the scratches. Detail work like this is more difficult with parts flopping around in your hand, so some MDF was found the correct size (width) to hold the wide portion of the trim, and another piece of MDF was shaved to fit the narrow piece of trim. We should have these done this weekend.


IMG_7308_kjLfG4LVJUXNGdwnnH8Qmt.JPG


IMG_7310.JPG


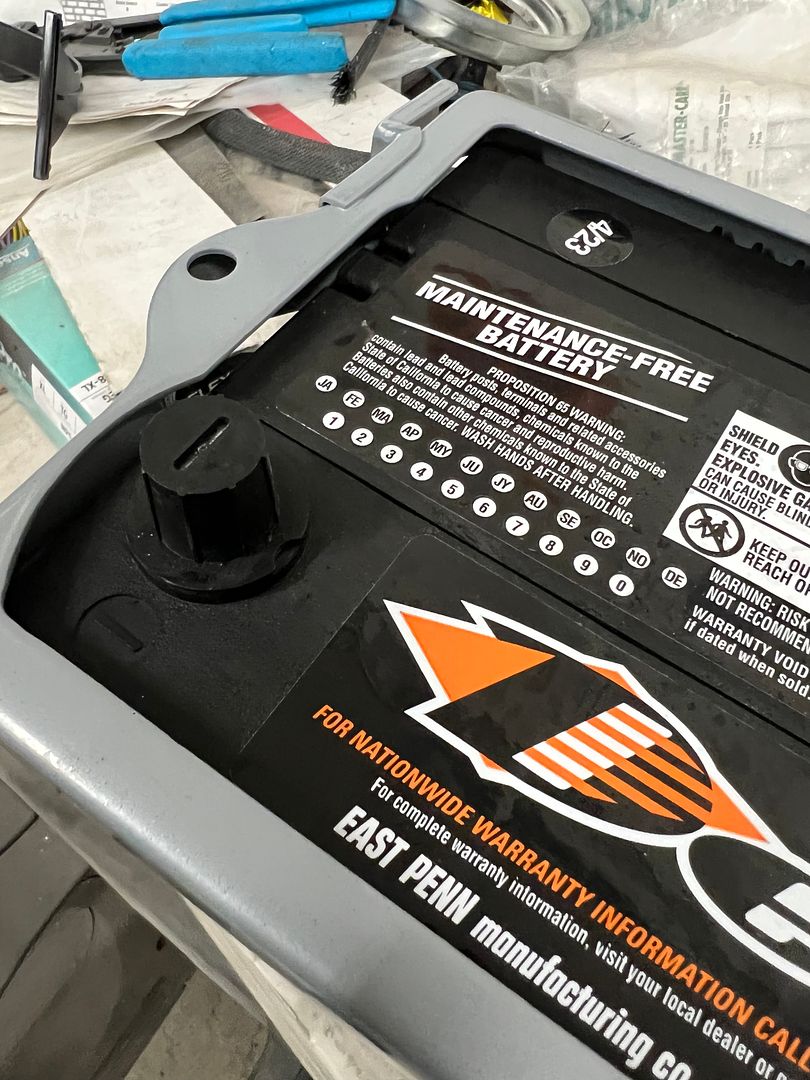
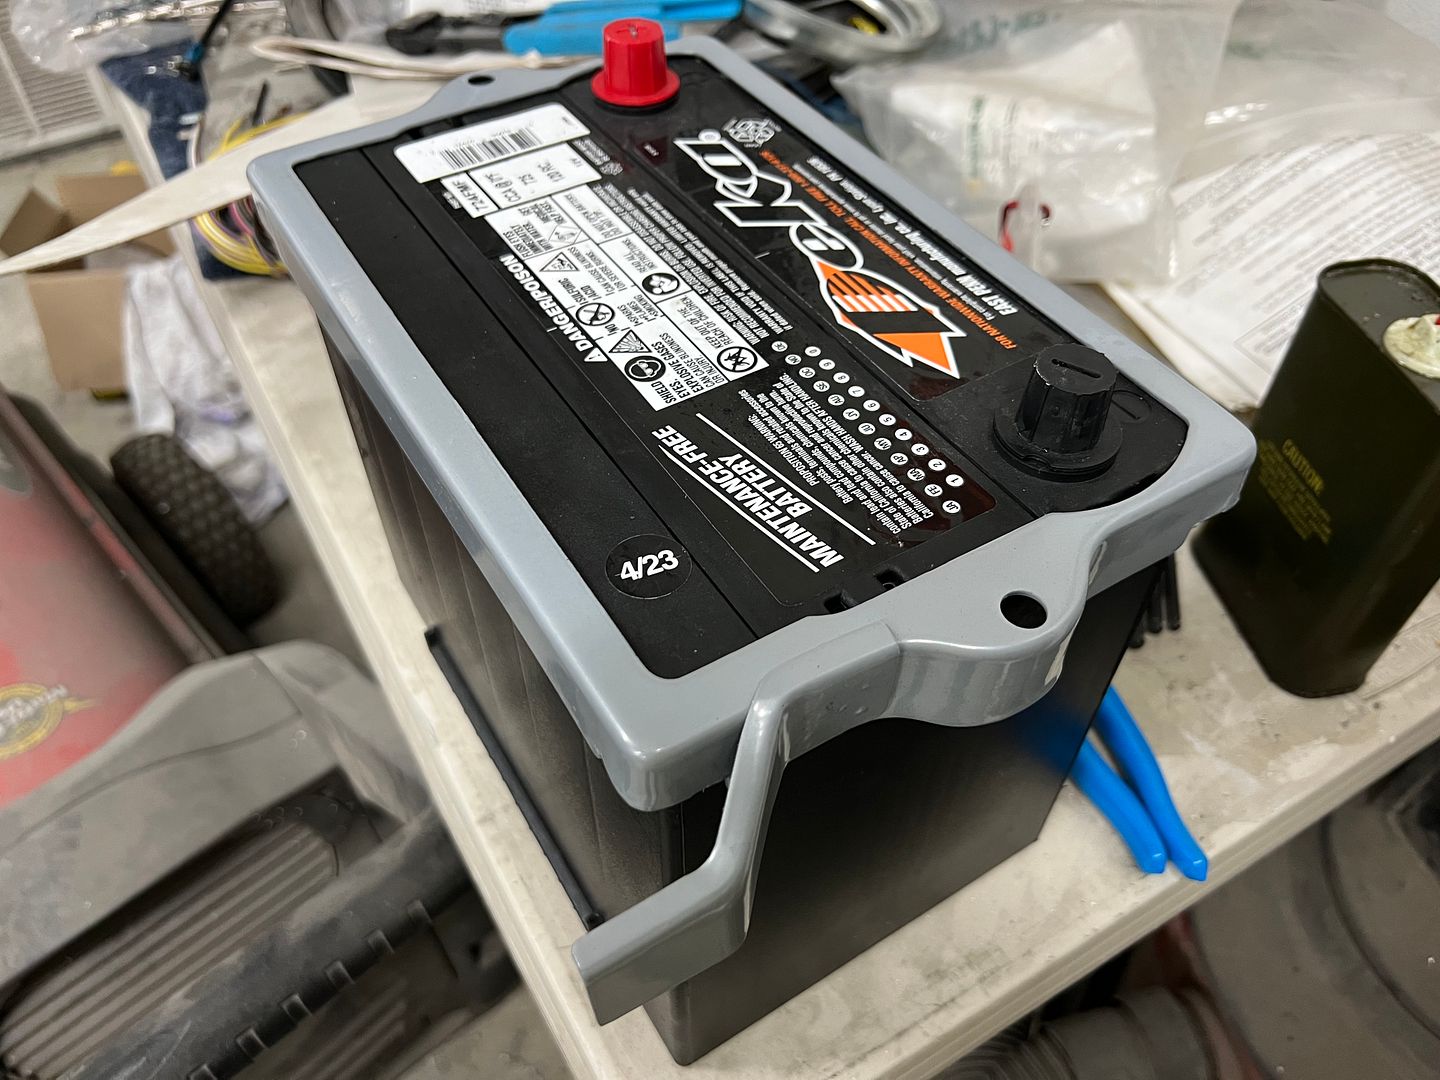
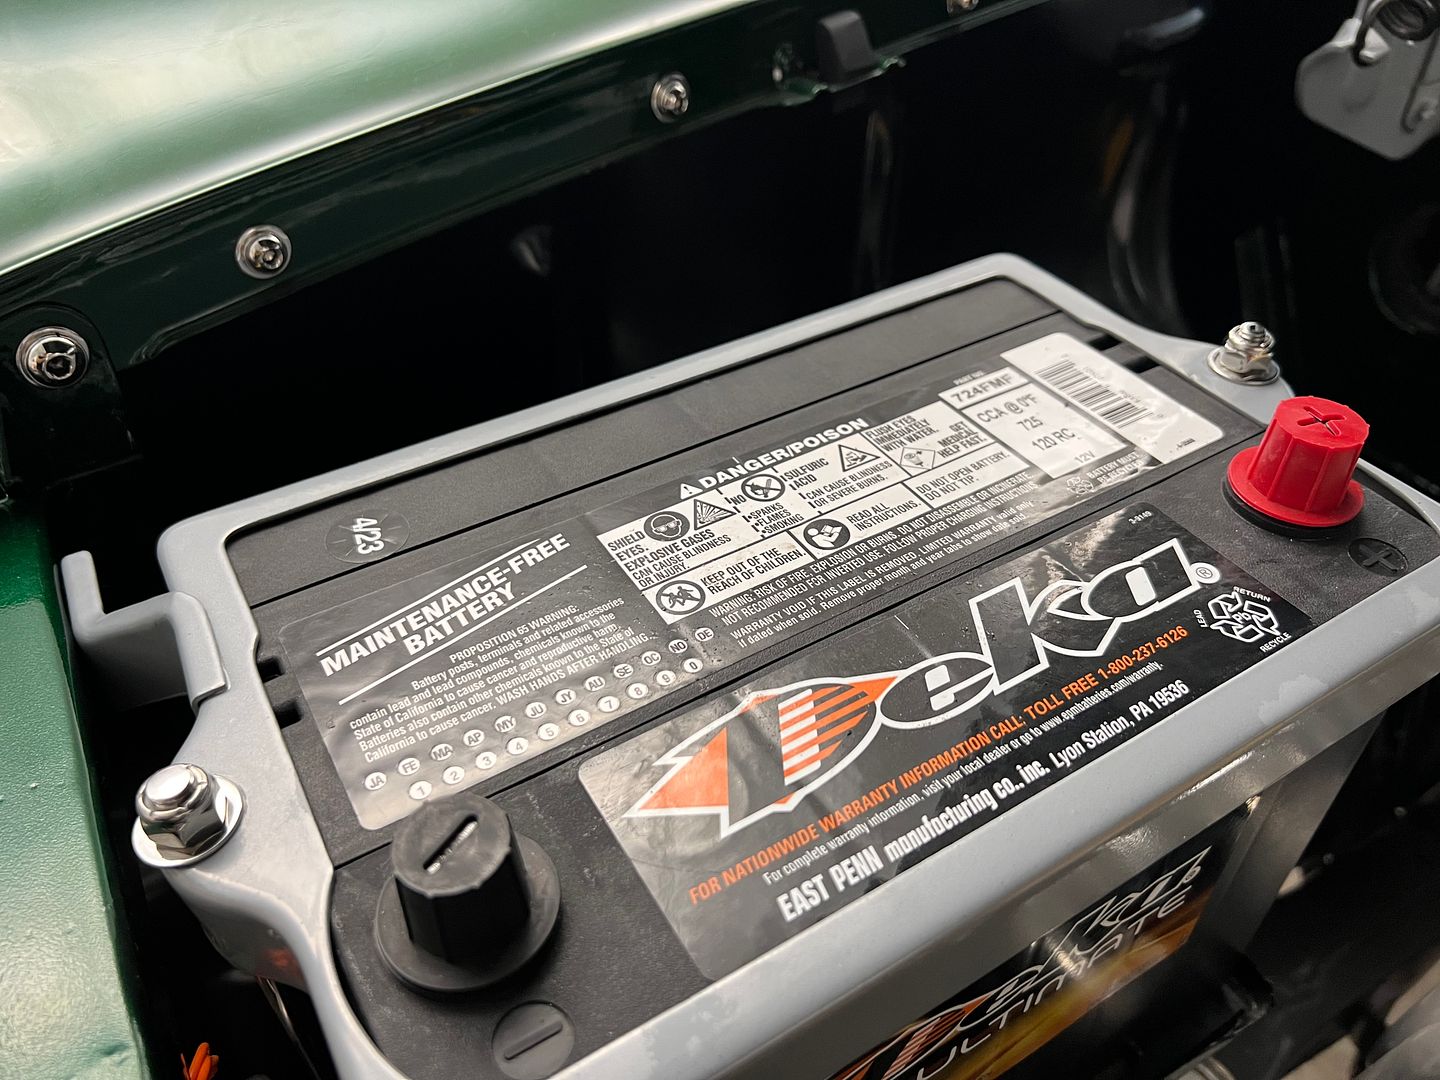
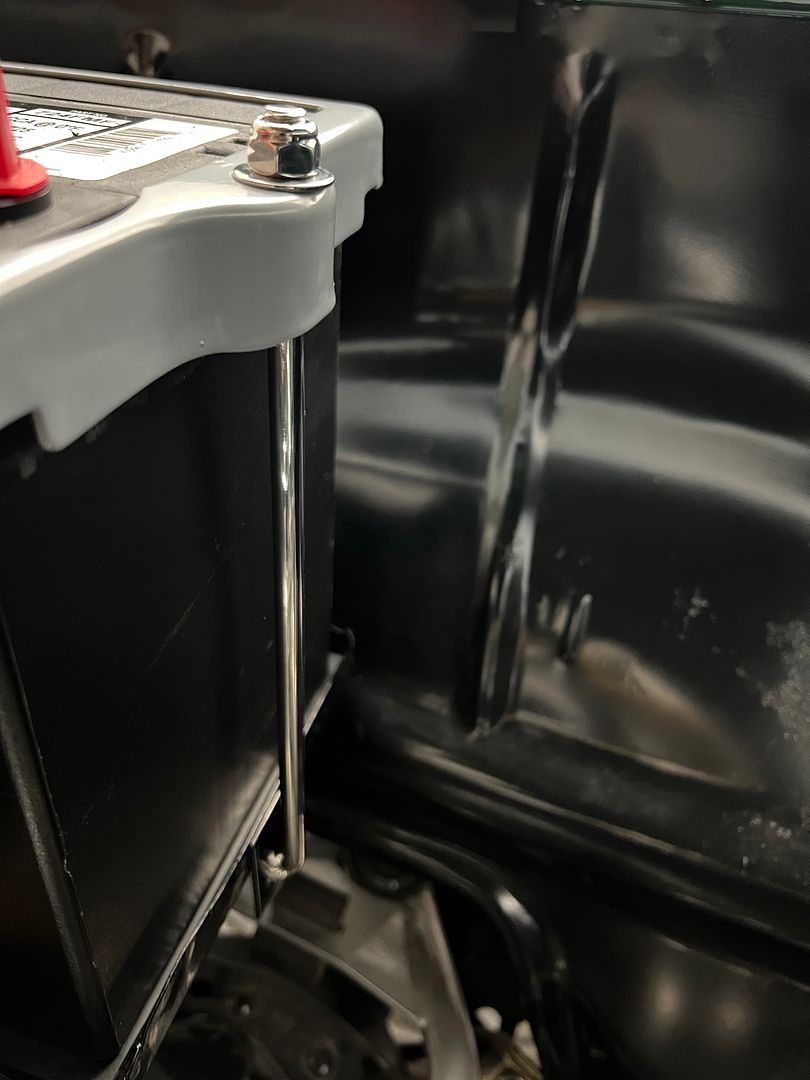
Next, we picked up our battery, but the lifting handle bosses on the ends of the battery interfered with our OEM hold down.


IMG_7366_hX5WufbbDXs2YKQEDfFhS9.JPG


IMG_7368_sR5QjkPaTj6FLb1Quo1Faq.JPG


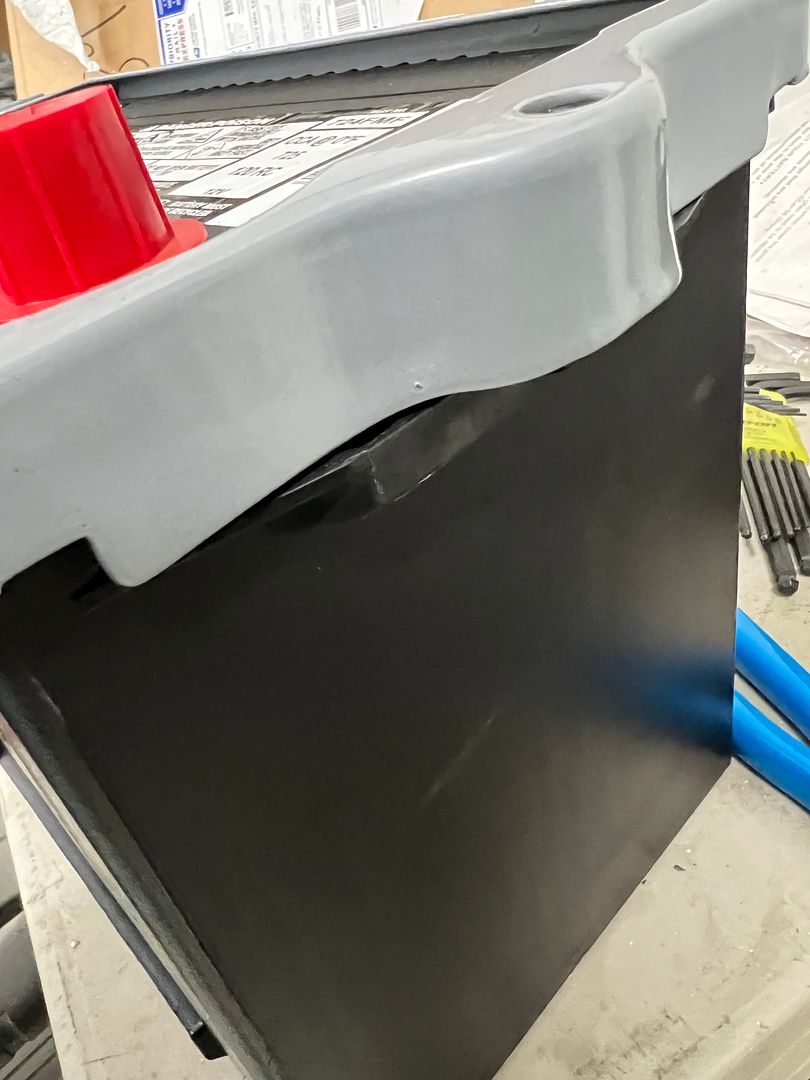
Not to be dissuaded, the belt file made short work of a shave.


IMG_7374_oYh7d1bDYL5rLQV5ig7Ttq.JPG


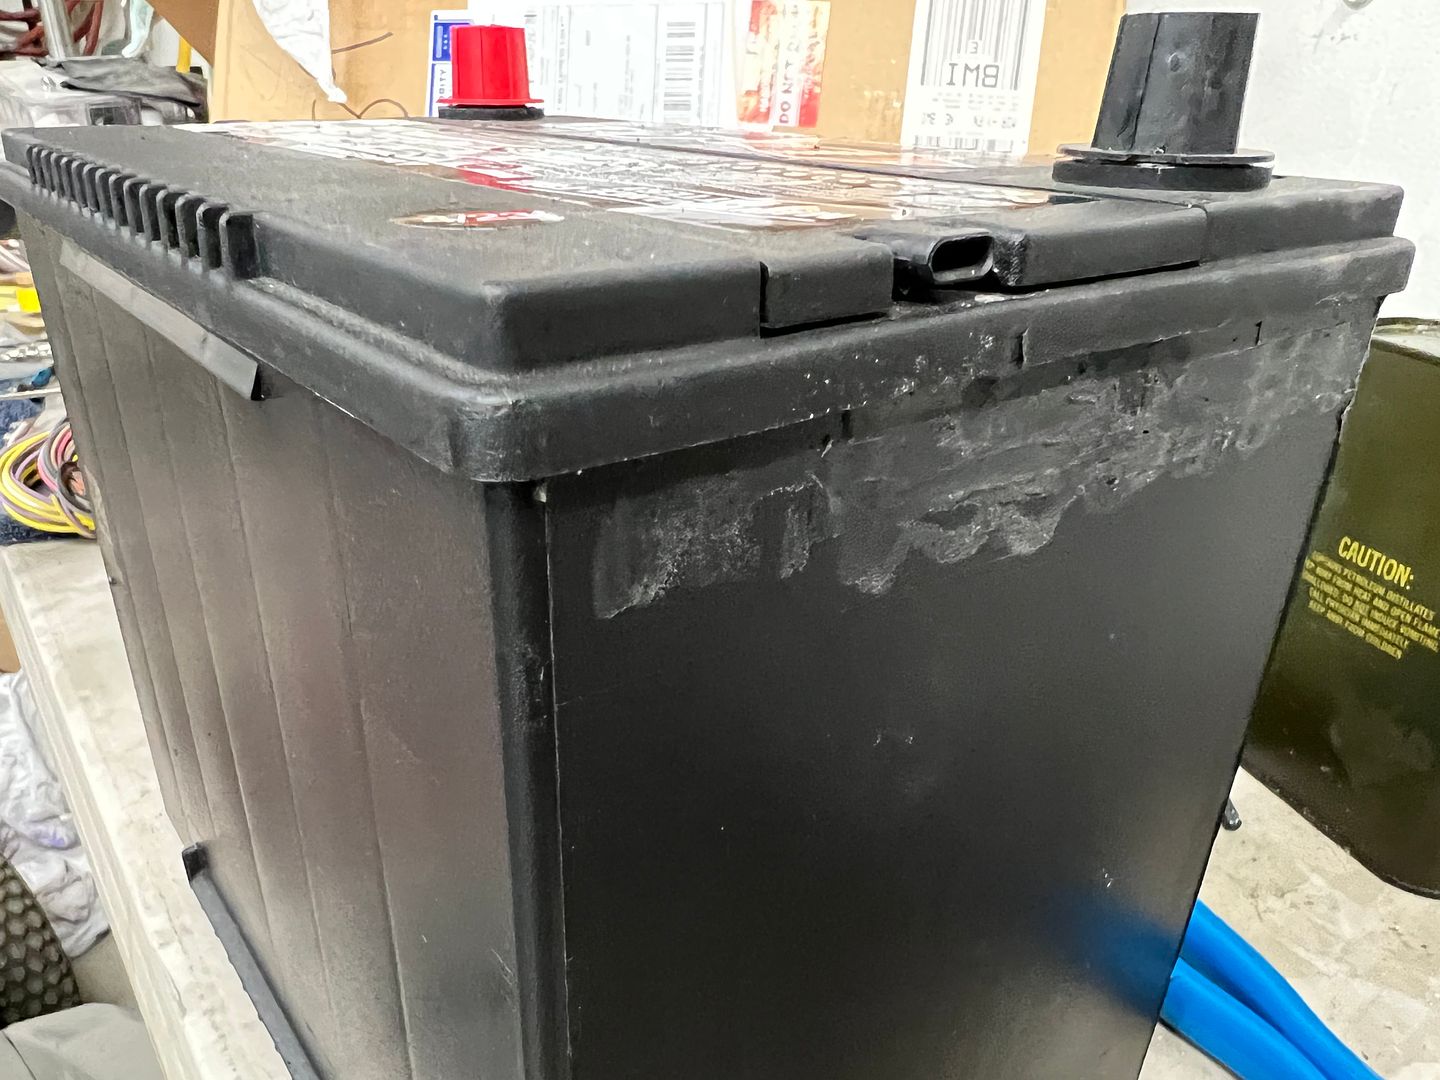
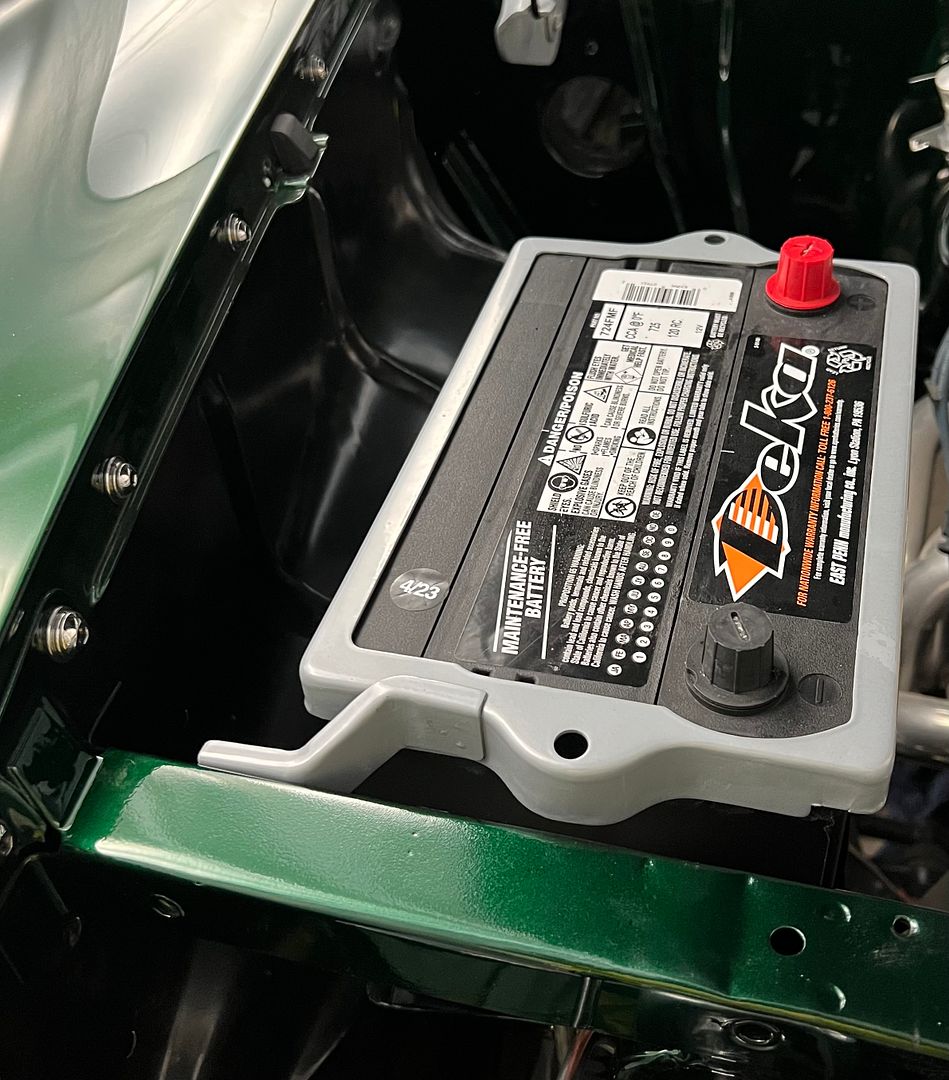
Luckily the mount hides our sanding marks. Much better down where it belongs...


IMG_7375_1YK3HfcyHwaP4gSkfJqRer.JPG


Like it's made to go there...


IMG_7376.jpg
I'm about to do this to vent windows in a beetle. What duro hardness have you found works best for compresability to get the glass in, yet has good holding power? Did you use Neoprene rubber or EPDM rubber?
 
When polishing the stainless I used to start with the sisal wheel but upon closer look found it to be adding fine gouges in removing coarse ones. That’s what got me into looking for another method. With the wet sanding process we now skip the first two steps on the buffing wheels.
I start with sisal and black rouge. Then grey on spiral, then white on loose wheel, but seems like it doesn't make much difference
 
I start with sisal and black rouge. Then grey on spiral, then white on loose wheel, but seems like it doesn't make much difference

I found the gouges the sisal wheel was leaving was more work that the next step didn’t want to remove them easily.

I’ve tried a few different combinations but liked the “color” that the green compound left the stainless. Looked deeper imo. Maybe my eyesight is going, who knows. :D
 
I found the gouges the sisal wheel was leaving was more work that the next step didn’t want to remove them easily.

I’ve tried a few different combinations but liked the “color” that the green compound left the stainless. Looked deeper imo. Maybe my eyesight is going, who knows. :D
Thank you for this explanation. I have limited experience polishing, but I have heard about "coloring" after using the first two compounds.
 
Well in our typical back up and punt fashion, the original battery hold downs that we had already powder coated did not fit the battery, too short. So we ordered some round stock in stainless to fabricate some new ones.


IMG_7482_jqXh5CpB5fhBFawSCxVyqR.JPG


A threaded standoff was modified to provide an angled surface for using as a hammer form to get the bottom "hooks" consistent...


IMG_7489.JPG


IMG_7481_89KDEDUpfKNKX1GjqPPDyX.JPG


All polished up...


IMG_7483_rZyGTtu2JYfxpmWZHVkmZd.JPG


Installed, and no polish job is complete without addressing the ends of the rods..


IMG_7592.JPG


IMG_7593.JPG


Assembling our vent windows, the excess rubber is trimmed using a No. 11 scalpel blade for a nice and tidy fit


IMG_7402.JPG


IMG_7403.JPG


All the bits assembled


IMG_7488_ngY2A2SP377inRw5bfmgN9.JPG


installed...


IMG_7590.JPG


IMG_7591.JPG


And more stainless we missed, the parting bands for the front arm rests, complete with a form-fitted sanding/polishing fixture


IMG_7404.JPG
 
Back
Top