My money pit

BB70

Promoted Users
I thought I would show you all what the car looks like so far off of jackstands. Its been a learning process, take one step forward and 3 steps back on stuff. I really wish I would have found you guys at the start of my painting adventure, but thankful I did eventually. Appreciate you all !!!!!

John
 

Attachments

  • PXL_20250321_201122668.jpg
    PXL_20250321_201122668.jpg
    164.9 KB · Views: 180
  • PXL_20250321_201158376.jpg
    PXL_20250321_201158376.jpg
    125 KB · Views: 178
  • PXL_20250303_205456658.jpg
    PXL_20250303_205456658.jpg
    107.3 KB · Views: 161
  • PXL_20241127_211155616.jpg
    PXL_20241127_211155616.jpg
    147.6 KB · Views: 179
Looks great! What has been your process steps from bare metal through final polish?

Thank you. I have to say I probably shouldn't have made this post as it isn't all SPI products on it. The shell, rear spoiler and frt bumper is all SPI epoxy only all the way except the color.
I didn't discover SPI till I was done with the other loose parts.

All loose parts except what I mentioned above got sprayed with epoxy after taken down to bare metal. Any body work was done to the best of my abilities and then sprayed with hi build primer. I think I guide coated and blocked those parts 7-8 times. I final sanded to 400 grit dry before painting them with 3 coats of single stage.

When it came to wet sanding after paint I started with 1200 and stopped at 2500. I have been using Wizards turbo cut with a wool pad and a black foam pad with Wizards polishing compound. I still have some scratches I can see from not wet sanding properly but I am leery of chasing them because of only 3 coats of paint.

Overall I give myself a C- on the job. This was my first time doing paint work and I wish I was young enough to redo it or do another car.

Thanks, John
 
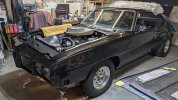
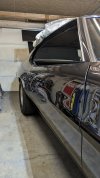
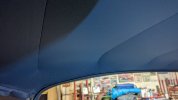
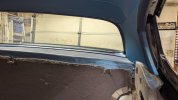
Hey all, I been trying to move forward on this car. 2 weeks ago I started installing my headliner, but it took a lot of planning and psyching myself up. Did one in '89 on a car and knew I couldn't afford or did I want to take it somewhere. It took me about 2 hrs from glueing everything, to getting it in place- That was a woopin. It has a couple fubars, but came out better than I thought it would. Then about a week to trim it all out.

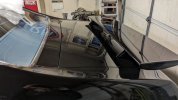
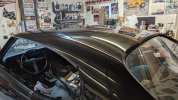
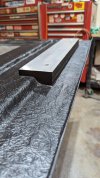
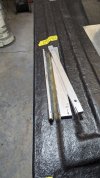
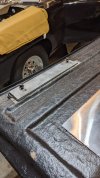
Also revisited my pin on hood to bolt on conversion, it was a fail. I couldn't get the hood to sit low enough in the rear. Also, with the springs off of the hinges, the condition of the hinges became apparent, and my spare set were junk too. So I sent a set out to get rebuilt and went with plan #523 to attack my hood- I had to sink the hinge mount- I needed about 1/2 inch. I still have to remount- retest, then if all is ok wetsand the paint and buff it.
John
 

Attachments

  • PXL_20250406_173613058.jpg
    PXL_20250406_173613058.jpg
    71.5 KB · Views: 72
  • PXL_20250406_173609589.jpg
    PXL_20250406_173609589.jpg
    77.4 KB · Views: 72
  • PXL_20250415_193639705.jpg
    PXL_20250415_193639705.jpg
    99.3 KB · Views: 70
  • PXL_20250303_205638353.jpg
    PXL_20250303_205638353.jpg
    135.4 KB · Views: 69
  • PXL_20250308_214202320.jpg
    PXL_20250308_214202320.jpg
    159.7 KB · Views: 67
  • PXL_20250406_180047233.jpg
    PXL_20250406_180047233.jpg
    166.6 KB · Views: 61
  • PXL_20250424_150249415.jpg
    PXL_20250424_150249415.jpg
    131 KB · Views: 79
Awesome project.....love the 70 GTO! Frankly, it is my favorite of the GTO family. That black with bright blue interior will pop nicely, if that is what you are going after. Great first job!!!
 
Thanks guys, I'm trying to just do my best. I have all of you to thank for the invauable info and support shared here. No way it would be at this point otherwise, thats a fact.
 
Back
Top