Father and Son Jeep Wrangler Floor replacement

H

HIG

September I bought my 15 year old son a 1988 Jeep Wrangler that we are rebuilding.

Here are a few pics of it:

The Jeep sitting on my brother-in-law's used car lot:


Working on stripping it down:


The Frame with 3 coats of SPI Epoxy:


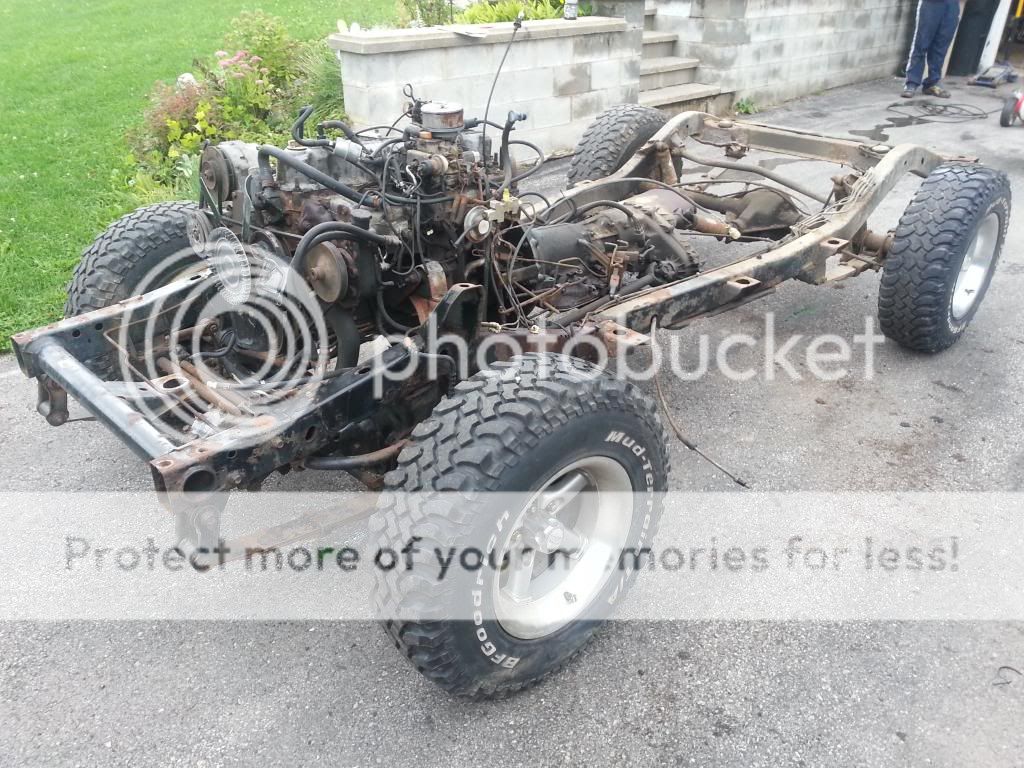
As the frame sits right now:


Steve

- - - Updated - - -

We will be starting on replacing the floor pans and I know I will have a few questions on the best way to do it. We will be using bedliner to coat the inside of the tub after the repairs are complete so the floor pan welds will not be hidden under the carpet.

I would like to use the factory edge on the 2 sides of the replacement panel. I want to drill out the spot welds to remove the old panel, I can see the welds from the outside on the rocker panel. Can I drill the welds out from the front or should I drill them from the back?


I should be able to fill the holes with weld when I weld it back together, I guess it figure it would be able to get to I just want to make sure I don't have problems with it later. Any problems doing it this way?

Thanks, Steve
 
We worked on the driverside floor a little bit today. This is how far we are:


I've never replaced floors before so if anyone can give any advice I would really appreciate it!! Does it look like we are on the right track, should I have not removed the edge along the rocker or will it be a better job by doing it that way? The front edge (towards the fire wall) we will probably overlap the panels and we will butt weld the rear and right side.

Any thoughts or advice would be appreciated.

Thanks, Steve
 
Your plan is fine, if you can sandblast the floor after the patchwork is done and shoot 2-3 coat of epoxy on and seam seal it where needed before the bedliner is sprayed it will last a long long time.

- - - Updated - - -

coat the inside of that boxed frame with cavity wax, those jeep frames are notorious for rusting from the inside out
 
Bob Hollinshead;32762 said:
Your plan is fine, if you can sandblast the floor after the patchwork is done and shoot 2-3 coat of epoxy on and seam seal it where needed before the bedliner is sprayed it will last a long long time.

- - - Updated - - -

coat the inside of that boxed frame with cavity wax, those jeep frames are notorious for rusting from the inside out


Yes, Zack & I patched 5 areas that had rusted thru on the frame.

Will cavity wax work over top of existing rust on the inside of the frame? If I get it on the epoxy primer by accident would I be able to remove it?

Thanks for the reply, Steve
 
http://www.tat-co.com/products/specialty-coatings/amber-rustproofing-4423/

Transtar Amber coat works good-I like it better than 3M's rustfighter and similar products, it soaks into the surface of scaly rust and forms a self healing coating, it's best to spray the inside of frame rails with 2-3 coats and let it set for an hour or more between coats, Transtar sells an economical 360degree spray wand that you can feed down the rail and coat all of the surface well. It cleans up easily with solvent base wax and grease remover.
 
Well I could really use some advice!! We started fitting the replacement panel in tonight and is going well. We will be plug welding along the rocker panel and butt welding the passenger side and along the back but I'm not sure what to do with the front edge?


I'm wondering about doing a lap joint and only welding from the top. The lap joint would be stronger than the butt joint (?) and it will be hidden with seam sealer but I'm afraid of moisture getting between the 2 panels, I should be able to seal the underside also.

What about panel adhesives? I guess the biggest drawback would be the cost of the material for such a small repair.

Or should we just do a butt joint there also?

Any advice would be great.
Thanks, Steve
 
butt joint is the easiest to dress and coat properly
 
What is the preferred method of trimming the panels when doing a butt joint? I tried using a cutting wheel to cut thru the 2 panels at once but that just worked okay, I had to go back and touch a few spots with a sanding disc to fix the gap.

I was reading on here last night about using tin snipe (I read the post where there was a Youtube tutorial on how to use them - I learned a lot!!). Is that what most of you do, get the one panel the way you want it, scribe a line on the other panel to cut, rough cut the panel as required (cut off wheel, body saw...) then trim to the line with tin snipes?

Any advice?
Thanks, Steve
 
crashtech;33043 said:
A small air saw is the best, imo.

Do you try to cut thru both panels at once or do you scribe a line and cut on that with the air saw?

Thanks, Steve
 
air saw or draw a line on it and use a cut off wheel.. i usually use a cut off wheel and then grind it a little at a time with a small angle grinder until it all fits just right.. Air saw's get on my nerves.. i think I have broke half a dozen of those things.
 
Zack & I sandblasted the metal around where the replacement panel will go and the bottom side of the replacement panel.


I sprayed 2 coats of epoxy:


I know there's a lot of different onions of weld thru primers or just using epoxy. I will be doing plug welds along the rocker panel and where the holes are drilled in the floor pan. I'm thinking I will just fit everything up and clamp in place then take my spot sandblaster and clean where the plugs will go. Does this sound like a good plan or should I use weld thru primer?

Thanks, Steve

- - - Updated - - -

I forgot to ask if it's better to wait a few days before welding in the panel? Will the epoxy hold up better?

Steve
 
I could use some advice and making this piece:


It's only 1 1/4" long, should we just form the radiuses around wooden dowels or sockets or could I make a block of wood with the shape and form it around that? It's short enough and thin enough to bend by hand, just looking for some options.

This is where it came from:


Thanks, Steve

- - - Updated - - -

We've started welding in the one panel and it's going pretty good. Can anyone give any pointers on how the welds look? It seems like there's good penetration on the back side.


Thanks, Steve
 
Welds look like they are standing a little high but if penetration is good that's the main thing just more grinding. Watch your grinding to make sure you're not thinning the metal adjacent to the welds or it will be weakened. Try a few test panels, turn your wire speed down a little and see how the weld looks, turn the heat up and see if it helps, distance from the surface also makes a difference-closer is hotter.
 
Bob Hollinshead;33257 said:
Welds look like they are standing a little high but if penetration is good that's the main thing just more grinding. Watch your grinding to make sure you're not thinning the metal adjacent to the welds or it will be weakened. Try a few test panels, turn your wire speed down a little and see how the weld looks, turn the heat up and see if it helps, distance from the surface also makes a difference-closer is hotter.

Thanks for the advice, I will try that. I know in some area everything seems just right, it sounds nice while welding, I don't have the high weld and great penetration but other areas aren't so nice. I have noticed how much of a difference it makes by holding the tip closer/farther away (hotter/cooler), I just have to find the sweet spot and be able to repeat it.

Thanks again, Steve
 
I did some practice welding and playing with the setting and I think I've made some progress.

I did the lower weld last:


The first 1 1/2" or so of the weld was the last I did, I think it looks the best but I can use any pointers you want to share. I can see how it's flatter then my other welds.


He's a shot of the back, the end looks good I think but down farther it does not look like I got as good of penetration, would it be a problem if it was the back of an actual panel?


I've been trying to do 5 tacks at a time them move to another area, is it my imagination does the first tack I make "pop" and "sputter" more than the rest? Is it colder? Or am I just making that up? I let the puddle cool, not glowing, before I move on to the next one.

When I make my tacks I'm not moving the tip and I'm starting right at the edge of the existing tack, does that sound correct?

Thanks you, Steve
 
I use sockets or different size rods to make my bends. A big vice helps to. Been doing it for years. I have different size rods all 2 foot long. Just in case I have longer tin to bend.
 
Penetration is good. Is this flux cored wire-the welds look sooty? The first tack is always cold and as the sheetmetal soaks up heat the welds get hotter as you go. Try your 5 overlapping tacks right in a row with no cool time between so you're moving faster and turn the wire speed down a little to keep the bead height low.
 
HIG;33268 said:

I have my share of welding problems also, but that picture looks to me like the direction of the torch is off. It should be pointed in the direction of travel, and in the middle of the seam, with overlapping beads.
 
Back
Top