72 Corvette

Bob Heine

Oldtimer
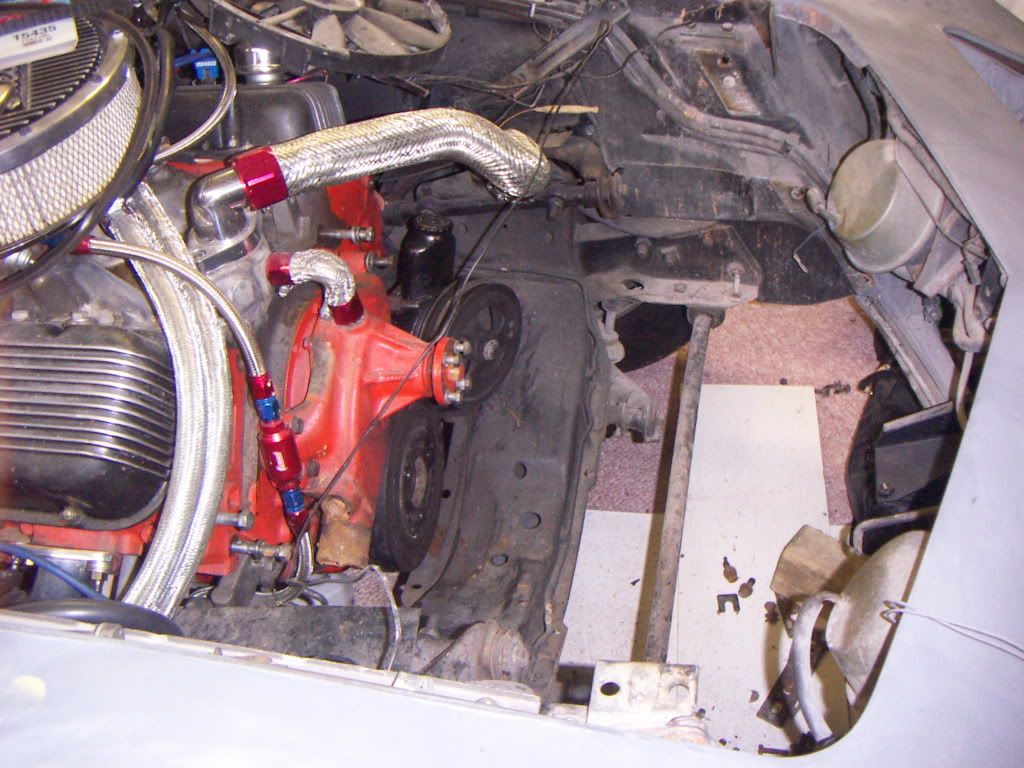
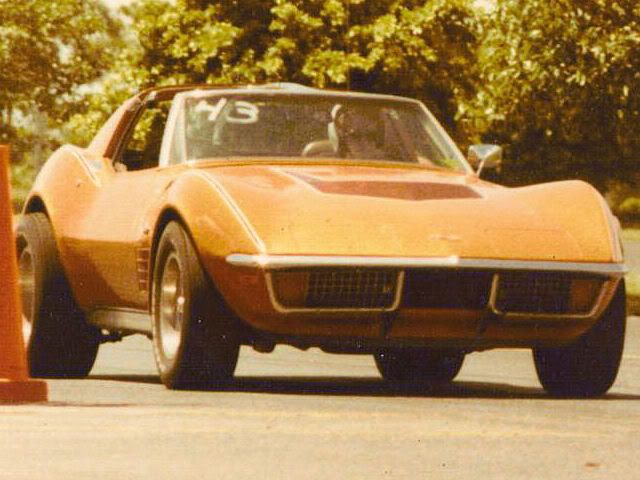
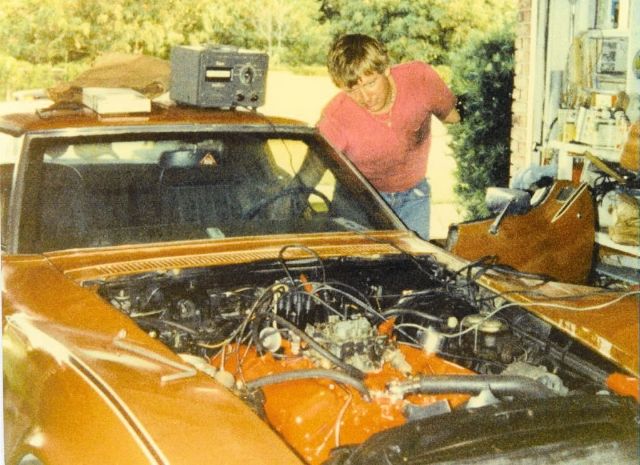
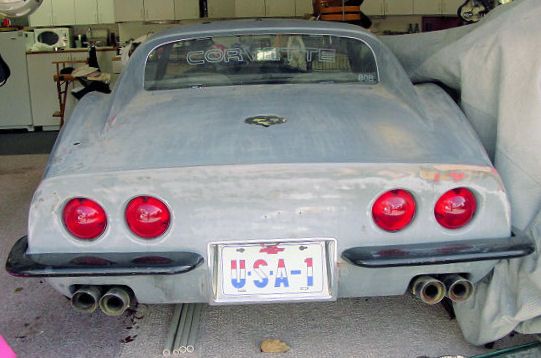
My 1972 Corvette (also my avatar) is my automotive guinea pig. I bought the car in 1978 and drove it for about six years.
LianeBehindtheWheel.jpg


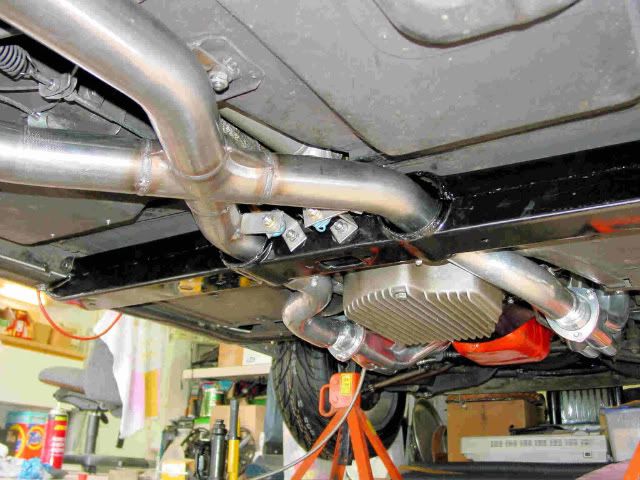
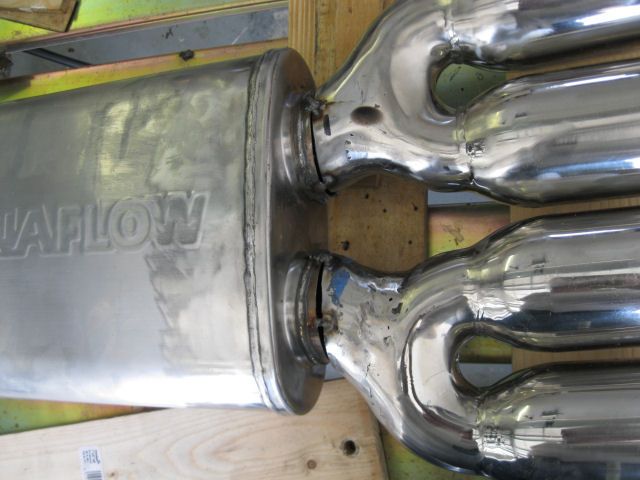
An oil filter failure led to a complete rebuild of the 454 and it was joined by a TCI turbo 400 Street Fighter transmission.
ItsGoingtoStart.jpg


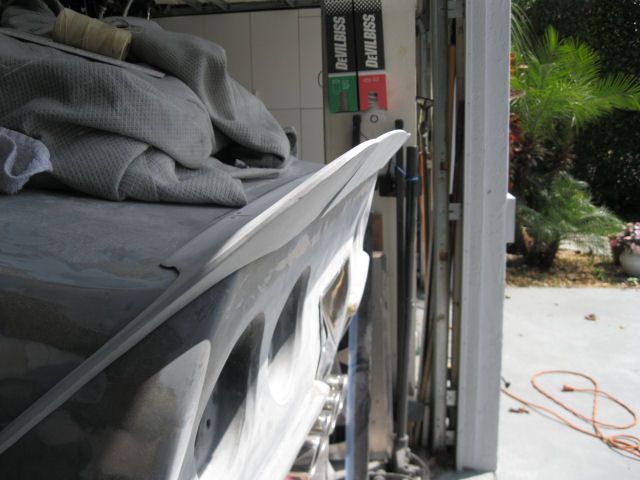
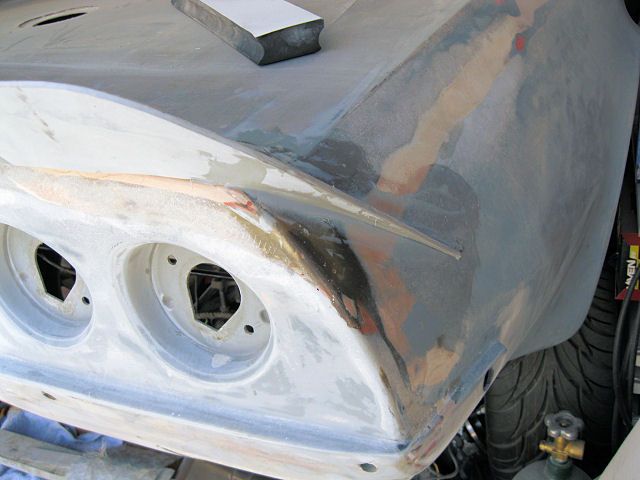
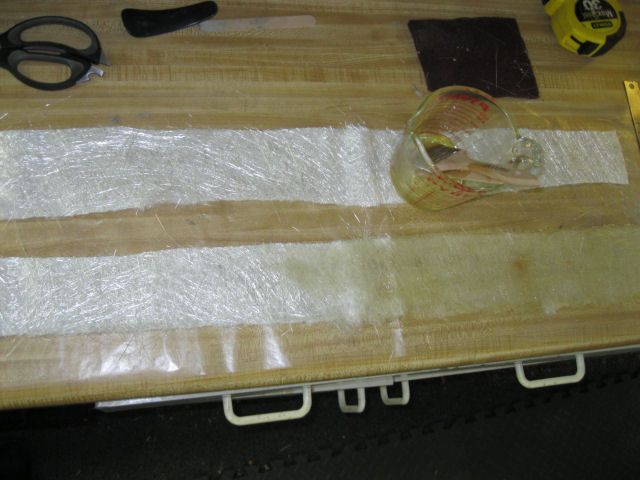
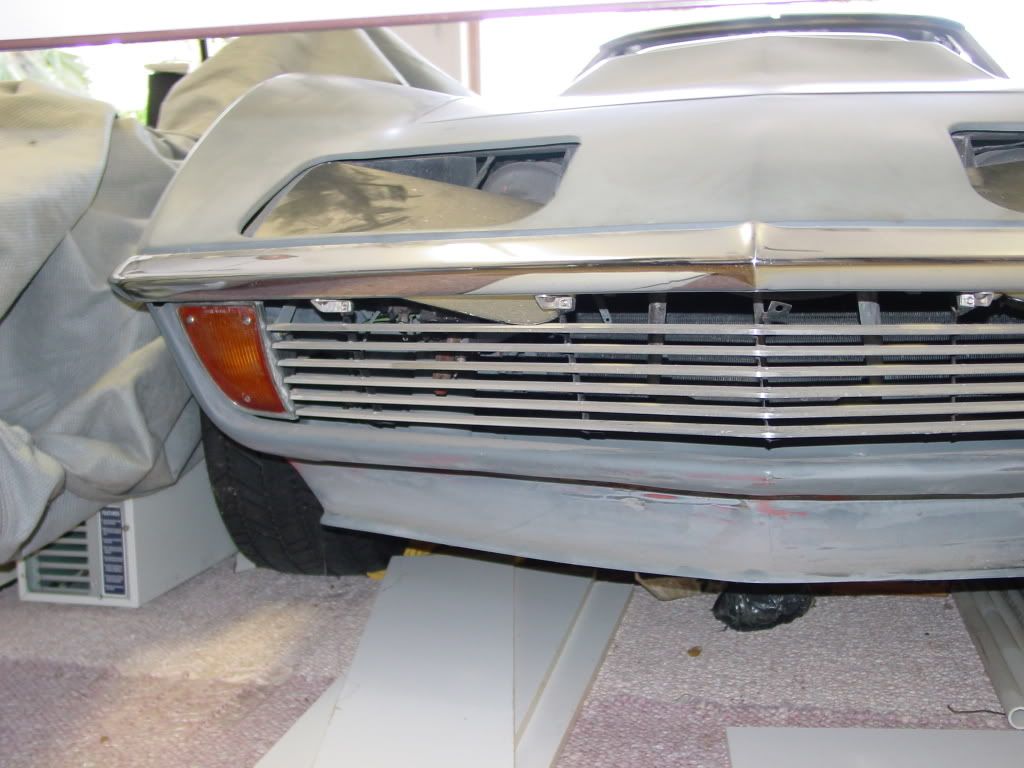
Once the car was back on the road, the paint job really started to get to me. It included some heavy coats of clear lacquer that was starting to craze and weekly buffing wasn't helping. I stripped the car down to bare fiberglass. Before giving it a couple of coats of RM lacquer primer, I replaced the 3-piece front grille with a single aluminum bar grille that Eckler's Corvette carried for one of its custom front ends.
Overhaulin004.jpg


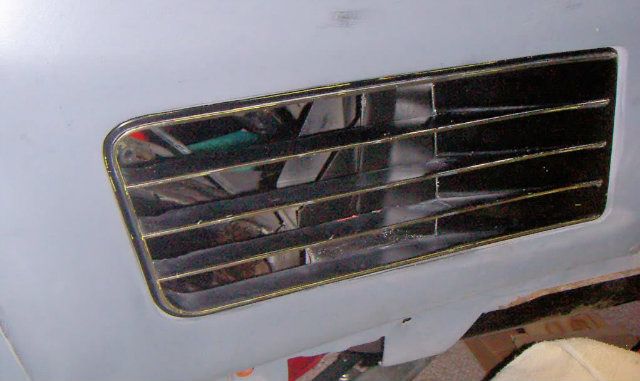
Once the eggcrate front grille was gone, I decided to hack up the side grilles and make them straight bar grilles as well.
SideVent.jpg


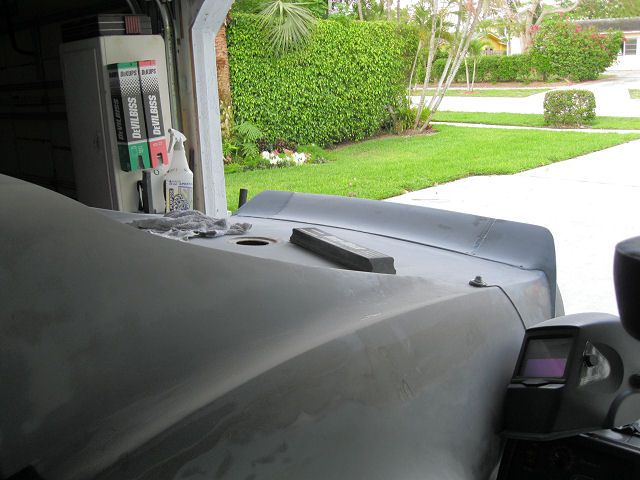
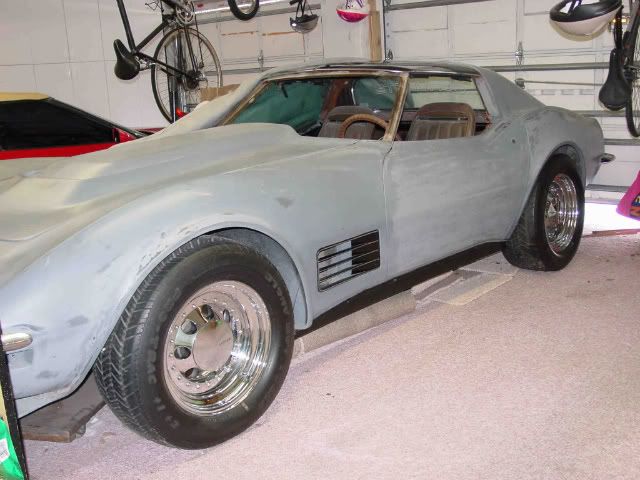
At an Eckler's open house I scored a mistake -- a long L88 hood that had the wrong mounting plates glassed in. A set of unilug 16-inch Cragar mags got added when it looked like a couple of quick coats of black lacquer would put the car back on the road.
CragarMags.jpg


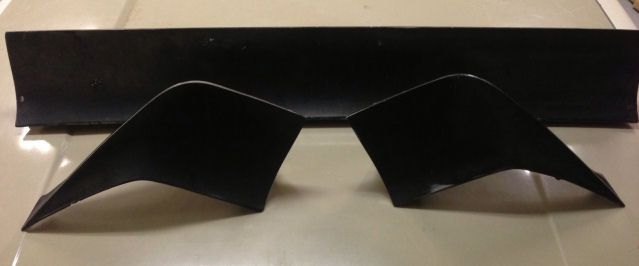
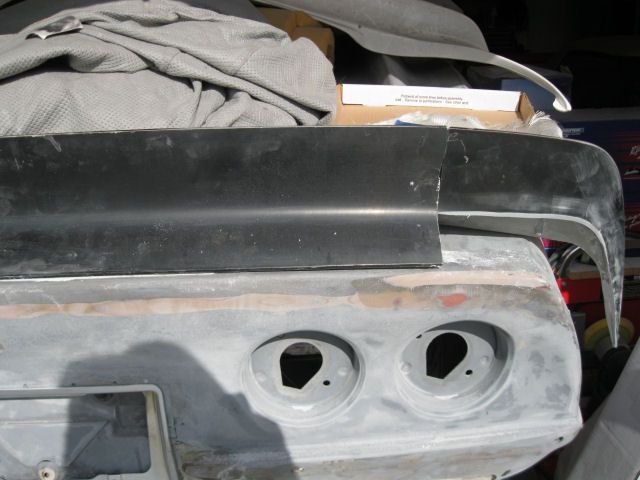
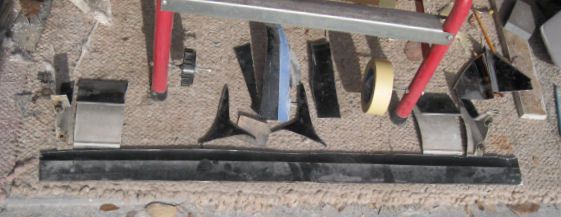
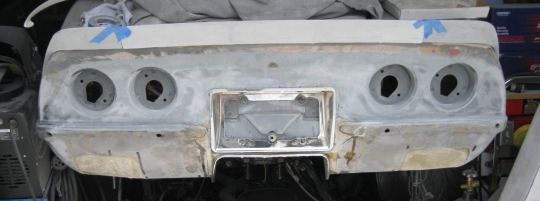
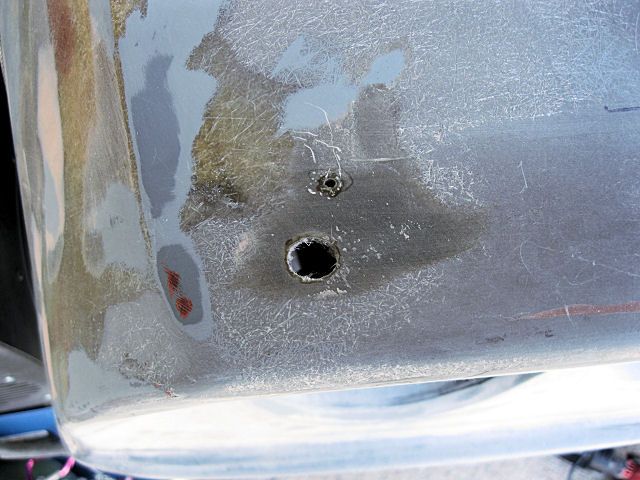
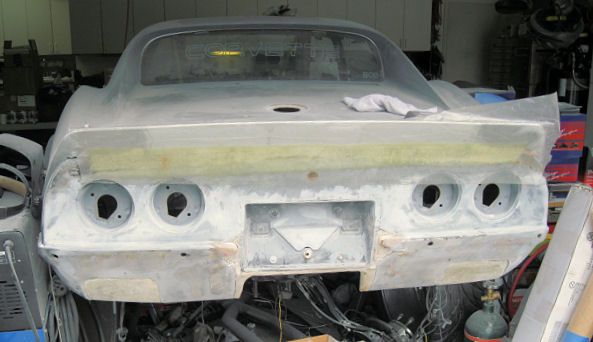
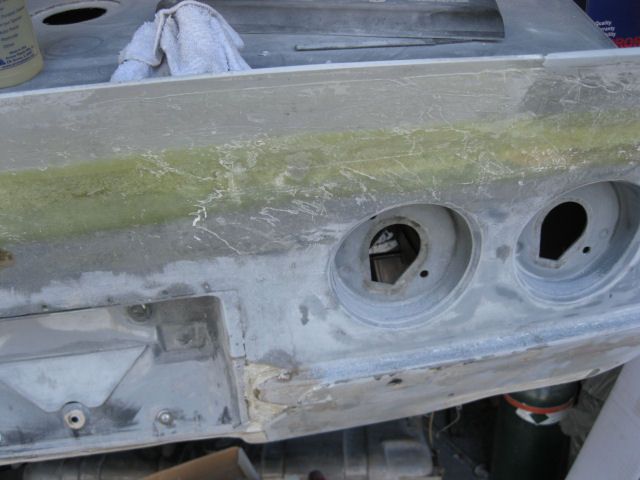
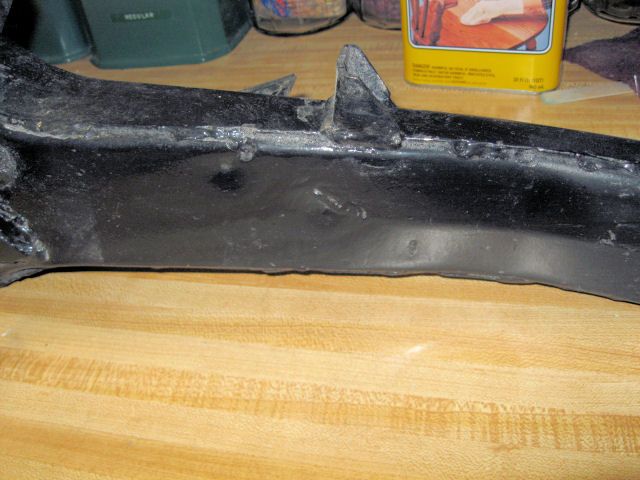
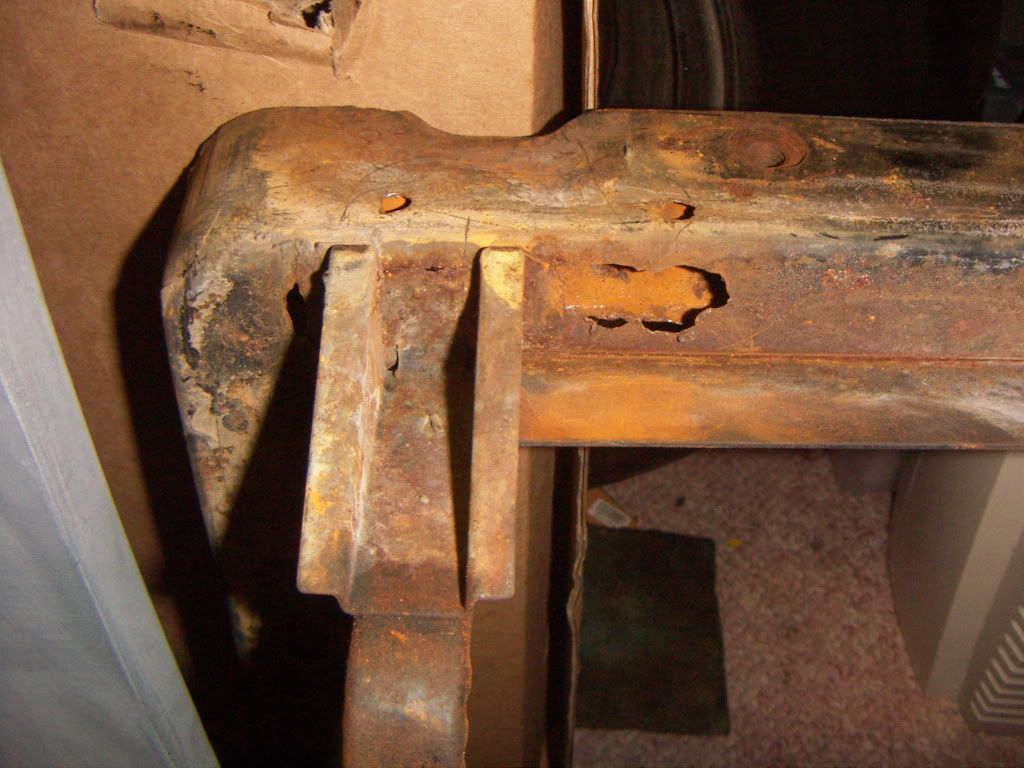
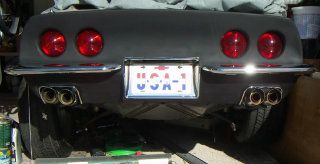
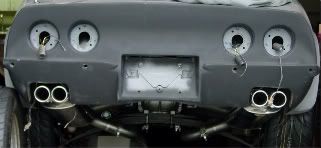
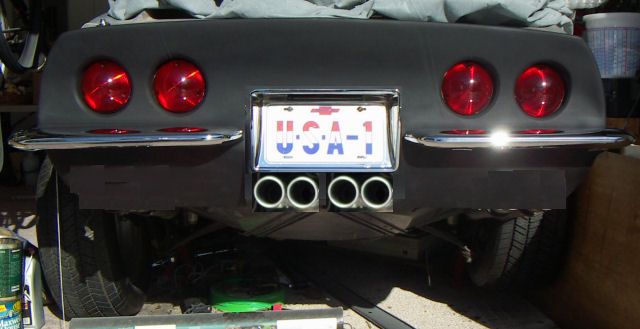
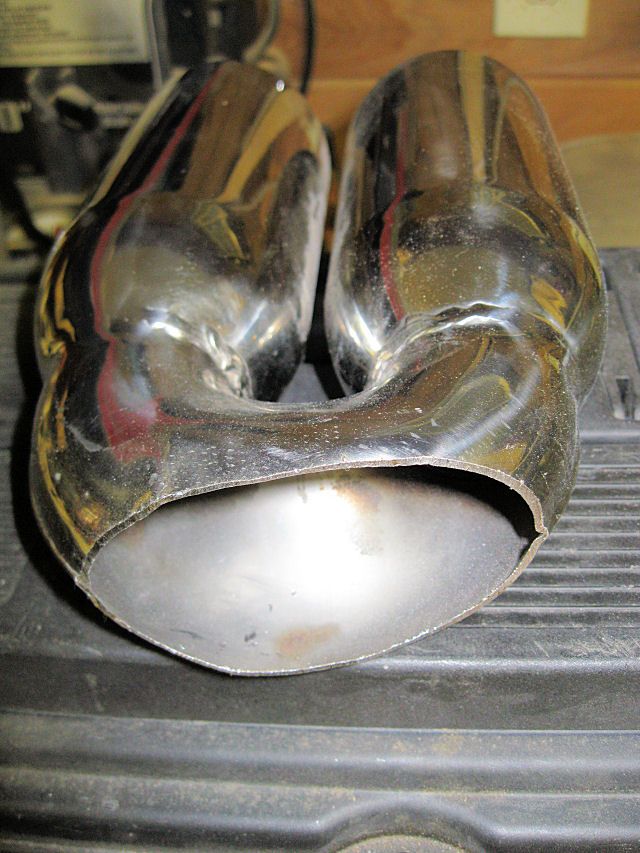
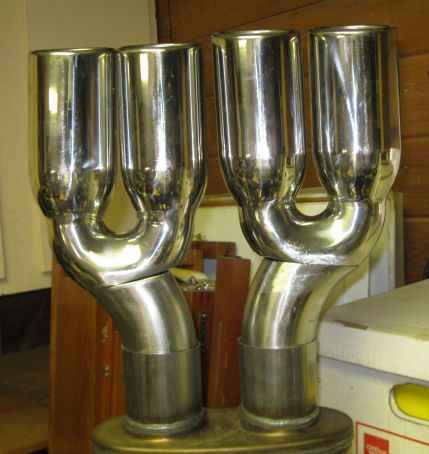
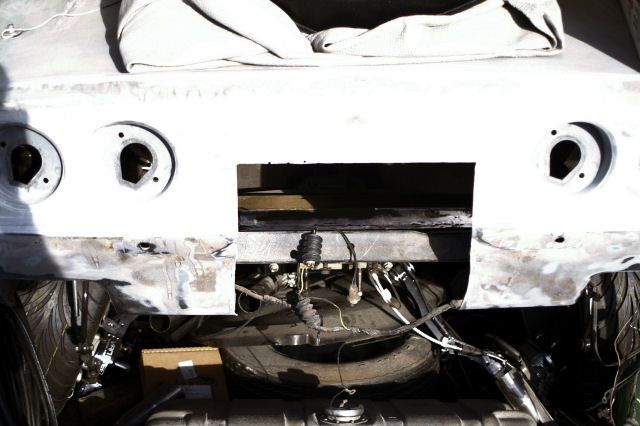
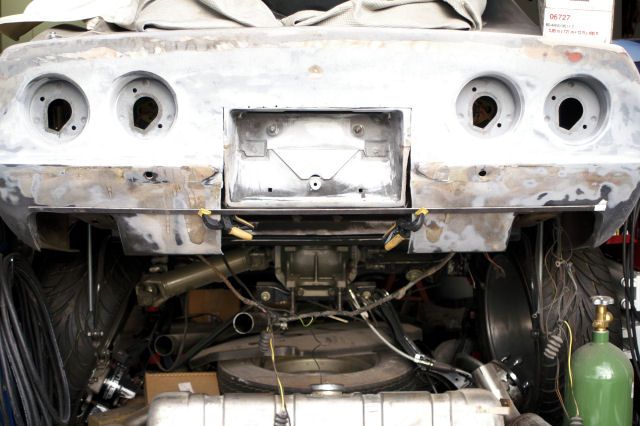
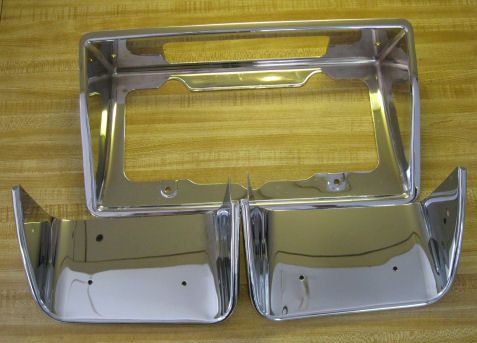
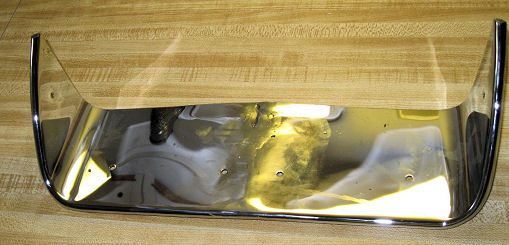
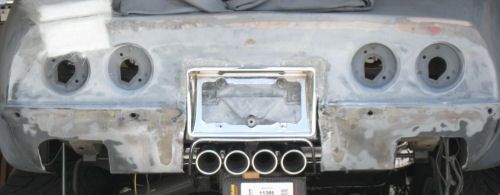
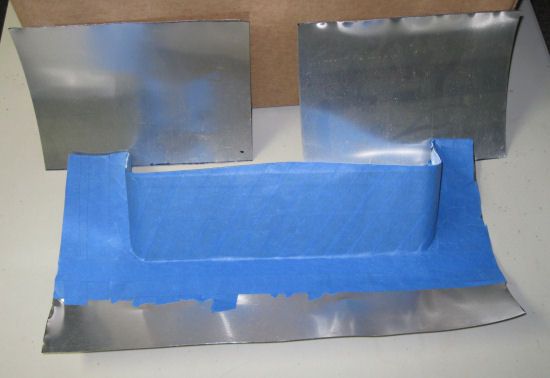
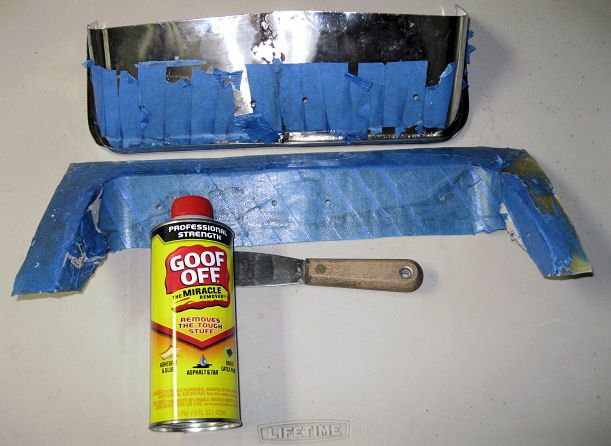
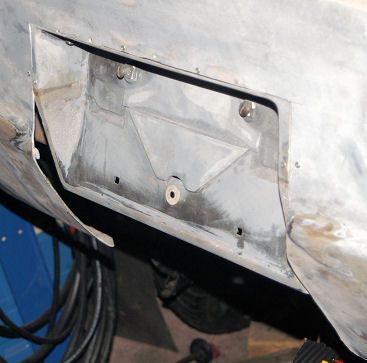
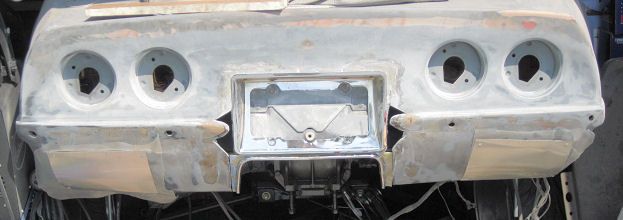
The rear bumpers had a bad case of acne. A friend gave me an equally ugly set of bumpers and decided to make a custom set from the two. Friend of a friend welded the pieces I cut back together. A few hours with hand files leveled the welds.
DSC00646.jpg


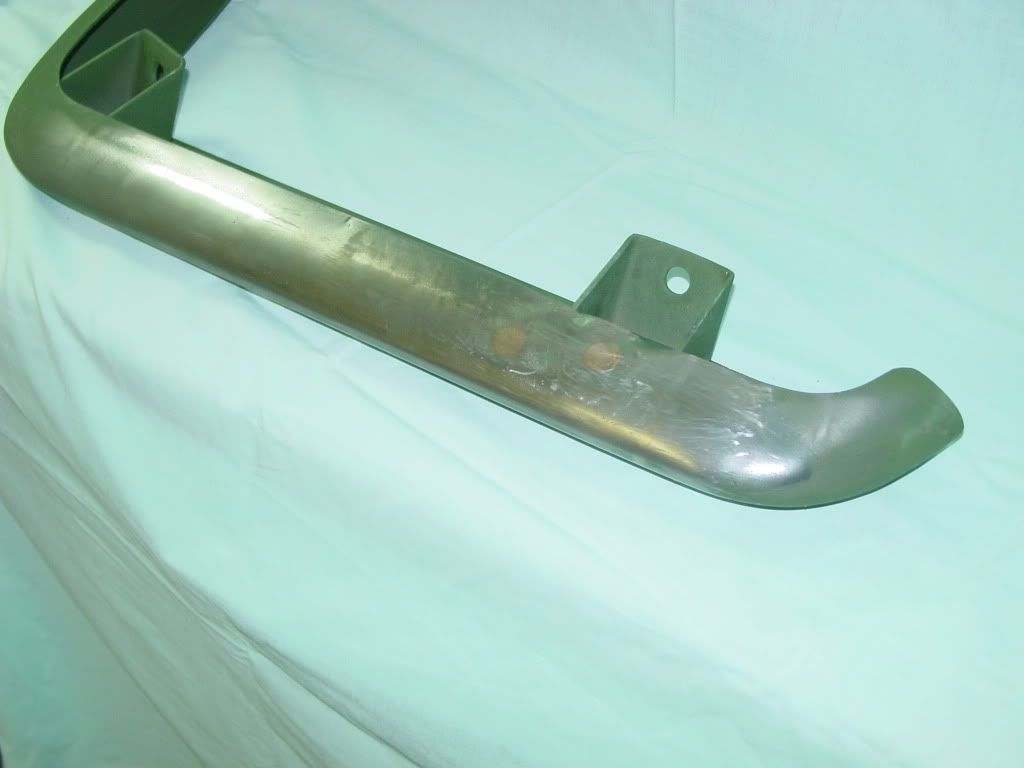
Because chrome plating was expensive back in the mid-80s I decided not to spend the $60 and just painted them black. Hey, the monochromatic look was gaining popularity.
RearView_zps08fede8e.jpg
 
A couple of promotions at work added responsibility for 60 people's work instead of just my own. Spare time became work time and my Corvette just sat. When I retired in the mid-90s I had lots of time but money was tight. I was happy to be retired at 50 but my pension was like living on welfare because I couldn't touch my IRA or 401k without penalties. Turning 59.5 improved things and getting Social Security at 62 put us over the top. Not rich, but more money than I earned working for a living.

For the last 6 years I've been buying tools and parts for my garage and car. Little by little I'm transforming the car into the one I've always wanted. I'm happy with most of the things I've already done but I also wanted to make some additional changes.

A free set of headers turned out to have some additional free-flowing outlets inside the collector so I bought a set of Hookers from Jet-Hot. I also bought a Magnaflow stainless exhaust system. I expected to cut the supplied head pipes and have adapters welded on. The pipes are meant for a standard transmission car and don't even come close to fitting my automatic. I cut some wedges out of one of the pipes and cut the other one in half to try to make the S-bend.
StainlessPipes_zpsd3faed04.jpg


When I brought my stainless pipe pieces to my local welder, he can't do the stainless until his machine gets fixed. The next welder estimates the two pipes to be at least $200, maybe more. I buy an $89 wire feed welder from Harbor Freight and buy some plain steel exhaust pipe from Advanced Auto. I know nothing about welding but figure the worst I can do is make a hot pile of junk. It wasn't pretty but after a few days I had something that sorta fit. Ordered a couple of J-bends from Summit Racing and made up an acceptable set of pipes that didn't look great but didn't leak.
SteelHeaderPipes_zps077ad107.jpg


Jet-Hot made them look better and their coating should help the car from becoming a sauna.
Exhaust.jpg


I'll never become a "certified" welder but with practice I should be able to improve my work. I had a momentary thought of getting a TIG setup but that process takes more practice and I can't find any instructions to do it one-handed.
 
I figured the $60 price to chrome plate my bumpers had gone up over the past 25 years but I wasn't prepared for reality. The local places I used to deal with are gone so I contacted Advanced Plating in Tennessee. They were very nice but until they could inspect the bumpers, the estimate was just a ballpark. The ballpark was almost $400 for each bumper (they were giving me credit for already having them de-chromed). Thinking they misunderstood my request, I explained I already had the bumpers and just wanted them plated. Yeah, that's just for the plating. A visit to a custom motorcycle shop gave me a lead to a tiny local shop that was still in business. Had I not gotten the quote from Advanced, his estimate of $400 for both would have seemed outrageous. They did a nice job and just to check out the look, I sprayed some flat black rattle can paint to see how it would look.
RearBumper-Small.jpg


I got side tracked with a couple of projects on my other cars. Both involved stainless exhaust work. Our PT Cruiser needed a better (read 3") downpipe on the turbo so I bought one from eBay. It didn't have a catalytic converter so I wanted to add one. I also wanted to put a set of stainless headers on my 87 Corvette. The head pipes on that car are only 2-inches at the manifold. Welding stainless steel requires shielding gas and my welder has no provision for gas. The bumper expense limited my options for a MIG welder and it occurred to me that I had no way to weld aluminum. Eastwood's 175 model was 220-volt and came with a spool gun for a penny less than $500, It worked well enough that I thought I could update the rear of the car with a center outlet exhaust.

Rather than guess or hope it could be done, I did a little cut-and-paste with Photoshop. First I needed a picture of the tips on the new Magnaflow system.
Exhaust002.jpg


It appears the center exhaust would work if I moved the license frame about 3-inches up into the rear panel.
CenterOutletExhaust_zps9f24a18a.jpg
 
I came across a post where another Corvette owner made the change but not for looks. He wanted to cut weight so he replaced the two stock mufflers with one dual-inlet, dual-outlet Magnalow muffler and saved 30 pounds. I'm starting with two of these:
MagnaflowMufflerforBigBlock_zpsbba45c7f.jpg


When I measure the tips, four of them is just under a foot across. That's the same width as the license frame so it should end up looking like the Photoshopped version. Unfortunately the centerline of the new muffler outlets are only 4-inches apart.
11386.jpg


The inside of the muffler is an x-chamber so the flow should be pretty good. I stared at the parts for quite a while and then just started cutting. The original tips needed an offset so I got rid of the original and used a piece of scrap stainless (remember that cut-up head pipe?).
SecondCut_zpsed822a91.jpg

Firstcut_zps9ab6b804.jpg


This is the "house of pipes" stacked up for a trial fit.
FirstMock-up_zpsfe0cf2ab.jpg


Lots of welding, cutting, fitting, grinding and polishing to the tips tacked to the muffler.
AlmostFinished_zpseda4ebbb.jpg
 
Once I proved to myself that the center exhaust would work, it was time to get out the body saw.
CenterExhaustMod1_zpsfd2d7b0e.jpg


A couple of tabs pop-riveted to the fiberglass and the initial alignment verified and the license frame was relocated.
CenterExhaustMod3a_zpsae2e7c22.jpg


I like the stainless bezels that surround the stock exhaust openings so I cut up a new pair and welded them together to make a single bezel for the new exhaust.
Bezels_zpsf0c850dd.jpg


ExhaustBezelFace_zps67041134.jpg


A trial fit using boxes and blocks of wood lets me know it's good to go.
NewRearView_zpsc604967f.jpg
 
The new bezel becomes the form for the fiberglass surround that needs to go into the space under the license frame. I don't need to make more than one of these so I just used blue tape and some very thin aluminum flashing to create a rough form. To make sure the fit wouldn't be too tight, I put multiple layers of tape on the form.
MoldforBezelSurroundwithstockopeningplates_zpsb11ae308.jpg


To pop the fiberglass off the form, I just used Goof-Off and a putty knife.
ReleaseTools_zps0bc8d6bc.jpg


After some sanding and cleaning, the piece was fitted to the opening. Moving the license frame higher in the rear panel created a gap in the panel close to the bumper fairing. I decided to cut notches so the panel could be faired into the license frame. I guess I could have just done away with the chrome license frame and built out the fiberglass but I actually like the chrome on the car.
CenterExhaustMod4c_zpsb8e57c1f.jpg


While I was at it, I cut the flanges off the original openings and pop-riveted aluminum flashing lined with wax paper over the openings so I could glass them in from the back side. Did the same thing with the holes next to the license frame after taking this picture.
PreppedformoreGlass_zps1327aedd.jpg
 
The fiberglass went on pretty well. Just as I was finishing the driver side exhaust opening, the epoxy kicked off and I didn't get a good soak of the matte. I went back the next day and re-did the patch. Now I have a last pair of gaps to fill.
CutFreshFiberglass_zpsa1dade0c.jpg


Obviously a piece of flashing and some more wax paper is going to be used. Blue Tape keeps some tension on the flashing so it doesn't move when I am glassing from the back side.
FormTapedinPosition_zpseaf917a6.jpg


Everywhere I use the wax paper SPI Waterbourne Wax & Grease Remover gets a workout the next day.
 
I should have been satisfied with this center exhaust change to the rear of the car but I remember the Motion Corvettes from back in the '70s. I wasn't crazy about everything on those cars but I liked one of the rear spoiler they used. This car reminded me of that look so I decided to give it a shot.
69blackbigflaresback.jpg


I recognize the lines of the spoiler. It's a design used on the early 70s Camaro. Where better to look for one than on eBay. I found one for $50 (including shipping) and the seller was local to me.
0-eBayFind_zpsf8bfce35.jpg


It's wider than my Corvette by several inches so I know I'm going to have to cut it up. I started by cutting the passenger side fender piece (the spoiler has two fender pieces and a trunk piece).
3-RightSideAlignment_zpsbec1ebce.jpg


Turns out this is not for the feint of heart. I started with the body saw and moved up to a Milwaukee power hacksaw and finally ended up with a pneumatic cutoff tool. The cutting room floor was filling up fast.
5-CuttingRoomFloor_zpsce95891f.jpg


As the pieces started fitting better, my tools changed to all kinds of sanders, from bench belt to DA and 3M 3-inch 50-grit Green disks. Had to cut and grind out all of the original mounting bosses because they prevented the spoiler from fitting the small spoiler lip on the Vette. The paint on the spoiler didn't respond well to the heat gun and razor blade so I just sanded it off with a DA and some 80-grit. Blue tape, as Shine says, is my friend and it helped hold the spoiler in place while I checked the look.
6-Tapedtogether_zps68e433a8.jpg
 
Spent some time lining everything up and discovered that the spoiler has all kinds of different tapers, The fender pieces also turn out to be slightly taller than the trunk piece. I realize that the Camaro fenders fall away from the trunk so that made sense. I decided to make my alignment as close to perfect on the front side and fill the back side as needed. A couple of alignment lines measured from the backlite established the spoiler's position.
7-PopRiveted_zpsc8b5a7a3.jpg


Once everything lined up, I pop-riveted the spoiler to the body. To get the sides to match the body line better, I wedged it enough to slide a piece of 80-grit PSA paper between the spoiler and body. I sanded until I could remove the wedge and still move the sandpaper. I also used a level to line up the end of the spoiler sides with the bumper mounting bolt hole below it. When everything lined up, a couple of extra rivets locked it down.
FinalFitting_zpsa837e7a6.jpg


I planned to use Evercoat Vette Panel Adhesive to bond the spoiler to the body. I purchased a quart about two years ago for another part on the car but got sidetracked. The cream hardener tube split open at some point but that was no big deal – the hardener needs to be fresh – so I ordered a new tube. Before I experienced a failure with the spoiler, I wanted to test the Evercoat on that other part. It’s a speaker enclosure for the 4”x10” rear speakers I wanted to mount on the back wall of the passenger compartment. A sane person builds an enclosure and slides it into the back of the car but I make no claim to being sane.

I mixed up a batch of Evercoat. The instructions are very specific on the mix ratio (2% by weight) but obviously I exceeded that amount because it kicked off in less than 10 minutes and had no adhesive quality left. I scraped off the adhesive and decided it was too risky to use on the spoiler. I bit the bullet and bought a professional grade adhesive, gun and a bunch of extra nozzles. For a couple of reasons I chose Lord Fusor SMC Repair Adhesive (Slow) - T21 and their gun along with an extra dozen mixing nozzles. I’ve spent more than $150 just for the adhesive to attach the spoiler. It’ll be worth it if the spoiler is bonded securely to the car. After waiting another week (if it isn't my new kidney, I don't pay rare wine prices for faster delivery) I had my glue and gun.
Adhesives_zps91c0e1f6.jpg


I drilled out the pop rivets that were holding the spoiler pieces in place. With the spoiler out of the way I drilled two holes in the rear deck under the area where the spoiler mounts. Hopefully these 9/16” holes will prevent pressure from building inside the cavity between the body and spoiler. I pictured the spoiler swelling and then exploding off the car on a hot day if there were no vents.
VentHole_zps70ffd802.jpg


With fresh rivets lined up, a couple of washings with SPI Waterbourne and a rest break, it was time to attach the spoiler for good. Expecting the worst, everything went fine.
GluedDown-Right_zpsec7b27c0.jpg


Not wanting to push my luck, I picked up my tools, put everything away and closed the garage doors.
 
I’m not sure when it happened but I managed to lay a nice bead of Lord Fusor adhesive on the fender of my ’87 Corvette. I didn’t notice it when it happened so it had a full 24 hours to harden up. I’ve gotta say, this stuff really sticks – to paint and whatever else it touches.
1Start_zps2c2d67ed.jpg


The same time I discovered this mess it started raining so an otherwise lost chunk of time got filled. I started sanding with 400-grit but the thick gob on the left was certainly going to end with me cutting through the clearcoat and make a disaster even bigger. I heard Shine outside, in the rain, yelling at me to put a piece of blue tape over the gob and sand through the tape. It worked like a charm. I used a small block with the sandpaper stuck to it to take off the vast majority of the adhesive.
2Progress_zps6c73b3f6.jpg

I switched to 600 wet and when the adhesive was almost transparent, I removed the tape and moved up through 800, 1000, 1500 and finally 3000 Trizact foam. I probably should have used 1200 and 2500 steps as well but I don’t seem to have any of those grits lying around. I finished it off with fine and ultra-fine Chemical Guys compounds using my buffer on slow speed, followed by the D/A polisher with some swirl-remover for the final step.

3Finish_zps1627f3cd.jpg

If it wasn't for the time I've spent on this forum, this would have been one hot mess.
 
After our deluge let up, I opened the garage and checked the spoiler to see how solid it was. I’m not sure but it feels like the spoiler will break before the adhesive gives up. It was time to fill the gap between the spoiler and the rear panel. That gap is about two inches by four feet and I’d like to fill most of it with one piece of fiberglass. I rolled a four-foot piece of wax paper out on the workbench and cut two pieces of fiberglass mat about 3”x42”. I mixed up a small batch of epoxy that should saturate at least one piece. If there’s any epoxy left over, I’ll soak the second piece.
GlassPreparation_zps1b181984.jpg


It turned out there was just enough to soak one piece so I set the second aside and transferred the strip from the bench to the car. The wax paper helps a lot because I can move and smooth the fiberglass once it’s on the car. When I work directly with the fiberglass I end up with lots of high and low spots because it sticks to my glove or whatever tool I use to work it. Working with a bigger piece of glass also seems easier with the wax paper backing. On the down side you have to be careful to remove all traces of the wax with each layer.
12GlassPlacement_zps68d1f228.jpg


The fiberglass doesn’t cover the length of the gap and the piece I cut is bigger on the left half. I realized that the ends are a more complex shape and I really need to study that area before I slap fiberglass in there. The wider section will have to be sanded off but that shouldn’t be a show-stopper. The hard part is going to be shaping the rear panel so it flows nicely into the spoiler. I think that’s going to be a challenge.

The coating of wax on the paper bonds with the fiberglass better than I would like. The paper doesn’t just fall off so it has to be peeled off a little at a time. As I was removing it, I also noticed a dip in the fiberglass that actually formed a large bubble. It came from the fold in the matte that you can see a couple of pictures back, right next to my epoxy mixing cup. I'm going to order a roll of 4-mil Visqueen for the next phase.
13WaxPaperRemoval_zpsac15b0bd.jpg


After I got the wax paper off, I washed the panel a couple of times with the wax and grease remover. Then I decided to block sand the panel a little to see how bad it’s going to be. I used a long board to even up the profile on the top edge of the spoiler. Doing that caused the two fender pieces to have a thicker edge than the center piece. Some time with the long board and they match up much better. There is also a noticeable taper where the pieces meet up. I think some fiberglass and epoxy resin will straighten that out. I don't plan to use regular body filler so this is going to require quite a few batches of epoxy resin and fiberglass matte. When it gets to the point of needing some filler, I have microsphere powder to add to the epoxy.

From the front side of the spoiler, it's looking pretty good. Just needs a few layers of fiberglass to eliminate the step. May need some veil cloth to bridge and tie the different pieces together.
15Bonded_zps246df445.jpg
 
Thanks Crash,

I'm having a ball.
I should be mowing my lawn or playing golf but Benny Garcia and his crew take care of most of the yard work and I have to agree with that guy on the Sopranos, who said: "Golf is a stupid fking game!"
 
Ash,

Thanks for the compliment. I figured I should post something about what I'm doing even if it isn't actually spraying SPI products. Beyond just sitting at my computer, I actually am working on my car.
 
Before I found this forum and more importantly before I tried SPI epoxy primer, I spent(?) my money at Eastwood. I still buy a few things from them but I no longer fall for their miraculous fluids. Going back about five years....

After 25 years up on blocks, I got the big block running again. I did the oil change, primed the oil system, pulled the plugs and squirted some Marvel Mystery Oil in the cylinders. Hand cranked it though a dozen rotations and static timed the distributor. Added a couple of gallons of gas to the tank and gave the carb a quarter cup. Fresh battery and it fired on the second try.
Overhaulin007.jpg


With the car on jack stands, I started inspecting the running gear. I vaguely remembered a rumble in the rear back in the 1980's. Figured I'd just grease the wheel bearings and they'd be fine. To use the plastic gizmo that is supposed to let you add grease to the bearings you have to remove the hub flange. When I pulled the half-shaft on the driver side, I noticed there was no cotter pin in the retaining nut. Not feeling real good, I also noticed there is no seal behind the flange. Decided to pull the whole trailing arm and have a better look.

When I bought this car in 1978 the previous owner gave me a stack of receipts and among them was one for a rear bearing replacement. Looks like the shop that did the work didn't have the tools or experience to do the job. Instead of using the expensive and unique bearing press Chevrolet recommended, they used their Big Fat Hammer.

There wasn't supposed to be any play but when I checked, it seemed to have a LOT. I decided to remove the axle stub and ended up having to use my own BFH to remove it. It eventually came out but it didn't look good.
002.jpg


I thought I could do the job myself. Took it all apart and bead-blasted the trailing arms as well as the hub and flange. Ground the ugliest flashing off the bearing carrier and put some Eastwood gloss chassis paint on the trailing arms. I then proceeded to replace the pivot bushing on the trailing arm.

When I searched the internet for the tools and gauges needed to properly set up the rear axles, I was shocked. It was going to cost me almost $800 with no guarantee they would be done right. Found a shop on the internet that would install new axle stubs and bearings on both sides, true the hub face and put new studs, dust shields and e-brake hardware and shoes for less than the price of the press and setup tools.
20090728_0185.jpg


I probably could have done this job myself but I learned that the original brake rotors on these Corvettes were riveted and trued to the axle flange at the factory. Slapping a new rotor on a rebuilt trailing arm may or may not need truing. I don't have that kind of equipment and based on my limited experience with local shops, they don't either.

At the time I didn't have any kind of welder so I farmed out another small job. The e-brake cable housing on these cars goes around the bottom of the trailing arm and across its face. Almost any kind of wider tire rubs on that cable. I decided to cut the emergency brake cable guide bracket off the face of the trailing arm and marked the corresponding spot on the top of the arm where it needed to be attached and took it to my local welder. For $35 he welded the two brackets on.
RelocatedBrakeCableBracketWeld_zpsf6ad61a8.jpg
 
I have the uncanny ability to turn every small job into a big one. I wanted to drain the coolant from the radiator. When I went to open the petcock, it wasn’t there. Then I remembered. I was getting the car ready for one of the last events we took the car to 25 years ago and noticed a small puddle of coolant on the garage floor. Figured it was the petcock so I snugged it up by hand. It was still leaking so I used a pair of pliers and the whole petcock assembly came out of the radiator. I rushed to the parts store and bought an emergency rubber plug and installed it. No big deal, I just cut the plug out, showered myself with antifreeze and quit for the day.

Started the next day in a better mood. I removed the hood and pulled the A/C condenser. I noticed a small rust hole in the radiator support so I pulled both the radiator and the support.
Had a radiator shop braze in a new petcock and backflush the radiator. While the shop had the radiator, I inspected the support a little more thoroughly. The side I couldn’t see when the radiator was in the way was Swiss cheese – with very little cheese left.
RadiatorMountPS.jpg


Ordered a new support and decided to make lemonade out of my lemons. The wide open engine compartment was a perfect opportunity to clean up the front crossmembers and the front of the engine bay.
CoolingOut.jpg


I also took the pulleys and brackets off the front of the engine, figuring I'd freshen them up with a little paint. Once I had them off and bead-blasted clean, I had the bright idea to have some of them powder-coated "chrome" (the idler pulley has a bearing so that piece had to be painted). When I got the estimate from the powder coater, half those pieces came home with me. Twelve "prepped" pieces still cost $80!
EngingBracketsampPulleys_zpsb39d9aa7.jpg


These were my "Eastwood Years" so the prep work was less than poor but I now realize their chassis paint is a poor substitute for SPI Epoxy Primer.
018.jpg


When I installed the shiny fresh pulley on the water pump, it made a scraping noise when I gave it a test spin. Thinking it might be the powder coating, I took the pulley back off and turned the pump by hand. The scraping noise was still there and coming from inside the pump. I ordered a new aluminum pump along with a new Summit aluminum dual-plane intake. Summit sent a cast iron pump so I sent it back (their description was wrong). The correct aluminum pump was back ordered so I waited... and waited...

While I was waiting for the pump, I polished the new intake manifold.
StartofPolishing_zpsfdafdf1d.jpg


I may have gotten carried away, even grinding off the nitrous bosses (I won't be needing those). I bought the higher-rise manifold to replace the old Edelbrock Streetmaster II a friend gave me.
SummitvsStreetmasterIIIntake-640_zpsb2dc3558.jpg


When I originally installed the Streetmaster II, I didn't know much about port matching and apparently neither did the folks at Edelbrock. This is how the ports lined up with the intake gasket.
StreetmasterIIPortMatching.jpg


I tried to do better.
SummitPortMatching.jpg


While I was at it, I polished my old Cal Custom valve covers.. The one on the right is finished. The one on the left is just like it was for the last 25 years - a coat of wrinkle paint over some pretty dull aluminum (I bought them for $10 at a swap meet). When it's done it'll look like the one on the right, which is a pretty close match to the air cleaner cover.
20090727_0190.jpg
 
Bob,
Thanks for the compliment. It's the original oval port big block. When I helped my friend rebuild it, it was his first big block. He had upgraded his father's small engine machine shop with a bunch of Sunnen equipment so he could build small block Chevy engines for the local circle track racers. I felt bad because he didn't charge me for any of the work and he bought a big block torque plate to hone the cylinders after squaring the block. He also bought the boring and honing bar for the mains to true them up. I got over feeling bad because he went on to use those fixtures to build a bunch of offshore powerboat big blocks and made a bunch of money.
 
Back
Top