68 el Camino Resto-Mod

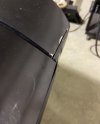
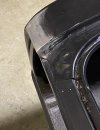
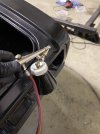
I mixed it 1:1, no reducer. Sprayed just fine out of my airbrush.

Thanks for the airbrush tip. It worked great for epoxy where I'd been working on the trunk opening and didn't want to set up the whole spray rig. Nice that it takes 30 seconds to clean up as well!
 

Attachments

  • airbrush 2.jpeg
    airbrush 2.jpeg
    138.4 KB · Views: 52
  • airbrush 3.jpeg
    airbrush 3.jpeg
    305 KB · Views: 51
  • airbrush1.jpeg
    airbrush1.jpeg
    116.1 KB · Views: 50
It's all about the little victories.
Of all the complex electronics I added, the wiper circuit stumped me the most.
Painless kit instructions were useless.
Light finally came on when a buddy told me the motor has constant power, the switch supplies ground for various modes.
Finally got it working.

 
Dash is installed, hopefully for the last time. Everything seems to work.
Now I can install the steering column (after I repaint it :rolleyes: )
Then just hook up the brake lines, bleed them, and go for first test drive, after I get the seats back.
Fun times!

 
I posted before about making a custom console. It's almost done and ready to get wrapped in leather.

20240227_174119.jpg


Mike the upholstery guy will sew a custom shifter boot, but I needed a trim plate for the boot.
Couldn't find any that were the correct dimensions.
So I used SendCutSend.
Sent them a drawing with dimensions and they created a CAD file, then cut it, deburred and black anodized it.
Came out great!
I also found a cool site called Monster Bolts and got stainless mushroom head Allen bolts to hold the plate down.
Just what I envisioned.

20240227_173553.jpg
 
Tilt steering column got scratched up during test fitting, so repaint, sigh.
And first paint job was black base and universal clear, very glossy.
Since the dash is matte it makes sense to have this match anyway.
So, sand it down, prep and shoot epoxy. Thankfully I've finally got a handle on getting coverage without catering.
3 coats tonight, base tomorrow, matte clear on Monday, then install without scratching, hopefully.
20240302_181407.jpg

20240302_181333.jpg
 
Finished painting the steering column.
SPI is my first choice always, but when I want a matte clear I just want to keep it simple so stick with a supplier that has all the components in their line. I used Lumabase (which I've used before and it is OK) clear, activator and matting agent. It's nice because they have complete documentation on the ratio's for various gloss levels. I went for 60% gloss and it came in just how I wanted it.

Nothing's ever easy on restorations/customizations is it? I have an upgraded high-ratio steering box from Lee Power Steering, custom tilt column and a custom steering wheel. Piecing in all together was a puzzle for sure. And just as I was putting the last parts together on what should be the simplest step, bolting on the steering wheel, wouldn't you know that the allen head screws from the steering wheel supplier were 1/8" too long for the hub from the steering column supplier? Of course! :rolleyes:
So, I had to grind them down and dress the threads to get them to work. Jeez . . .
And, replaced the turn signal stalk that came with the column with the cruise control stalk from Dakota Digital.
Yeah, this 1968 car will have Cruise Control!
You ever tried to thread a wire bundle down through an assembled steering column? Not easy :mad:

Anyway, it all came together and I like the look! Should match up nice with the custom console I'm doing etc.

Steering Wheel 1.jpg


Steering Wheel 2.jpg


Here is a quick video if you are interested:

 
look good dean. putting a steering column in by yourself without scratching takes some planning
Thanks. Lot's of shop towels taped around things it could touch.
Holding up the column and bracket and then starting the bolts is definitely a 3 handed job and takes some creativity :)
 
Bonus points if you know what this tool is:

Brake Tool.JPG


Never thought I'd be using it on a car with Wilwood 4-wheel disc brakes.

The rear end is a Ford 9-inch unit and the parking brake is a drum inside the rotor hub. Kinda cool, but I thought I was forever done with those stupid star wheel drum brake adjusters. Send in the "engineer" who came up with this. I have words for him . . .

Meanwhile I had to patch together a parking brake cable system that would work with the GM pedal and the Ford 9-inch housing and the Wilwood calipers. Little of this, little of that, and I think it is going to work.
 
Bonus points if you know what this tool is:

View attachment 30276

Never thought I'd be using it on a car with Wilwood 4-wheel disc brakes.

The rear end is a Ford 9-inch unit and the parking brake is a drum inside the rotor hub. Kinda cool, but I thought I was forever done with those stupid star wheel drum brake adjusters. Send in the "engineer" who came up with this. I have words for him . . .

Meanwhile I had to patch together a parking brake cable system that would work with the GM pedal and the Ford 9-inch housing and the Wilwood calipers. Little of this, little of that, and I think it is going to work.
i have one. =)
 
Back
Top