Skinning doors

CJK440

Promoted Users
Soon I will be attempting to skin 2 mid 70's camaro doors. The shells have been blasted and will be sealed with SPI epoxy. The skins, I plan to scuff the EDP on the inside and seal with a light coat of epoxy.

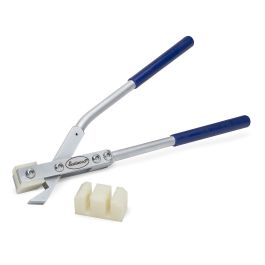
I'm following 3M's tech sheet for this and am going to use 04274 NVH dampening material and their 08116 panel bonding adhesive. I also bought a skin zipper thing for an air hammer which is supposed to make folding the skin around the frame easy.

I've used a panel adhesive once before for trunk dropoffs (Fusor) and it needed to be down to bare steel but that is different than what I am doing here. Considering the door skin will be crimped all around and even tack welded up top like the factory did, I was just going to use the 3M panel adhesive right over the epoxy. Any issues with this approach?
 
Panel Adhesive for door skins is a relatively new thing. OEM's started doing it in the early 2000"s. Originally your Camaro doors did not have it as it didn't exist. I would not use it for your application as it is a "one and done" type deal. Once it's on there it's not coming off without acetylene torch type heat. It is also messy and you have a limited time to turn the flange. As for the NVH, use the NVH material against the door reinforcement in the center, nowhere else.
Main reason for it's use on OEM stuff is corrosion protection. I would recommend that you epoxy the inner door and epoxy the inner skin. That would be sufficient and provide excellent corrosion protection. It would also look more "original" than it would using adhesive.

Have you ever done a door skin before?
 
First time.

I figured some other sealant/sealant was used back in the day and thought I remember some redish looking compound that I had to clean off. If I skip the panel adhesive are you suggesting to install it "dry"? I assume something other than the pinch of the skin is needed to keep things in position. When a took off the skin a while back I didn't remember if there was something like a few tack welds but on the blasted shells I see some evidence of small dots of brazing on the bottom of the frame.

Or perhaps I use put a small bead of seam sealer on the face of the shell flange which will provide ample working time and eventually dry and provide some grip?
 
Last edited:
First time.

I figured some other sealant/sealant was used back in the day and thought I remember some redish looking compound that I had to clean off. If I skip the panel adhesive are you suggesting to install it "dry"? I assume something other than the pinch of the skin is needed to keep things in position. When a took off the skin a while back I didn't remember if there was something like a few tack welds but on the blasted shells I see some evidence of small dots of brazing on the bottom of the frame.

Or perhaps I use put a small bead of seam sealer on the face of the shell flange which will provide ample working time and eventually dry and provide some grip?

The skin is held in place by turning the flange and getting it tight against the inner door frame. Any welds you see are secondary reinforcements.
 
Seam sealer isn't going to provide any grip. You can use a two part seam sealer after you turn the flange to seal the seam like on modern doors.
 
Being this is your first time your main concern should be on turning the flange and not destroying the skin when doing so. Adding panel adhesive to the mix complicates things.

Use a flat dolly or a nice clean 2x4 piece of wood and hold it on the edge of the skin to support your hammer blows. I'll post a pic later to show the proper angle. If you hold it flat against the skin you will dent the skin as you install it. Need to have the proper hammer as well.
 
I bought one of these and was going to use it to get most of the flange turned. I also have a door skin hammer and dolly set.

1646488631219.png


I have never seen a body man use one of these, but have seen some try various "time savers" that only got tried once then put in the back of the tool box. It may work in some areas, but nothing will replace some hammer and dolly work. I had a body man that was the best I have ever seen at replacing door skins. He used a dolly wrapped in a piece of old t shirt and a regular body hammer and never once do I remember him using any filler on the outside of the skin. Most of the time the primer was not even scratched. He showed me how he did it, and the key was folding over the skin in several steps and keeping the dolly firmly against the skin. He usually went around the skin about 4 times, folding it over more each time. If you did use 8115 , it is critical to mount the door after skinning to line up the door before it dries. The shell can twist and once the 8115 dries, it can not be untwisted easily. If you put it on dry, as Chris suggested, this will not be a problem.
 
When I replaced the door skins on my 67 Camaro, I used 3M 8115 panel adhesive and AMD reproduction door skins. If I remember right, the adhesive had to be on bare metal so when I prepped the inside cavity area and sprayed epoxy, I had the panel contact areas taped off and scuffed the e-coat off the skin edge. I checked the panel fit a couple of times before proceeding with the adhesive application step. The 8115 has a working time of 90 minutes so you have to move quick and accurate. I also have the Zipper and it works good at setting the initial edge fold angle and followed up using a few passes with a pneumatic skinner. Before using the zipper I did tap the skin edge with a door skin hammer to begin the fold from 90 to about 45 degree angle. This helps the zipper to start and also cuts down on the time spent crimping (remember you only have 90 minutes) and also locks the panel position in place. The reason for the two tools is because I found the Zipper didn't have a wide enough opening in the 'thick' Step 2 area to slide over the folded edge for the final crimp. My thinking is that the Zipper is meant for newer vehicles with thinner sheet metal vs. the thicker gauge of classic cars. For the edge corners and the curve area near the front top I used a hammer and dolly to finish the crimp. The very top inner tabs were welded to the door shell as was done by the factory. Like Chris mentioned, you need to be mindful at the angle otherwise you can get low spots along the outer edges that will need filling. I'm not an expert with the hammer/dolly method for crimping because I don't change skins often, so the zipper & pneumatic worked for me for the small working window when using an adhesive. Also.....wear ear protection because when using an air tool to crimp, the hollow door cavity and panel will resonate while crimping....and loud!

Depending on how accurate a look you want to go for, to duplicate the factory spot welds along the skin edge (which were barely visible originally) , a trick is when spraying the door with epoxy after skinning, spray an extra wet coat of epoxy along the seam edges and when it has just flashed, use the smooth bottom of a ball point pen -or- a new pencil eraser end and give a firm single tap to create a low spot. Once the epoxy dries and you top coat it afterwards, those low spots will remain and give the factory round weld look.
Once the car is top coated and before the interior is installed, I sprayed a coat of cavity wax along the door cavity inside edges to further seal them.
Good luck with whatever method you choose.

Mike

 
I did my first door skin last summer.
The advice you are getting in this thread is great.
That skin zipper goes on an air hammer, which is a pretty brute force approach. It would scare me.
The approaches above use finesse, it takes very light hammer taps on the lip.

I used the Eastwood manual skinning tool.
Had to hammer and dolly the lip most of the way, but the tool made the final pinch very nice and uniform.
It has a hard nylon block that goes against the outer skin and prevents any gouging.
 
I still need to do this on my Camaro. I bought some fancy tools, but after seeing Jubee skin a door with a block of wood, I think I'll go that route, especially for my first time. I bought a real cheap skin just to try on a junk door to get the feel for it. The fancy tools would work great in the hands of someone that has done many. I bought the door zipper too. I dont see how it would work on these older cars. Seems the metal is heavier.

. Start at 24:25. Some really good footage. Our camaro skins differ at the top. They just get pinched and welded along the door frame. I plan to use some clamps and start in the center and work my way out while its on the car.
 
Years ago working at dealers body shops I did a lot of door skins and like Chris said dry fit first but most of what I did was damage and even did a lot of the panels with never talkiing door off the car. Clamps with wooden paint sticks and gental taps with clean face body hammer and masking tape on a flat block or dolly. Sem and others have door skin adhesive but can be messy
 
Back
Top