need advice on this door

R

rayfrausto

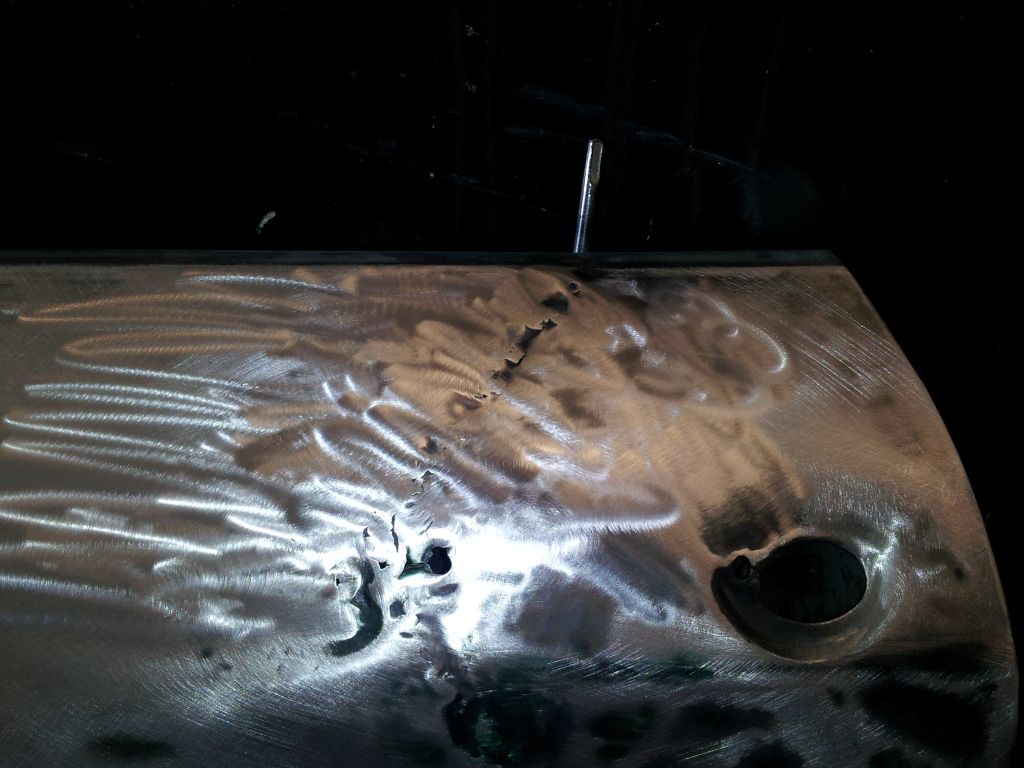
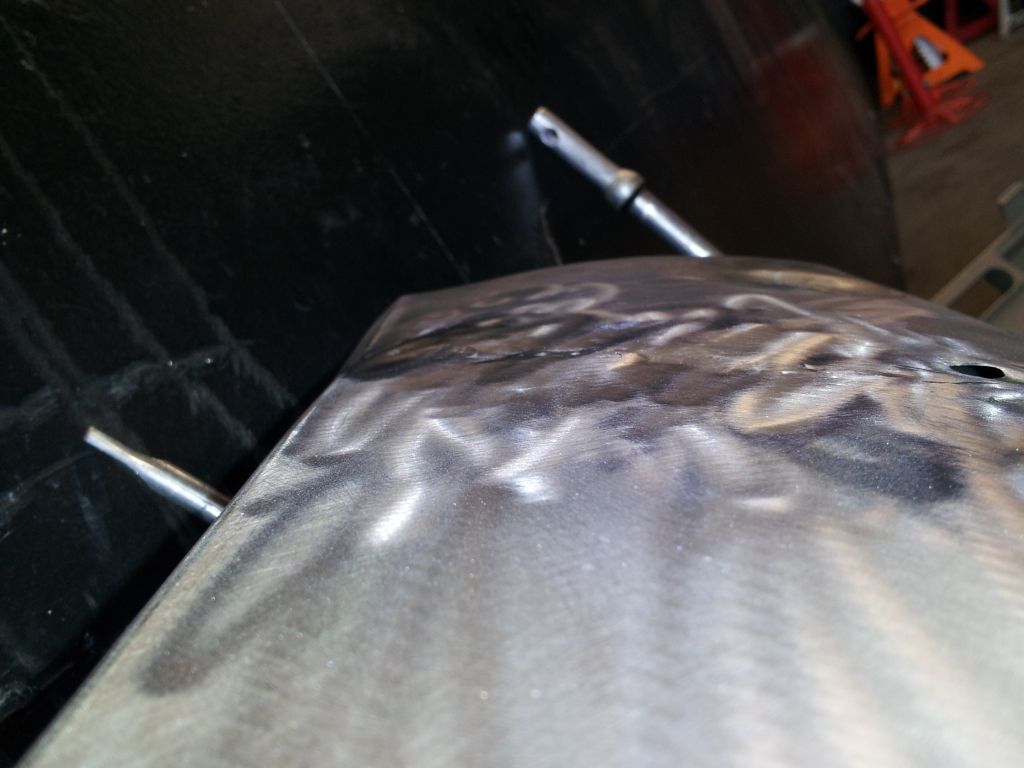
i need advice and help on this door. i want to get it presentable and in epoxy. i need to no where to start and some good advice. very new to this but i need to get the body somewhat presentable and protected in epoxy. so i can focus on the engine and getting her all running squared away. then when funds come in and im down with that do body work or send it out for bodywork. door seem to had dent and who ever attempted drilled holes and try to pull them out. would i just do a lot of hammer and dolly. weld holes and grind?
mail.google.com.jpeg

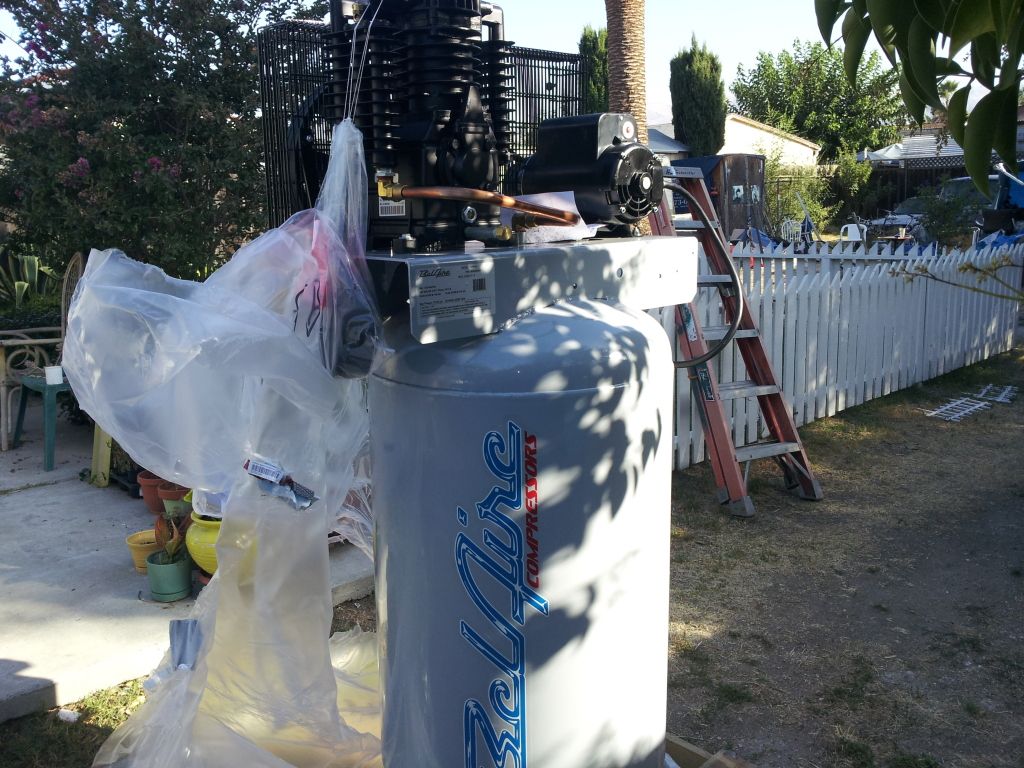
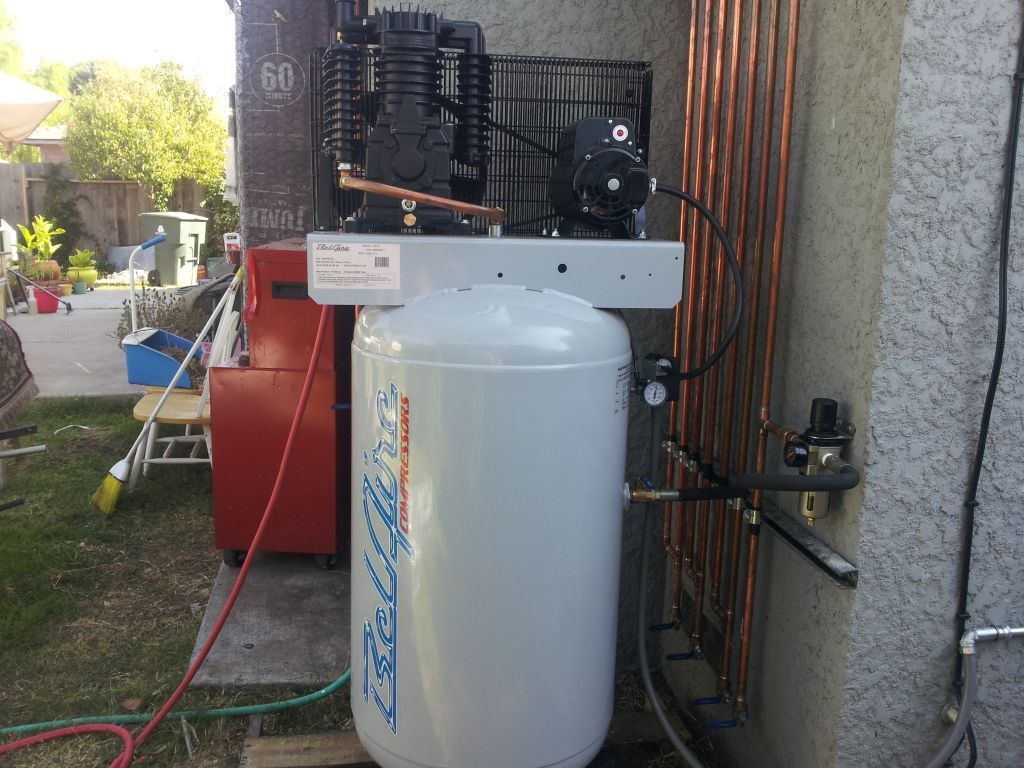
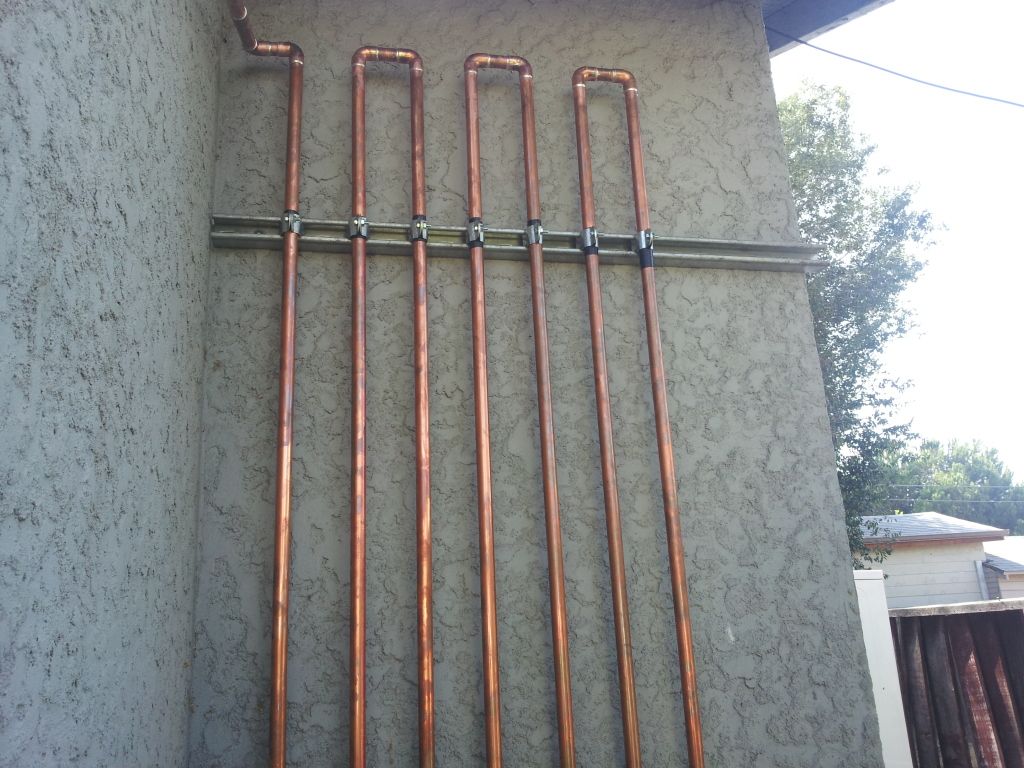
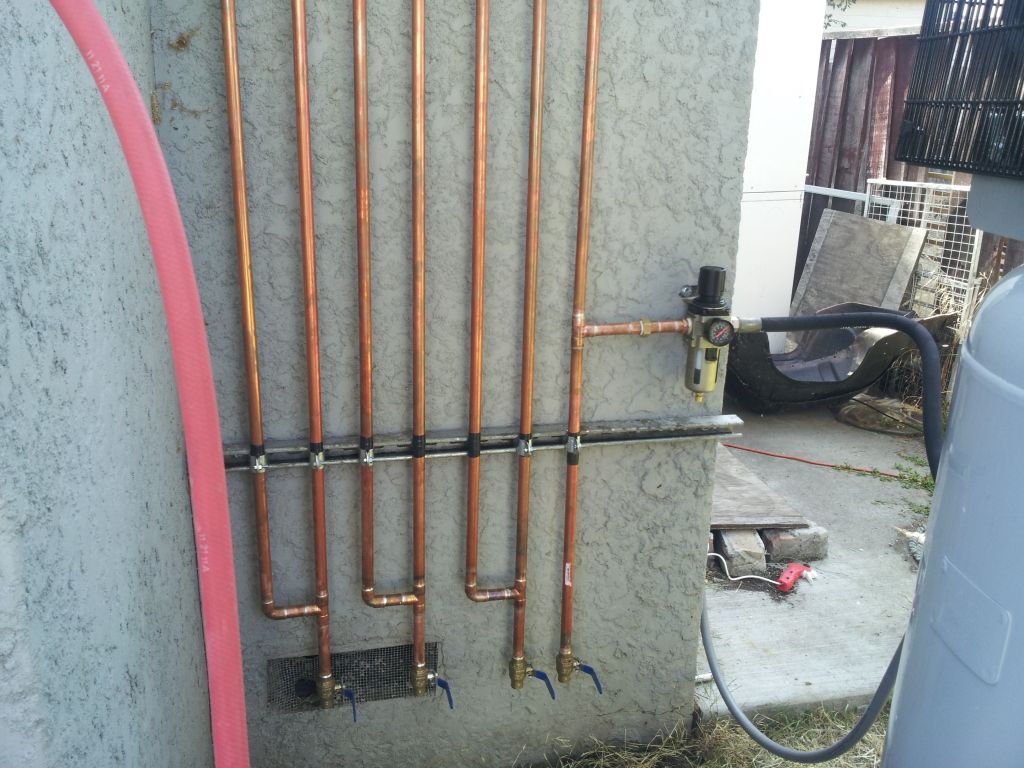
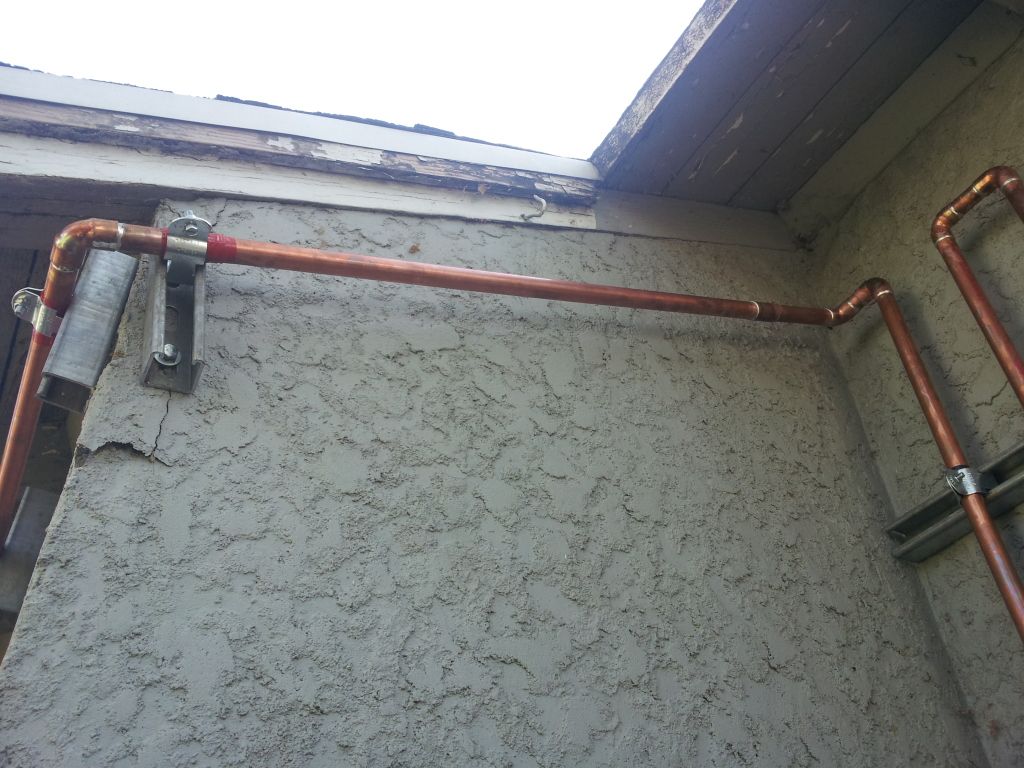
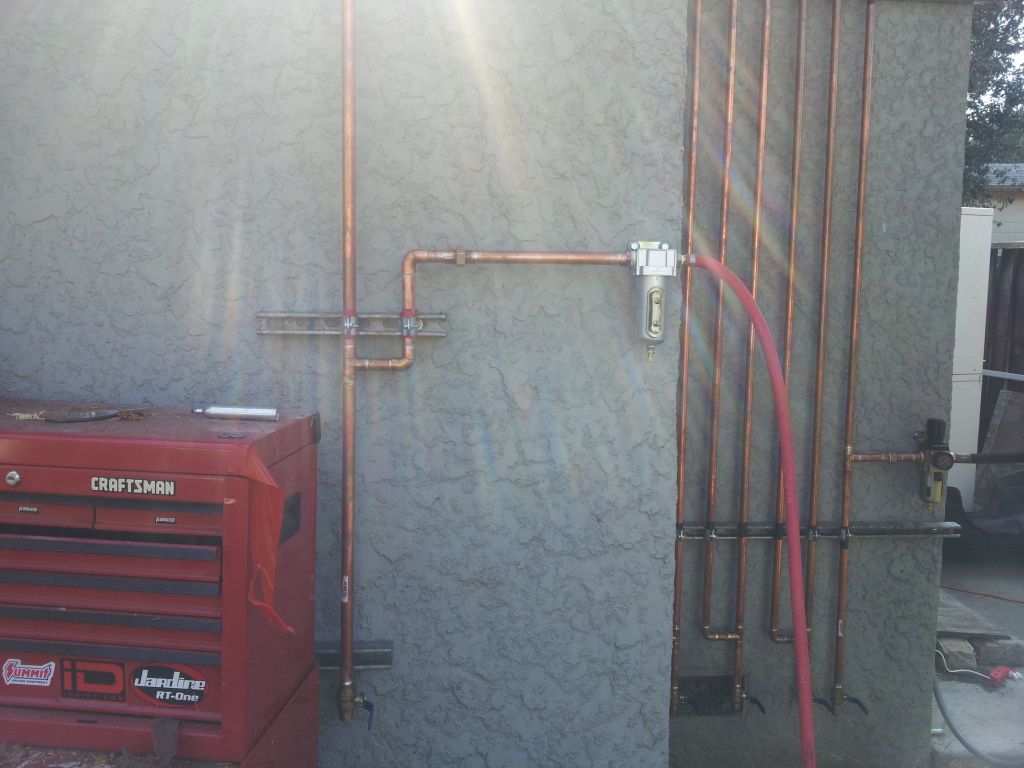
also im buying a compressor for my house to put outside in the back. really tight on budget and trying to get my stuff squared away so i can start putting this ls1/4l60e combo i got into the engine bay. but ive been looking around and i have enough to get this kobalt 60gal at lowes for $499. would this be okay to start out with and just work around with here and there spraying panel by panel in epoxy.

Horsepower (HP) 3.7
Tank Capacity (Gallons) 60.0
Air Compressor Voltage 230
Amps (Amps) 15.0
Air Delivery SCFM @ 40PSI 13.4
Air Delivery SCFM @ 90PSI 11.5

http://www.lowes.com/pd_54284-1126-...L=?Ns=p_product_qty_sales_dollar|1&facetInfo=
 
Looks like you are well on the way, with the door.

Sand off as much of the red and Grey and black that is left and then you can brush or roll a coat of epoxy for storage purposes.

That compressor will be fine for spraying a panel or two at a time but would be tough for it to keep up with a big job.
 
Will do I'm going to try spend some time hammer and dolling, grinding. Then shoot coat of epoxy and see where I'm at. Thank you
 
68-69 Chevelle? Buick Skylark? A new doorskin would be the best but with enough time you can correct all that damage.
 
Bob Hollinshead;23320 said:
68-69 Chevelle? Buick Skylark? A new doorskin would be the best but with enough time you can correct all that damage.
I was thinking about door skin. But if I do it be in the future I just want to get it epoxied and driveable trying to spend budget right now on motor and getting running that is after it all epoxied. When funds allow and done with that come back to body work and paint
 
Just a little update on the compressor. I've decided between two that I want but don't know with to buy.

First one is an eagle compressor. I did research and there very little but the reviews and forums I do see stuff on are all good information. And people seem very please and it has a 3 piston pump.I can get it 920 to me shipped
agle 5hp, 60 Gal Air Compressor produces 18.5 CFM @ 100 psi Features:

FREE SHIPPING TO LOWER 48 STATES Rugged Compressor With Cast Iron Cylinders "V" Design Minimizes Vibration, Improves Cooling and Extends Compressor Life Individual and Removable Cylinders For Smoother And Cooler Operation No Magnetic Pressure Switch Required Heavy Duty Pressure Switch Has On/Off Control Thermally Protected 5HP 208/230 Volt Electric Motor Metal Air Filter with "Auto Drop" Feature Convenient Oil Drain On Front Of Unit 60 Gallon ASME Registered Tank With 150 PSI Rating Easy View Oil Sight Gauge High Efficiency Reed Valves For Maximum Performance Efficient Heat Removal From Pulley-Fan For Cooler Running and Longer Life Sturdy Metal Belt Guard Outlet Valve Included 1 Yr Manufacturer's Limited Warranty This Unit Weighs 280 lbs.
http://bigboysgaragetoys.com/AIR-COMPRESSORS/Eagle-C5160V1-Air-Compressor-108/

And next is the tsc ingersoll rand ts4n5 compressor
Manufacturers Number: TS4N5 Brand: Ingersoll Rand® Grade: Consumer Style: Stationary Tank Size: 80 gal. Running HP: 5 HP Voltage Rating: 230 V Phase: Single CFM @ 90 PSI: 15.8 Maximum Pressure: 175 PSI Width: 40 in. Total Length: 48 in. Height: 76 in. Weight: 600 lb. Warranty: 1 yr. or 2 yr. w/Use of Ingersoll Rand Synthetic Lubricant PSI Rating: 175 PSI Pump Style: Two-Stage
http://www.tractorsupply.com/ingers...ng crazy. This is what my budget is thank you
 
a little update i worked on the door some and try to get the uper half straight or at least good enough for filler. it looks like i got the crease out some trying to just study it and see how every hit from the hammer and dolly affects the metal. any advice would help greatly. I also got a update on the compressor i went out of my budget and spent 1500 on a 318vn bel aire model 80 gal 2stage 5hp with 18.5@100 psi. so i think this should be a good compressor got it hooked up yesterday and it is very quiet, i was pleased and happy to be on the phone next to it :cool:

20120913_163245.jpg

20120913_163256.jpg

20120912_090108.jpg
20120913_163256.jpg
 
It would have been better to straighten the metal before welding the holes but it looks like it's taking shape. There's some stretch there that will be difficult if not impossible to remove. Make sure to test fit the handle and get the mounting surface as near perfect as possible-you don't want much if any filler at the handle mount areas.
 
Its hard to tell in the pictures, but from the way you used the grinder in the damaged areas to clean it, there must still be a pretty good valley around the damage. If you could get a dolly inside and have enough room to swing it into the the depressions without any backup, it will raise them and flatten the valley in the process. If not enough room, then use steady heavy pressure with the dolly on the depressions from inside and tap around the valley ridges with the hammer. This is one repair that I would have cut a section out of the inner door for better access.

I don't like to use the grinder because the door will already be weak after you get the damage out, and stretched as Bob said, so you don't want to grind any of the metal away.
 
yes after i welded i figured i should have straighten before my mistake. how can you tell there is stretched metal this is hard to figure out. ive never worked metal before but im trying to learn. im at the point where i think i would just try to get it best and epoxy hold of till i do a door skin?
 
Think of stretch this way: If you take a plastic garbage bag and try to push your finger through it you'll see the plastic will stretch and stay deformed-"stretched". When the steel on that door was dented it didn't just cave the door where the damage could just be reversed and popped back out-instead there was enough force to stretch the sheetmetal. The stretch would need to be eliminated if you want to return the metal back to the proper contour. Without removing the stretch you may be able to move the damage out but it will go too far-(think of the dent being reversed) and will then show as a high area untill the stretch is removed by shrinking. Improper work with hammer and dolly can also cause additional stretch-avoid hammer on dolly in most situations when removing dents, use a hammer off dolly technique to move the metal without causing more stretch. Stud pullers can also cause stretch if not used properly. Shrinking can be done with a torch, shrinking disc, or a stud gun.
 
Skin it and be done with it. By the time your done playing around with it, you are better off with a new skin on something damaged like this. The metal is fatigued, and it can be fixed, but to me, it's more time and cost effective to buy a new skin. You'll have a better job in the end, and it'll probably actually be quicker to just re-skin, as I'm sure that there must be other damage to the current skin you're working on. If done properly and new skin will save time and be a better repair.
 
thank you guys for opinions and insight even if this is a fail and i have to skin it later on when i get down to completing body work after motor. its all learning curve never done metal working but it is fun to learn. finally got my compressor all wired up and only had limited space for plumbing so i did research and came up with this idea that best suited my space. here some more pics.

Also going to be starting spraying soon and i have 1 gal epoxy and 1 gal activator. when i open it how do i store it? can i just put the cap back on the gal buckets and maybe put some tape around it? will store in my closet of my room.

20120927_152108.jpg

20120927_144609.jpg

20120927_144617.jpg

20120927_144630.jpg

20120927_144658.jpg
 
Back
Top