Need Advice, Butt Weld or Lap Weld

rustover

Member
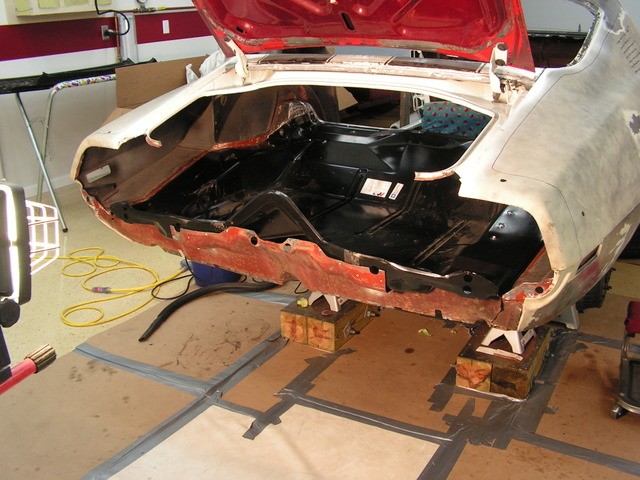
Hey guys, I'm in the process of replacing my trunk pan in my 72 Camaro. I have the whole pan fitted to the car. Its where it is going be and there really isn't any movement to it. Its non adjustable at this point. I have check and double checked and best I can tell I have it right. I have also test fitted the tail panel and its close.

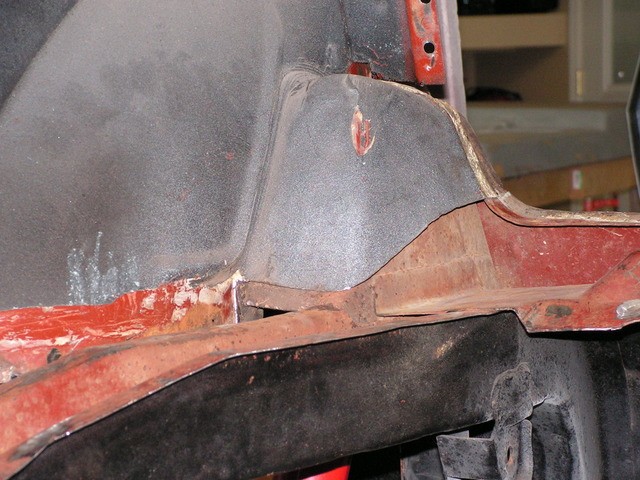
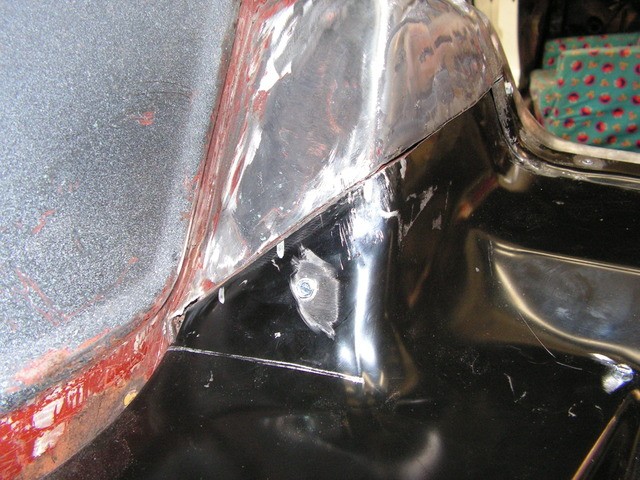
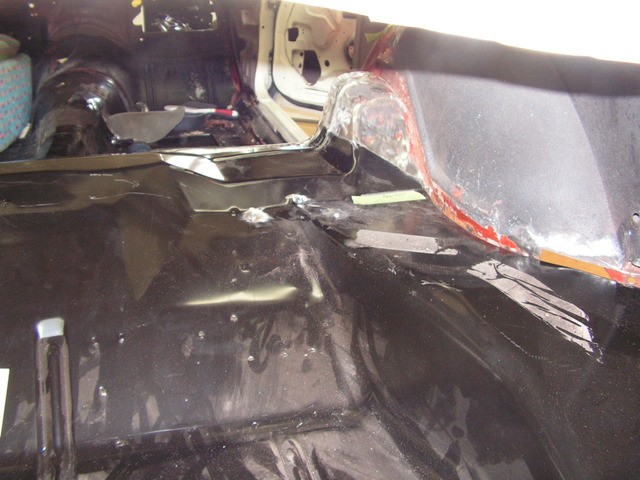
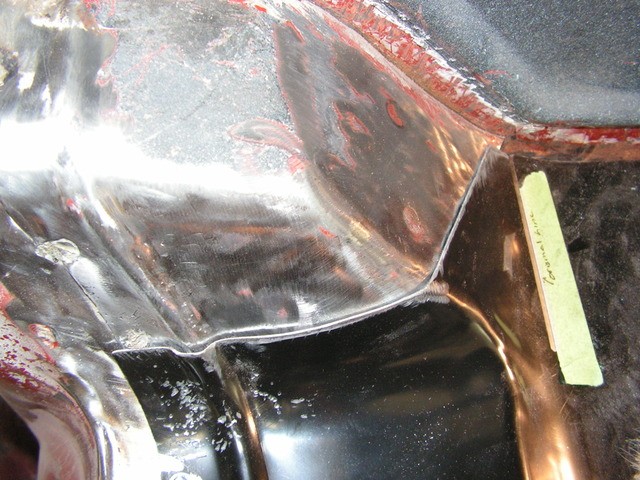
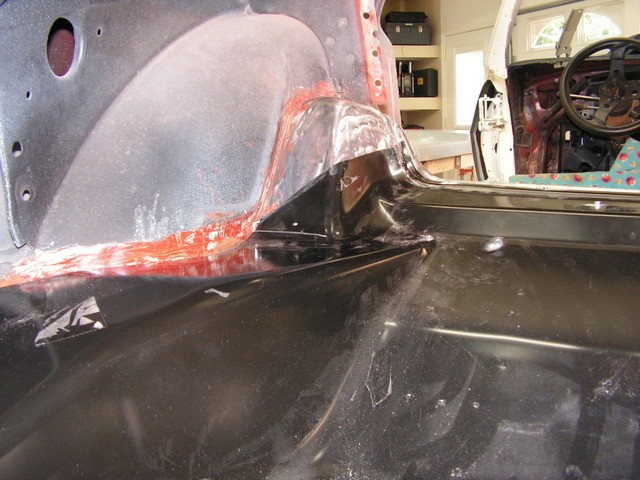
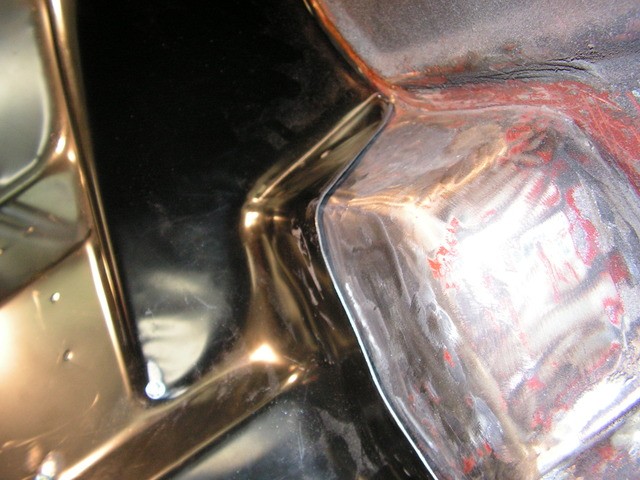
I didn't remove the whole pan. I left the shock tower area in the car. Reason being I didn't want to try to separate all that metal. In this area there is the trunk pan, inner wheel house and a frame brace and a shock tower inner brace. So I opted to make a splice in that area. I now have the trunk fitted in that area with about an inch overlap.

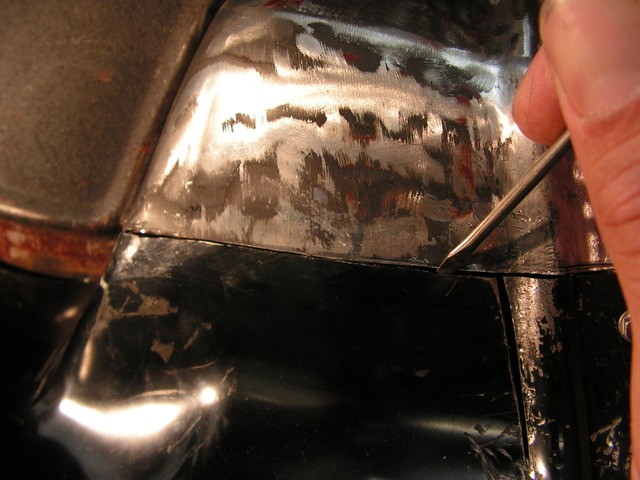
Here is where I need some solid advice. At first when I got to this point I was planning on scribing a line and doing a butt weld. Looking at how its fitting I'm a little worried that once I cut it, the original piece and the new piece wont line up flush to do a butt weld. I may be able to hammer and dolly the new metal over but I'm not sure.

Anyway, I'm wanted some advice on where to go from here. I could lap weld this area and I guess it would be a good repair, The seams are all hidden by the frame brace underneath. I will still have to push the top metal down with a driver until I get my tacks, then I could hammer the metal tight. Or I could go ahead and proceed with my scribe lines and take my time until I have the metal lined up. What do you guys think is the best route to take? Thanks, Russ

Here are some pics:


Personally, I am not a fan of lap welding. My worry (and it may be unfounded) is that the lap creates a pocket for rust to form. Butt-welding, when you have access to both sides of the panel, allows you to clean and seal the repair completely with almost no chance of rust forming.
That's my two cents worth.
 
I guess the butt weld would definitely be a better way to go. The right side fits great. I believe I can butt weld that area ok. The left side is not as tight. Its still overlapped and once I get the underlying metal out of the way, it may sit down just fine.
 
I normally scribe a line and then cut to old panel out leaving the line and may a 1/16th more metal so as to get a nice tight fit by grinding a bit here or there. In my experience the less gap I have once my panel is fitted properly the better the weld turns out. Its very thin metal and you can blow holes in it quickly if you are trying to fill gaps.

By the way, I use a gas MIG and .023" diameter solid wire.
 
No matter which way you decide to go, you will have to make the panels fit better before moving forward. If you scribe and cut now for a butt weld, then your problems with get worse and worse as you go along the seam pushing it together. So you need to get the two sides fitting good before making any more cuts, and that will require shrinking, shaping, and probably some stretching, just what ever it takes to get them together.

When you get it close, you can start using screws to hold it, and to be sure it stays lined up each time you test fit. I tried using clecos and didn't find them to be as good as screws. In this photo you can see the shrinker marks.


83e7a262-68a2-4a87-b379-248acb8572e6_zps45b60199.jpg


And the use of screws


f09d8157-842b-4217-be97-5b22460e5574_zps8c652c45.jpg
 
I like butt joints more because you can always grind them smooth.
The most critical part is getting the gap between the panels right(not cutting too much off). I get them close with the cut off wheel and then shave them the last bit with a 24 grit roloc disc.
The steps between the panels arent that bad. You can hold them down to get started and get a few stitches done, and once the joint gets some stiffness to it you can just whack them in place with the body hammer.

The step actually works in your favor for finishing the gap as well. You can still do some final trimming for gap when that step is present because it gives you acces to the face of the joint.

If you end up with too big of a gap, depending on the size its not that big of a deal as long as you are using .023 wire and some patience. The occasional gap of 1/8th
inch(which looks enormous) is pretty easily spanned if you take your time even if it is 10" long... I just clipped a car last week, and had to make a butt joint down the entire inner fender panel. This section was attached to the entire front core support, and the way the vehicle is made you cant just set the components on the frame rail(since they weld to the bottom, and no way to clamp). After some really rough fitting I started shaving and shaving then finally said "I just gotta go for it and make a cut".. Ended up with gaps from the hoodline to the bottom of the inner fenderwell ranging from 1/8" to 1/4", with only a few spots being an ideal butt joint. It took a while to fill that gap with weld(about an hour), but it welded up with zero porosity and after grinding the welds down you can't tell it was ever done.
For what its worth, I don't really like to punch a bunch of screw holes in panels to hold them together. I'd rather get it as close as I can to start with, then start tacking things in and work it as I go, and then do the final shaping, grinding etc when its all done..
 
I'd trim the overlap off with an airsaw and weld it up.
 
Thanks for all the replies guys. Lots of good info here. I worked on it tonight and with the hammer and dolly I got the left side fitting a lot better, its flush and once the underlying metal is removed it should line up. I'm going to go ahead and pursue the butt weld. I had to use about 10 sheet metal screws to pull the pan down in various places. I need to get some larger clamps. These screws will serve as an alignment tool. I have made my scribe lines and will soon start trimming the original pan to meet up to the new. Bob I wish I could use a saw, but there is a brace underneath. Its a tight area, I'm going to use the cut off wheel from my dremel and then sneak up on it with a 2 inch roloc. Once I get this pan fitting good and my holes drilled, I'm going to blast and epoxy the inner structure and the pan, then do a final fit and weld.

 
The whole car is lap welded together. I dont think a few more will hurt if that is the way you would rather do it.
 
You could cut some of that with an airsaw, after some experience with the saw you can cut with even less clearance than the stoke length-just hold it at an angle and use the tip of the blade, I also cut my own blades and sometimes narrow them down to 1/8' for cutting radius's as tight as 1/2". Bob is right though-the car is all lap welded at the factory-I just hate finishing off lap welds. When you're done if there's any way to get to the backside with some cavity wax and a spray wand it would be a good thing to do.
 
Thanks for the help guys. I made the cuts for the butt weld today. I think they turned out ok. I'm happy with it. I do have some gaps in some areas but they are not that large. The pics makes them look huge, but they are thinner than one of those panel clamps. The good news is both panels line up very nice. It will make a nice repair. I did have to split the panel at the end to get the contour to line up on one side. Also when I do my first tack I will have to use a driver to align where I split it at.


Overall I'm pretty happy with the way this pan fit. I need to drill all my weld holes, debur, and the repair some of the rust on the inner fenders. I plan to blast the inner frame rails and coat with epoxy, then weld it all in place.
 
Looks good, take all the coatings off in the weld areas.

- - - Updated - - -

I like that comfy cardboard floor!
 
The primary reason the automakers use pinch welds or lap welds is for expediting the assembly process. Period.

Now go back to your vintage car of whatever make and look at those areas.....typically they are where the majority of the rust started. Plain and simple... butt welds are the way to go.. I've even removed factory pinch welds where rust was prevalent and butt welded the panels together to eliminate the rust trap in the future.
 
Back
Top