Metal Working tips and tricks.

Chad.S

Oldtimer
To make a long story short, I feel as if I have been fortunate to pursue my interest in Metal shaping and owe part of the opportunity to be able to do so to SPI. I think it was Barry who posted years ago about metal meet and sponsored their forum. This got me a little more interested and I made the trip down there, I didn't learn a whole lot there but it was a eye opener to what it really took to do even the most basic looking task. I also feel like I wouldn't have been able to do this without the help of the sales we have gotten from this forum and from other users of the products we carry. It allowed me a little free time to be able to work on the education side of this.

So I thought that since to me it was fairly related I would post a few things as I can, I'm still fairly new to metal shaping and metal work in general but I think I can post a few things of value. I would also like some of the other metal workers on here to post some things so that maybe we can all learn a thing or two..

What inspired me to do this was lately I noticed a few more conversations and questions revolving metal work around here, and a lot of them questions have revolved around welding panels together. And it just so happened that I had to do two patches today, so I made it a point to remember to take a few pictures.

I would like to keep it to just individual tips or tricks than displaying a whole project. This may give new comers one thread to read through and make it a easy instead of fumbling through the whole site..
 
Ok let me start with this. I made the mistake of cutting a panel to large and had to make a patch to fill in the panel. Mistakes happen, we just have to learn how to fix them.

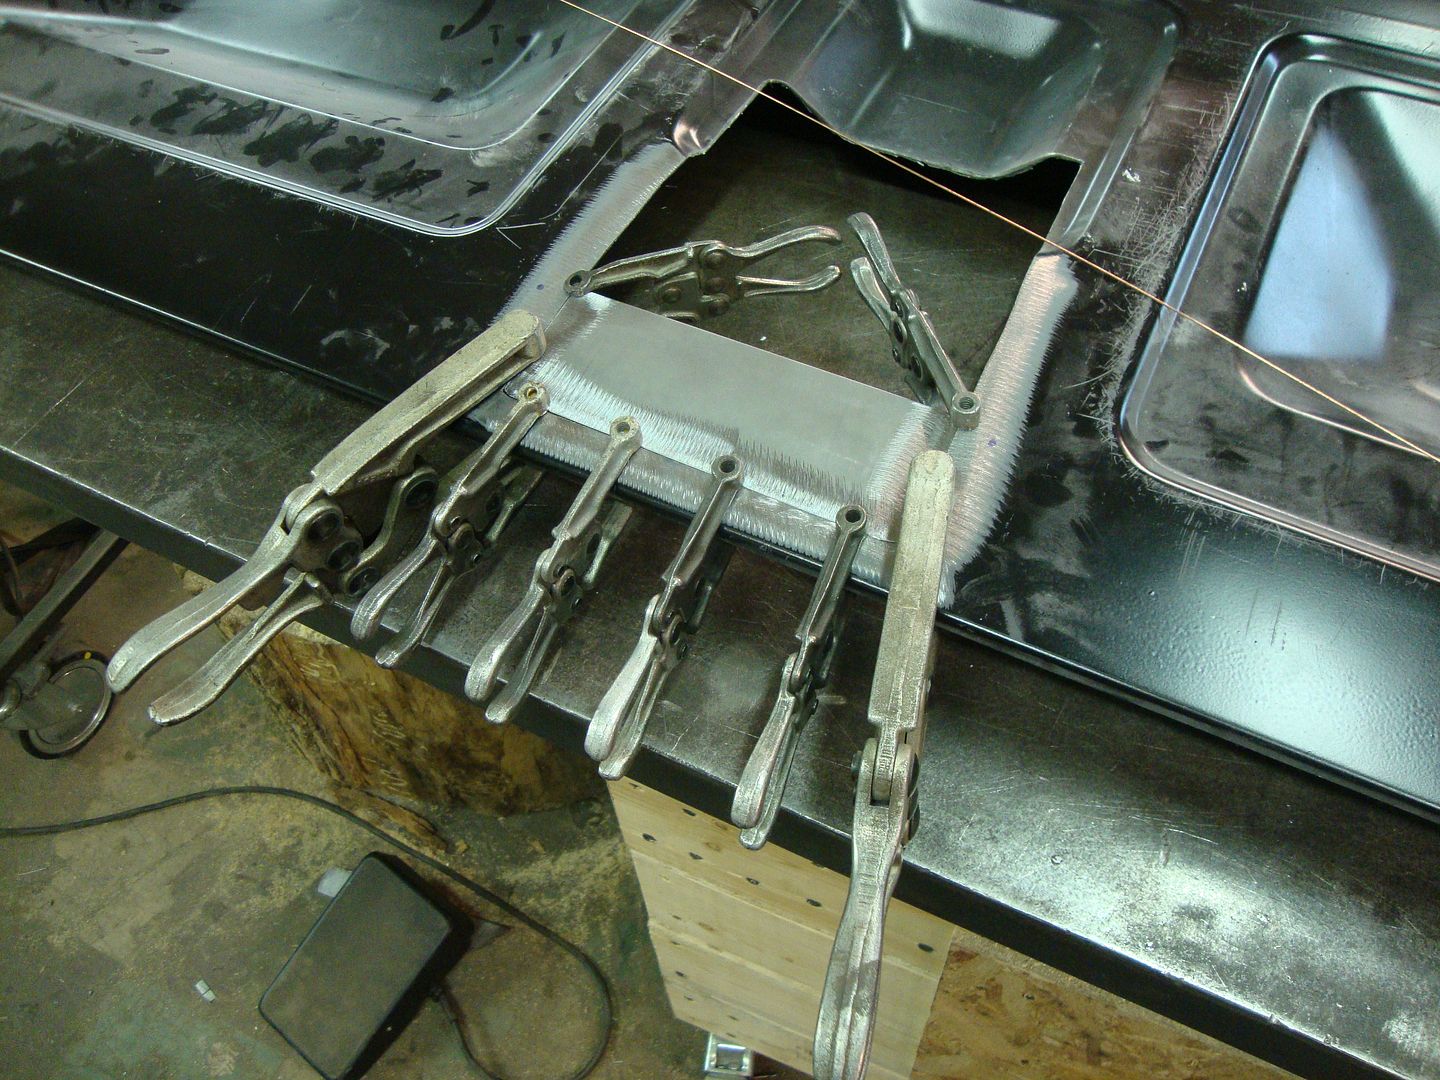
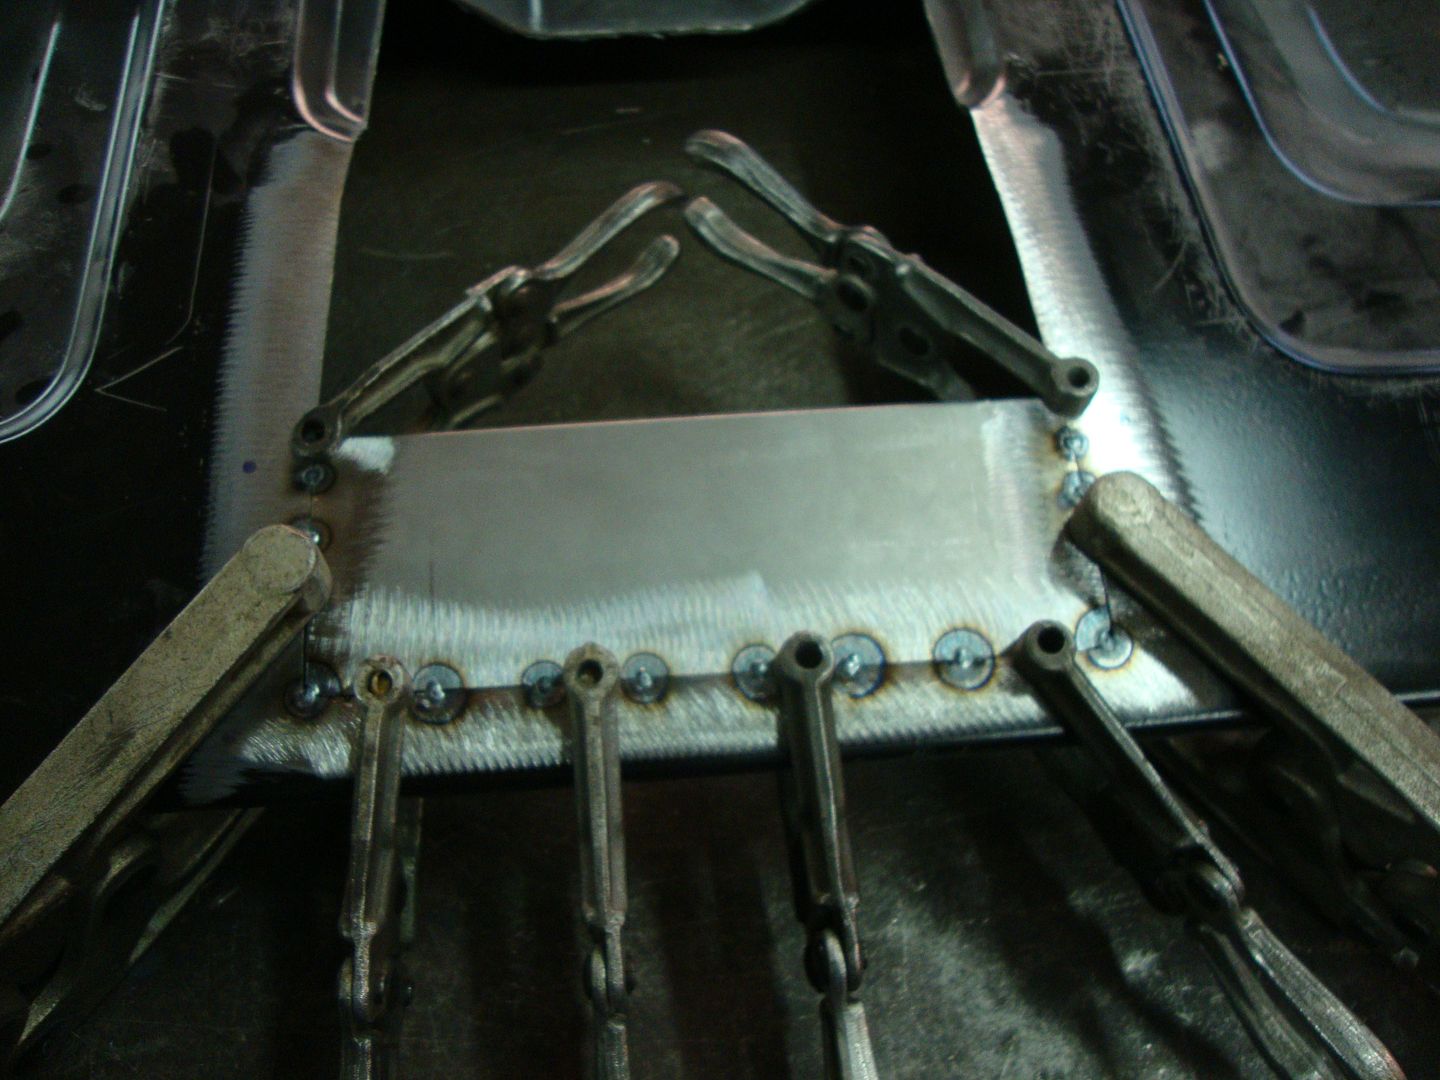
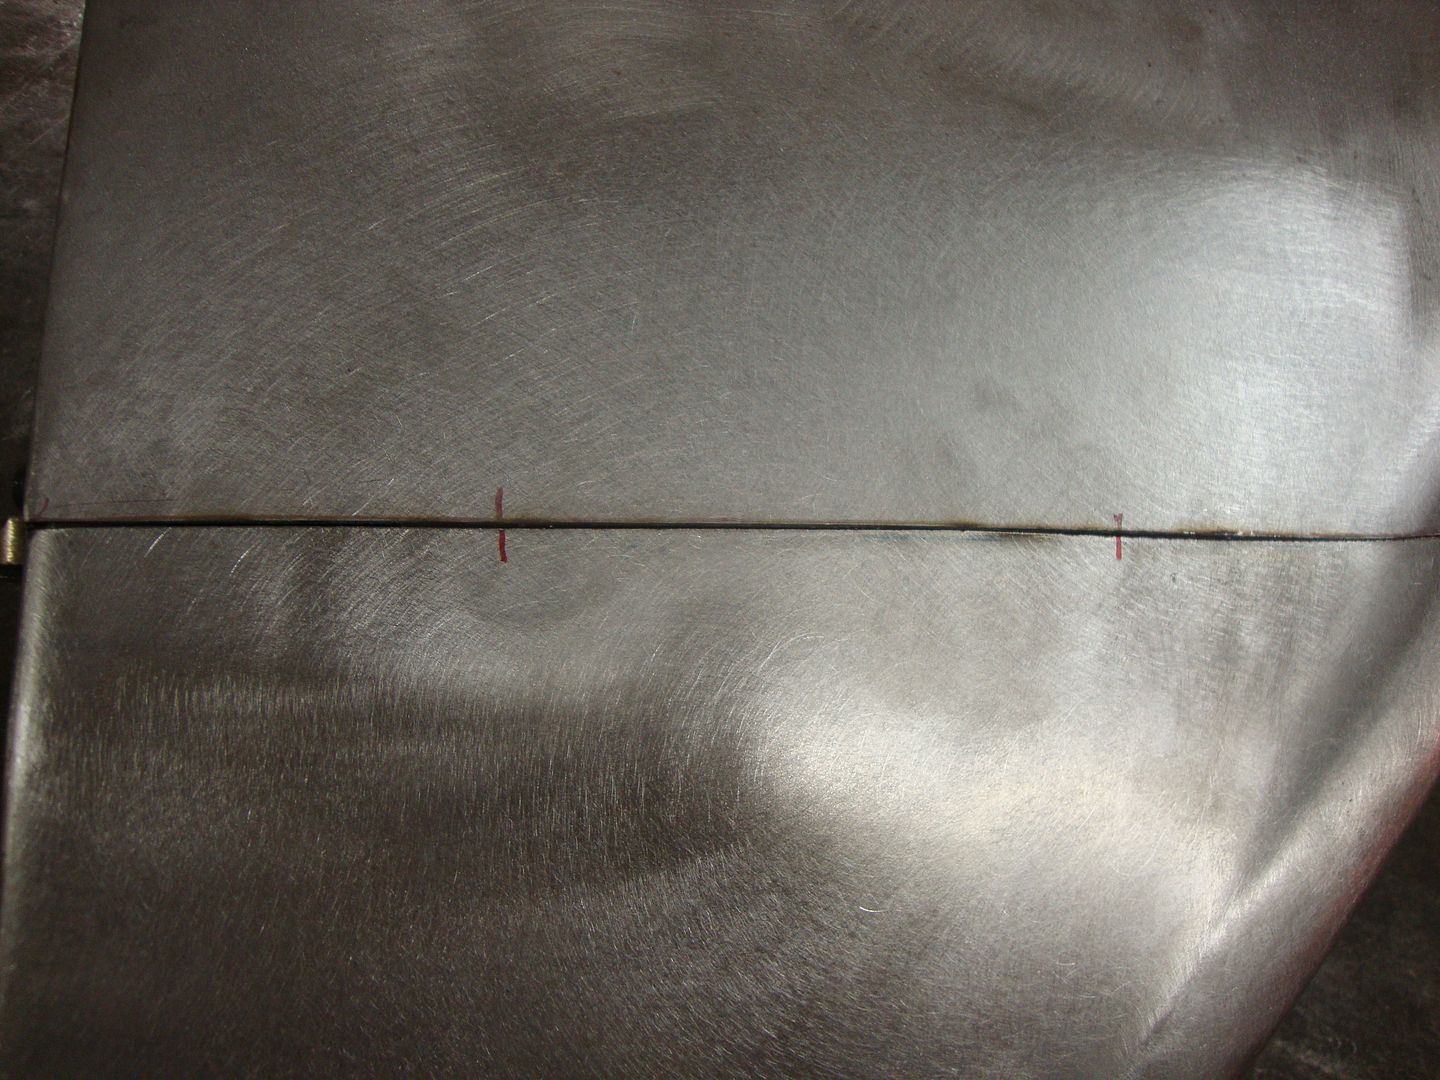
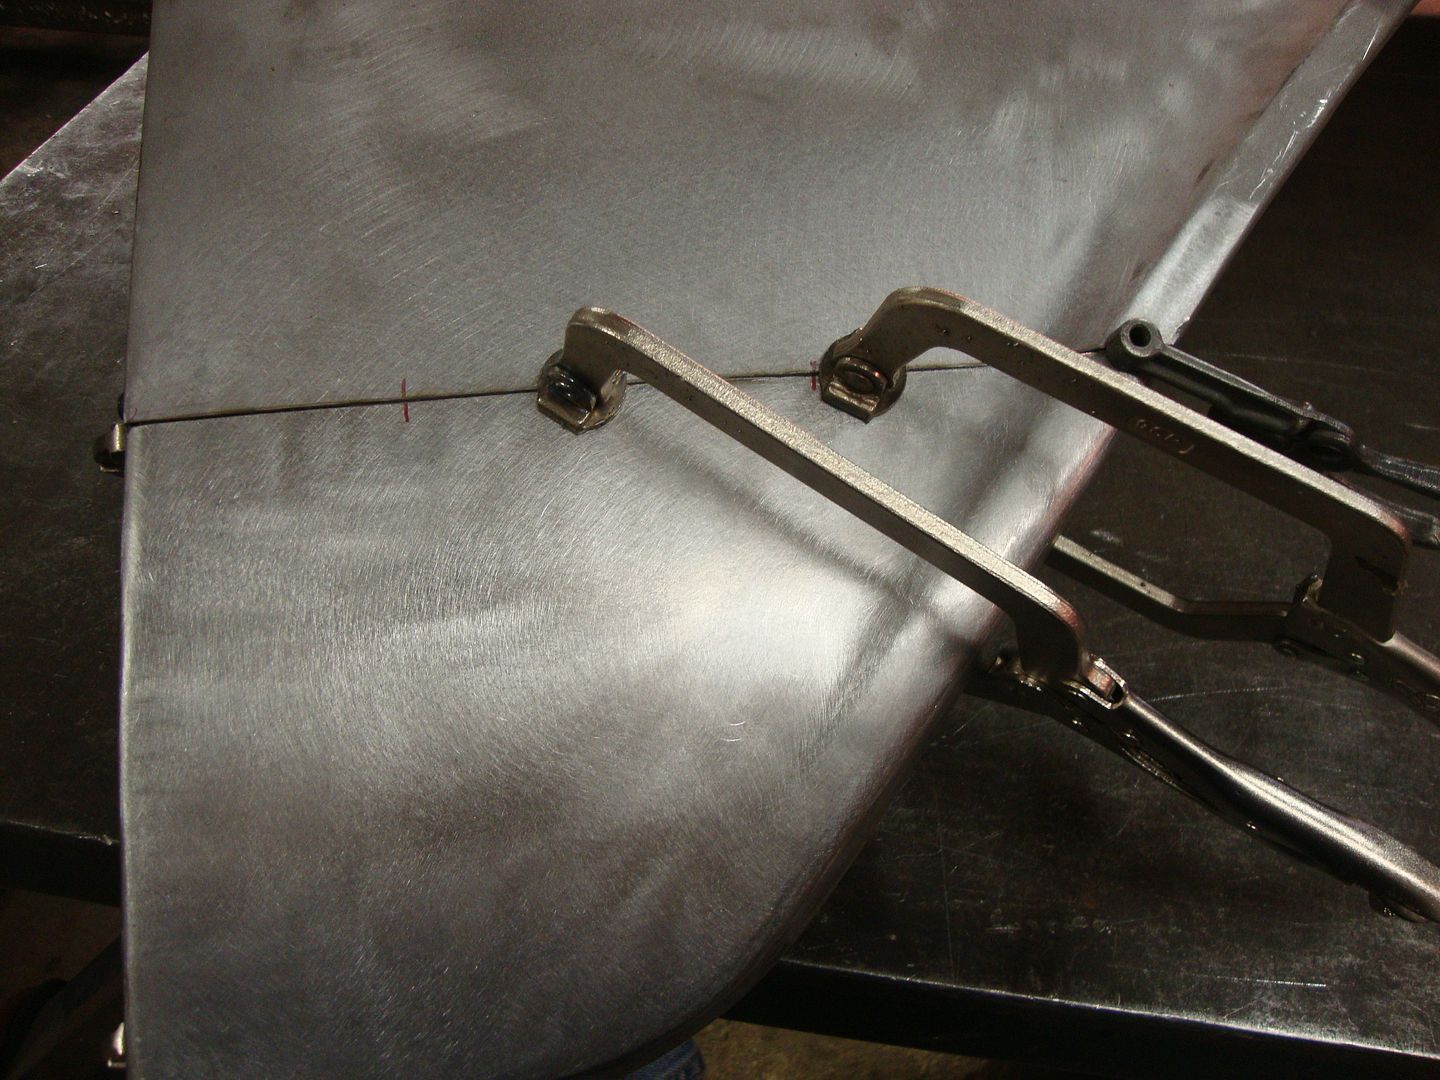
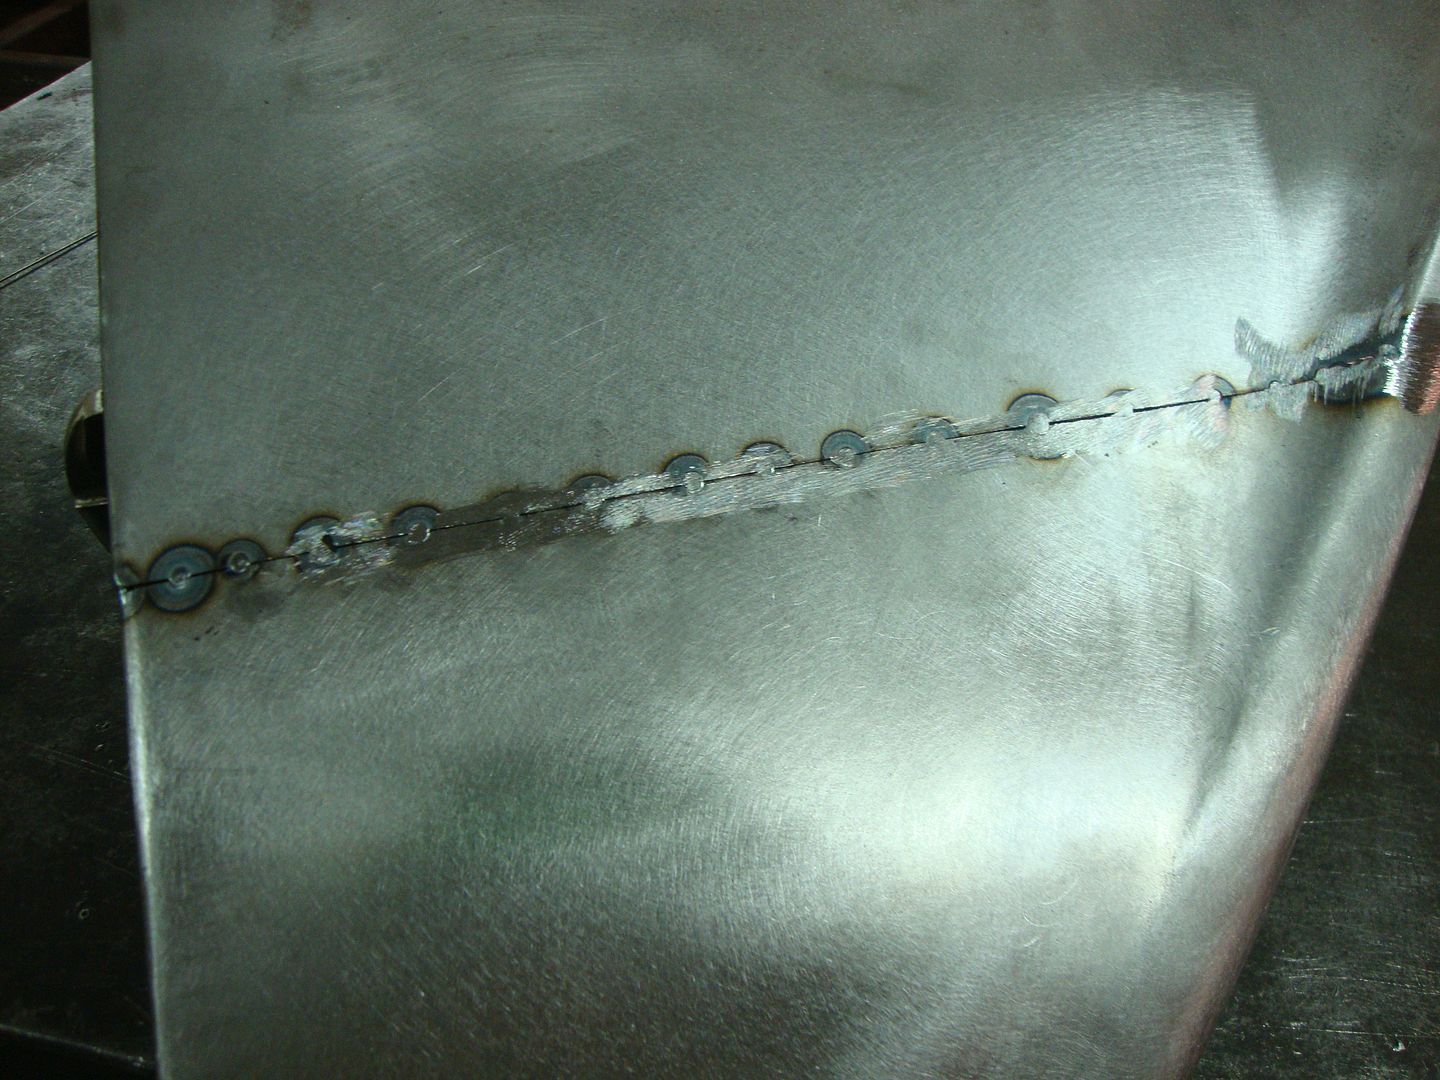
I'll start with the patch itself, take a look at the perimeter of the patch and see how tight the weld seam is, also notice my clamping, I have enough clamps that I can work my way around and weld right next to each clamp, the clamp verifies that the panel will be flush on both sides.. Also keep in mind that I checked metal thickness on both pieces to make sure they matched.

Here's a picture of the patch clamped into place. The second picture is of the welds around the clamps.


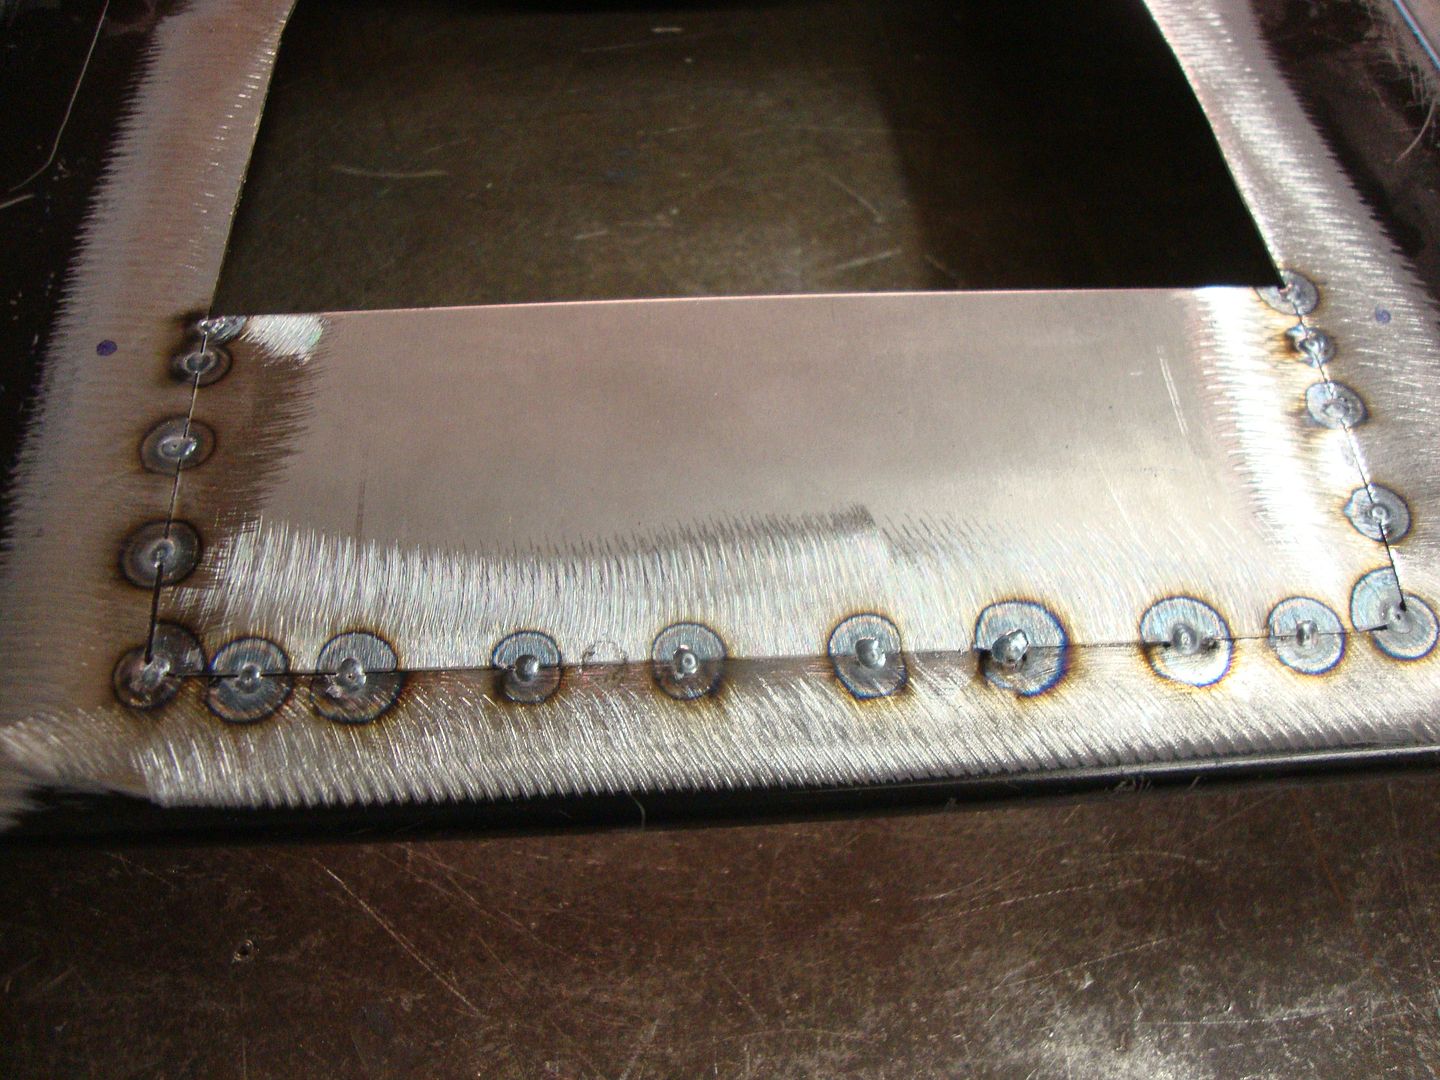
Here the clamps are removed.


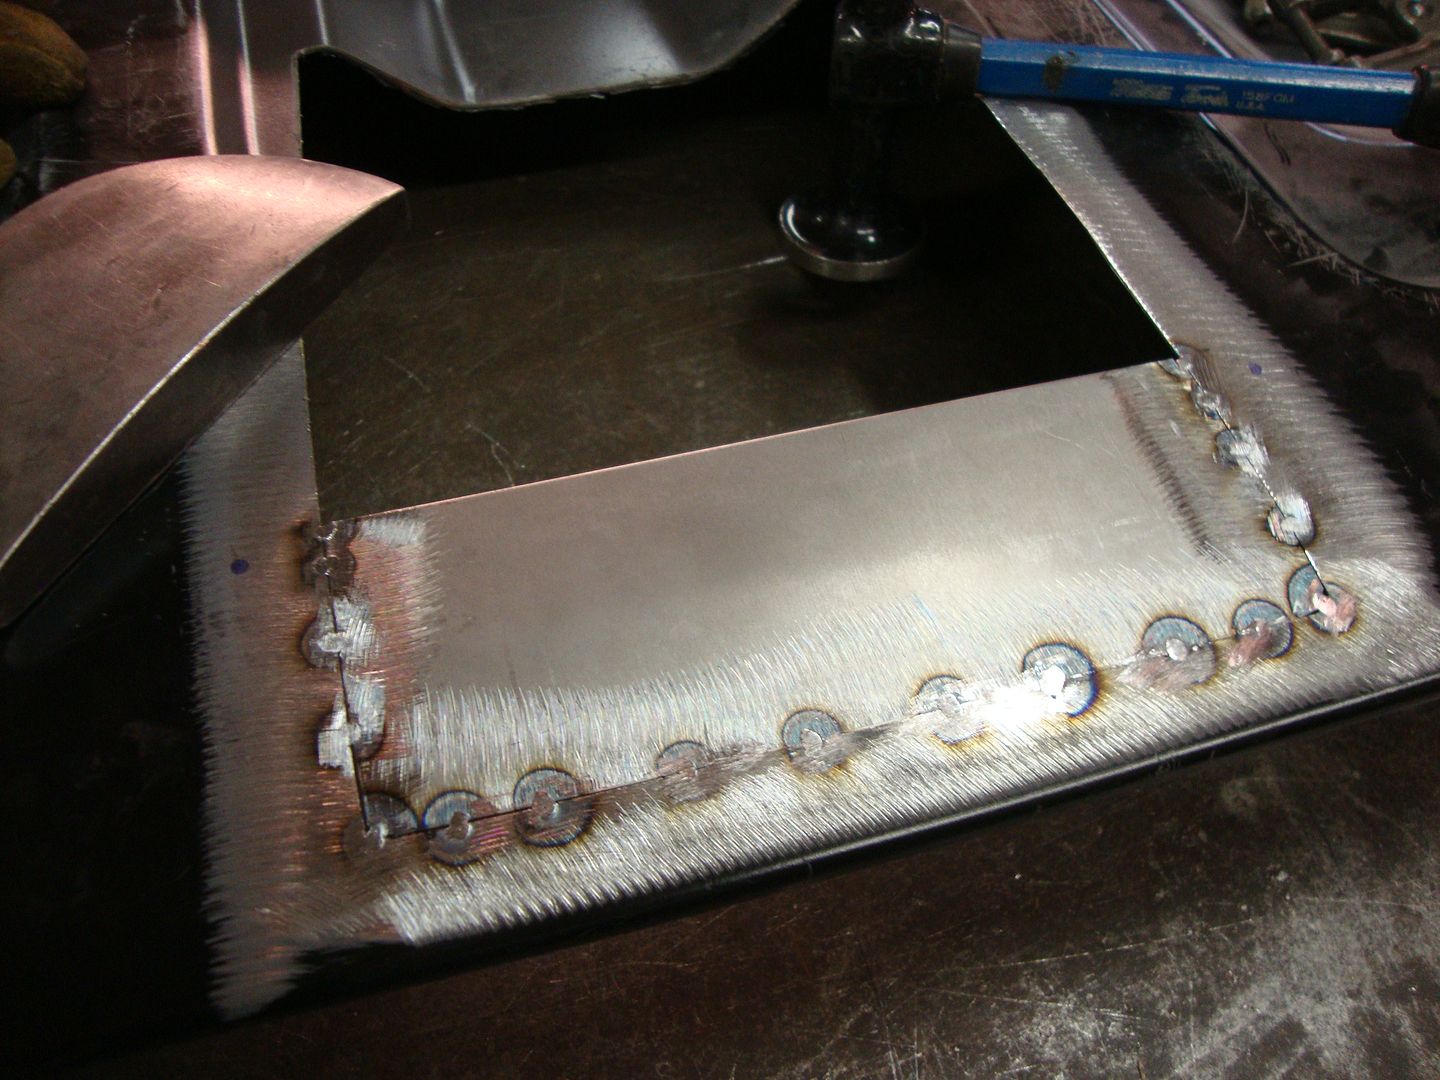
I then slightly grind the weld down, and then hammer and dolly a little bit over each weld to relieve the stress.
Sometimes I do this before grinding but I used filler rod on these tacks so they were a little tall, sometimes I will use no filler.


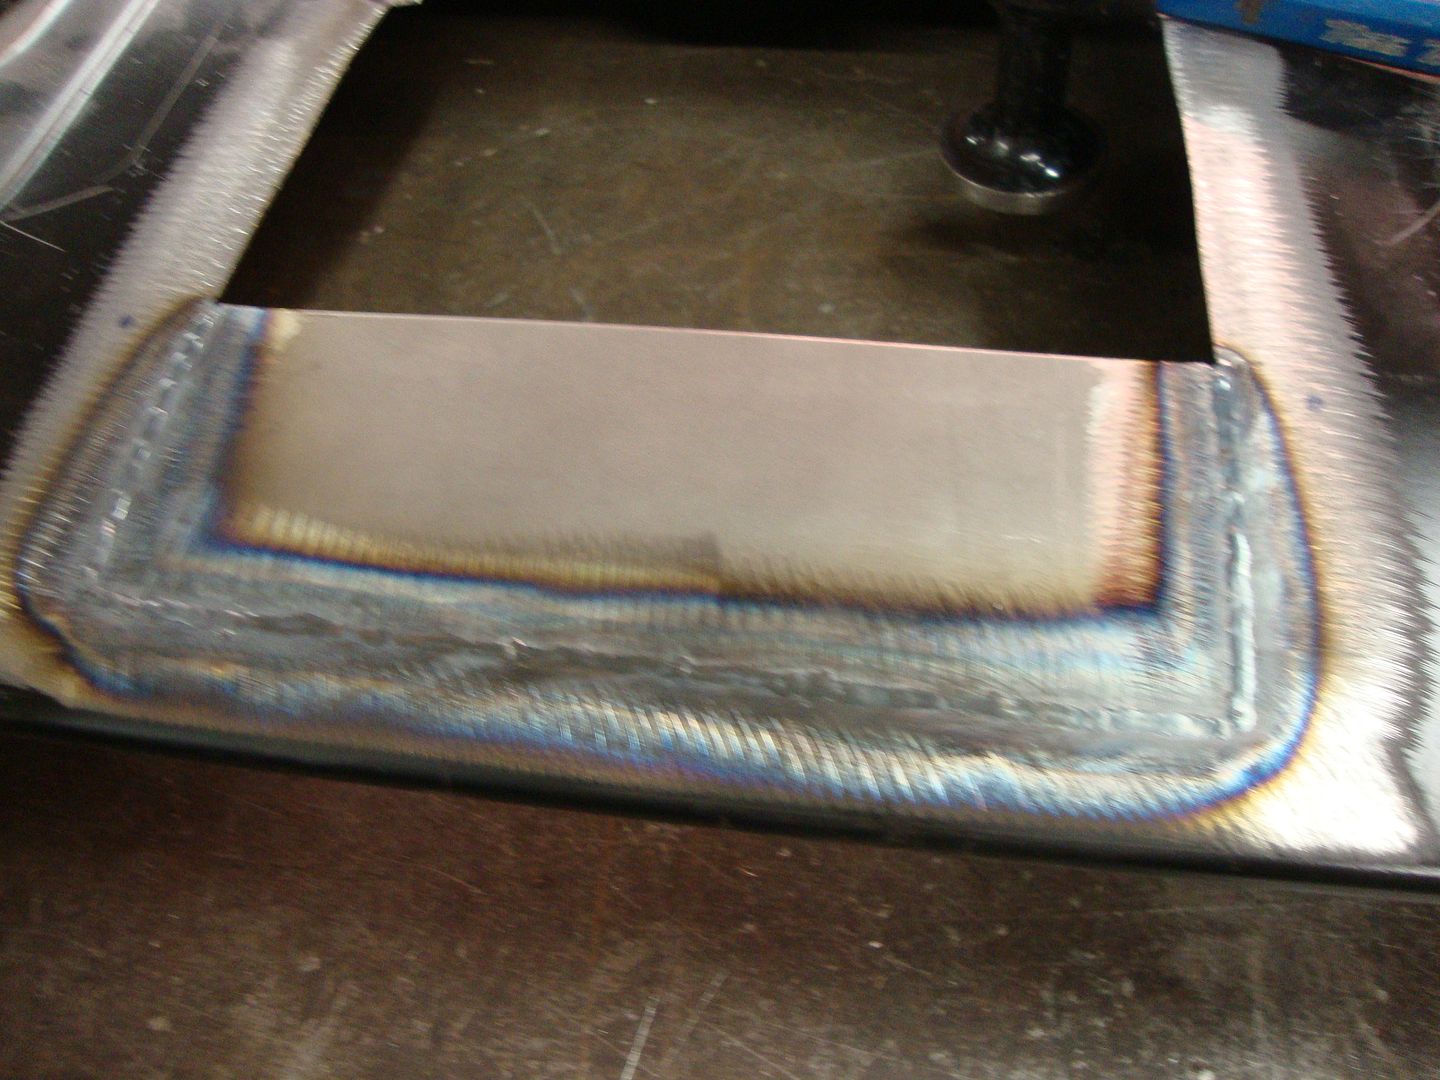
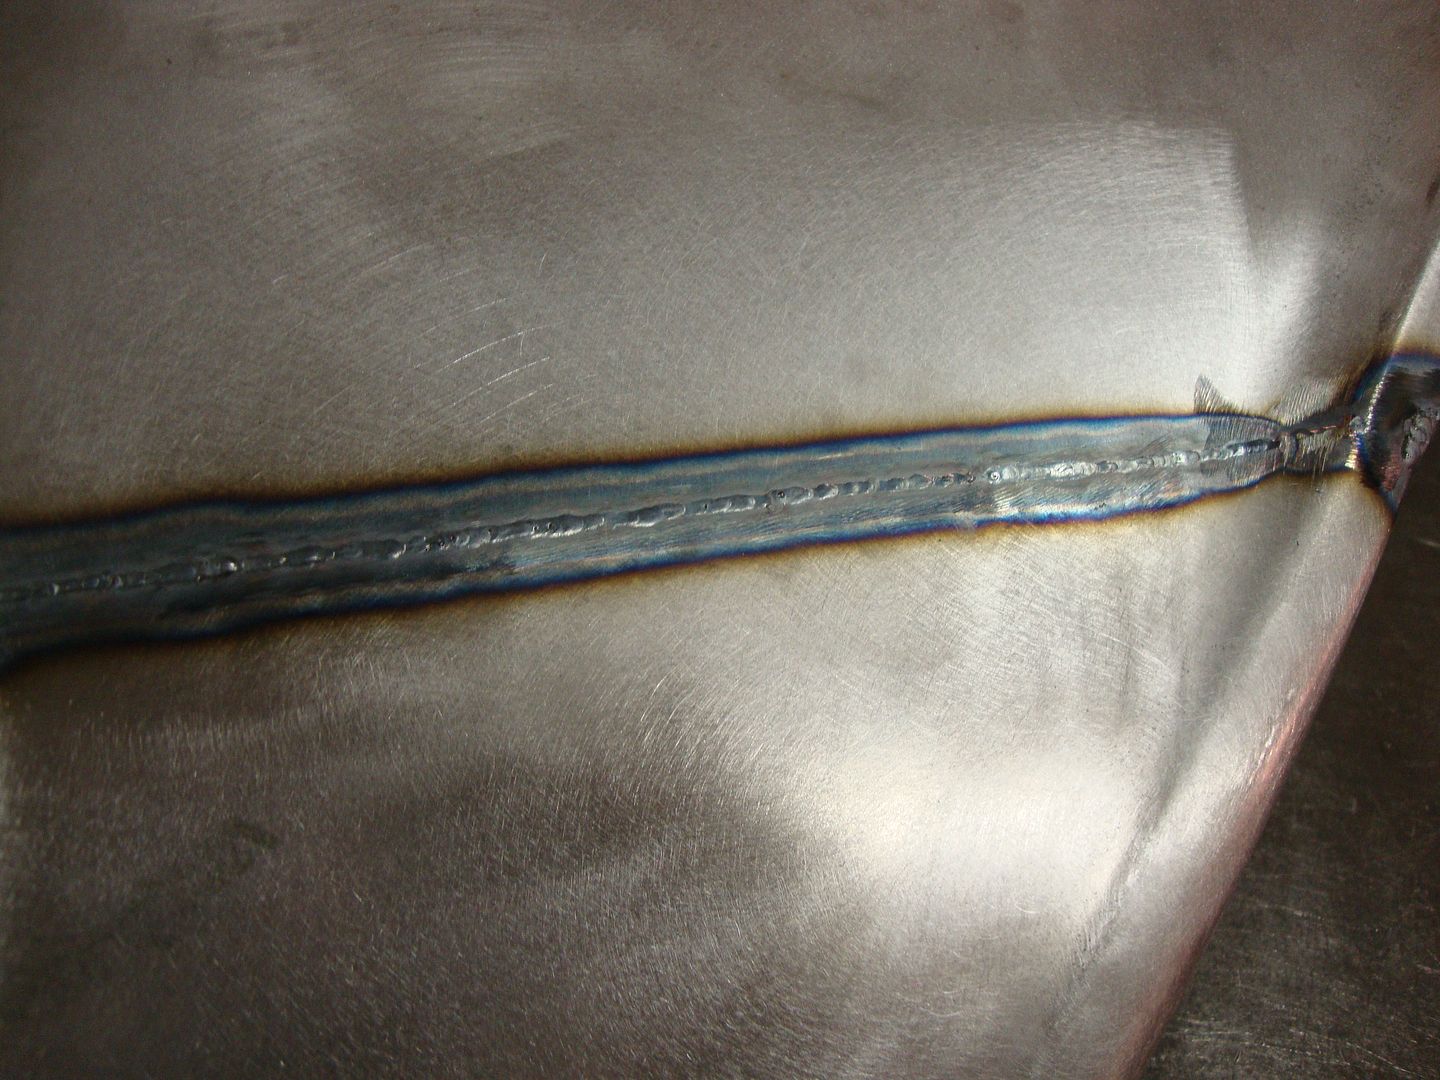
Then I ran a weld around the whole seam, I pretty much did this as fast as I could without stopping.
You can get away with this with a tig welder which is why I preach using a tig welder, I know some can do this with gas but I am not that skilled.
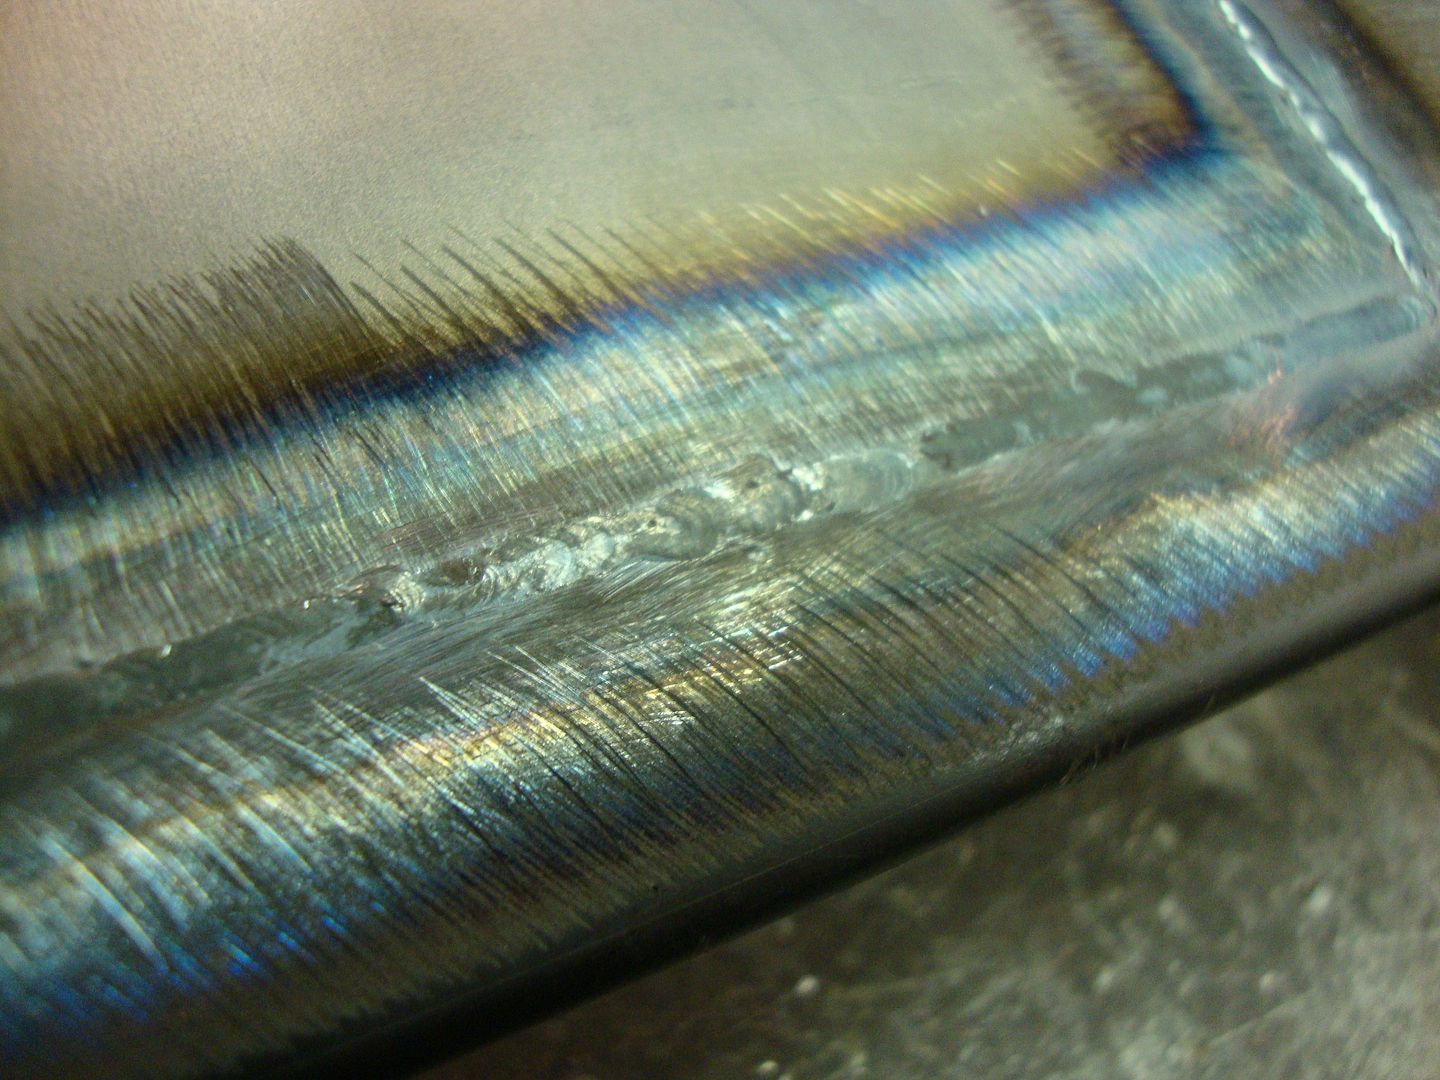
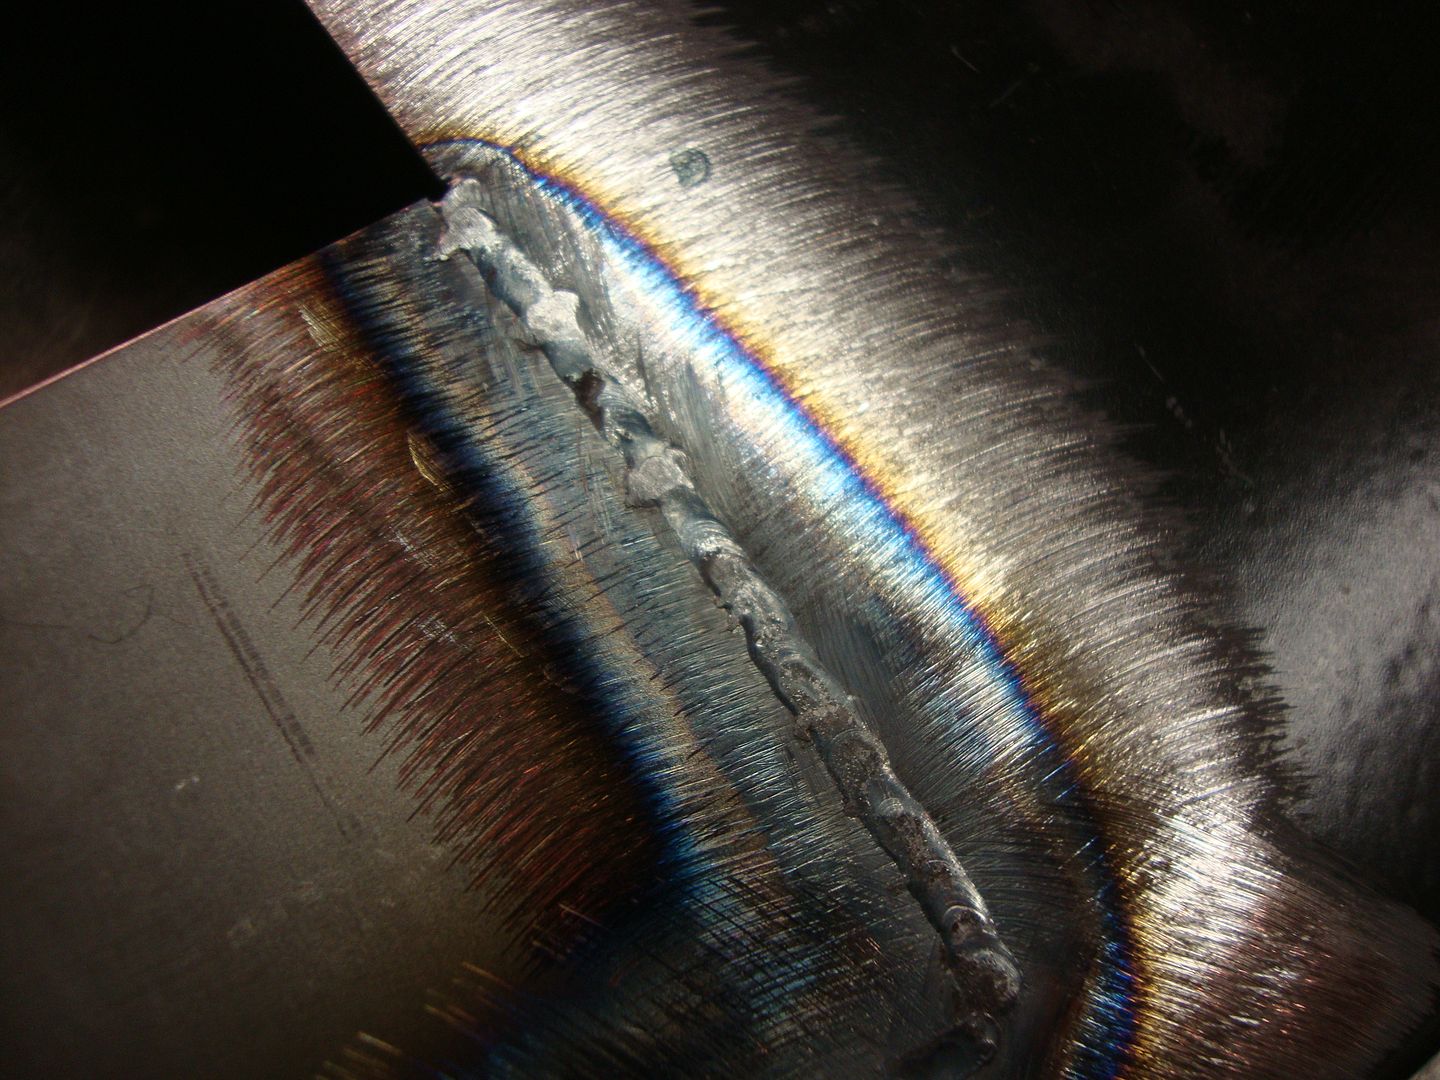
also notice how small the weld is. this makes for much less grinding than if you used a mig welder.


Next I plannished the welds a little bit with a hammer and dolly. You can see the weld getting pushed into itself a little bit. I like to be very gentle at this point because the weld isn't perfectly even from one end to the other. Something I need to work at.


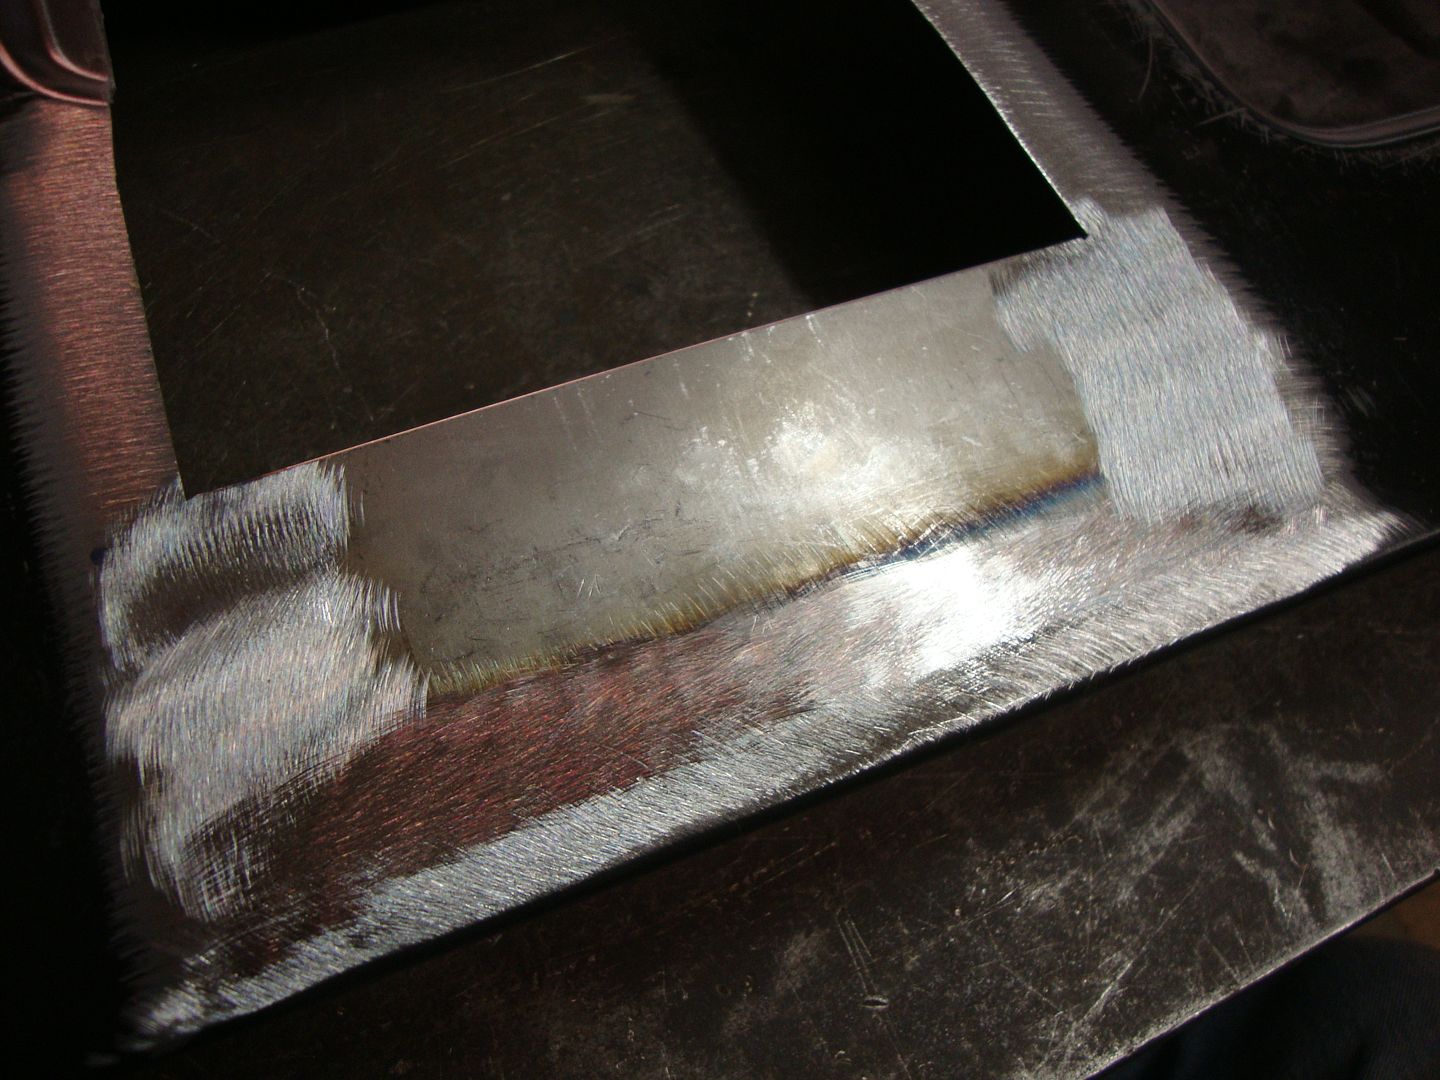
I then make a pass with the grinder, I use the norcut wheels, they are a fairly hard wheel, this way I can focus the grinding where I want, I typically run the grinder in the direction of the weld and not across it, this helps me from getting the surrounding area to thin. then I go over the whole area as a wash pass as I call it. This is the result of that.


Here I switched to 50 grit on the norcut. I typically start with this but I didn't realize I had 36 grit on the disc. 50 grit is plenty coarse enough and doesn't beat up the metal as much.


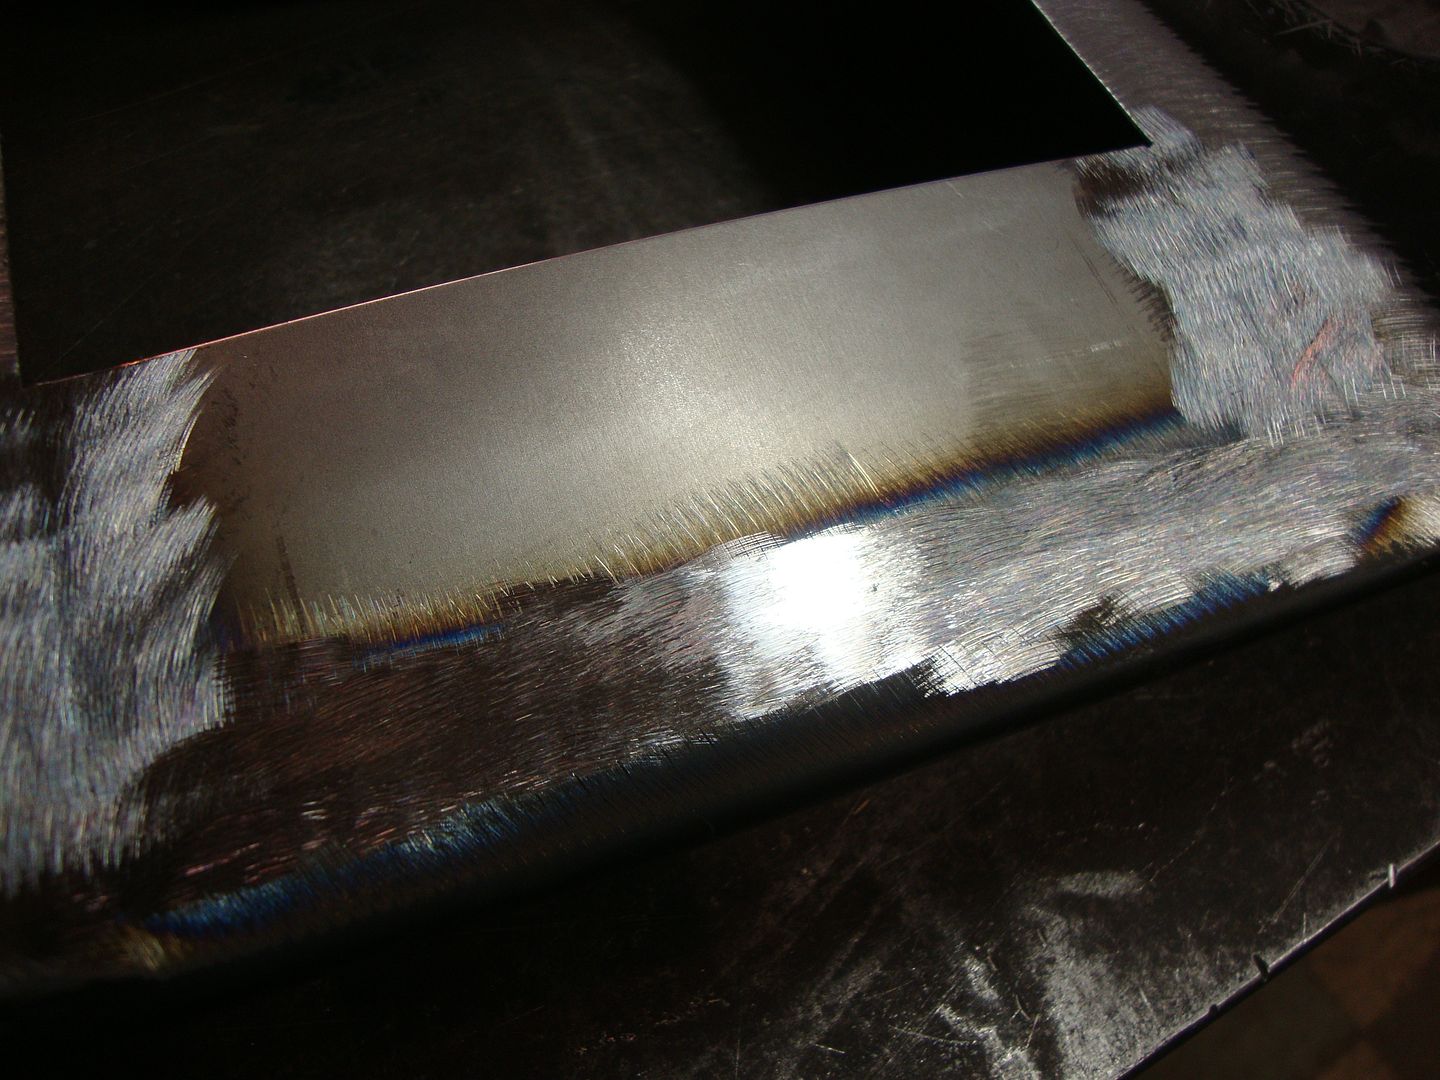
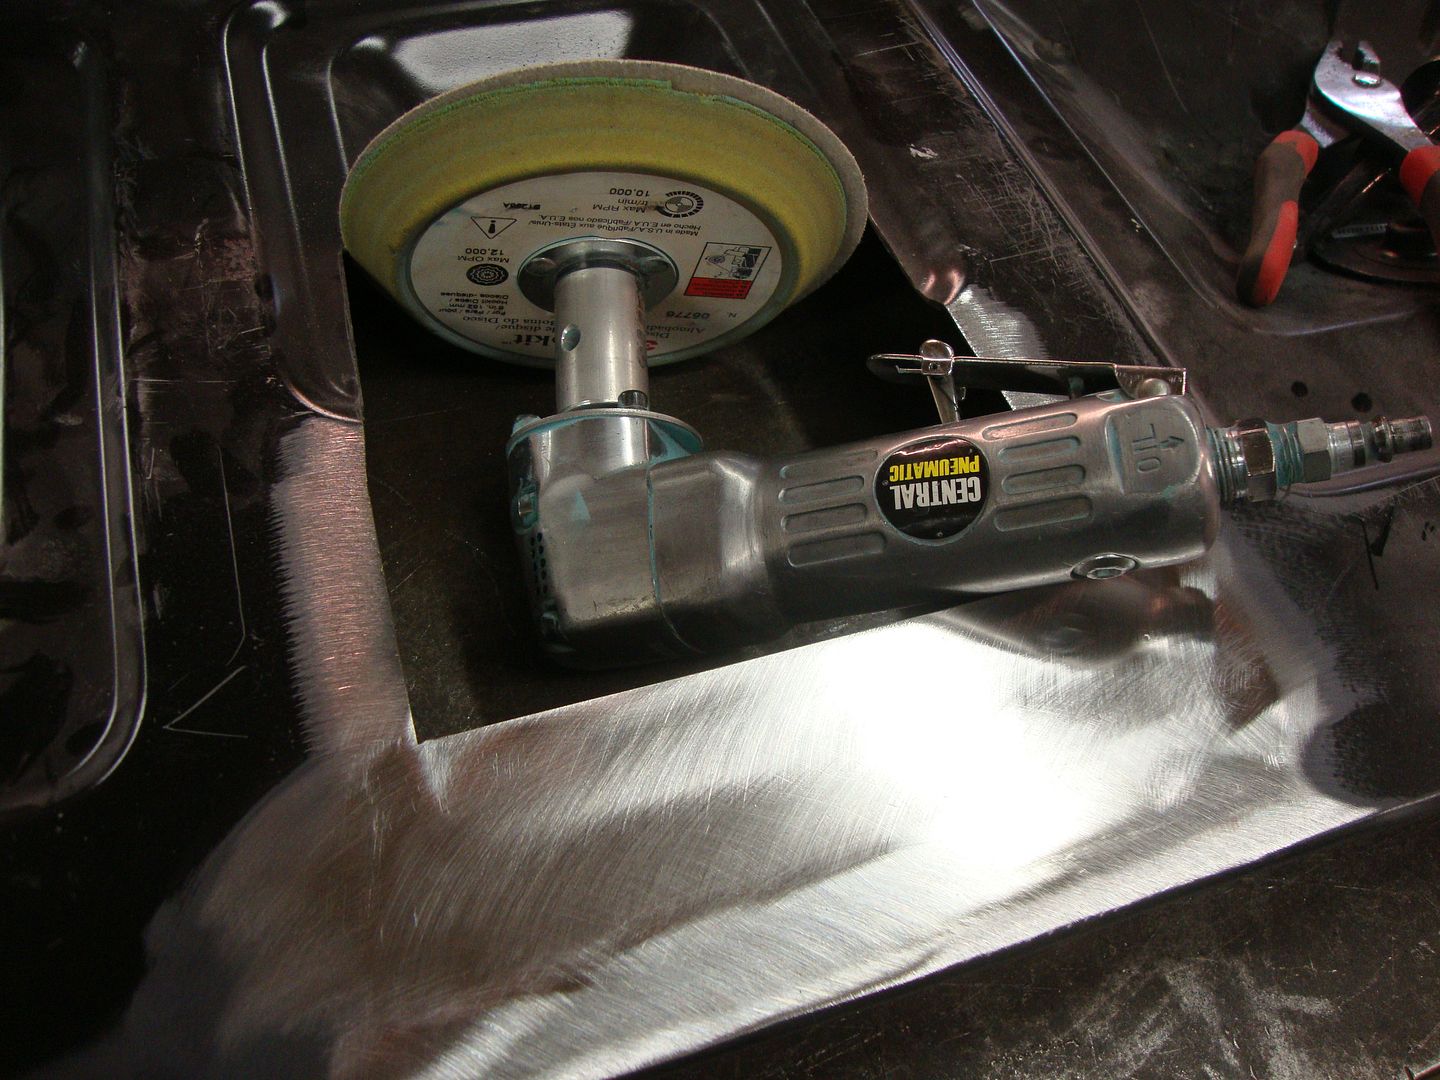
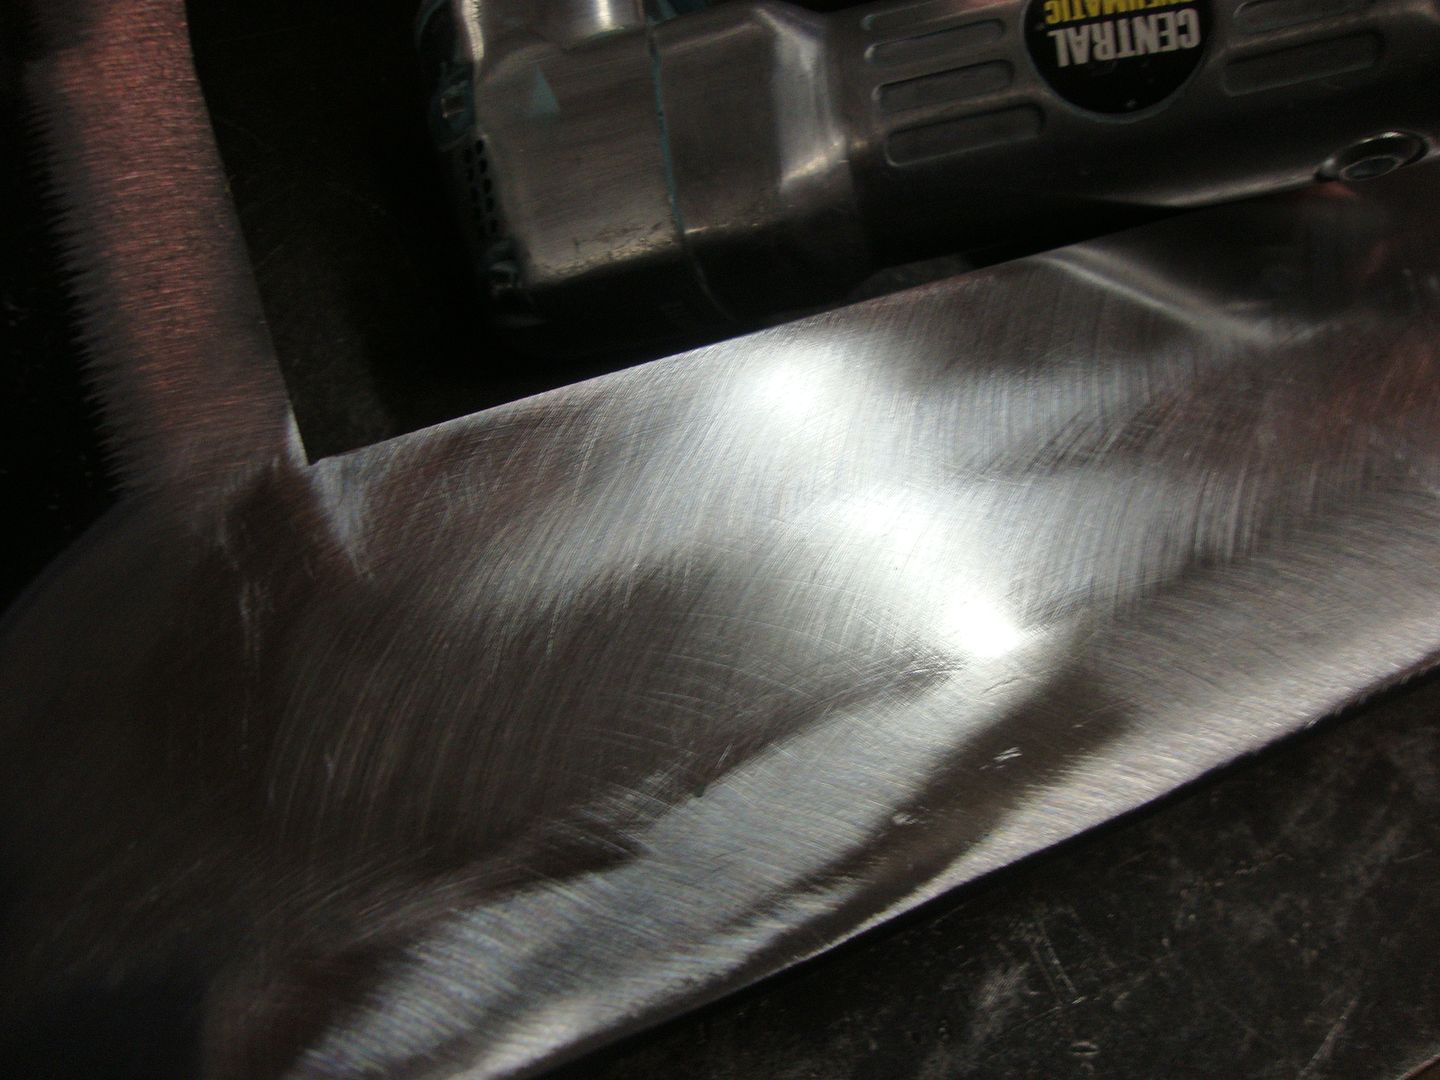
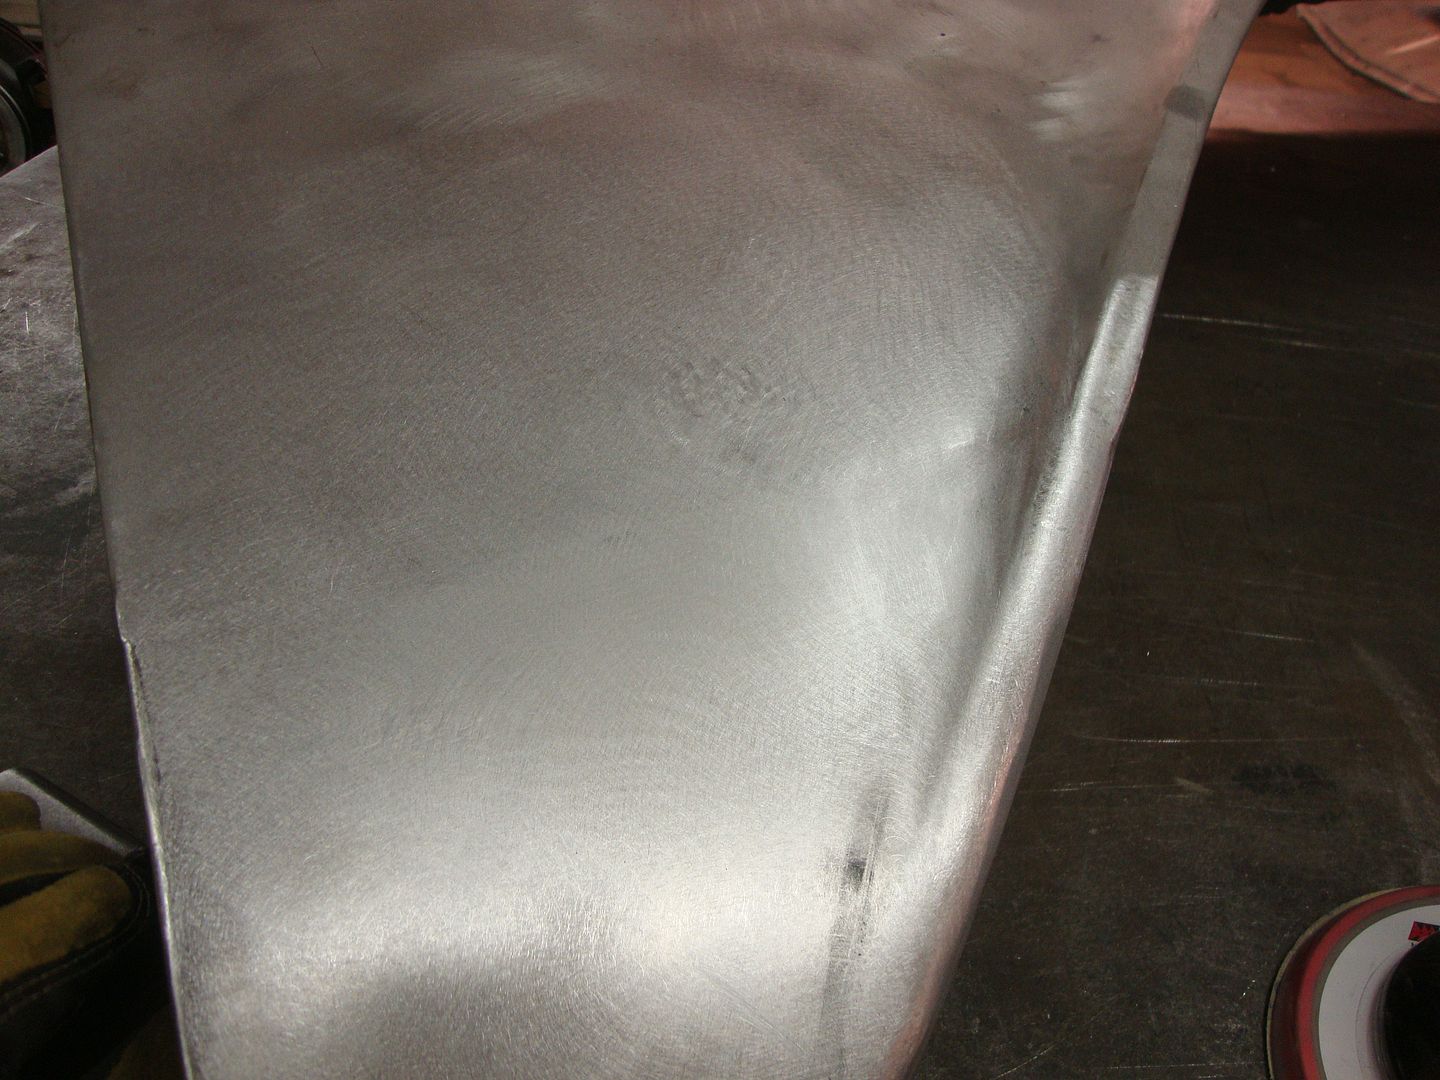
Then I went over it with this harbor freight grinder with a adapter that Wray Schelin made for me to convert the grinder to a sander, works really good, however you must use velcro paper so it doesn't fly away. I use both 80 and 120, this was done with 80


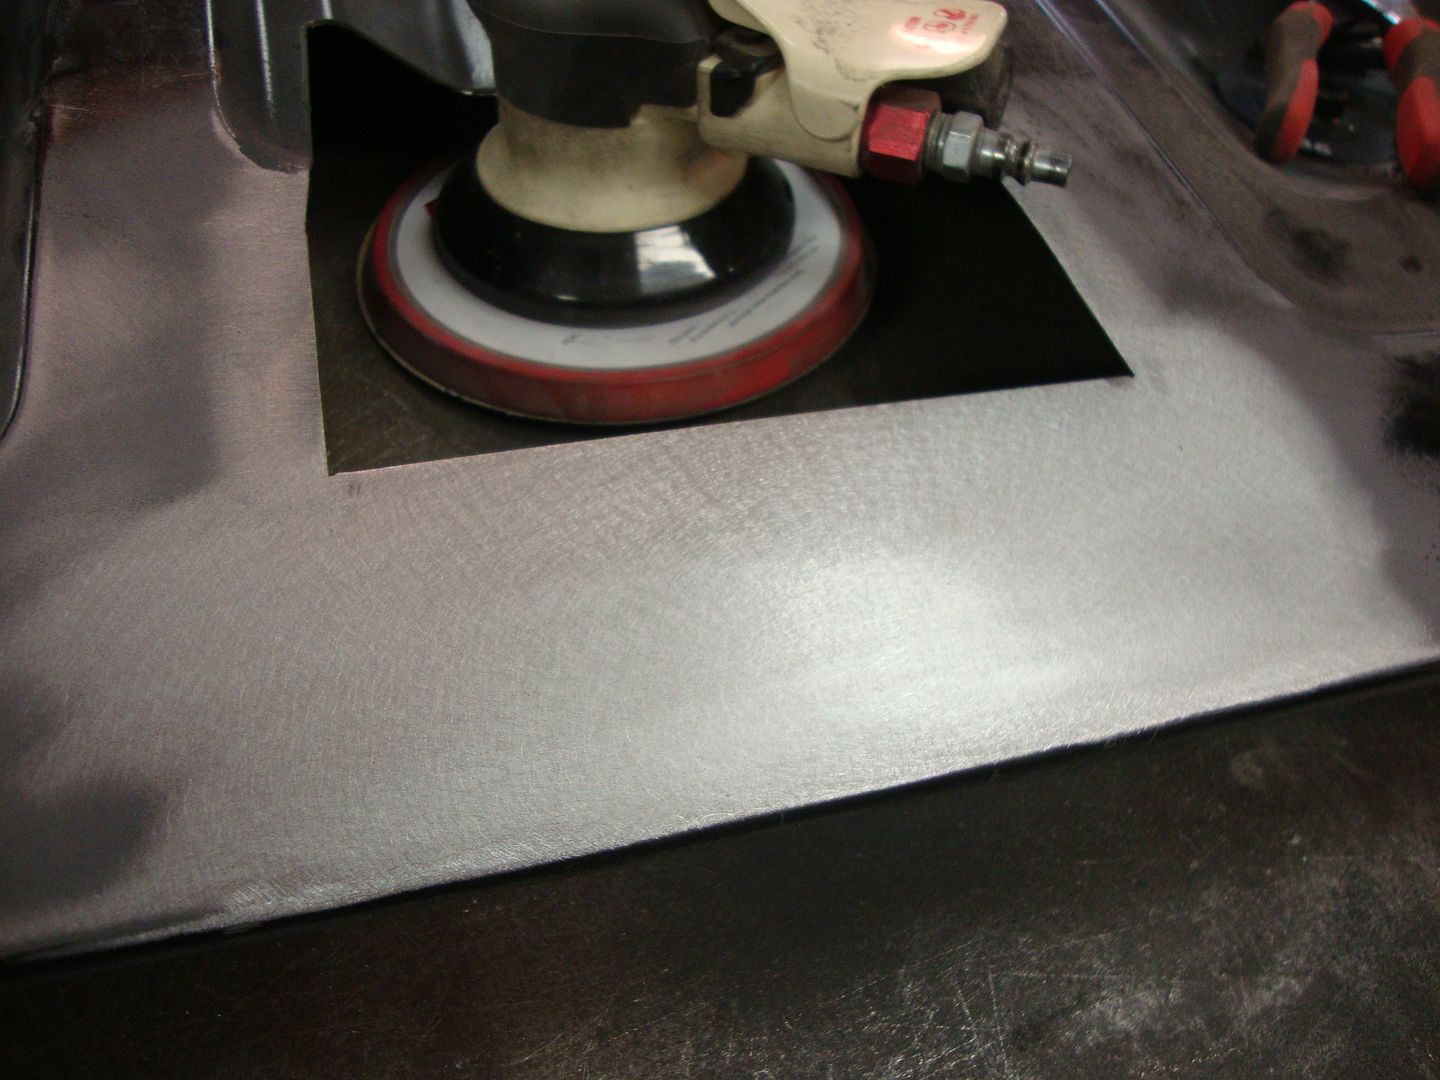
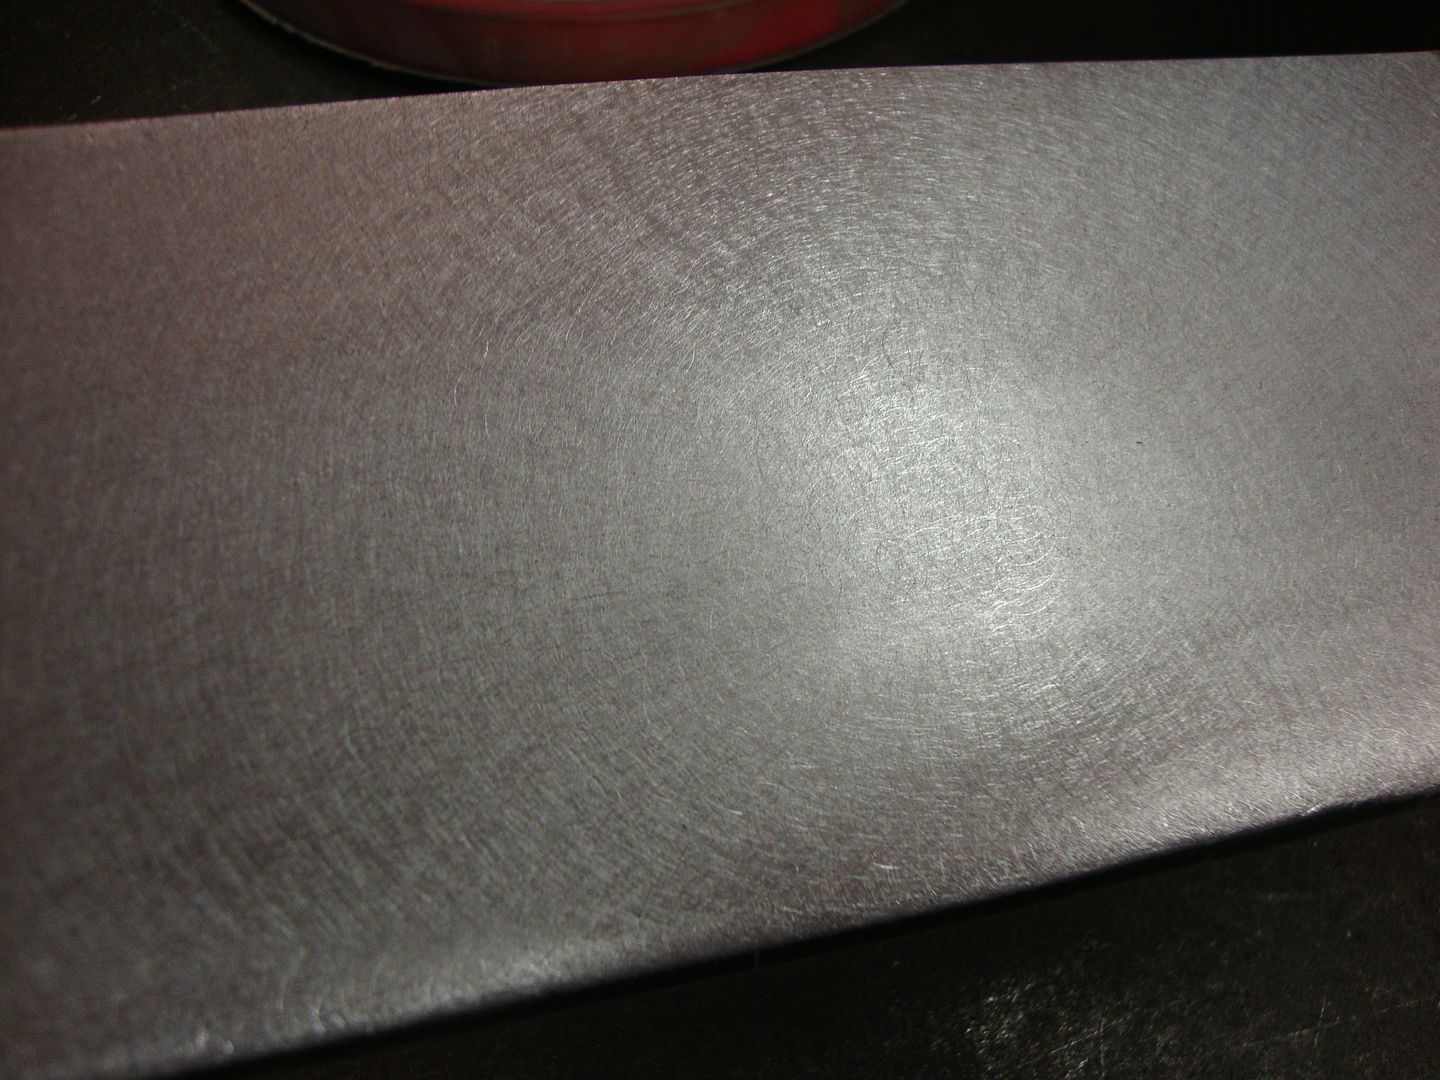
and then here I went over it with a DA sander with 80 grit


As you can see there is very little sign of a patch.


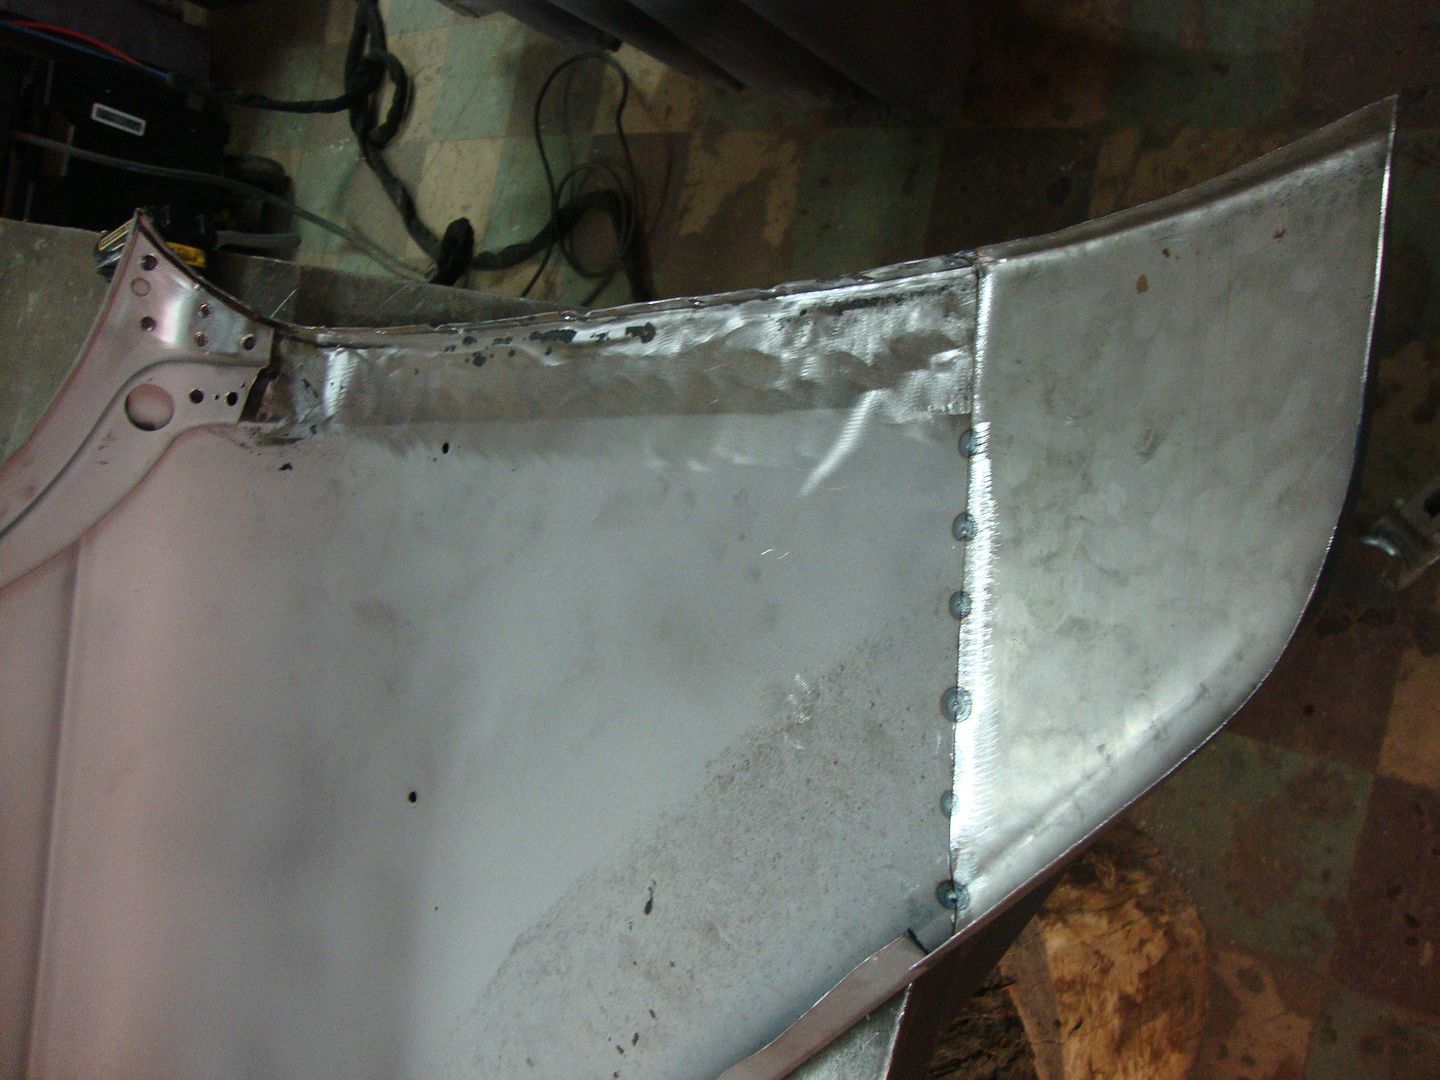
Here is the second patch I did, I will not go through the details but just show the pictures to see the process.

I will add that this patch didn't have as nice of a fit as the first one and it made it a little more difficult to get the finish I wanted, it also was a aftermarket patch that wasn't a perfect fit. I wish I was a little more efficient with making panels like this because it seems the pieces you buy never fit as you would like them to. The gap was also a little wider than I would like as well, this introduces more heat into the panel when welding and also more filler. both of which we like to avoid.

When you look at this fitment and the fact that I wasn't happy with it should give a good indication of how much I hate the use of those butt weld clamps. I feel like you could throw a cat through the gaps those things leave you with.

Also keep in mind that I kinda self taught myself this part of the metal work, without any real hands on teaching, so if anybody else has any pointers please join in.


You can see here that the inner brace had to be removed to allow me to get a good finish on the panel, with the brace in the way it makes it hard to metal finish anything. I have taken complete quarter panels off in order to get to the back side of something before.

I also feel that the sign of a good repair is no sign at all, this is where it gets really tricky. For instance while I am fairly happy with the results of this patch, you can still see signs of a repair, the factory fender is just different than the patch, you can see this in both ends of the patch and the fact that the bend radius on the fender is also different than on the patch. I will put a little more time into it but not until we get all of the other body lines on this car correct, we are starting in the back and working our way forward. This will also give me a chance to throw a few more tricks at you guys as we progress.


If you look up at both panels, you can see how much of a difference a good fitting patch vs. a mediocre patch makes in the whole project, I can't emphasize fitment enough here.


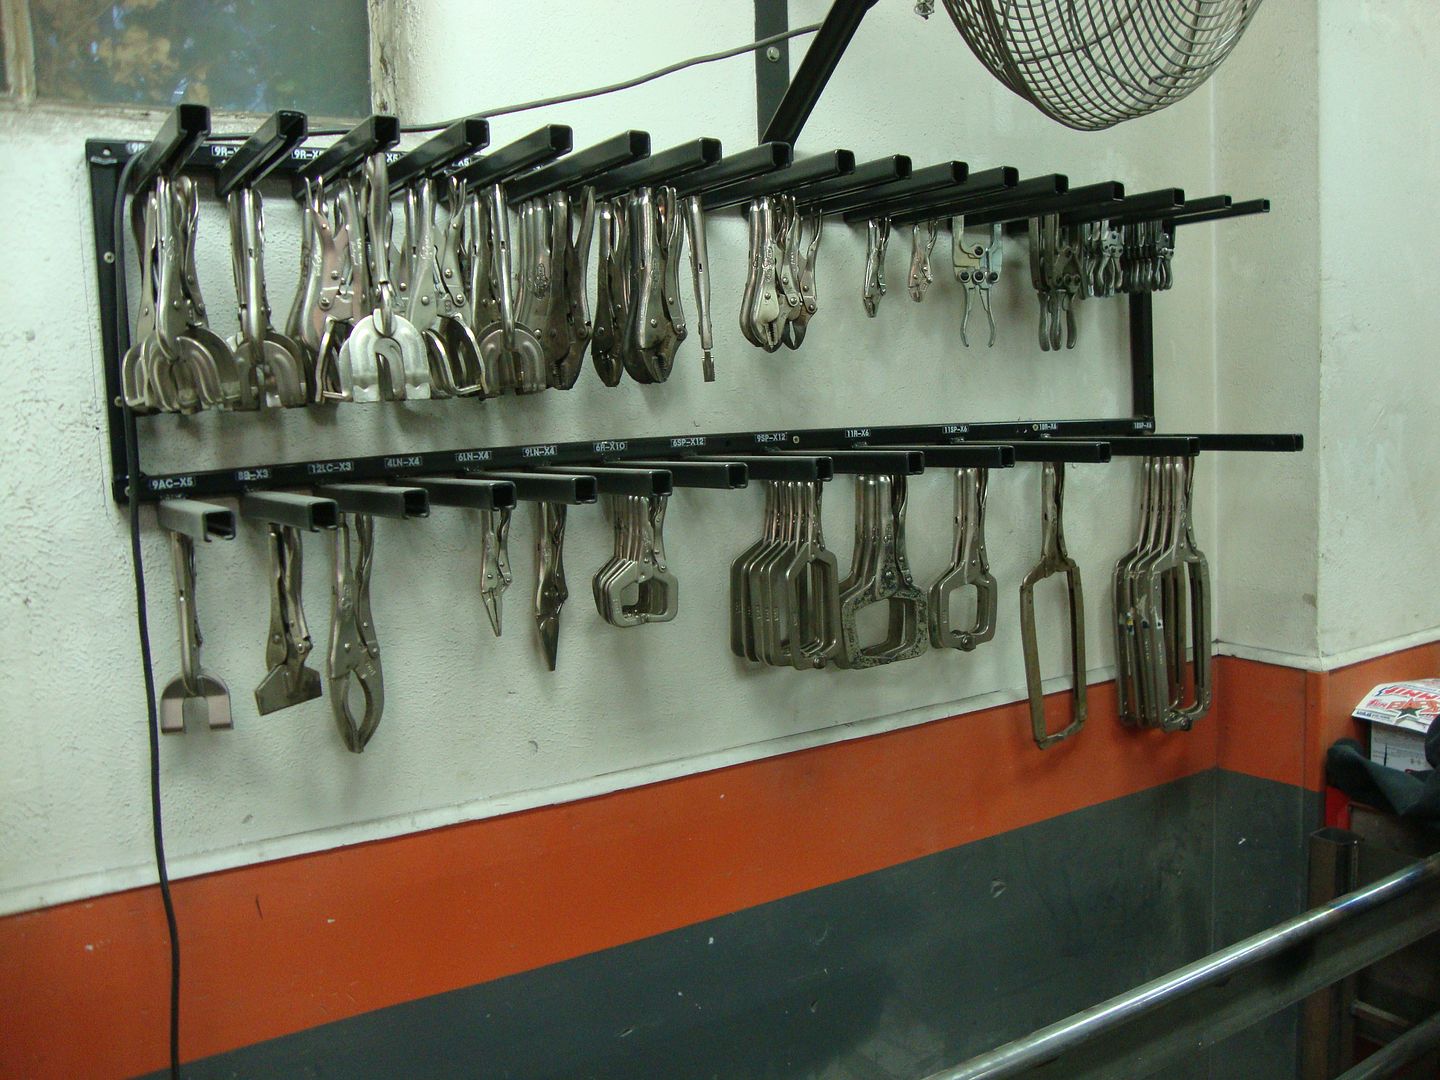
Also you will notice that I use a lot of clamps when working with metal. I need a good variety and a place to put them, I got tired of digging through drawers looking for one specific clamp. So I made this rack and it's been a major time saver. Organization is just as important as fitment in my mind, however you don't need the organization to get the fitment, it just helps. lol.
 
I would also like to touch base on time frames, with what we are doing time is money and this is always a big factor in working on these projects, this is why I have become so drawn to doing these repairs with tig welders, you couldn't weld a full panel like that in one pass as I will do with the tig welder.

I'm curious to how long you guys think it took me to go from welding in the patch on the fender all the way to final finish.
I had it clamped, I timed myself from the moment I put on my welding helmet to the moment I sat down the sander.

I had only one interruption which was from Kate and that was timed in, But that was roughly a 2-3 minute conversion so factor that into your guess. First one to guess gets a free shirt mailed to them. Hopefully we can get a good dozen guesses before I say to make it interesting.
 
Its hard to tell how long the joint is from the photos, so Im guessing 11". I would guess one hour and forty minutes.
 
27 minutes.

Thanks for posting this. I know little about TIG welding so do everything with my MIG. Can I convert my MIG to TIG or is that not practical?

I am anxious to see how you make patches as well. Maybe another thread?
 
Outlaw said:
Its hard to tell how long the joint is from the photos, so Im guessing 11". I would guess one hour and forty minutes.
WOW.. It was 11", couldn't have gotten that any closer.
 
[QUOTE='68 Coronet R/T;n79042]27 minutes.

Thanks for posting this. I know little about TIG welding so do everything with my MIG. Can I convert my MIG to TIG or is that not practical?

I am anxious to see how you make patches as well. Maybe another thread?[/QUOTE]

No completely different machine. You would still want a mig welder as well.. Some of the tig welders are pretty reasonable, You really don't need anything big for stuff like this. I have a big machine but it's way overkill for me. I wanted the smaller one but this one came with a water cooler for the same price so I couldn't pass it up..

You can do all of this with a mig welder but it just takes so much longer and it's a lot more work to get the same final results.

The fender patch was just a after market patch, the tailgate patch I just set behind the hole and drew a line and then cut it. I usually leave it just a fuzz longer and file it until it fits.
 
Nice work Chad. I like how after everything is done you don't have any outline of the outer edge of the welds. I guessing it took you 45min.
 
Does your time include hanging the clamps back on the rack???? On of the first things I learned on sheet metal welding , particularly for tig, is the fabrication & clamping part can be as much or more work than the welding. Can't wait to get my syncro 200 from work to my home shop to get to work on some 20 gauge steel projects.
Funny thing is , I learned to tig weld on a 59 chevy shaped aluminum bed cover I handmade ,have more trouble with steel than aluminum.
Nice work as usual.
so with a tig on a patch, you can run along the whole distance after it's tacked straight without too much warping if you're capable of running along fast enough?
 
Chad.S;n79023 said:
Then I ran a weld around the whole seam, I pretty much did this as fast as I could without stopping.
You can get away with this with a tig welder which is why I preach using a tig welder, I know some can do this with gas but I am not that skilled.
also notice how small the weld is. this makes for much less grinding than if you used a mig welder.


Nice work Chad, your welding is very good with a consistent HAZ all the way around, except on the corner.

It looks like you may not have had a choice here but that HAZ shows very well the reason for putting a radius on the corners.
There is just do much more metal on the outside of the corners to dissipate the heat, so the inside of the corners get a lot hotter.
 
jlcustomz said:
Does your time include hanging the clamps back on the rack???? On of the first things I learned on sheet metal welding , particularly for tig, is the fabrication & clamping part can be as much or more work than the welding. Can't wait to get my syncro 200 from work to my home shop to get to work on some 20 gauge steel projects.
Funny thing is , I learned to tig weld on a 59 chevy shaped aluminum bed cover I handmade ,have more trouble with steel than aluminum.
Nice work as usual.
so with a tig on a patch, you can run along the whole distance after it's tacked straight without too much warping if you're capable of running along fast enough?
Lol.. No it doesn't include putting my clamps on the rack..
I struggle with aluminum but like everything else, I'm self teaching myself.. I'm starting to figure it out though.
 
Interesting observation, something I didn't even notice. I did stop in the corner to re-position but I don't think that effected much. the corners needed more hammer and dolly work to stretch things back in place. This is probably why..
 
I always understood tig welding was way slower than mig welding. That 11" weld from start to finish (same finish) would take me way longer than even an hour and forty minutes. But from what you said in your threads on Tig Welding, I am left with the impression Tig is faster than Mig. Will be interesting to hear how long it actually took. I may be trading my Mig in. Another concern is if I get that finish with Mig, If I grind the surrounding metal i'm afraid of thinner metal than original.
 
21 minutes total. 8 minutes to tack, + 3 to unclamp, grind, planish. 1 minute to run full weld, 3 minute conversation, 5 minutes to grind/planish/blend. Add another minute for picture taking.
Mig takes me 12" per hour.
 
Back
Top