First time clearcoat , Did not go well

C

cstevens71

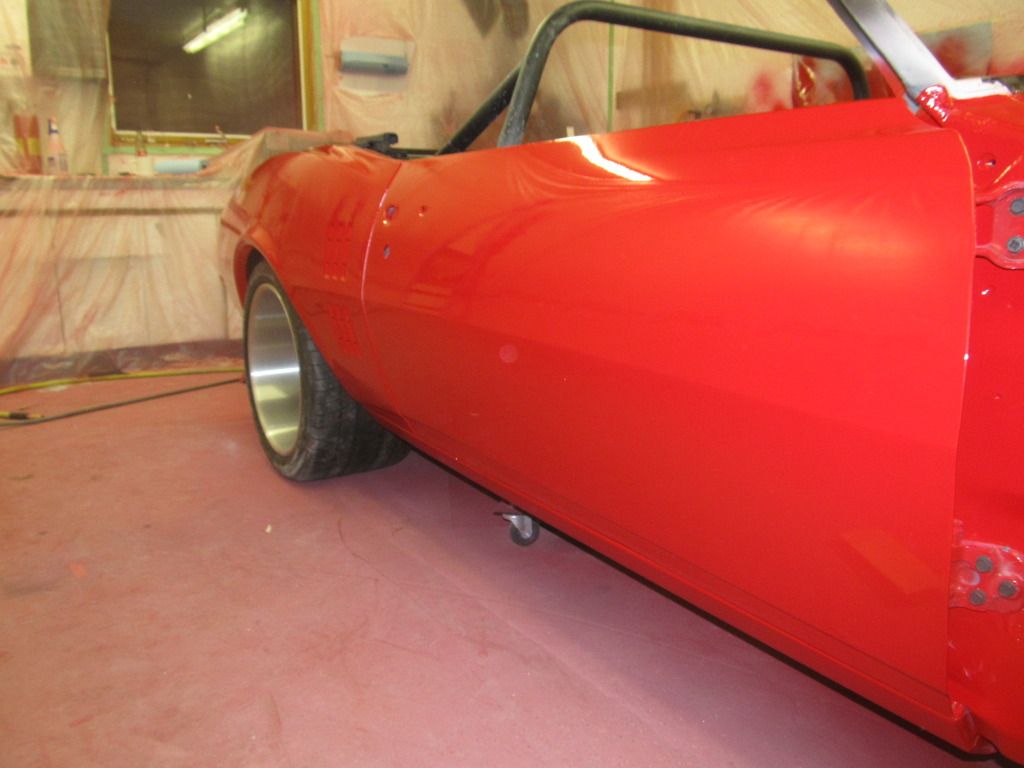
Hi all , I sprayed some uv clear , did not come out well at all. I Sprayed 3 coats of ss red ,which came out perfect , little orange peel , no runs and normal amount of dust for a home paint job. I was planning on shooting 3 coats of clear, wait a cple months then cut and buff

I sprayed the ss on pretty heavy , 1/2 gallon for 2 doors ,quarters and trunk lid. Used a starting line gun , 1.5 tip,30 psi and was a piece of cake.

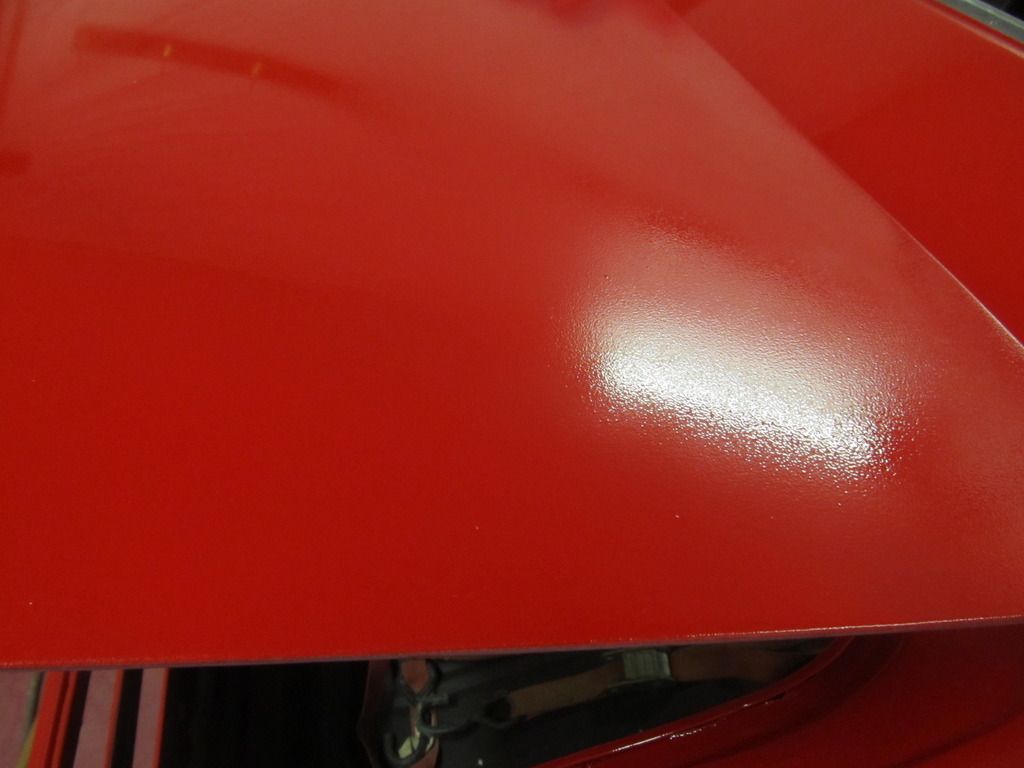
So I thought I would spray the clear on the same way ,did three coats of clear ended with about 30 percent of the surface having this rough texture, after thinking about it all day , I think I made the following mistakes.

1- had a hard time controlling the clear , if I put it on so it looked nice , it turned into a run ,so I think the texture is from me backing off too much?
2 - After I did a cloat of clear , I mixed up the next pot to kill time(waited about 45 minutes) - Would the clear start to set by then?
3 - Way to much spray for a rookie , I had the fan wide open , by the time I got to the last panel there was so much clear in the air I couldn't see how it was going on

I was going to still wait a few months ,then try to cut and buff ,but its too depressing to go out to garage and look and this mess , so after some reading I think I will try the flow coat method ,then leave it for a cple months and cut/buff

SO where I am at now . I am able to cut the clear down with 400 grit with out hittng the ss ,works well and I am able to get it all flat with the exeption of a couple small holes(Solvent pop?). , so I am thinking of dapping some clear in the holes, block the clear with 400,, and re-clearing with a 1.3 tip. Guess I have the following questions...

Is it the end of the world if I break the clear and hit my SS red ,I have some tricky spots that need to be smoothed out.

Do the pictures of the finish look like they match my diagnoses of where I failed in with the uv clear?


Last time I saw something this bad it was mixed 4:1 by mistake??
Only other thing I can think of is dry spray after dry spray coat?
1.3 is not going to help here but proper gun adjustment might or might not depending on air system.
 
Need more information to properly diagnose the problem.
Gun type, compressor size, temperature of metal, activator speed, reducer speed, etc.
Once the spray problem is fixed you will be able to straighten out the paint job pretty easily.
 
The gun is a devilbiss starting line ,compressor is fair size , 9.6 cfm @90psi ,I run it a little higher , it was cycling off@120 and on @100 psi. Right out of the compresser it goes to 20 feet 3/4 copper , then a motorguard filter ,1/2 hose to the gun where the regulator is.

The shop was hot , prob about 75F . I don't have a make up air , so my fans draw outside air @40-50F(I live in northern Canada and winter is coming), through the shop in the hopes of heating up the air a bit,then filtered into my booth.

I mixed the clear with 2 parts clear , 1 part slow and 1 part medium. Was I supposed to use reducer?

 
I think its just a matter of technique or lack of , I finished knocking the decklid down with 400 dry and resprayed with the 1.3 , and about 1/2 the fan I was using before... Going balls deep and using my firebird as a piece of test metal was not too wise...but I figured since I nailed the ss the clear would be just as easy. it came out not bad , 3 coats in these photos , I think its in range of colorsanding/buffing now at least


Much better but remember, your under scfm requirements, so doing individual pieces will work better then doing a large area, so compressor will keep up.
 
Barry makes an excellent point. Without proper air supply your gun will never atomize the paint as it is designed to do. Compressed air is measured in two capacities, pressure and volume. Pressure is measured as Pounds per Square Inch or PSI. Volume is measured in Cubic Feet per Minute or CFM (sometimes referred to as SCFM). These are two different things and should not be confused one with another.
Air tools, including spray guns, will have the required amount of air (CFM) given at a specific operating pressure (PSI) for them to run properly. This means that your compressor must be capable of producing that much or preferably more than this amount. For example here are the Specifications for the DeVilbiss Tekna Copper:
Key Specs
  • Air Cap 7E7 High Efficiency Air Cap (as efficient as HVLP!)
  • Fluid Tips 1.3mm needle/nozzle set as well as a 1.4mm needle/nozzle set
  • Materials All basecoats (inc. waterborne), all clearcoats, all single-stage
  • Air Pressure Input pressure: 16 to 30 PSI
  • Spray Pattern 12 ½ inch
  • Air consumption 9CFM to 13CFM
Notice that two different specs are listed, Air Pressure and Air Consumption. To be safe in calculating air supply I suggest you take the high numbers so for this gun to operate properly your air compressor must produce 13 CFM at 30 PSI. Another concern is the run time of the compressor so sizing your compressor to handle at least 15 CFM at 40 PSI is recommended. This is especially true if you plan to use an air sander or sandblaster as they required large volumes of air as well.

If you have more than one air tool running at a time (you have a helper stripping paint while you are painting) then you must combine the Air Consumption of the tools to properly size your compressor.
 
I just finished my first paint job last weekend so I'm no expert but my finish came out nice. I think the key is laying it on as thick as possible without getting runs. To me it looks like you were just dusting it on too lightly, holding the gun too far away, or had too little pressure. My compressor setup was a joke and I had to constantly adjust my regulator at the gun to maintain 30psi. However, I noticed that even when my pressure would drop like crazy and I only had 20 psi it still payed out fine as long as I was slightly closer to the panel and traveling slightly slower. The flip side is when it would run itself up to 40 psi, I was still fine with the gun a little further from the panel and moving faster. And I ended up being able to read, hear, feel the gun as it had higher and lower pressure.

My point is, I achieved good finish with my gun ranging between 20 and 40 psi as long as I adjusted my technique to match. However, when the gun had 28 psi constantly it was super easy to get constancy out of it without fear of runs or dry spray.

I also used the devillbiss starting line gun with 1.3 tip.
 
y5mgisi;n76970 said:
I just finished my first paint job last weekend so I'm no expert but my finish came out nice. I think the key is laying it on as thick as possible without getting runs. To me it looks like you were just dusting it on too lightly, holding the gun too far away, or had too little pressure. My compressor setup was a joke and I had to constantly adjust my regulator at the gun to maintain 30psi. However, I noticed that even when my pressure would drop like crazy and I only had 20 psi it still payed out fine as long as I was slightly closer to the panel and traveling slightly slower. The flip side is when it would run itself up to 40 psi, I was still fine with the gun a little further from the panel and moving faster. And I ended up being able to read, hear, feel the gun as it had higher and lower pressure.

My point is, I achieved good finish with my gun ranging between 20 and 40 psi as long as I adjusted my technique to match. However, when the gun had 28 psi constantly it was super easy to get constancy out of it without fear of runs or dry spray.

I also used the devillbiss starting line gun with 1.3 tip.

Not to be offensive but because you gotta away with it doesn't mean it should be put forth as a good painting practice.
 
I can see is point though ,and he is correct, now that I understand how it flows out as compared to the SS it is going on great , I am going a lot closer too the panel now and being more not so scared of it.

However , that being said , I HAVE to follow your guys suggestions also. I have informed my wife that the pros say the success of this project is utterly totally 100% dependent on me getting a new 2 stage compressor(I hate that noisy thing anyway) , soooooo , Barry , if you get a call from some chick to confirm the issue , go with it.
 
cstevens71;n76986 said:
I can see is point though ,and he is correct, now that I understand how it flows out as compared to the SS it is going on great , I am going a lot closer too the panel now and being more not so scared of it.

However , that being said , I HAVE to follow your guys suggestions also. I have informed my wife that the pros say the success of this project is utterly totally 100% dependent on me getting a new 2 stage compressor(I hate that noisy thing anyway) , soooooo , Barry , if you get a call from some chick to confirm the issue , go with it.

LOL
Hey it won't be my first time, I know what to say!
I can vision a 15 hp screw type compressor under the Xmas tree. LOL
 
Barry;n76947 said:
Much better but remember, your under scfm requirements, so doing individual pieces will work better then doing a large area, so compressor will keep up.


to add to this, the startingline gun.....welp, its devilbiss' lowest quality gun. its what i started with. its an air hog for sure. atomization is not very good. to get something reasonable i had to run at 35-40psi with clears.
the fan on the gun- wide open makes an hourglass shape with gun 6-8" from surface.my startingline barely had any product in tne center being sprayed.set up i did on some masking paper taped to the wall. to get the right fan pattern with equal product across the fan, i had to dial it down to where tne fan was only about 8" wide.that gave me a good fan with consistant product across the fan.
then fluid control knob id turn way out, pull trigger, then turn knob until it bottomed on handle, then one more turn.
doing my best to keep travel speed, distance from surface, and overlap consistant......
i still had OP.not like your first pkcs, which look like either overspray or gun control was a little off-overlaps and/or distance got off(my personal experience there as i had an old hood i practiced on and it looked pretty nasty sometimes). ipainted quite a bit with that gun. closest i came to perfect was factory OP with over reduced clear.
so i pretty much did what youre doing and layed on enough coats of clear to sand/buff.
then bought an finishline 3.
MUCH better results.
then i bought a tekna.
now,if i get OP its operator error only.

you may want to consider a higher quality gun if youre going the distance with a two stage compressor you may wa t to consider a higher quality gun as well.
 
[QUOTE='68 Coronet R/T;n76972]

Not to be offensive but because you gotta away with it doesn't mean it should be put forth as a good painting practice.[/QUOTE]


No offense taken. That's why I lead by saying I just finished my first paint job and that I'm not an expert. I just wanted to share my first time experiences.
 
y5mgisi;n76991 said:
No offense taken. That's why I lead by saying I just finished my first paint job and that I'm not an expert. I just wanted to share my first time experiences.

As I see it it's all good. The one thing you and others that start with lower quality guns and such is that when you do get to the point of getting better equipment you will have the experience of lesser equipment and if something goes haywire with the new stuff you will quickly be able to adjust your technique to complete the project. Where as if you never had that experience and something went wrong with the better tools you might not be able to adjust as quickly if at all, IMO.
 
We all started somewhere in the never ending process of learning how to spray paint on a car. I tried to "get by" with an undersized compressor and a cheap spray gun at first because, lets face it, big compressors and nice spray guns cost $$$. When I got tired of waiting for my compressor to catch up with the DA and spray gun, I broke down and bought a bigger 2-stage compressor and viola the light came on. Better tools mean more efficiency, less time wasted and much better results. So I bought an Iwata LPH400 to see what if any difference that would make - again huge difference noticed. Now I have a "collection of spray guns" but use the Tekna Copper mostly because of the larger fan.
Well, I started thinking if its true with the tools then maybe its also true with the products? Yep.

Anyway, I try to help others not make the mistakes and waste the money that I did.
 
Its almost not fair 68, the worst part for me on the tech line is who starts out with an 80 gallon tank compressor putting out 24 scfm and a $1000 plumbing system connected to the compressor let alone an $400-800 gun. Most of us took years to get to that point.
 
Well , This is just a project car , TBH I might have enough life left in me to 1 or 2 more ,so top shelf equipment/efficiency is not paramount... anyhow , I nailed it the next go around ,so thanks for the tips and the great product.Also , just an FYI , I did break the clear to the SS in a cple non-critical spots , once recleared I cant find them at all. maybe in the sun but so far it looks good.

Anyhow ,thanks guys.Here is the build thread for this car if any one needs to kill some time.

http://www.camaros.net/forums/showthread.php?t=313153
 
I looked thru your thread, Lot of work for sure. Nice job. Now keep the energy up and get her put together :D I wanta see it on the ground in those shoes you got her, looked good during mock-up.
 
Back
Top