Father and Son Jeep Wrangler Floor replacement

Dub;33271 said:
I use sockets or different size rods to make my bends. A big vice helps to. Been doing it for years. I have different size rods all 2 foot long. Just in case I have longer tin to bend.

Thank you, we will try the sockets or I could pick up some metal rods at the hardware store.

Steve

- - - Updated - - -

Bob Hollinshead;33272 said:
Penetration is good. Is this flux cored wire-the welds look sooty? The first tack is always cold and as the sheetmetal soaks up heat the welds get hotter as you go. Try your 5 overlapping tacks right in a row with no cool time between so you're moving faster and turn the wire speed down a little to keep the bead height low.

I am using gas (sorry, I can't think of the mix). What should my gas pressure be when I pull the trigger?

That makes sense about the first tack being cold and not laying down nice. You are saying I don't need to let the puddle stop glowing before I go on to the next one, I just thought it would help with not blowing thru.

Thanks so much for the advice!!

- - - Updated - - -

chevman;33273 said:
I have my share of welding problems also, but that picture looks to me like the direction of the torch is off. It should be pointed in the direction of travel, and in the middle of the seam, with overlapping beads.

I was welding that with the panel verticle and the seam running horizontal. I'm aiming the tip right at the edge of the adjacent weld with the gun angled away so the wire is shooting towards the previous tack at about a 45 degree angle. I'm trying to keep the tip about 3/8" away from the metal.

I hope that makes sense - any suggestions?

Steve
 
Nothing can beat practice, but you're welding so that's a good start..
I never became happy with my mig welding so I switched to Tig, takes a little more patience to figure out but in many instances I think it's actually faster as well.
 
I find there is a place and time for mig/tig if I just want to tack something together quickly I grab my mig. Or if in a tight spot the mig is just easier in my book. If you are welding tight edges or want a weld to disappear completely the tig is your best bet. It is up to you which way to go. But I use both, sometimes on the same project.
 
HIG;33274 said:
I am using gas (sorry, I can't think of the mix). What should my gas pressure be when I pull the trigger?

That makes sense about the first tack being cold and not laying down nice. You are saying I don't need to let the puddle stop glowing before I go on to the next one, I just thought it would help with not blowing thru.


I was welding that with the panel verticle and the seam running horizontal. I'm aiming the tip right at the edge of the adjacent weld with the gun angled away so the wire is shooting towards the previous tack at about a 45 degree angle. I'm trying to keep the tip about 3/8" away from the metal.

I hope that makes sense - any suggestions?

Steve

When I run beads I angle the the gun and sometimes push the puddle or drag-either works. Doing the overlapping tack welds on sheetmetal I most oftentimes hold the gun 90* to the work surface. Aim right at the seam, 3/8 to 1/4" away. Do one tack and take note of the trigger time, adjust your heat, wire feed speed, and trigger time so you end up with good penetration and a low weld height-once this is all in sync then practice doing multiple overlapping tacks in a row with no cool down time. Or if you can adjust the machine well just run 1" beads. Test, test, and practice! Metal needs to be clean.
 
Thanks for the replies!!

I've read on the "how to weld thin metal" thread about cleaning the surface. I know brake and carb cleaner are bad to use because of the gases that can be given off, can waterborne or solvent W&G remover be used to clean the panels before welding or is only soapy water safe?

Bob, what do you think is causing the soot on my welds?

Thanks, Steve
 
You can use mineral spirits and be safe, I would think wb W&G remover would be just fine, alcohol and acetone are both safe solvents to use before welding. The only cleaners I know of that aren't are the ones that state Chloronated , that is the stuff that the UV turns into phosgen gas.
I was a pipe fitter for a number of years and we used mineral spirits alot, stoddard solvent at times, even wd40 if it was all we had with us. I swear there is nothing worse than working on weld piping at an asphalt tank farm. Spend as much time cleaning as actual working
 
Bob Hollinshead;33304 said:
When I run beads I angle the the gun and sometimes push the puddle or drag-either works. Doing the overlapping tack welds on sheetmetal I most oftentimes hold the gun 90* to the work surface. Aim right at the seam, 3/8 to 1/4" away. Do one tack and take note of the trigger time, adjust your heat, wire feed speed, and trigger time so you end up with good penetration and a low weld height-once this is all in sync then practice doing multiple overlapping tacks in a row with no cool down time. Or if you can adjust the machine well just run 1" beads. Test, test, and practice! Metal needs to be clean.

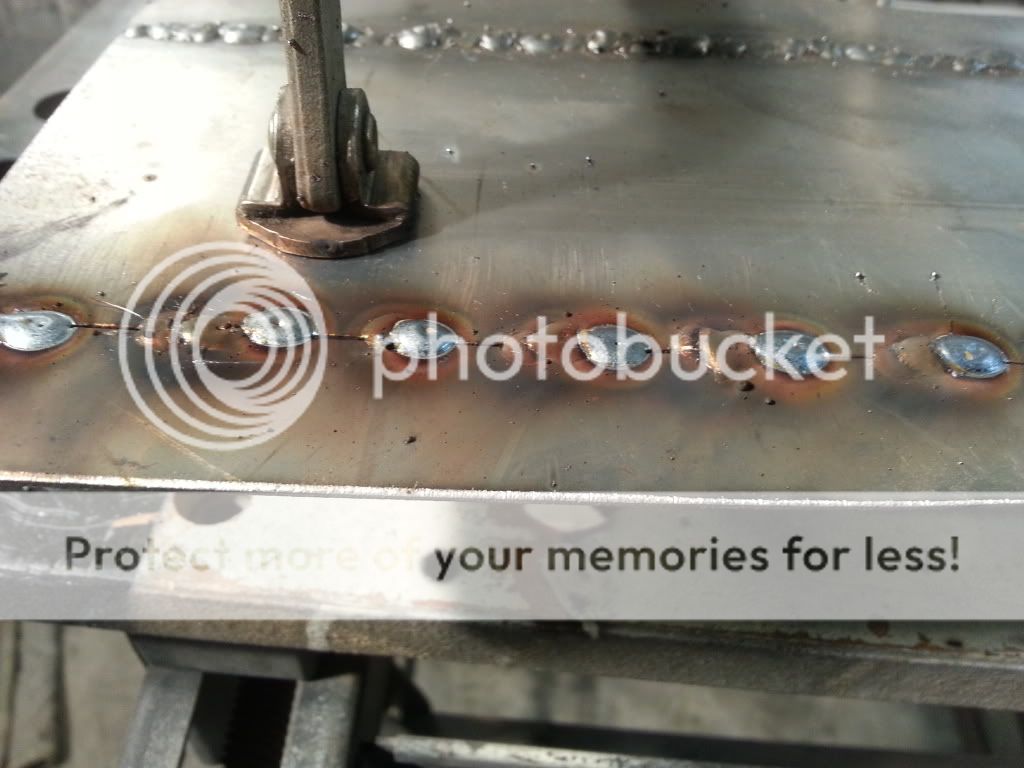
I did some more practice tonight and I would say it's getting better but please point out anything that I could improve upon!! The thing that scares me is the test piece I'm doing is a vertical panel at eye level not laying on my head under a dash but I should improve with practice.

This is 18 ga cold rolled using 75/25 gas.


How common is it to get small blow through while welding? I'm assuming I can just weld it up. It's so strange that I can be welding along and all of the sudden blow thru and not have any idea why but I do realize there's so many factors.


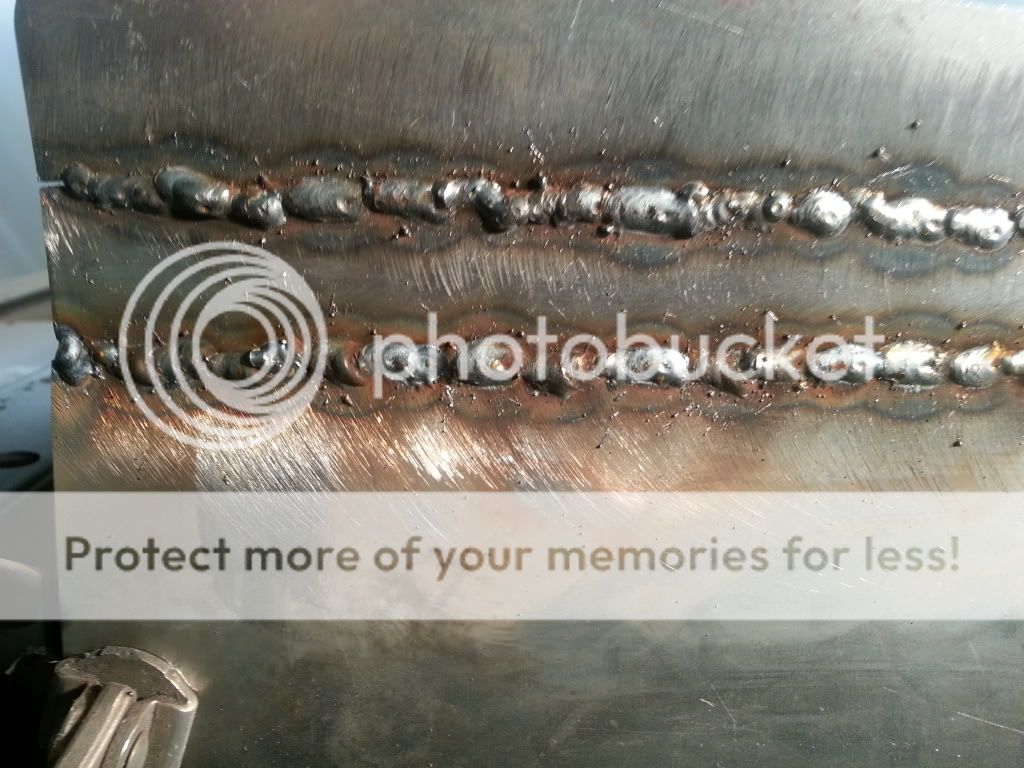
Well here's my final attempt tonight (the lower weld, I think I can see some improvement from the top one). If I back my wire speed off any I feel like I lose the wire protrusion.


They are done with the gun at a 90 to the surface about 3/8" away with no cool down between the 5 tacks. I had to laugh because I was having a hard time not pausing between tacks, I have a auto darkening helmet and I kept waiting for that to reset - I had to make myself pull the trigger without pausing.

On the lower weld I would say I got much better penetration:


Please pick them apart, I really appreciate the help and do feel like I'm made improvements with the help.

Any other tips or tricks?

Do anyone have a good pic of a very good sheet metal mig weld?

Thanks, Steve

- - - Updated - - -

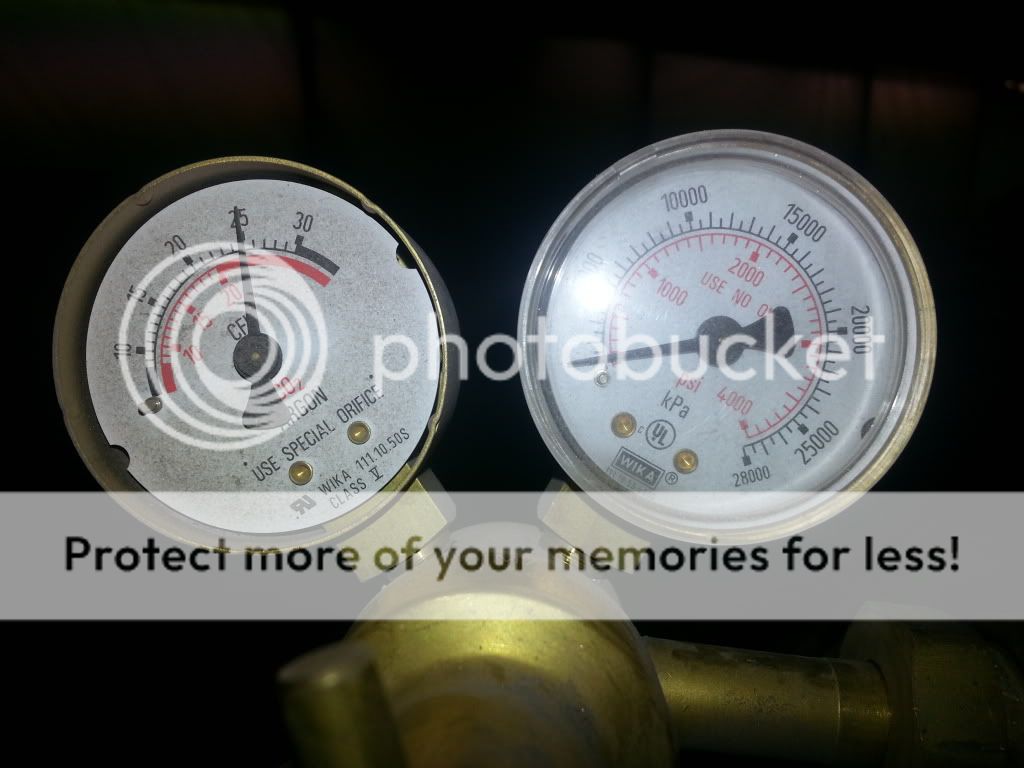
What should I have my regulator set at? I'm swapping out my tank tomorrow, I know it's almost out. I have the other gauge set at 25 CFM with the trigger pulled, I thought I read once that's what it is suppose to be but I have no idea where I read that but now that I'm looking at the gauge I see that I'm outside of the range (red/black).

 
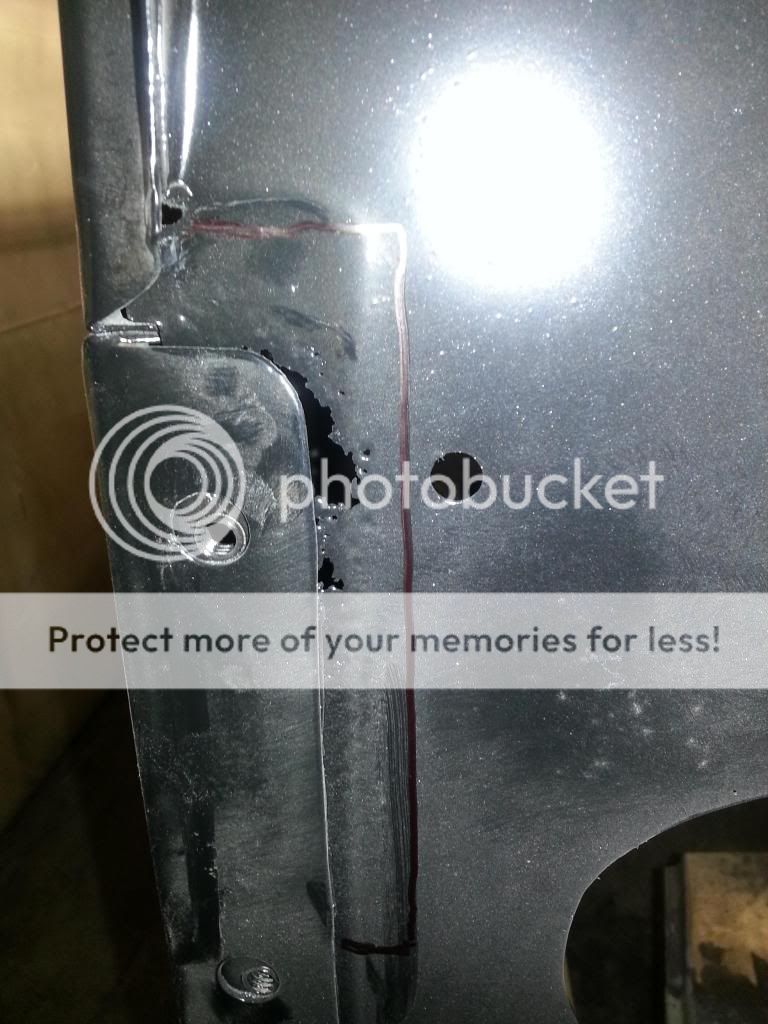
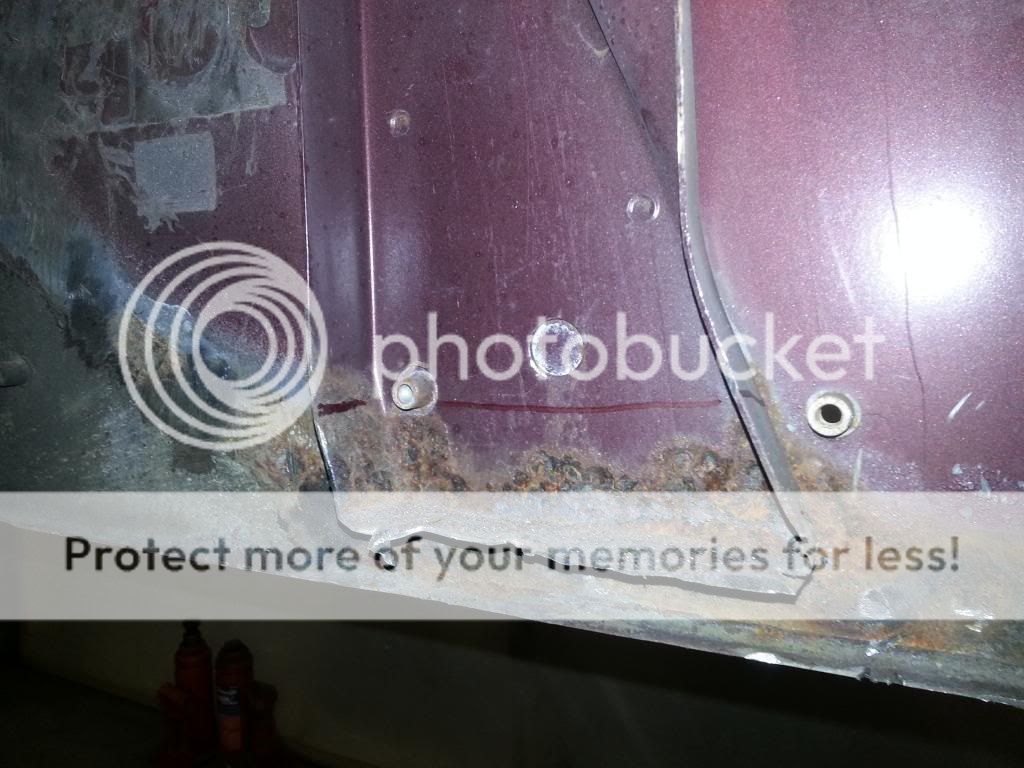
I'm looking for some advice and options for cutting out some rust and making the replacement parts.


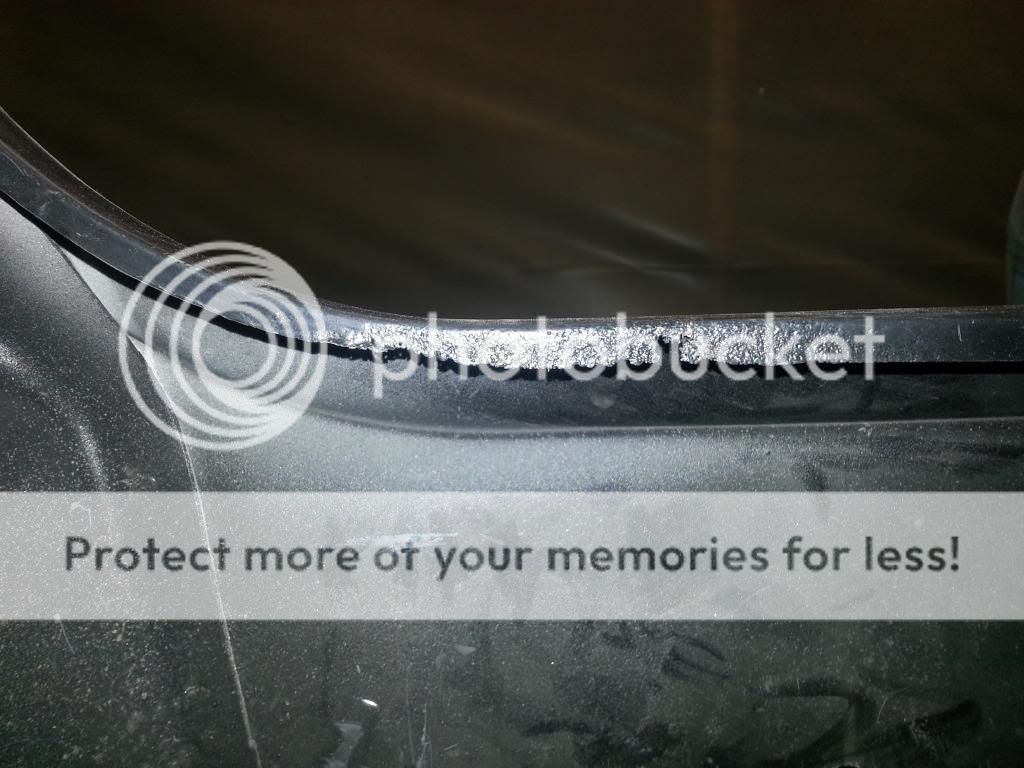
You can see the line where I think we should cut, we'd extend the cut all the way down to inside the Jeep:


I straightened out the rolled flange and I think we can drill out the spot welds and remove what we'd want to cut:


Same thing here, we'd cut on the line and drill the spot welds:


I'm not really sure where the best place would be to cut across the top and blend it in. This is under the hood behind the battery box so it will not be very visible but I'm looking at this as a learning project so I'd like to do the best we can.


Here I'm thinking about cutting out the bottom of the brace and making a new piece:


Last one:


Has anyone used a Eastwood or Harbor Freight shrinker/stretcher? I was think we could bend a piece in the vice then stretch it to form the curve, I'm not a big HF fan just wondering if anyone has used one?

So what do you think, do I have the right idea? What's my options for cutting in those tight places, small cut off wheel or air reciprocating saw? Does anyone see a better way to fix this rust?

Thanks!!!
Steve
 
You are using plenty of gas if the gauge is reading correctly. 25 is a lot and a waste imho unless you are outside and there is a slight breeze.(anything more than a very light breeze and you are headed inside) In the shop 15-18 is quite adequate.

Your tacks/stitch are not interconnected, leaving a lot of pin holes which can lead to weld failure from vibration and flexing over time.

When you start a new tack - start it so that the wire is right on the edge of the existing tack. Hold for just a moment then move slightly away from it.

When done correctly it will look like a nice oval shaped tack laying slightly over the previous tack and you wont have a pin hole in between them, just a continuous weld.

Be sure to keep the wire centered on the gap. I try and hold the gun at 90 degress to the weld, and tip the gun 10-15 degress toward the exisiting tack. I make the tack either round or oval, then move to the opposite side and do it on a cool location.
I do not do the 5 tacks in a row for the reason that it is dam hard to get 5 tacks all with good penetration, consistant size, and centered over the gap when zapping away.

In this picture of your tacks I have circled in red what appears to be the first tacks.
Then the first green circle to the right of the red circle is your second tack.
These 2 are a great job, just what you want !
I put in more green circles to show how I would continue across the seam. I might have to many green circles as it is hard to scale , so it might less than shown.

Another tip to get good penetration: When you have made a tack that is a bit thick , instead of just trying to melt into it, grind it down to the same height as the normal tacks. You will get a far better start, better penetration, and less risk of burn through.

When we weld pipe using wire , whether it was x-ray or not we ground a small relief on the start and end of every tack or stringer. Wire doesn't "dig in" like stick and the thinner the start zone is the easier the tie in . A slight gap, about the diameter of the wire is the best. Doesn't take near the heat to get full penetration since you are only fusing to the edges and not melting the panel through to get penetration. This technique is a bit harder to do , but gives a full weld with less haz.

In sheet metal work the haz is what it is all about, keeping it as small as possible while maintaining full penetration. Less distortion and warpage is the result, as well as less material to grind off, which again means less heat put into the panel.

The use of a flange weld is great for spot welds, but when used for stringers all a flange weld really does is require much more heat to get full penetration and a resulting warped panel.

I'll get off my soap box now, LOL

Have fun, you are getting there! SOF.

tack welds.jpg
 
Senile Old Fart;33571 said:
You are using plenty of gas if the gauge is reading correctly. 25 is a lot and a waste imho unless you are outside and there is a slight breeze.(anything more than a very light breeze and you are headed inside) In the shop 15-18 is quite adequate.

Your tacks/stitch are not interconnected, leaving a lot of pin holes which can lead to weld failure from vibration and flexing over time.

When you start a new tack - start it so that the wire is right on the edge of the existing tack. Hold for just a moment then move slightly away from it.

When done correctly it will look like a nice oval shaped tack laying slightly over the previous tack and you wont have a pin hole in between them, just a continuous weld.

Be sure to keep the wire centered on the gap. I try and hold the gun at 90 degress to the weld, and tip the gun 10-15 degress toward the exisiting tack. I make the tack either round or oval, then move to the opposite side and do it on a cool location.
I do not do the 5 tacks in a row for the reason that it is dam hard to get 5 tacks all with good penetration, consistant size, and centered over the gap when zapping away.

In this picture of your tacks I have circled in red what appears to be the first tacks.
Then the first green circle to the right of the red circle is your second tack.
These 2 are a great job, just what you want !
I put in more green circles to show how I would continue across the seam. I might have to many green circles as it is hard to scale , so it might less than shown.

Another tip to get good penetration: When you have made a tack that is a bit thick , instead of just trying to melt into it, grind it down to the same height as the normal tacks. You will get a far better start, better penetration, and less risk of burn through.

When we weld pipe using wire , whether it was x-ray or not we ground a small relief on the start and end of every tack or stringer. Wire doesn't "dig in" like stick and the thinner the start zone is the easier the tie in . A slight gap, about the diameter of the wire is the best. Doesn't take near the heat to get full penetration since you are only fusing to the edges and not melting the panel through to get penetration. This technique is a bit harder to do , but gives a full weld with less haz.

In sheet metal work the haz is what it is all about, keeping it as small as possible while maintaining full penetration. Less distortion and warpage is the result, as well as less material to grind off, which again means less heat put into the panel.

The use of a flange weld is great for spot welds, but when used for stringers all a flange weld really does is require much more heat to get full penetration and a resulting warped panel.

I'll get off my soap box now, LOL

Have fun, you are getting there! SOF.

View attachment 3060


Thank you for the nice explanation and what to watch for!!

I see what you are saying, the picture you added the circles to do show a nice overlap but when I look at my other welds they all do not look like that. I'm shooting for the edge of the previous weld but that does not mean that I'm hitting it, especially if I'm trying to zip off a few tacks in a row. I will have to do more practice and be VERY conscious of hitting the edge of the previous weld, keeping the wire in the center of the gap and moving a little bit to oval the weld. Thank you!!

I also see what you mean by grinding any large tack to match the others, it would take more heat to melt the next weld into it causing bad penetration or a chance of blowing thru.

What is the idea gap for sheet metal, is it about the thickness of the wire? I have some of those butt joint clamps and they seem to make the gap too wide. Of course the idea and actual fit up very a lot, if you come to a spot with no gap do you do anything different than if it was a bigger gap?

Can you explain this? "The use of a flange weld is great for spot welds, but when used for stringers all a flange weld really does is require much more heat to get full penetration and a resulting warped panel."

Thanks again, Steve
 
HIG;33595 said:
I'm shooting for the edge of the previous weld but that does not mean that I'm hitting it, especially if I'm trying to zip off a few tacks in a row.
A steady off hand will go a long way in holding it on what you are aiming at as your favored hand pulls the trigger.
 
chevman;33601 said:
A steady off hand will go a long way in holding it on what you are aiming at as your favored hand pulls the trigger.

Yes, I still need more practice but I think steadying with my other hand better will help. I think there's a lot of factors, good lighting, position, hand placement and just taking my time.

Thanks, Steve
 
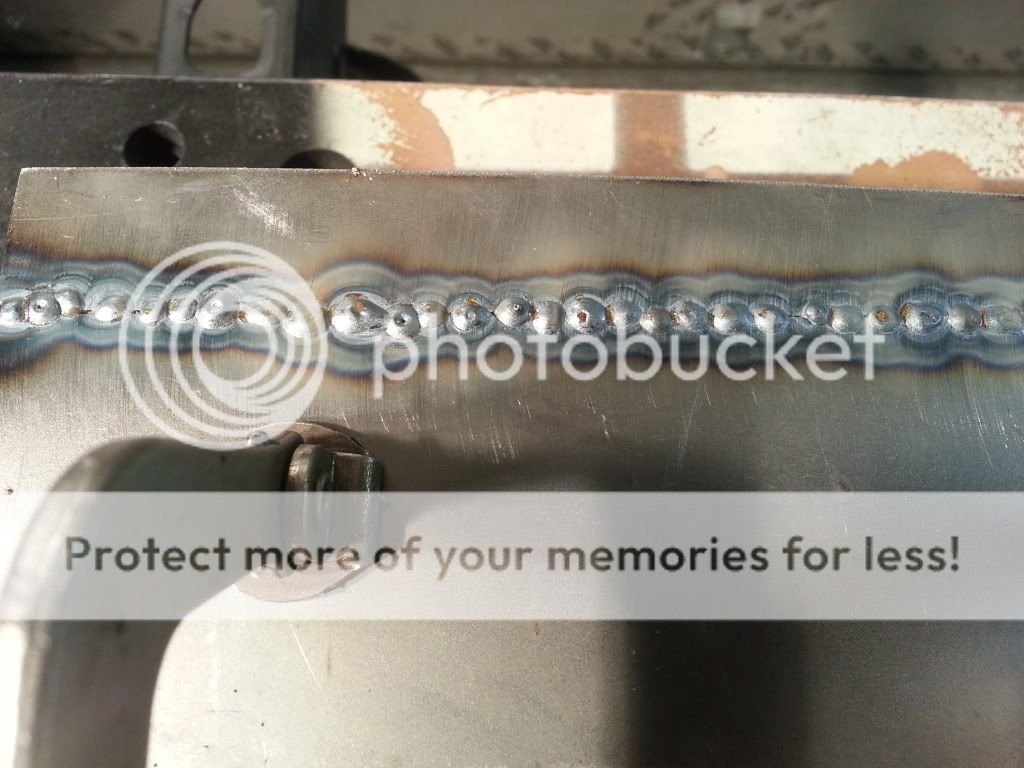
I did some more practice last night and I think I can see some improvement, I did the top row last night also but I don't think I held the trigger long enough:


I think the penetration looks much better, I'm wondering does it look like the welds are high or is that about right? I'm holding the trigger a little longer in hopes of burning the weld in better, I only blew thru on one spot. I'm also shooting for oval shaped tacks.

SOF, it's funny you mentioned about grinding down any large tacks and for some reason a had a very high one and I didn't have my grinder out so I figured "it's just practice I'll leave it".


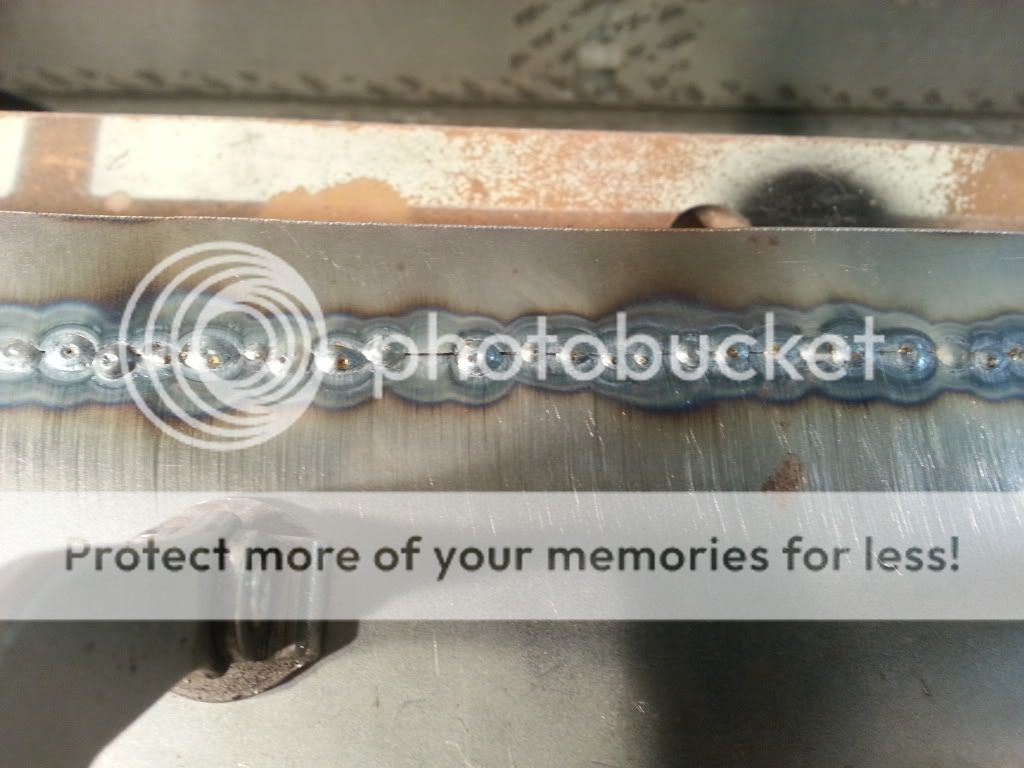
Well look at the back side where that big blob was, no penetration:


Lesson learned - grind them down, I know it would not have helped with that tack but maybe the one next to it would have penetrated better. I wish I had paid attention and knew what happened to that tack, why did it just sit on top?

Again, any comments would be appreciated!!!
Thanks, Steve
 
Those are looking a lot better, you are getting there. I think you got the knowledge now, just need to self analyze and proceed. EX: why is there no penetration between some of the tacks and full penetration on others, not quite long enough on the trigger, the puddle formed on the surface and hadn't fully penetrated when you let go of the trigger.
At the rate you are improving you will be making sheet metal welds better than a lot of guys that think they are pros!

I know I can't weld worth a hoot, that is why I was a fitter and not a welder, lol.

:encouragement:
 
What gauge sheetmetal is that?-looks thick. It's easy to see in the pics that you're gaining control of the gun.
 
Bob Hollinshead;33629 said:
What gauge sheetmetal is that?-looks thick. It's easy to see in the pics that you're gaining control of the gun.

It should be 18 ga., I'll have to measure it - 0.05"

Thanks for the compliment.
Steve
 
I guess I'm old school I really want to use a waterproof fiberglass product over the welds. From what I've read this should not be necessary, especially if I'm epoxing both side. Should I use Evercoat 632 for some peace of mind - just in case there is a weak spot in the welds since we all can see Zack & I are learning? The spots should not be very deep 1/16" to 1/8" max.

http://www.evercoat.com/productDetail.aspx?pID=36

I've alway thought Duraglass would be the same as the Evercoat but from what I've read here the Evercoat is recommened.

Thanks, Steve
 
Everglass isn't waterproof but it is water resistant compared to most fillers. Put 3 good coats of epoxy primer down before you apply anything.
 
Back
Top