Another Welding Question

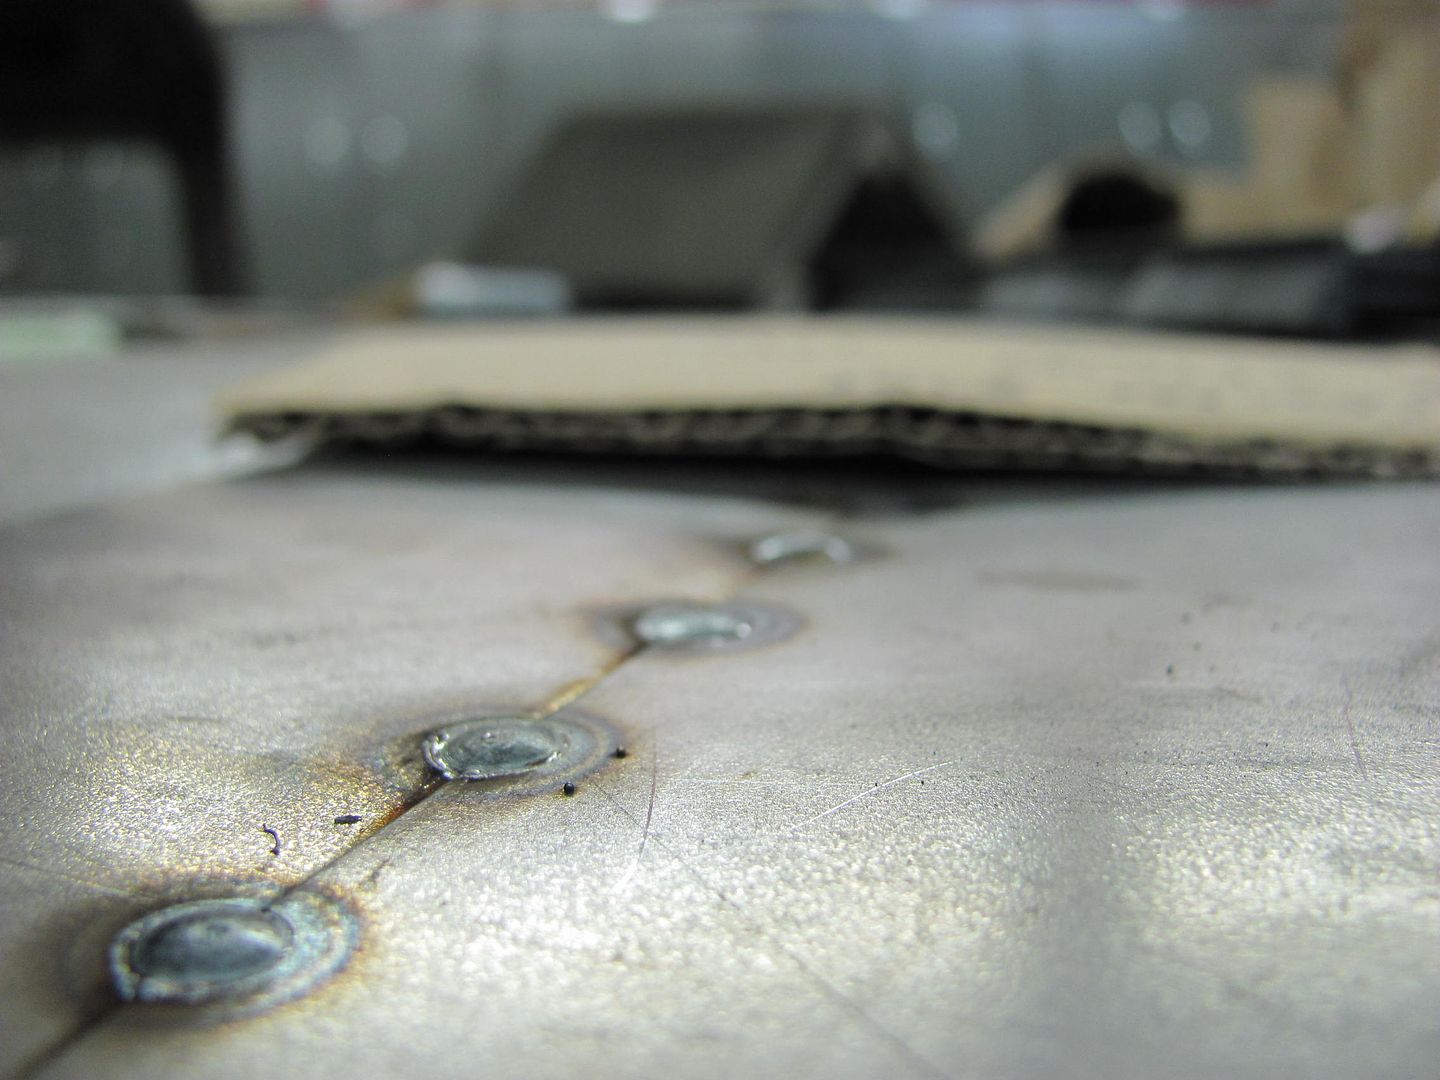
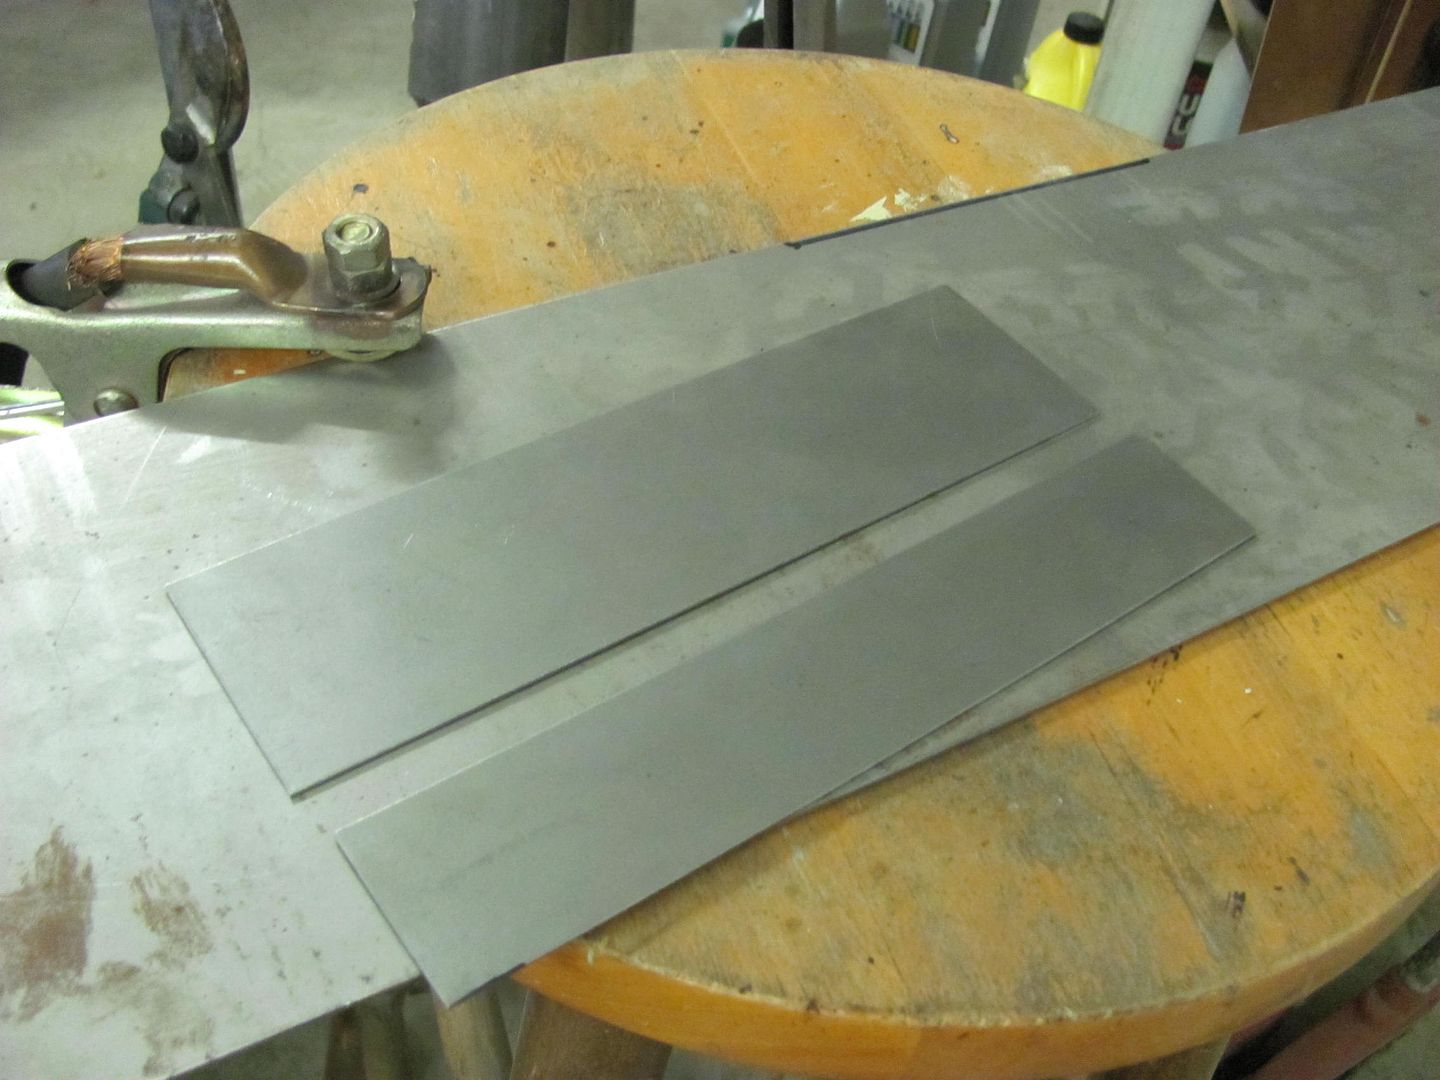
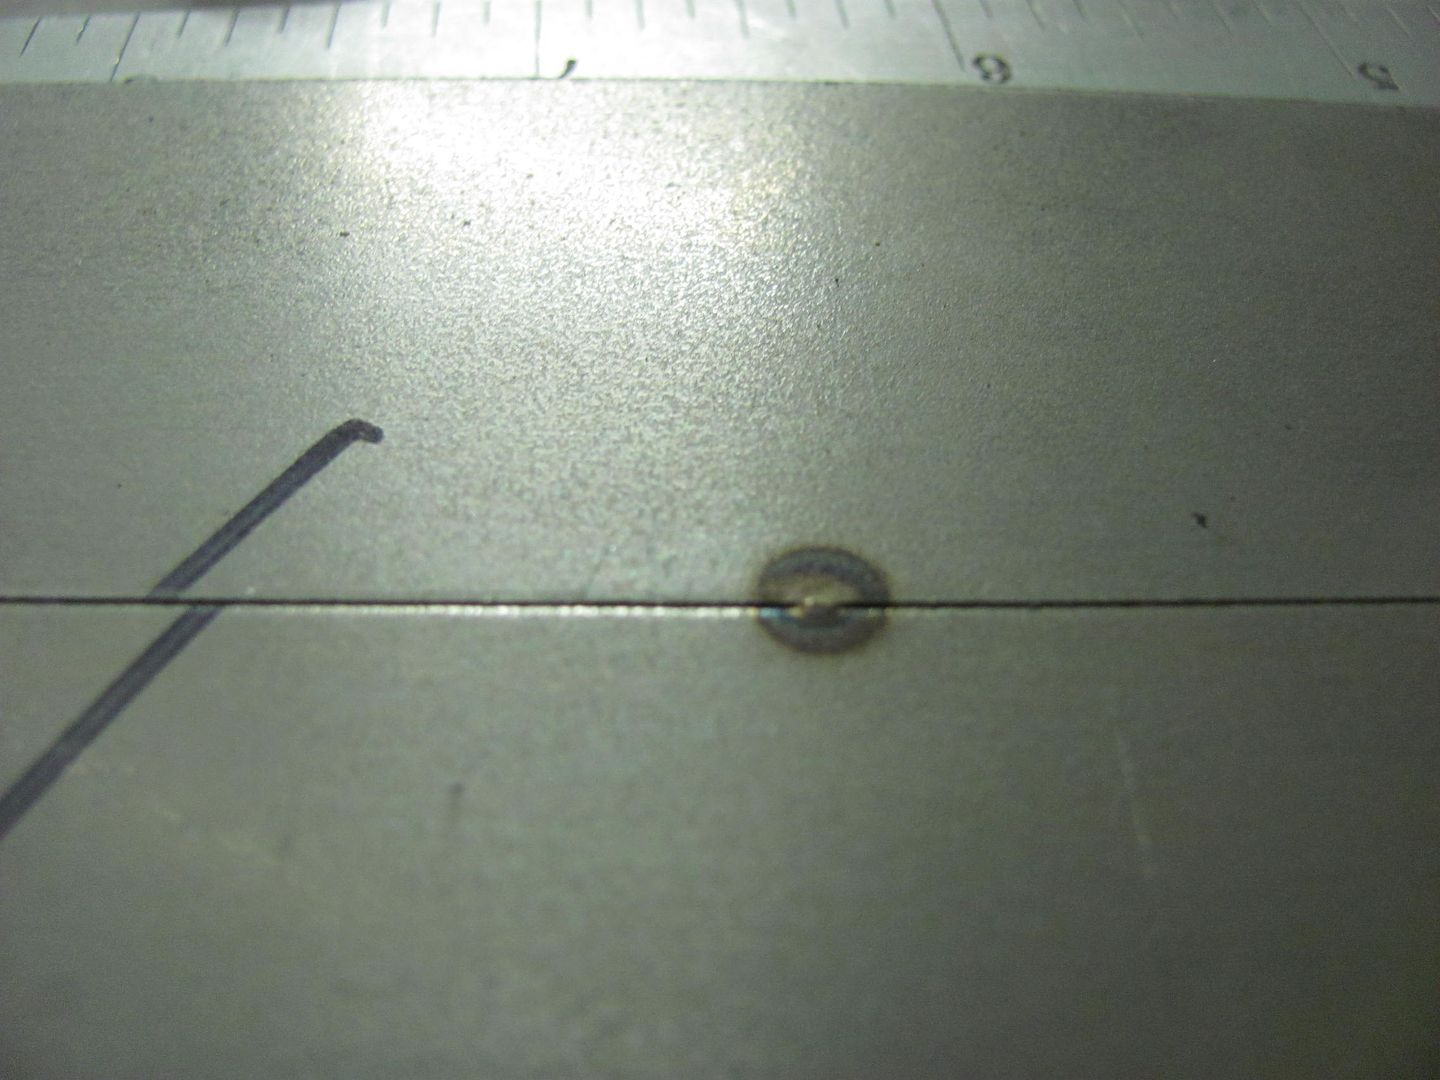
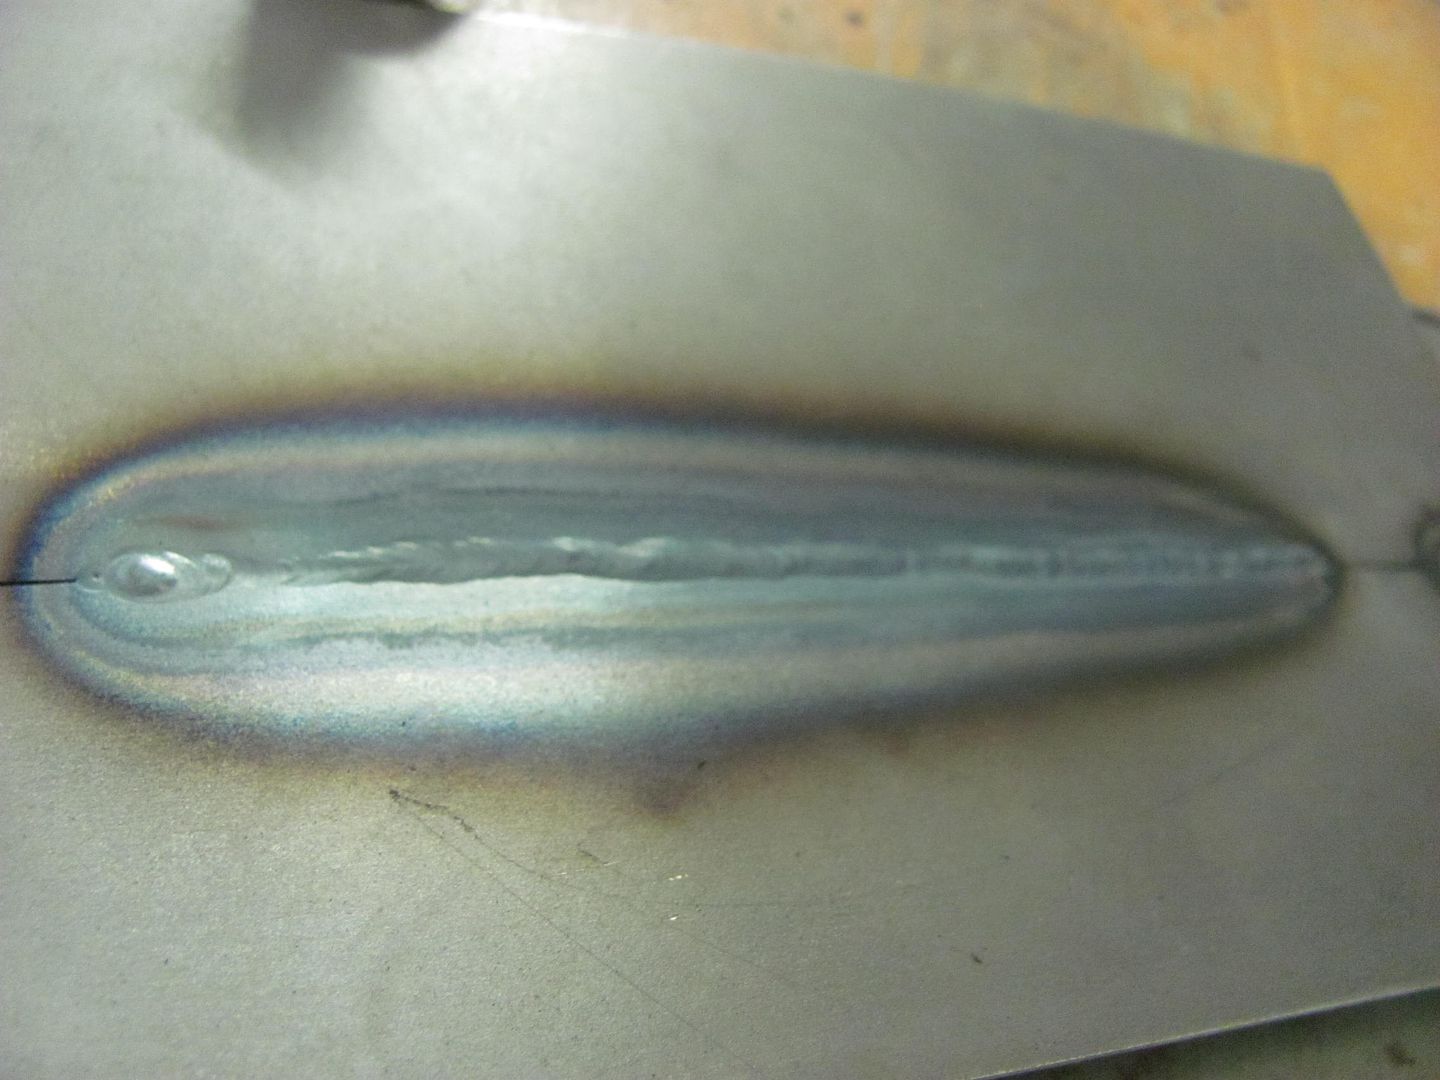
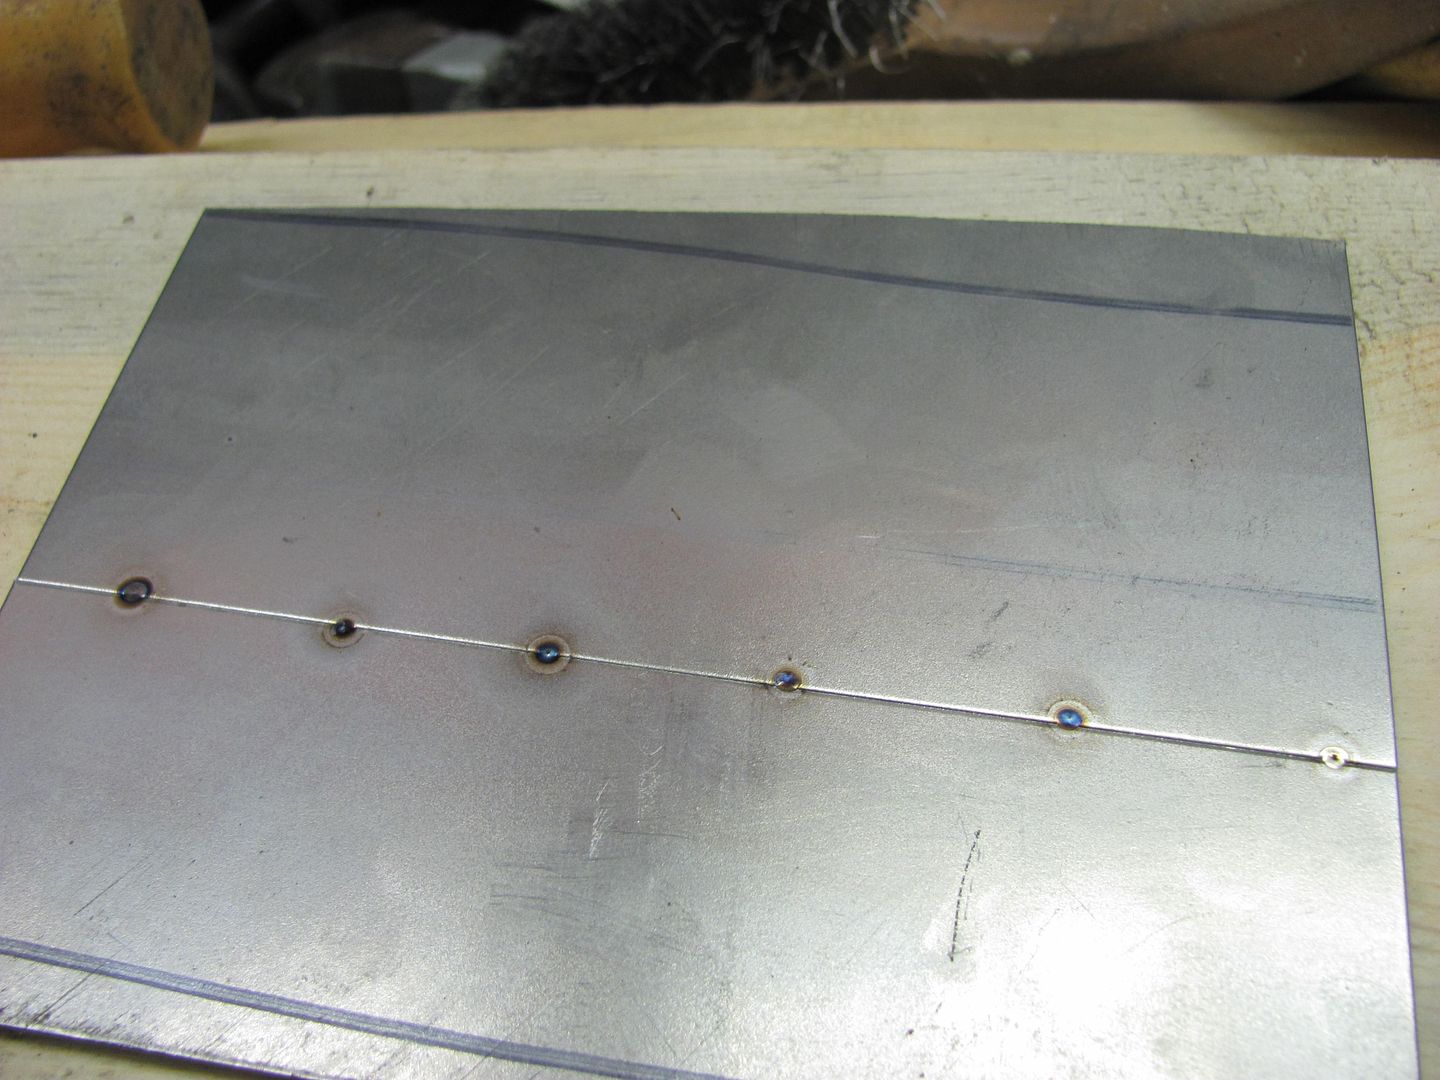
Yes and no. The biggest problem in using the Mig is all the work in planishing and grinding the welds. Using Tig or O/A will normally give you a weld with slightly less proud, for less cleanup. They also require a bit more manual dexterity in controlling the heat, controlling the puddle, adding filler, etc. So if you can't walk and chew gum... the "point and shoot" of a mig may be a better solution. (I'm still practicing... with the Tig and the gum :D ) But hands down, the method that requires the least amount of cleanup afterward would be a fusion weld (adding no filler) using the Tig or O/A. Either will require an absolutely tight joint. So to be effective, you'll have much more time in panel fitment to get the gaps non-existent. Here's some fusion weld practice I did using Tig, the first step is to tack the panels together. Using no filler, electrode about 1/16 away, a quick zap, one second or less, will tack the panels. Note the minimal HAZ.

Picture128-2.jpg


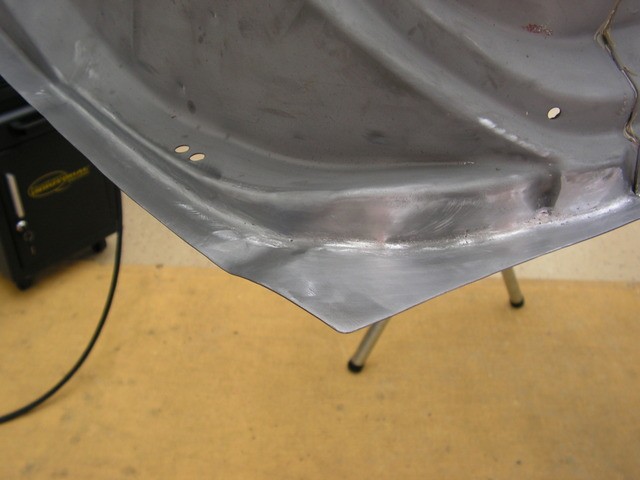
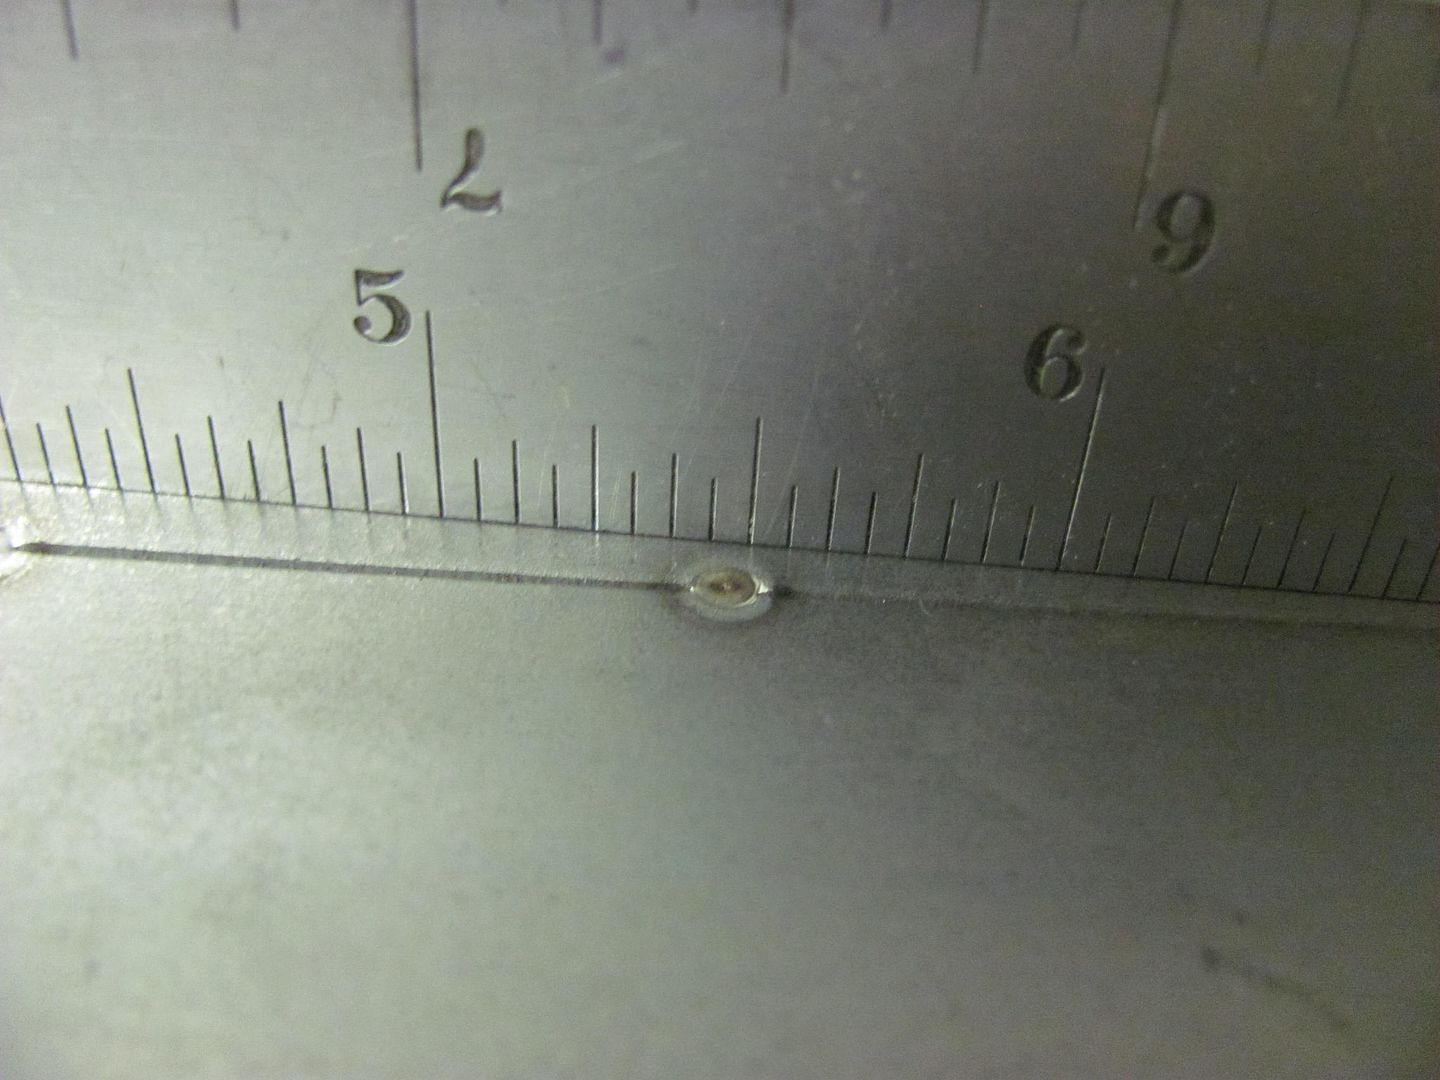
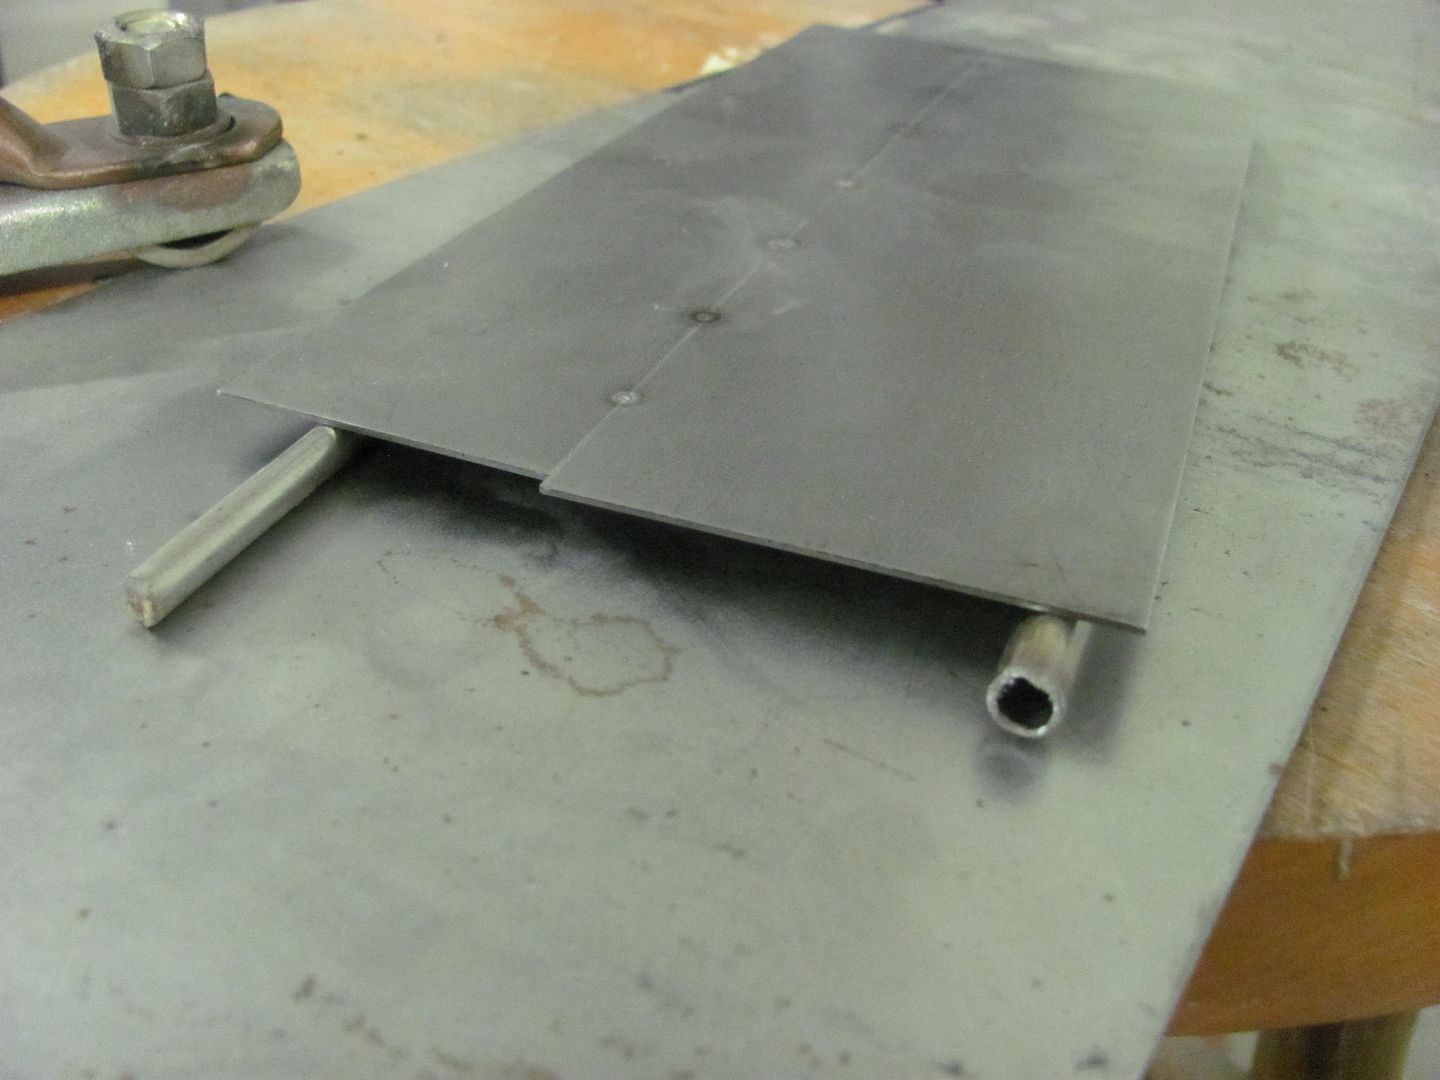
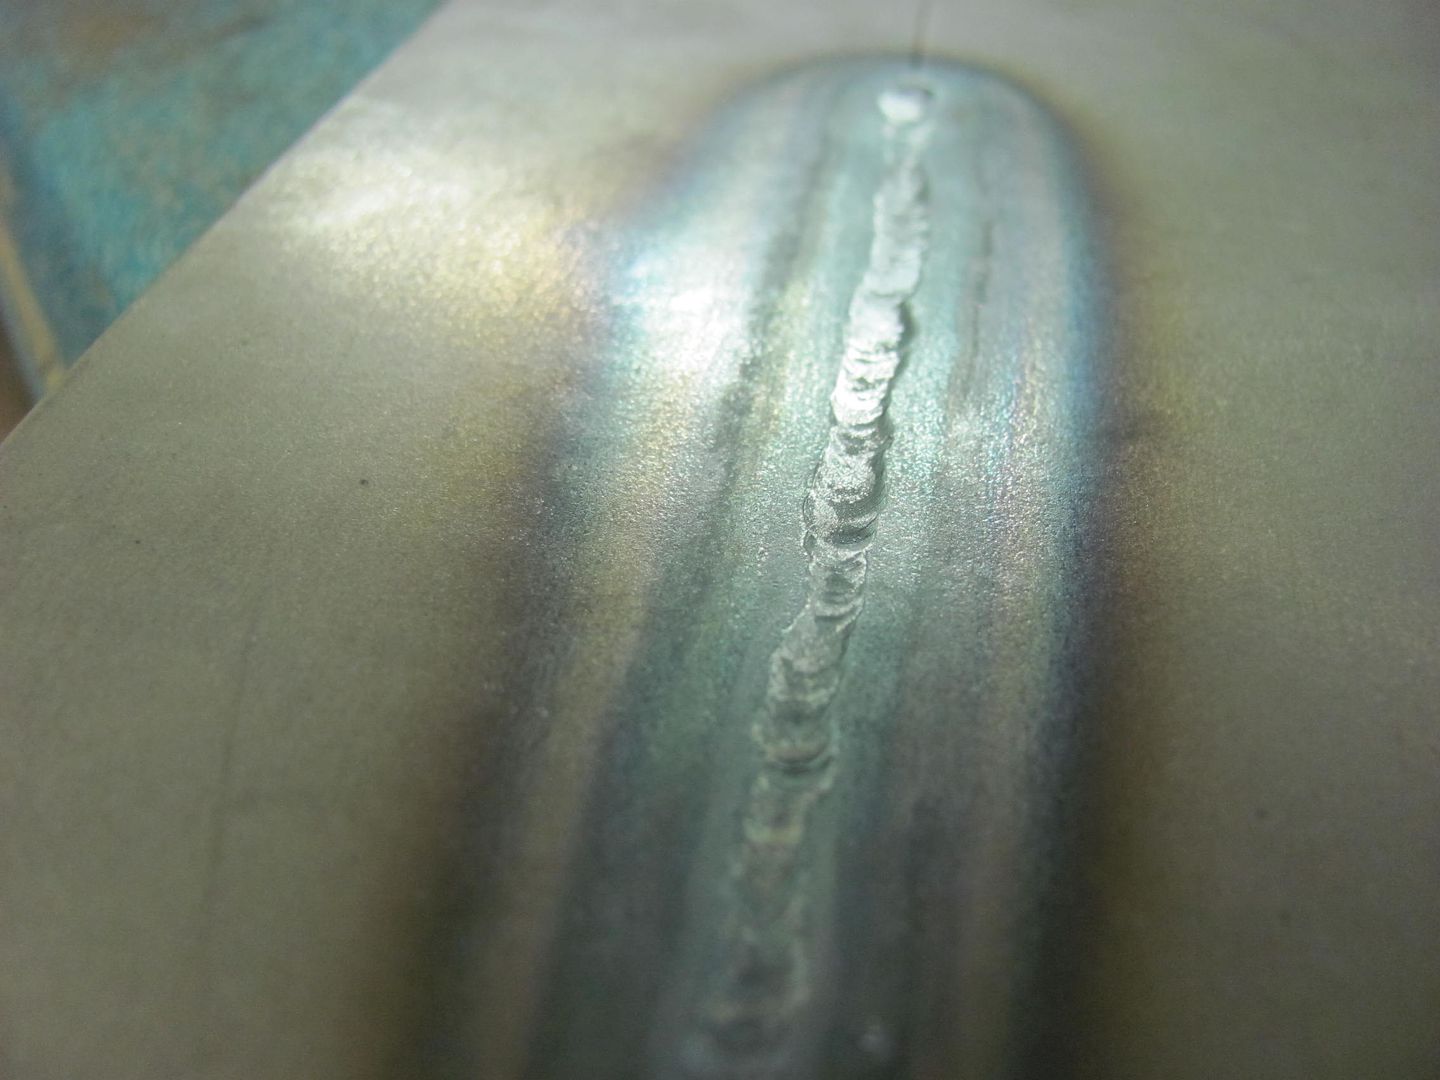
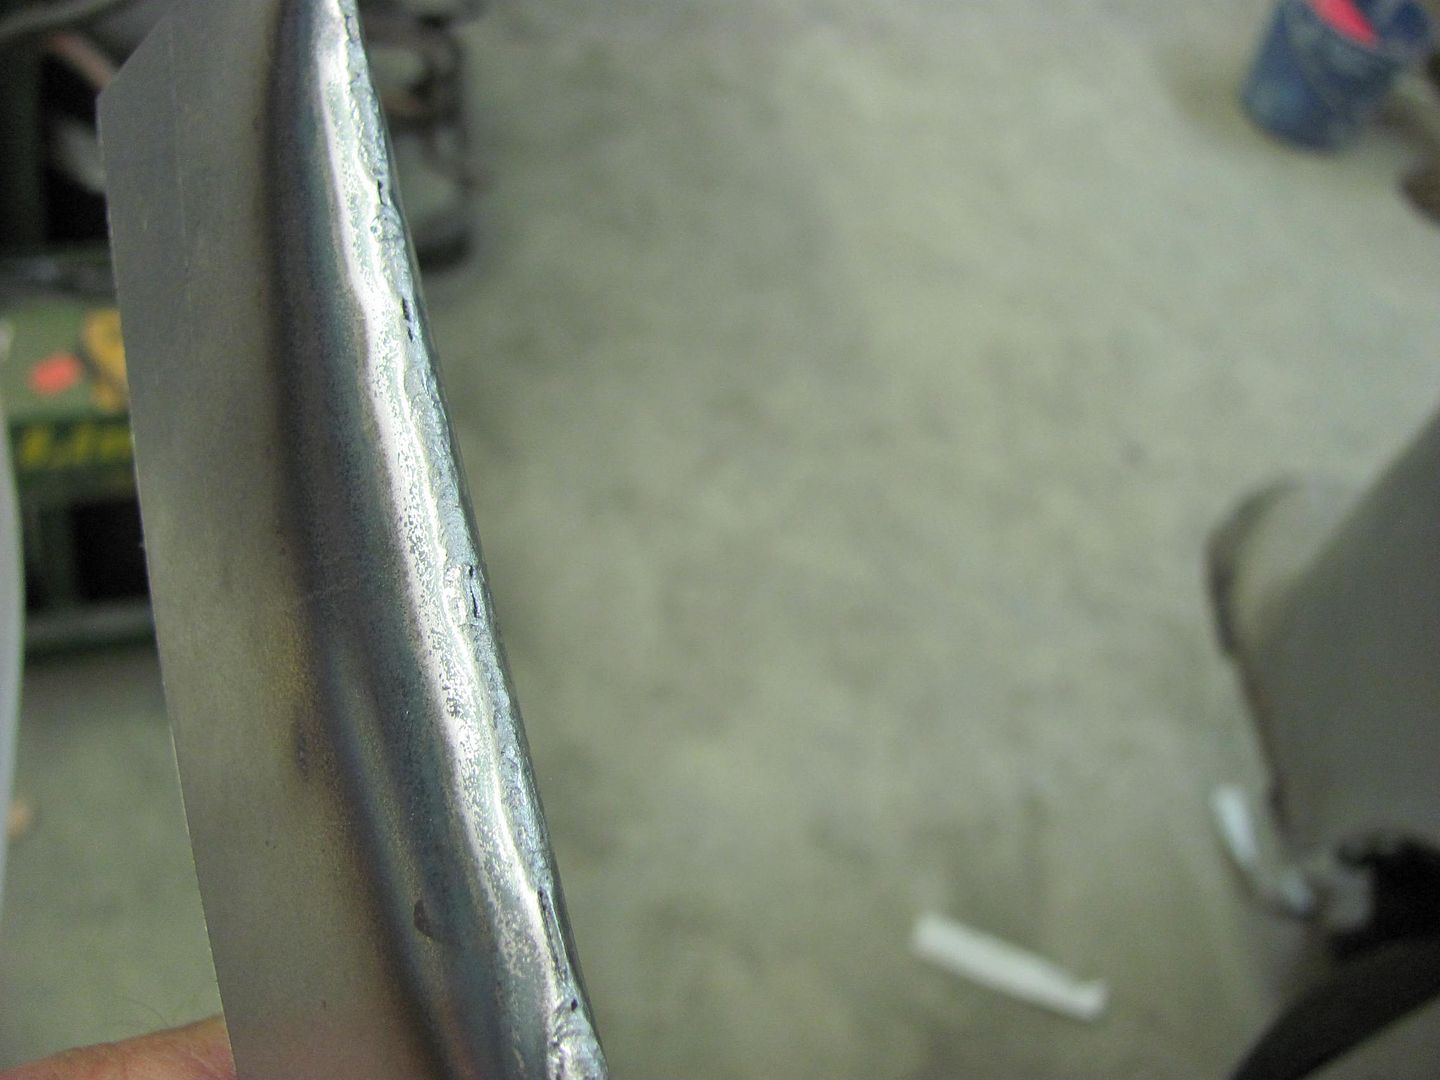
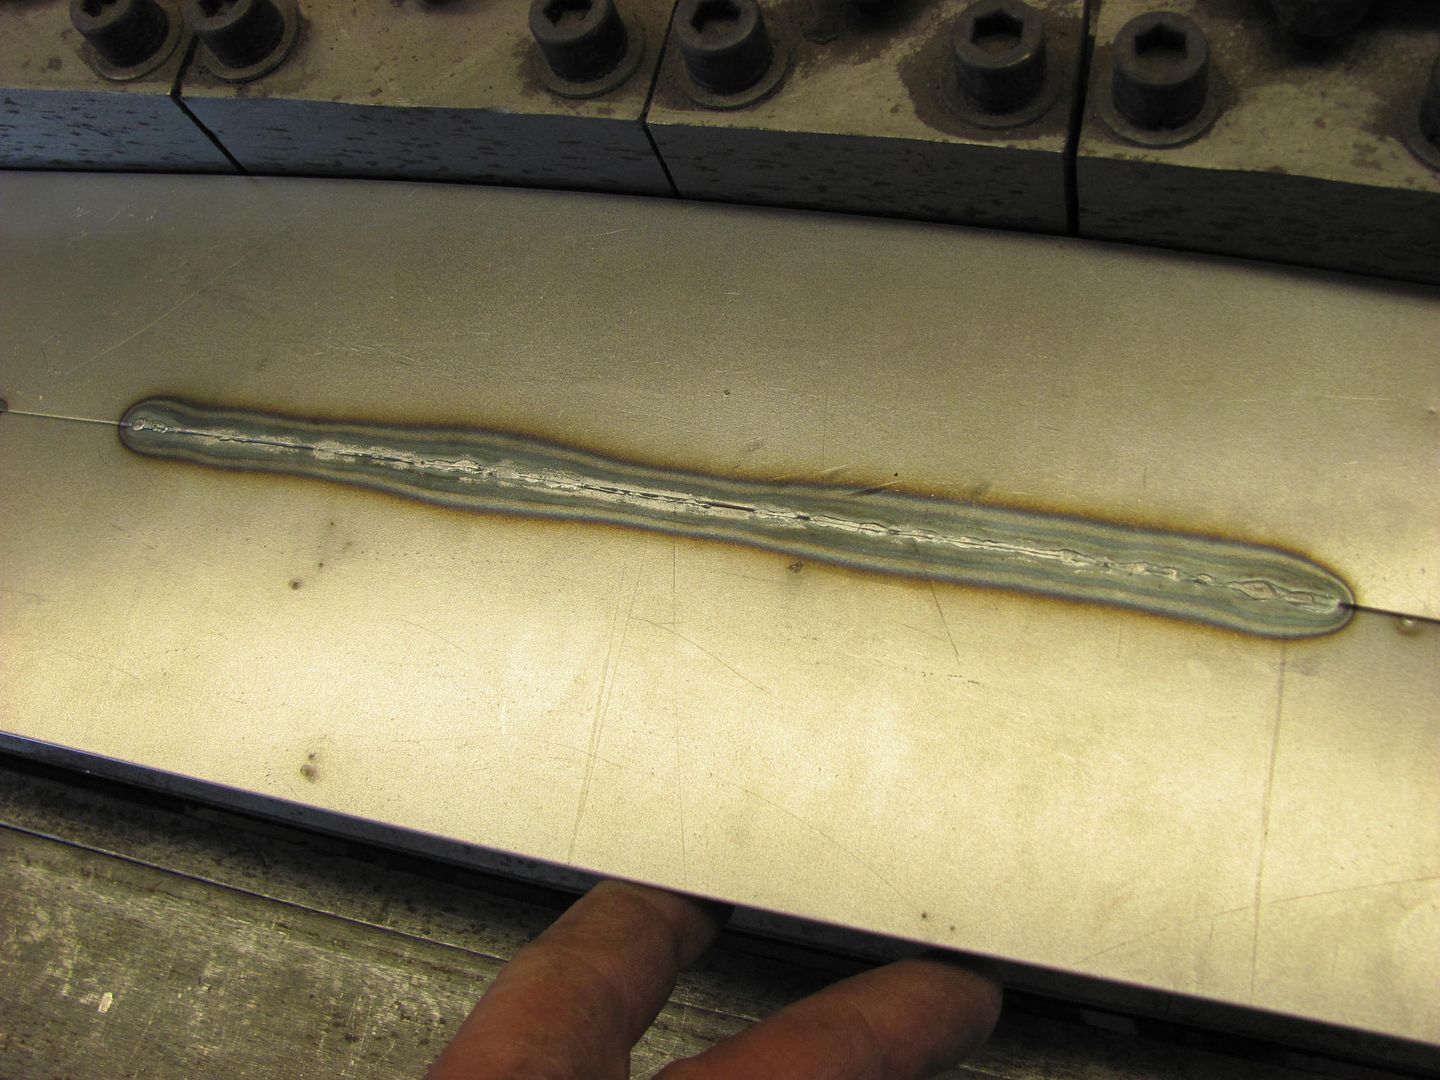
Here's a practice piece I did in fusion welding, this is done with the heat dial set slightly higher than if using filler, mash the pedal FULLY, and controlling the heat by the speed of your weld pass (faster than normal). The front shows some slight undercutting..


Picture892.jpg


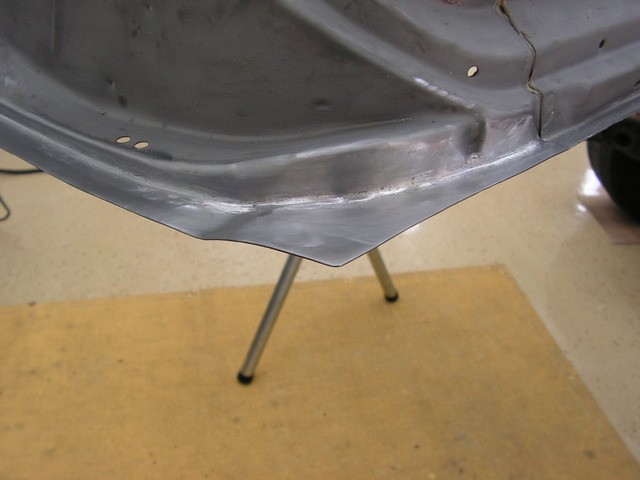
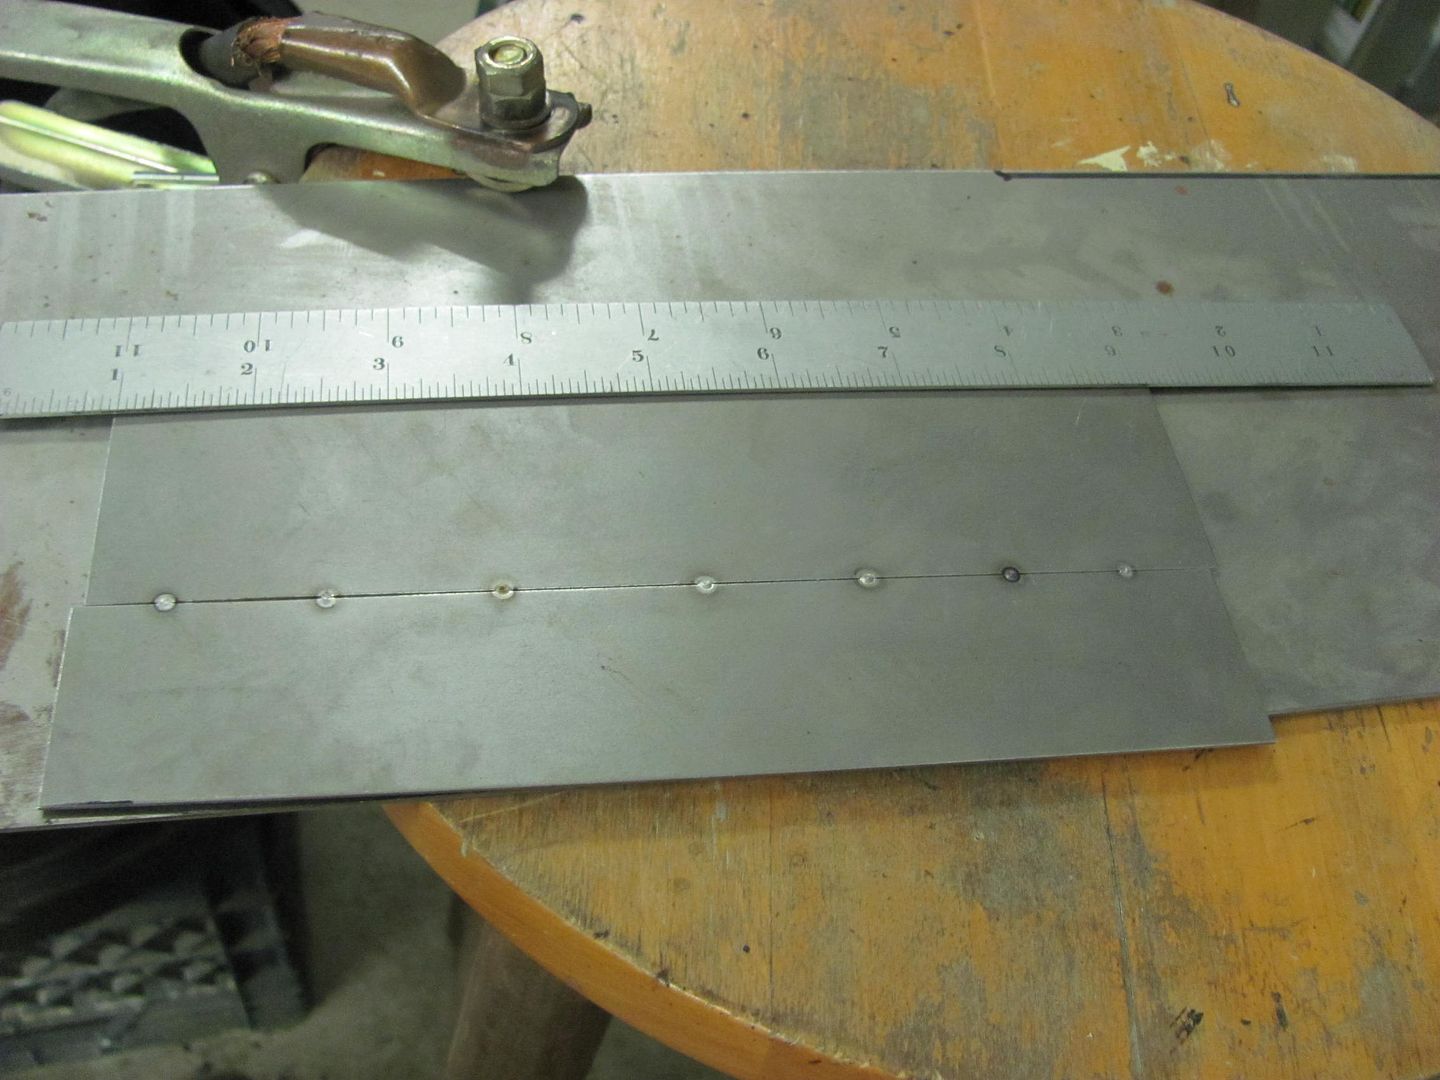
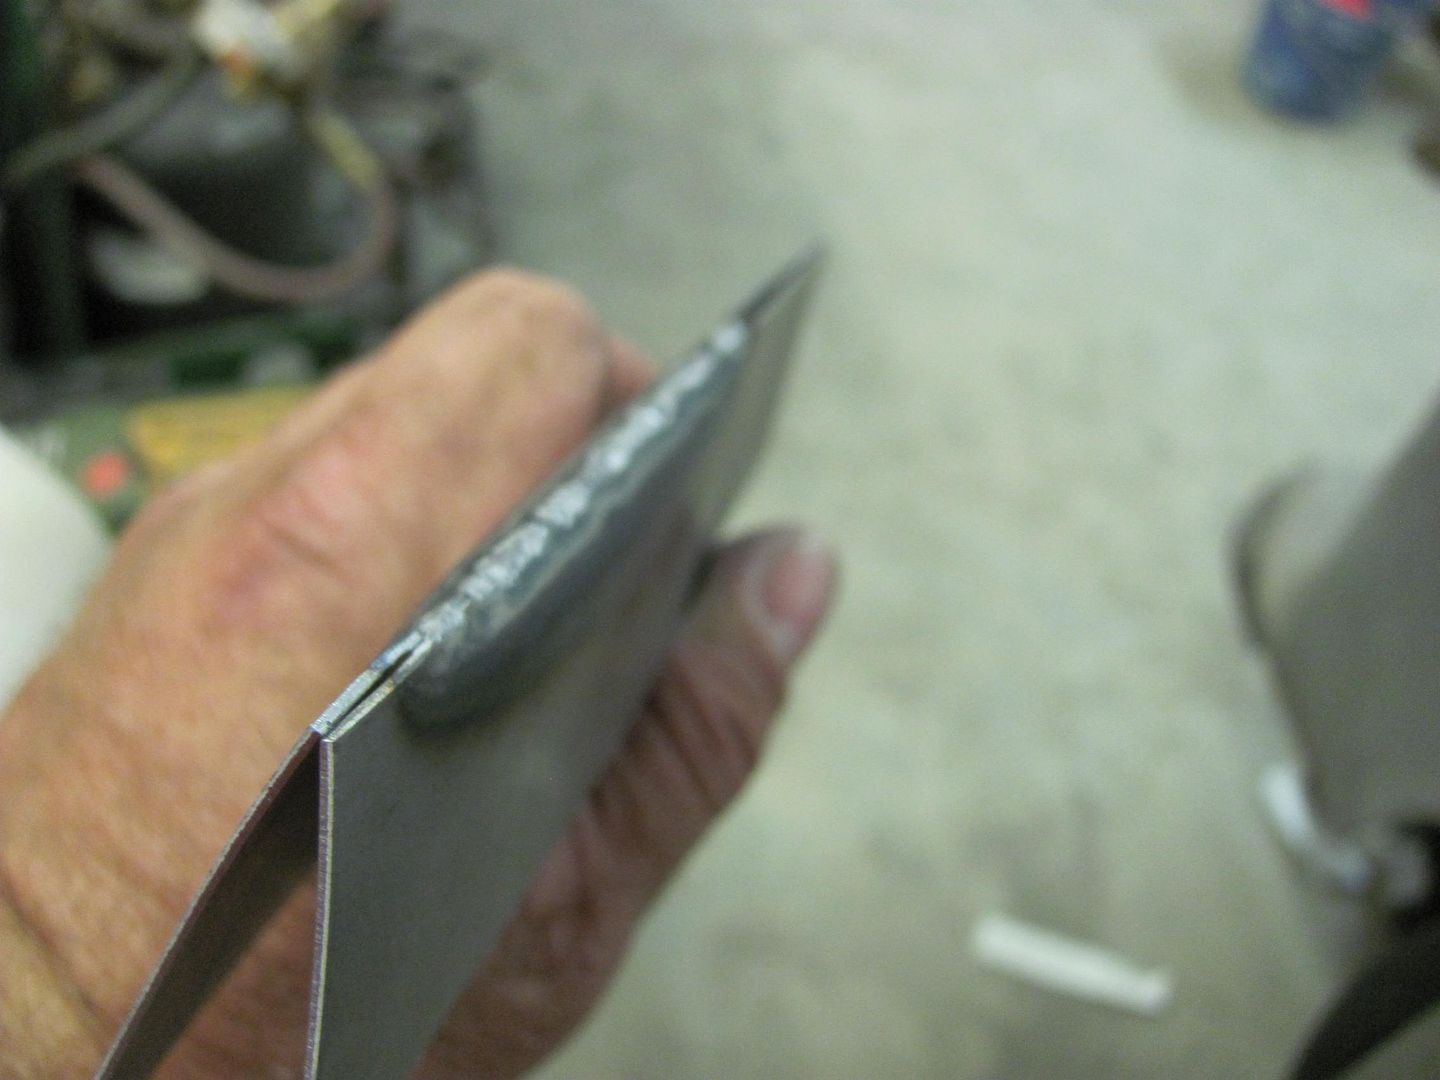
The rear side shows some good weld penetration in some areas and others needed a bit more heat. I need more practice ;)


Picture891.jpg


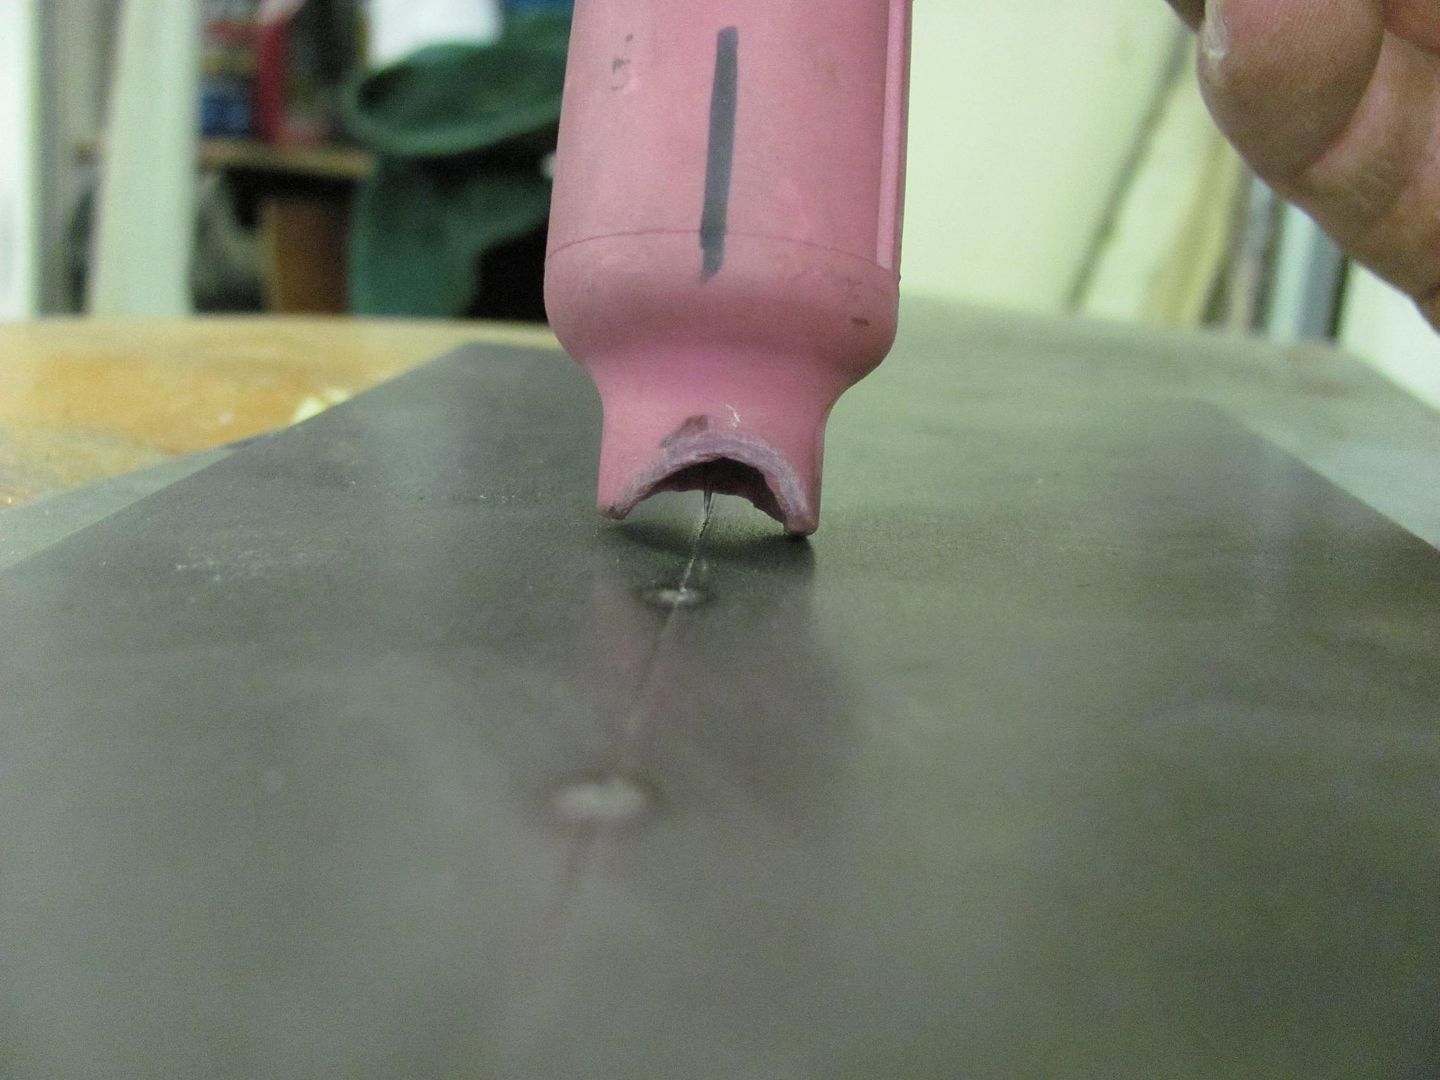
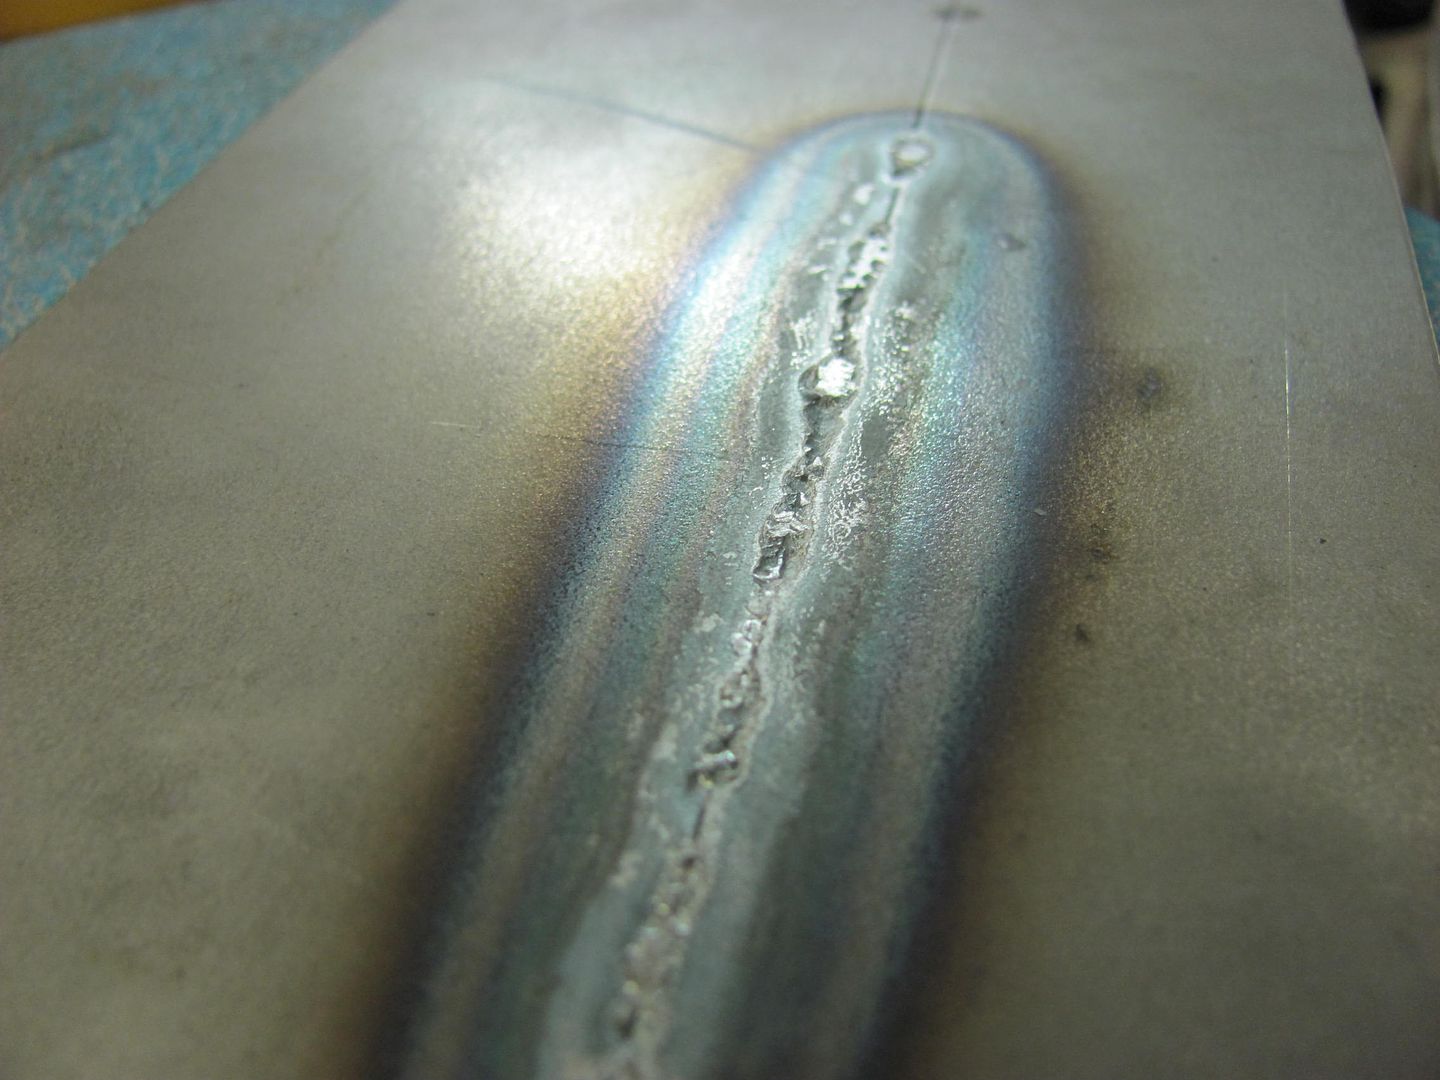
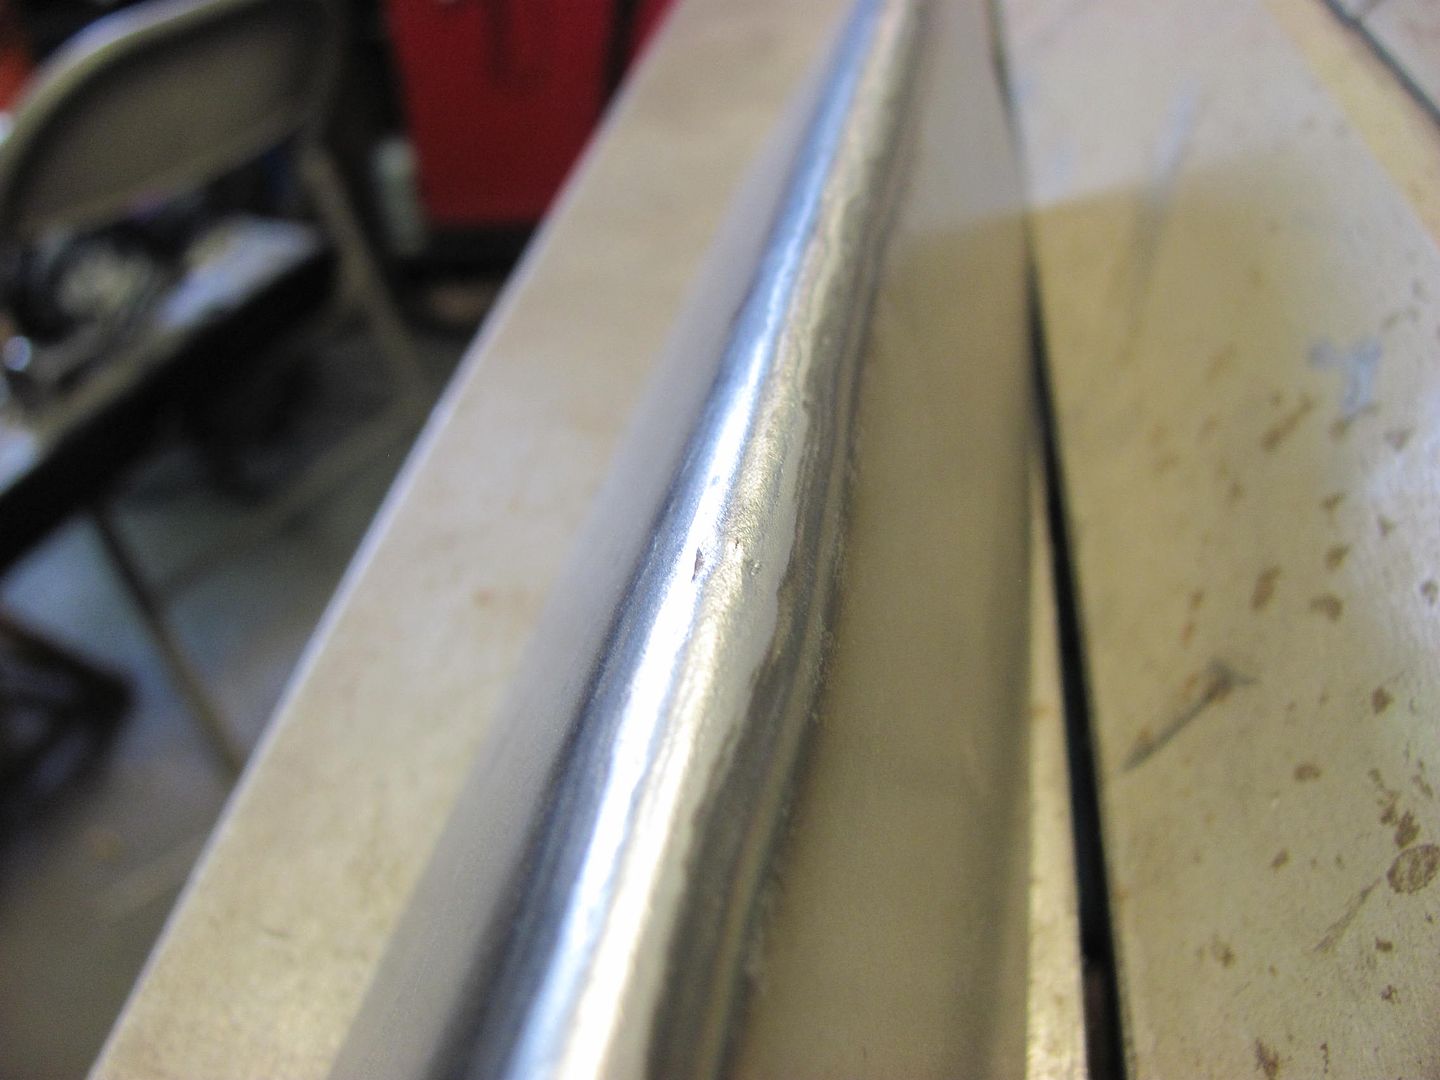
This weld could be planished if there was any deformity, filed if there were any high spots, but for the most part after a fusion weld like this you are all but done. The largest amount of deformity in any weld comes from inconsistency, and stopping and starting. With these fusion welds and one quick, continual pass, you will have the least amount of deformity of any sheet metal weld, and obviously, the least amount of cleanup work after..


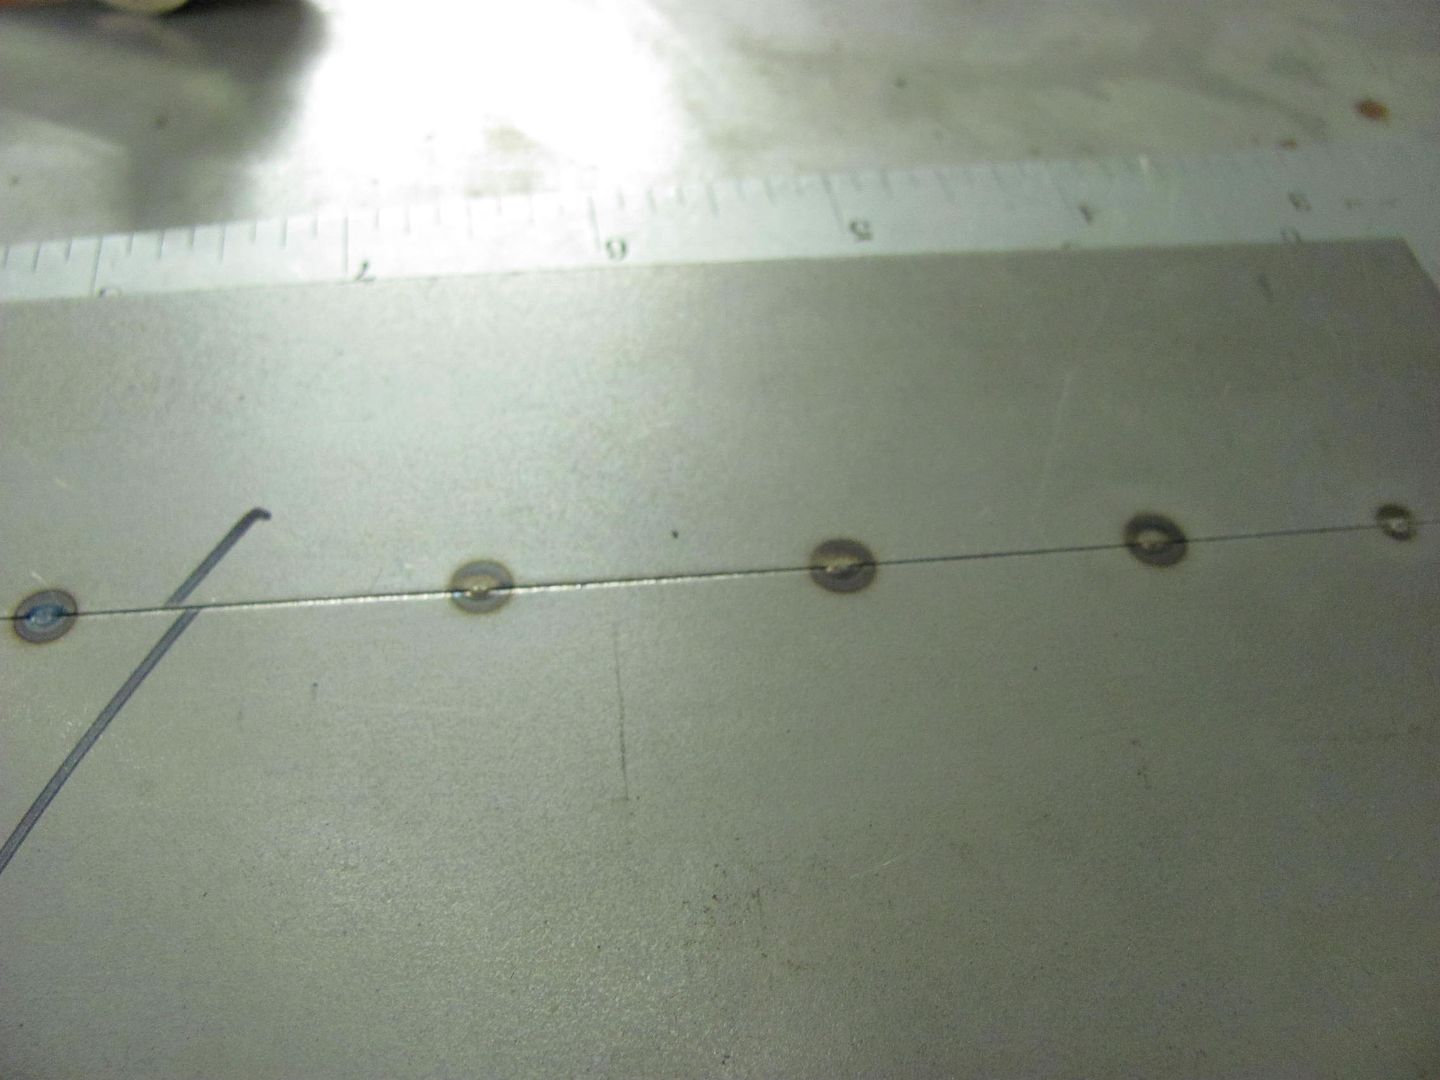
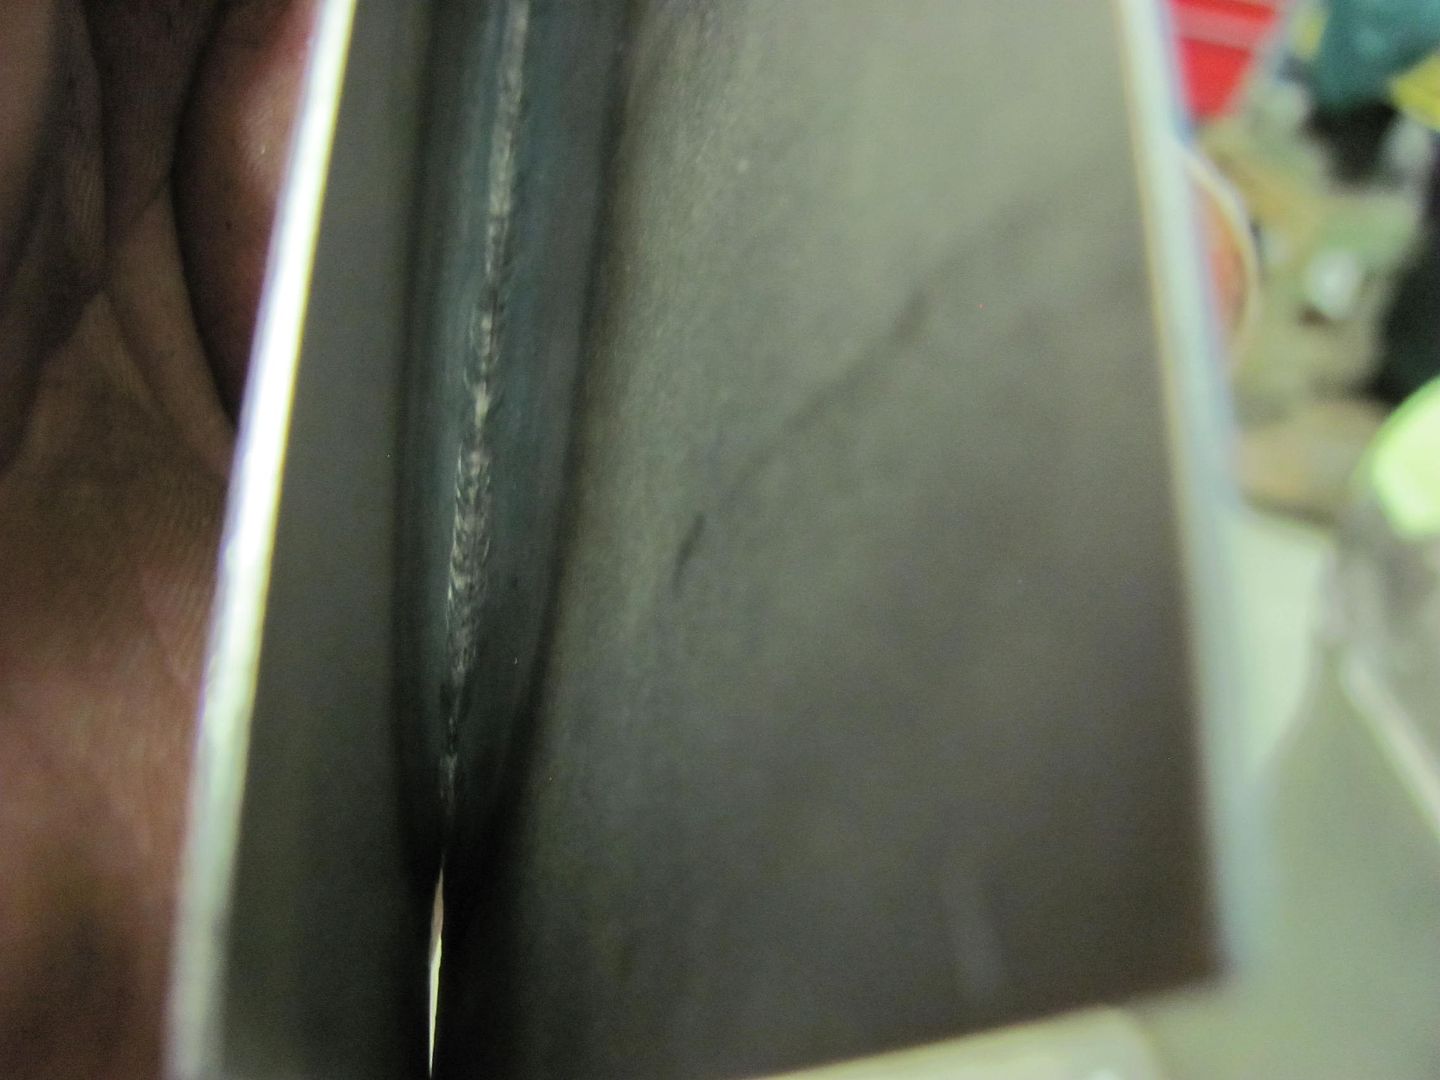
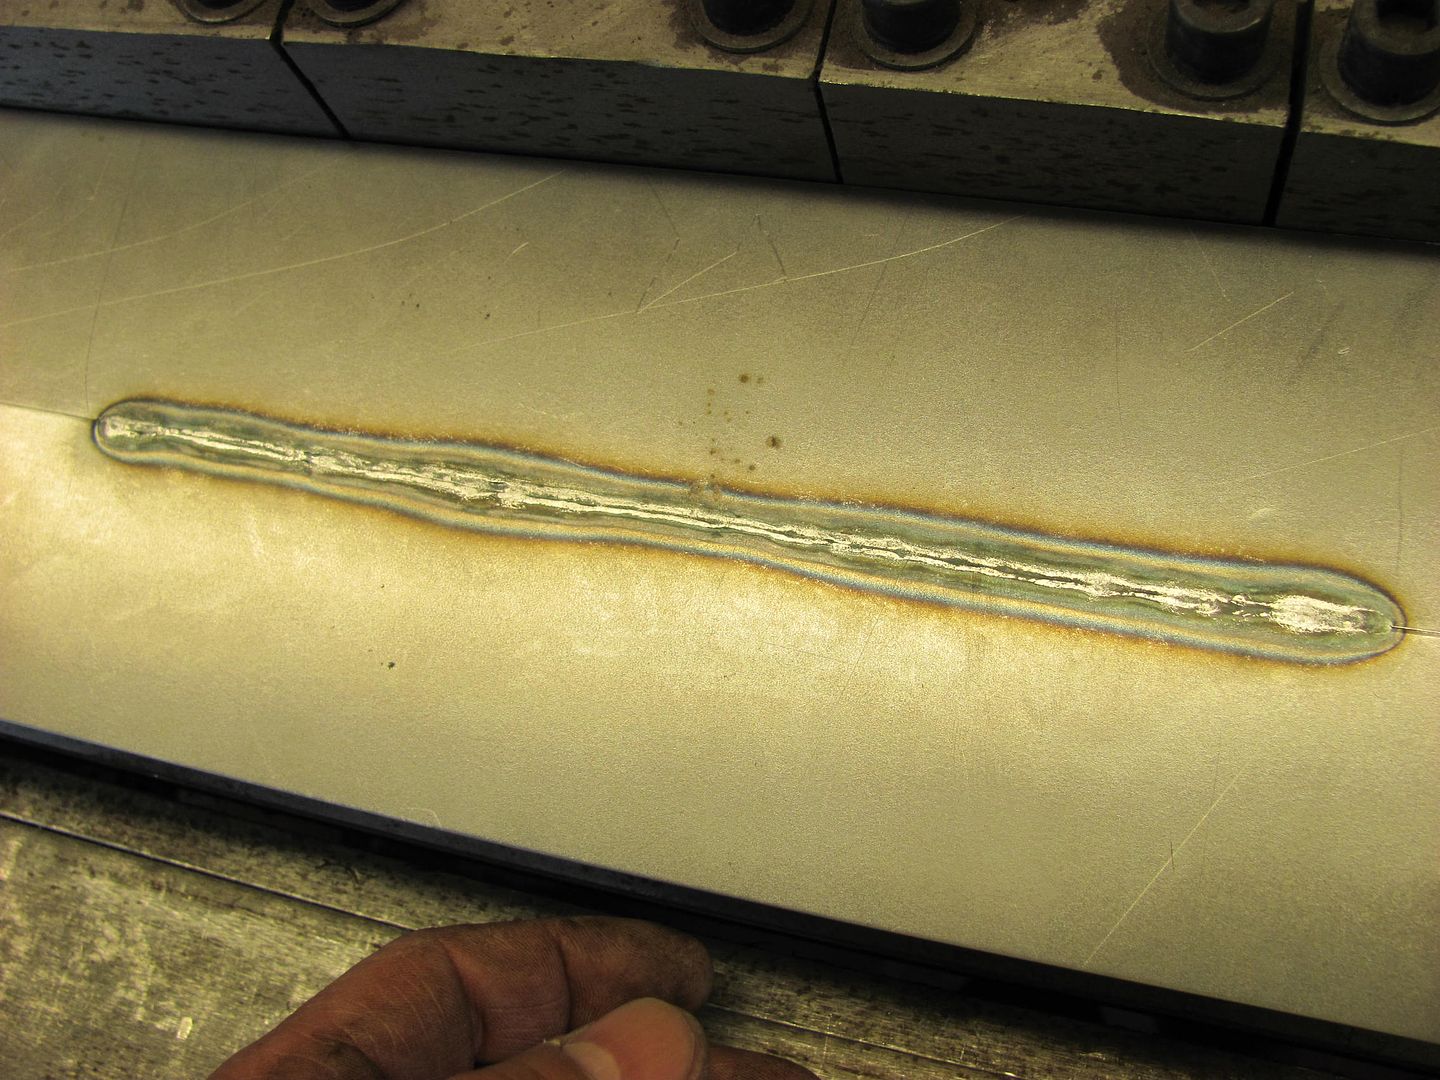
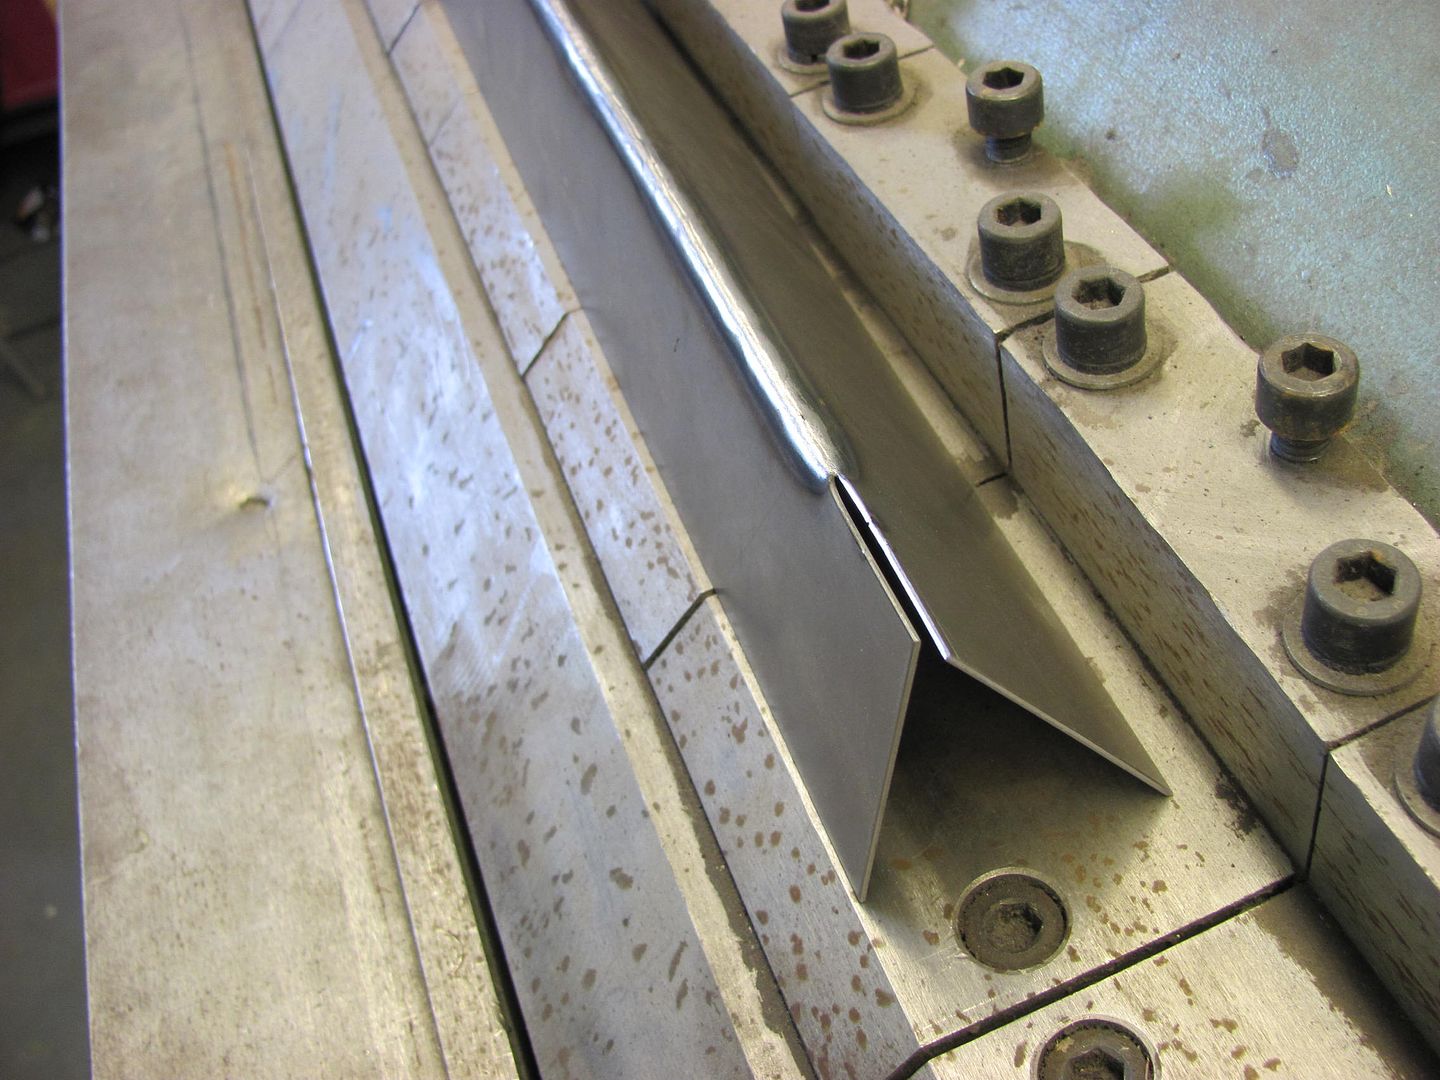
Just to show that slight undercutting on fusion welding was not an issue in the joint's strength, the seam was clamped in the apron brake and bent to 135 degrees, with no detriment to the weld..


Picture895.jpg


Picture901.jpg
 
To add to the last post, another benefit of the fusion weld is that is adds no volume or bulk to the weld.

In much the same fashion as a flanged/overlapped seam risks a ghost line, having a mig weld without dressing the welds may have the same effect. I've seen a guy that welds so cold that all of the weld is on top of the panel. He couldn't grind it down for fear of the panel coming apart as there was no weld penetration. This resulted in a covering of what he referred to as kitty hair to both add strength of the fiberglass in the filler, and to hide the excess weld he couldn't take off. The flange repair has two panel thicknesses on one side of the joint and has proven to show ghost lines. A cold weld sitting on top of a joint like this could be as much as 3 to 4 times the original panel thickness. So this area of repair (?) will also have differing expansion rates from that of the parent metal, and greatly risks ghost lines in any finished panel.

The fusion weld retains the same metal in the joint before and after welding, so there should be little if any risk of ghost lines, and because the continuous weld seam (vs. dot welds using a Mig) is less prone to shrinking and deformity, it makes a better seam for those areas inaccessible for planishing.
 
Thanks for the detailed write up Robert. I will follow your advice and give it some more practice. I did weld the two patches differently, just trying to find out which one work for me and the first one turned out better. On the second one I figured I was moving a bit too fast because I was never really getting a puddle to push along the seems between the two spot welds. I will turn the heat and speed up just a tad and practice on my trigger release. I do have the heat and speed up just a tad higher than the recommend spec on the welder already, but will give it a bit more. I need to get some more metal for practice. I have done a few patches before with a miller 130 welder, but I switched up to the Lincoln 180C for more adjustability.
 
More adjustability is always better. What size and type wire are you using? I'm sure it's ER70S-6, as that is what is supplied with most welders. When you do get to a point that you are running out of wire and need to replace it, look for Esab's 87HP, which is ER70S-7. This has a higher manganese content, for better wetting to the parent metal. This means better flowout, and slightly less height on the weld proud, for less grinding, less cost spent in grinding consumables. In the singular form (one weld dot) it has also shown to be softer for easier planishing and easier grinding. Piled up in a blob, it tends to harden previous welds, or similar to that of the -6 wire.

Given the cost of welding wire, use up what you have first, don't rush out and buy something different tomorrow. But when the wire does need replacing, this may help to improve what you're doing just a bit better.


Here are some welds using the -7 wire, just to show wetting (flow-out). Note the minimal height and consistency of weld prouds from front side to back side..

front view

Picture646.jpg


rear view

Picture647.jpg
 
Learning gas welding in High School all of the first assignments were without filler rod and it was the best way to learn heat, speed, and puddle control. You don't need rod with a torch if the fit is perfect, flame adjustment right, and control is good.
 
Robert , Right now I have the Lincoln .023 wire that came with the welder. I'm thinking about trying to repair a patch I put in the door frame about a year ago before I put it in epoxy. I welded the patch from the inside of the frame. The weld penetrated to the outside, but it was inside a 90 degree corner. I grinded it down the best I could, but it still don't look right. I want to re-weld it from the outside and then grind it, to look right.

Here is a pic of my door:


Here is what I hope to get it to look like:


I do have an old door shell that I cut up to repair this one in several places. I'm thinking about practicing on it before I commit.
 
Achieving a fusion weld with a tig seems to be the holy grail . I have yet to master it, 50/50 chance of success at best. When I was a millwright I did setup and maint. on an automatic tig fusion welder for aluminum. The fit ups were both shear cuts, then slide against each other while being held in full length clamps about 2" from the cuts. I do not recall the psi that was applied to the fit up. Not much but some. Underneath the weld zone was a copper backer bar which had a shallow ball milled groove down its length. Maybe 1/8th wide by 1/16th deep. It was located directly under the weld zone. The intent was to pull away as much heat as possible in the weld zone without pulling the heat out of the weld. When set up correctly it would weld a 48" bead in under 1 minute. The resulting weld was good enough to run thru a 5 stand rolling mill without breaking at a travel speed of 1200 fpm.
Darn difficult to simulate that at home, but the setup is a known and worth learning from.
 
Took the plunge and welded this door corner up tonight. Its not perfect, but a lot better than it was. I believe with a couple of coats of epoxy followed by finishing the door skin, some primer and paint, that the repair will disappear. I can live with the way it is now. Something I'm learning is to go really slow with my grinding and pay attention to the surrounding metal and carefully blend it in, without taking much off surrounding the repair. Its very time consuming. My next welding project will be welding the trunk pan in the car and door skins. As for now I have a bunch of parts to prep for epoxy. Thanks for the help guys.


Thanks for explaining the difference between mig ang tig welding sheet metal!
 
This evening I tried some more Fusion welding using the Tig.. When using the Tig torch on my previous attempt (shown in previous post above), I had set the amperage, mashed the pedal, and used the speed of the pass to control the heat. The slight undercut in the center was likely due to the fact that I made a straight run from one end to the other. I wanted to try this again, giving the torch a circular motion to see if it helped. Here's our sample pieces..


Picture1003.jpg


For tacking purposes, I set the electrode depth so it was just sticking out past the cup. The electrode is fairly easy to position using this method, drag it side to side and it will find the exact joint between the two pieces. Then rotate the torch backwards just enough for the cup to pick up the electrode off the metal, and give the pedal a quick push. These "tacks" were about 1/2 second in duration, amps set at 82. This shows the front:


Picture1004.jpg


Picture1005.jpg


And the rear side weld penetration:


Picture1006.jpg


Picture1007.jpg


For the weld pass, the sample is raised above the "table" to simulate welding the panels on a car in free air...


Picture1008.jpg


In order to maintain consistency for the test, the cup is modified so as to use it as a "glide" (think plasma cutter guide) and the electrode is now moved just inside the low point on the cup. This should hold our electrode height exactly the same, to limit one of the walking, talking, chewing gum factors.


Picture1009.jpg


Picture1011.jpg


This was welded using a circular motion with the torch while making the pass:


Picture1012.jpg


Rear shows some undercutting


Picture1013.jpg


Planishing to bring the weld proud down flush with the front surface

Front:


Picture1015.jpg


Rear:


Picture1014.jpg


Now to test the weld to see how structurally sound it is with the undercut....


Here's the front side with the weld pass...


Picture1017.jpg


This is the rear side with the undercut..


Picture1019.jpg


This was bent approx. 150 to 160 degrees and the weld held..


Picture1020.jpg


I definitely need more practice to build up my "comfort level" with using this process, but sure beats all that grinding!
 
Forget the cup wiggle part, just run a straight stringer, the haz will be much narrower.
The secret to the method is lots of heat, high travel speed, and a very tight fit up.
Check out the Metal Meet website for some inspiration.
- Have fun!
 
Back
Top