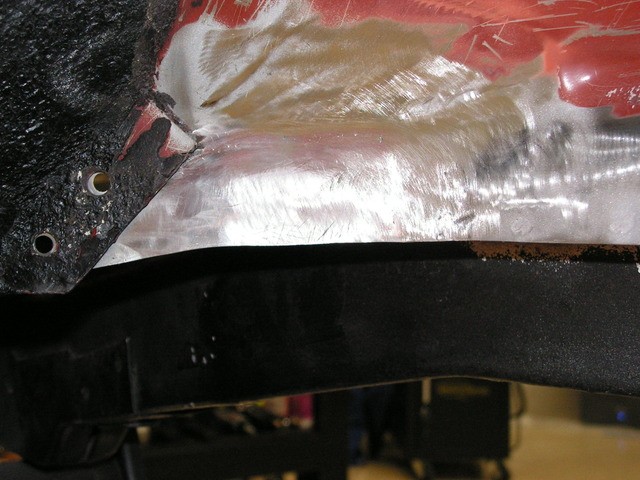
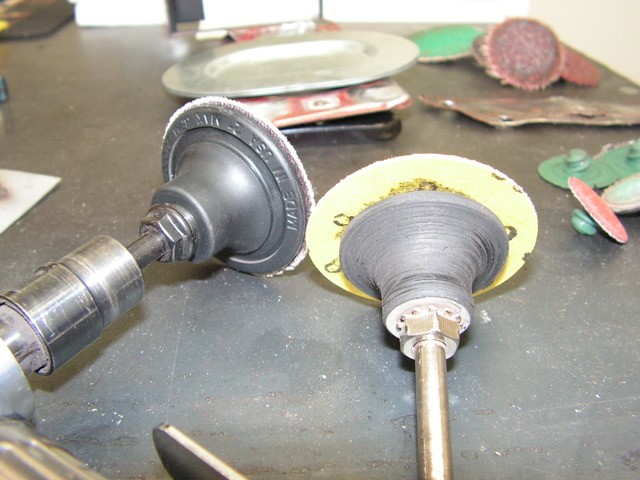
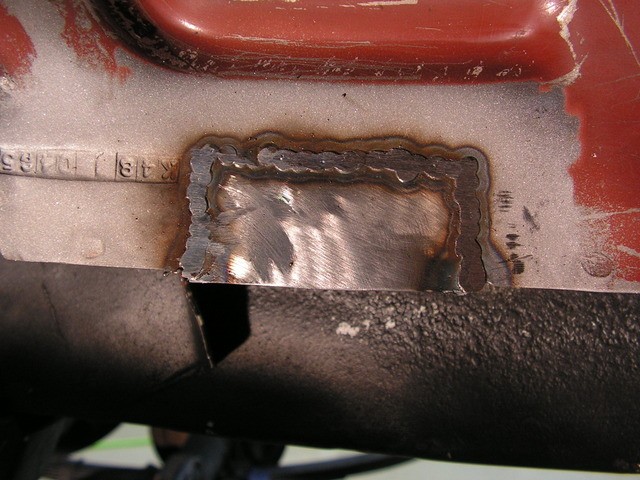
I would like to be able to weld sheet metal without anyone ever know it was done, but I'm a long way from that. I cut and made two patches for my rear inner fenders. These were very small patches. I used the setup chart with gas and .023 wire. I actually found it better to run the welder just a tad hotter with a faster wire speed. I got good penetration on my tacks, however on the back of the patch before grinding it down there were just a few areas that I could see the line where the two pieces of metal were butted up to each other. Once I ground the back side down, it looked ok.
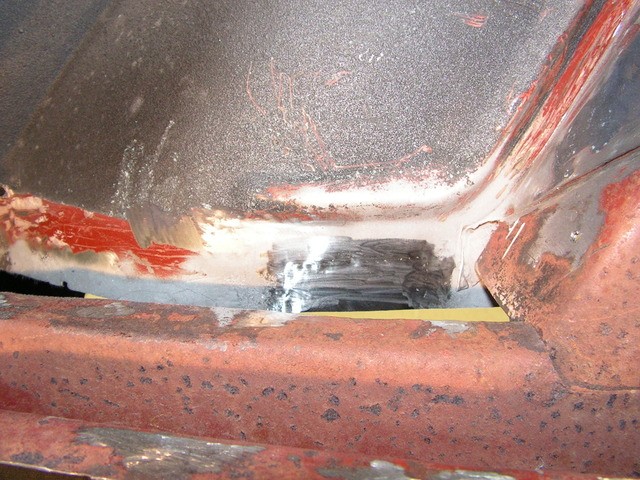
Here is the first patch.
 Nice job in trimming/fitment. I prefer the tight fitting, no-gap panels. When you get working on larger patches in low crown areas, I think you'll find that gaps equal more chance of movement, more chance of losing crown. I'll echo the comment about losing the sharp 90 corners. As your welds shrink, a tight inside corner gets those effects from two different directions, where the shrinking effects will compound in the inside corner, normally as a pucker that is a bit challenging to remove. A large sweeping radius helps to balance out the shrinking effects on either side of the weld, where the planishing efforts don't need to focus on puckers or deformity on one side only.
 Hard to critique your weld dots with the fronts already ground down, but I think I would try just a touch more heat and feed speed. Reason being, it appears you may have had considerably more proud on the front that you still have on the back. I prefer just a slight bit more weld proud on the back side, that way when you planish the welds, the forces exerted in stretching the weld are on the weld alone, and not attempting to deflect the panel. A bit more heat and feed should get a bit more proud at the back, or more equal to the front, and you should be able to release the trigger sooner to limit the weld size. Given that, let's back up a step, I would have welded in about 1 or 2" spacing, and then planished each weld, and then ground down front and back to just above panel surface. Now you have a "clean slate" for planishing the next set of welds, nothing in the way. Lather, rinse, repeat.
And with any adjustments or tweaks to your methods, always cut some scraps and practice, in free air just like the panels on the car. Laying the sheet metal on a welding bench only serves as a heat sink, and will change your results..
Having said all that, not that anything looks wrong at all with the results you've shown above, but with any attempts at larger patches and longer welds, these tweaks may help out in achieving better results in that regard.
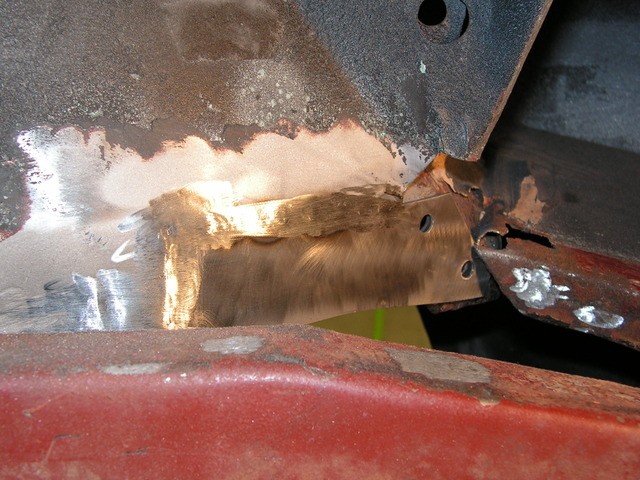
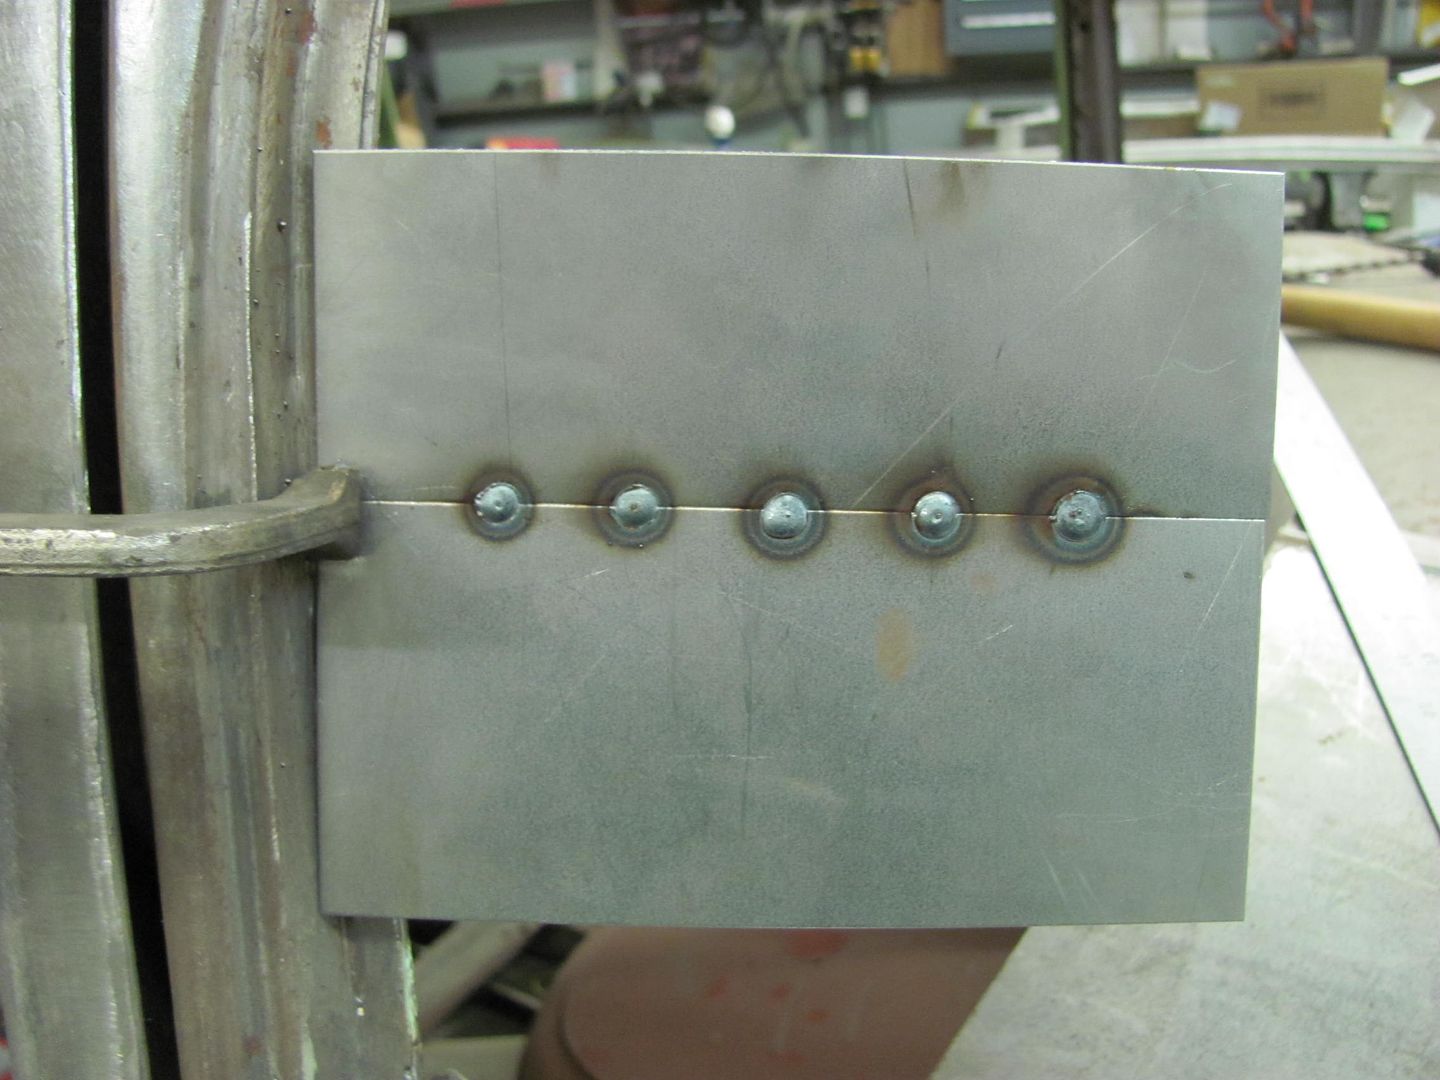
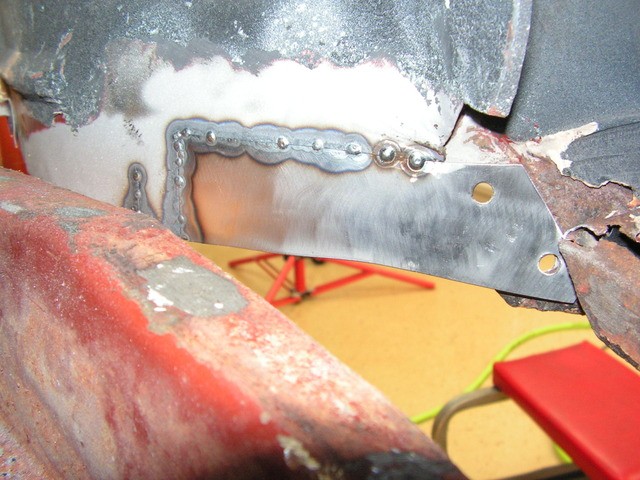
Here is the second:
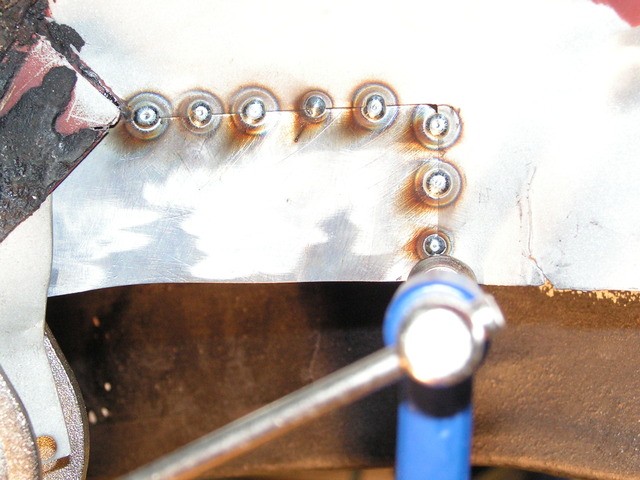
 These are a good start, could be spaced a bit more, and they are about exactly what I'm referring to above. Enough proud on the back to insure planishing affects the weld and not a deflection of the panel. A bit more room between would give you more hammer/dolly room
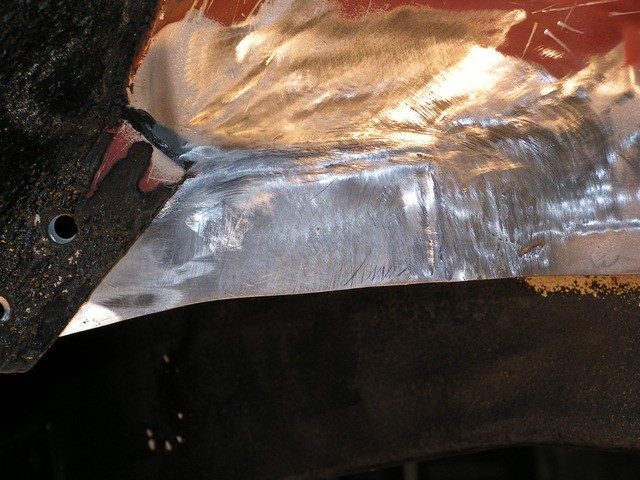
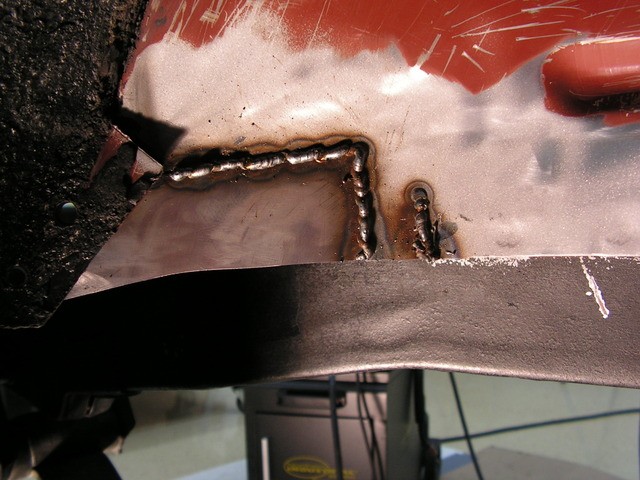 On this picture, I would suggest to revert to what you were doing before this. Here you switched to a short pass to fill in between, and the speed gave you no proud on the back side. (Actually, comparing this to the rear view above, on the back you can still see the joint between the panels, so there is insufficient weld penetration, and the long weld passes on the front are really sitting tall, again, no weld penetration) Planishing, if this were a quarter panel, may result in moving the panel as there is no proud on the back side for the dolly. In most of anything I post, I try to emphasize consistency throughout. If you start with welding dots, do it from start to finish. Once you get your machine set up where the heat and wire feed are producing the weld penetration you're looking for, then you can control the weld size by elapsed time of trigger pull. Get all your gaps nice and tight as you have them, and you don't need large blobs of weld to span a big gap, adding more heat and shrinking. So any extra time spend to get the consistency in panel fitment as you show here is well worth it. When all of your methods from fitment, trimming, weld spacing, planishing efforts, weld overlap, etc. start to become an OCD issue, then you will have better consistency throughout, for better consistency in the results.
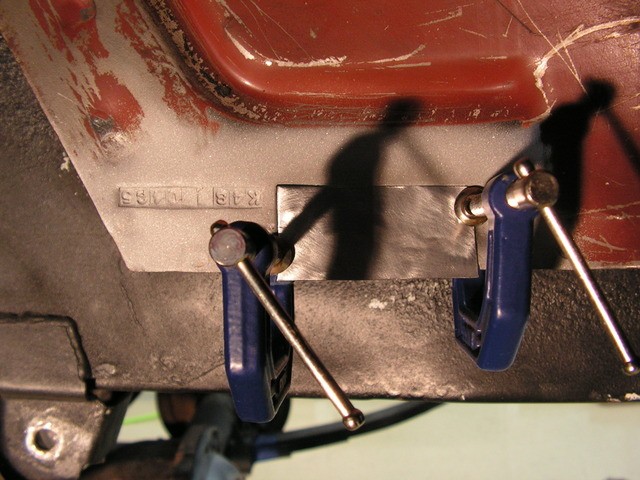
I'm a little worried about the backside. On the front you can still tell where I welded it at. I believe the second patch could use some more grinding, but I'm afraid I will take more metal off in the surrounding metal, thus making a weak repair. What do you guys think?