1967 Camaro ss/rs restoration

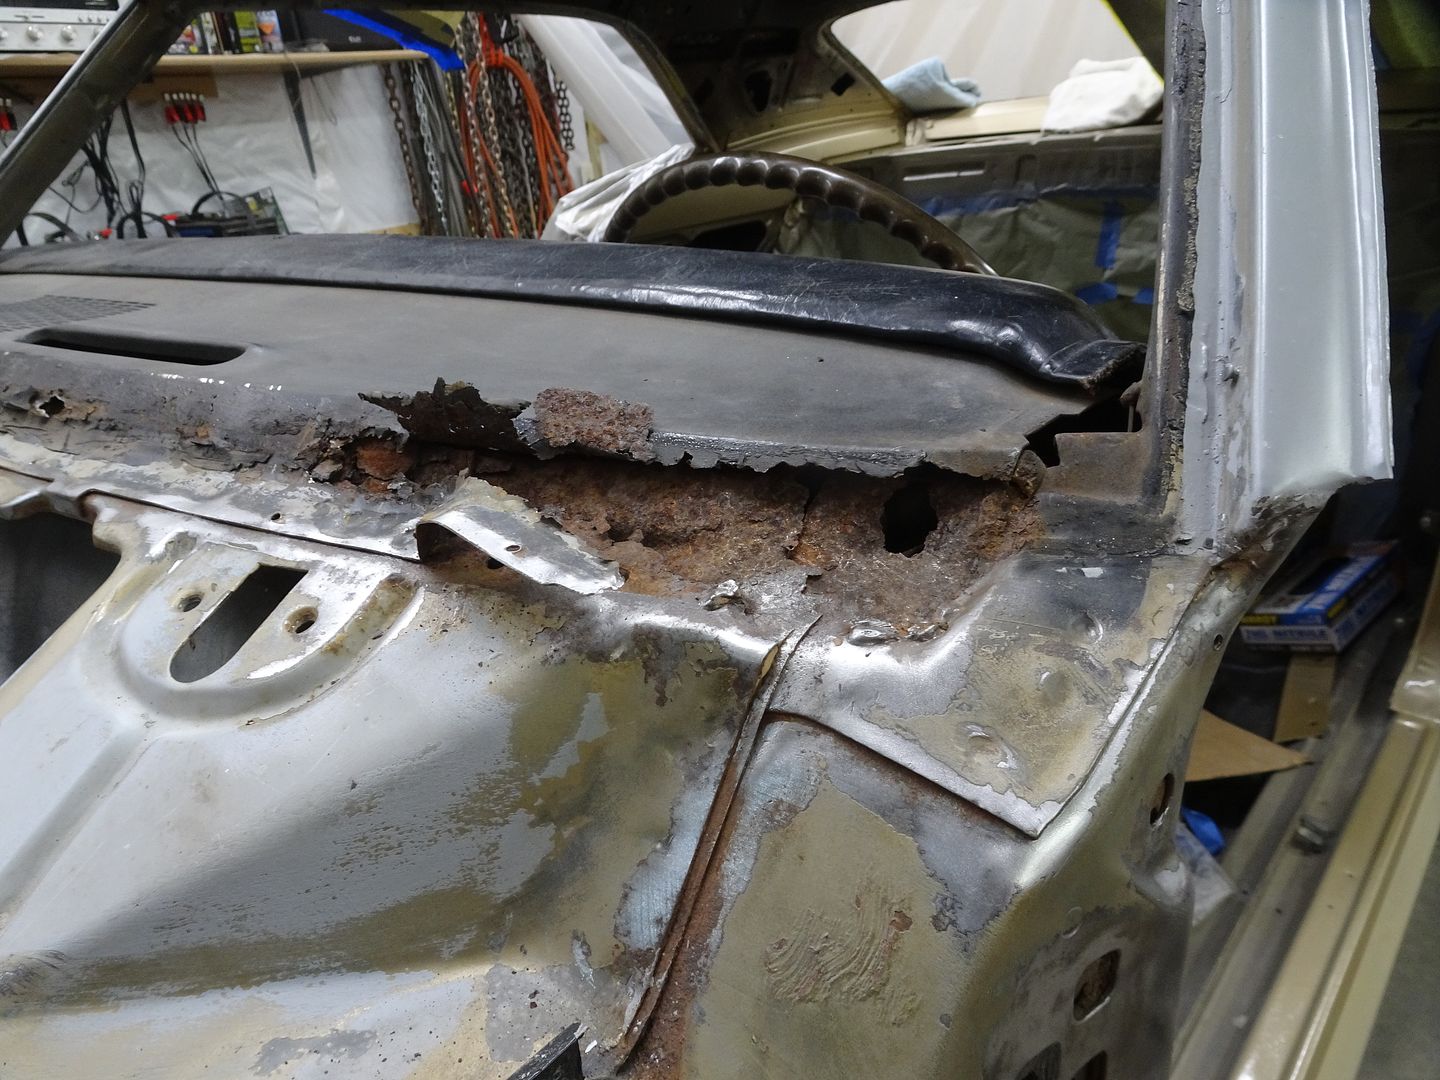
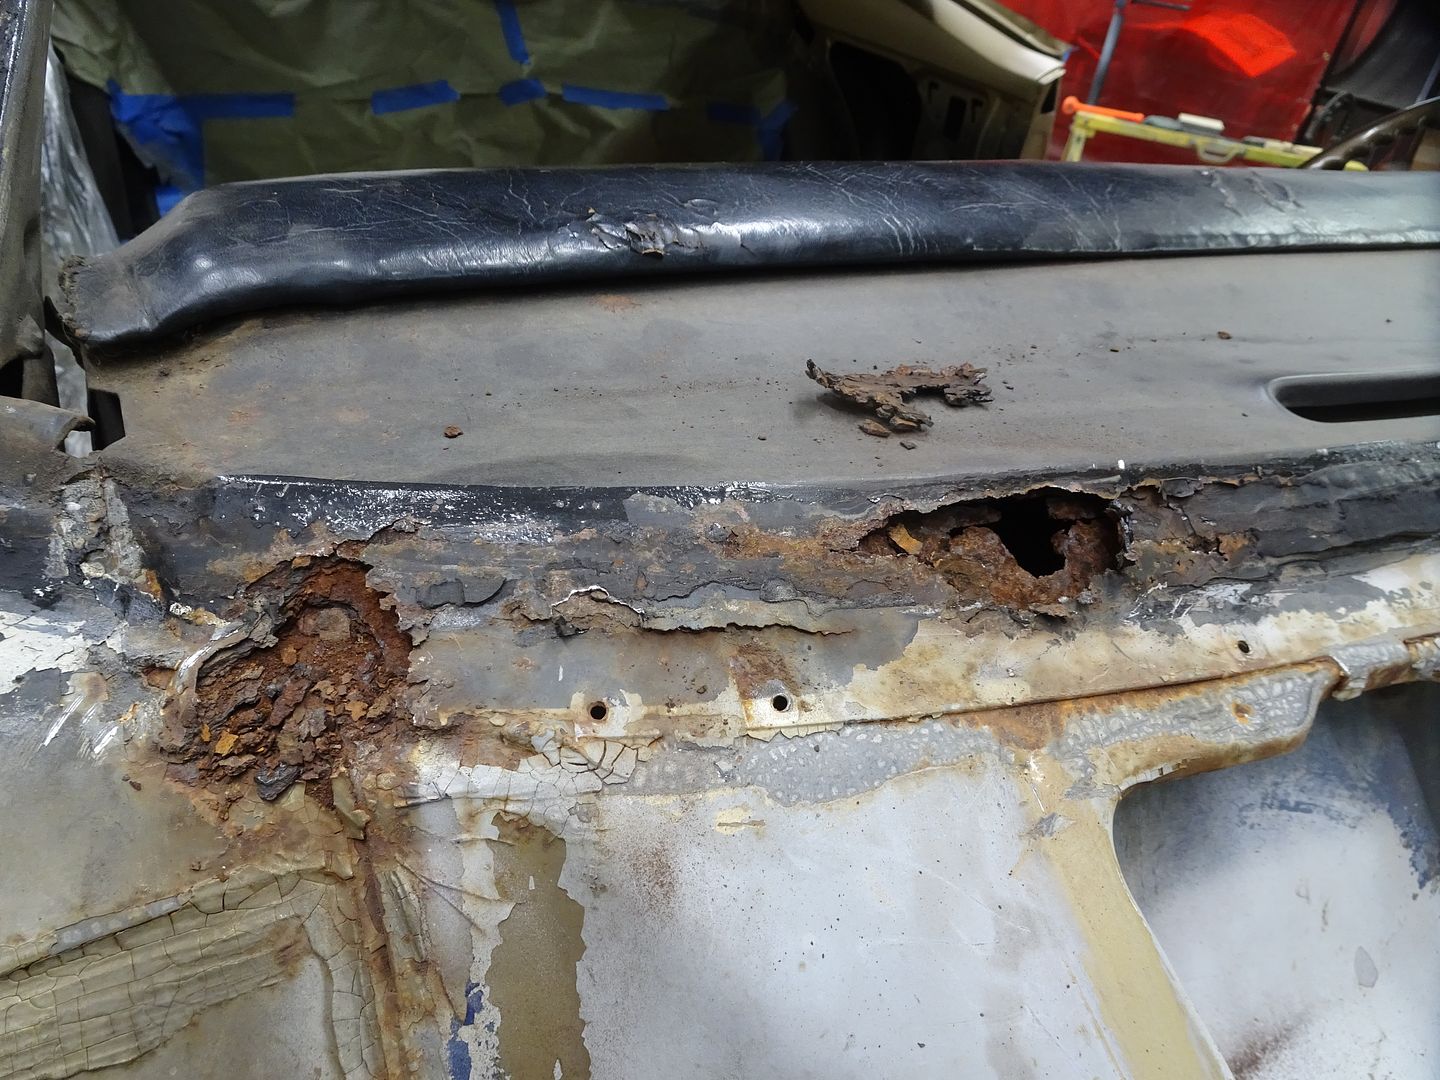
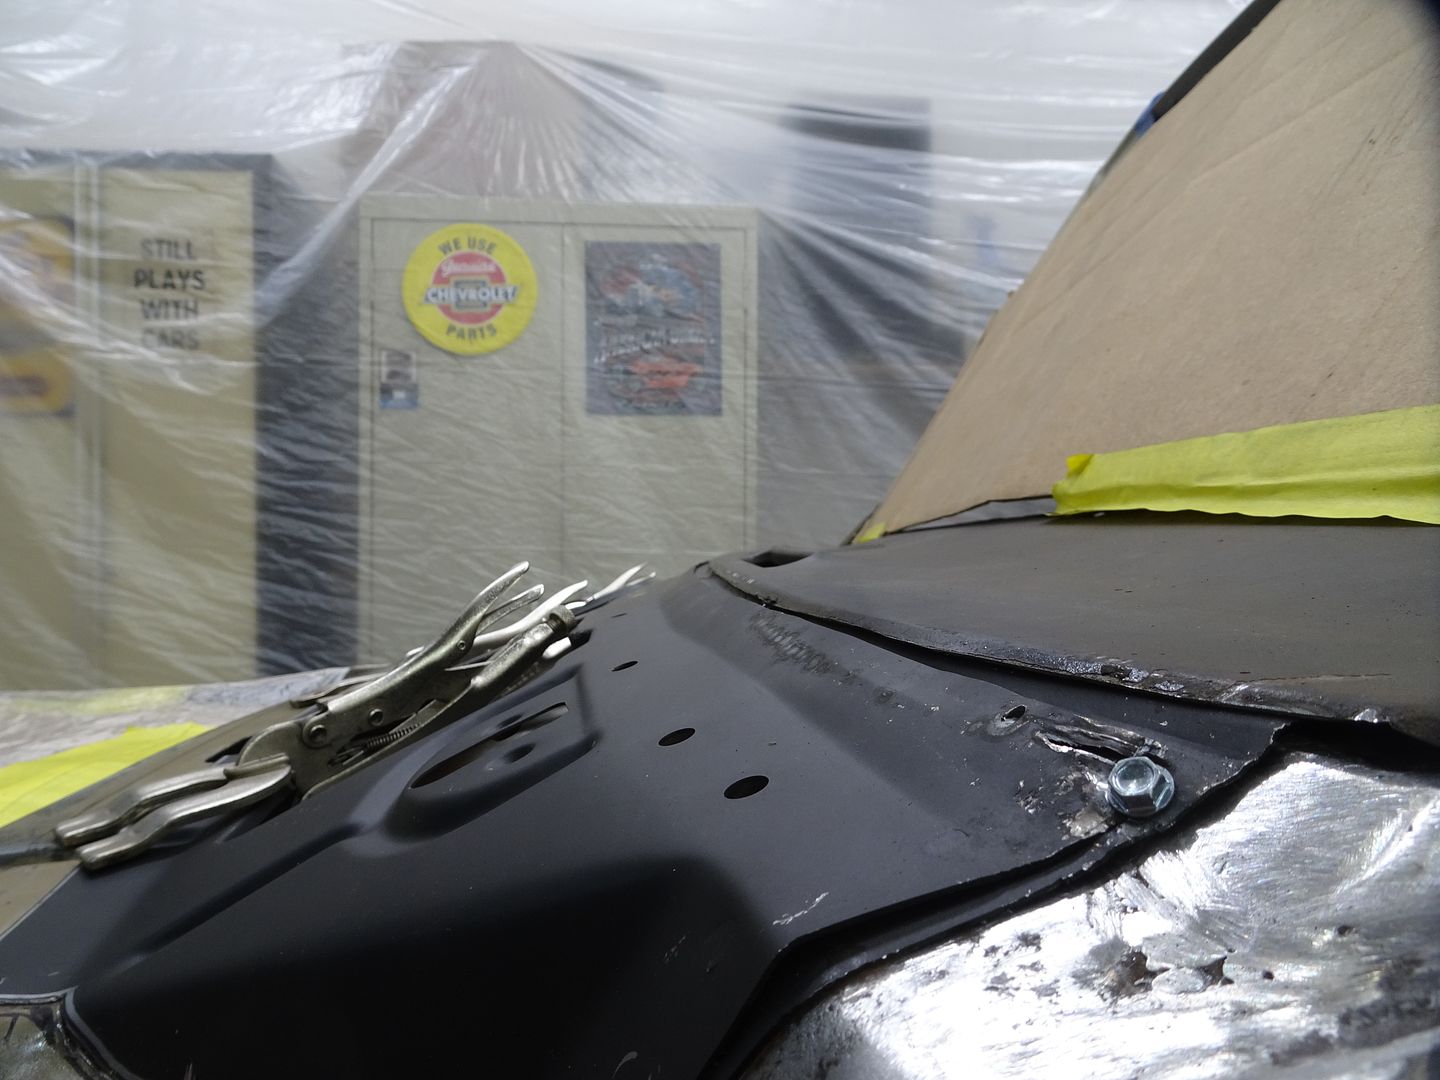
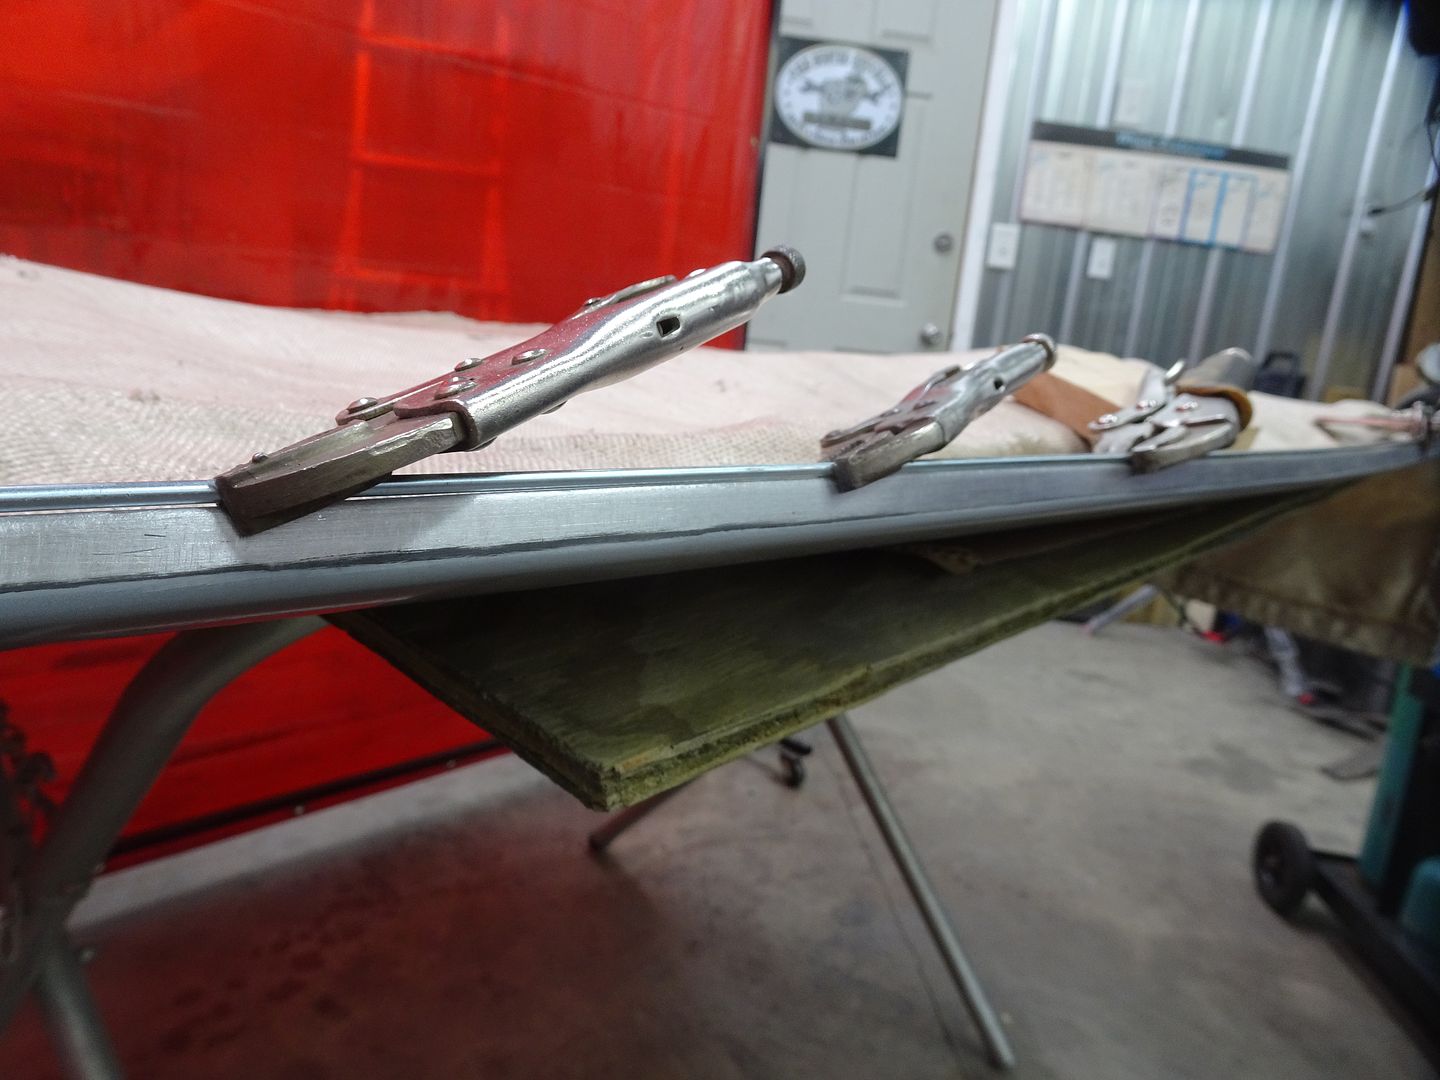
I had sent the doors and trunk lid to Restoration Specialists in Franklin WI while we were working on the filler/primer stage. When I picked them up, I was shocked at all the hidden damage that had been under the paint. No rust, but, again, they looked like they had been in a demo derby. Only 1 pic of the right door with a large dent that I worked out to only needing a swipe of lightweight filler and then 2k glaze.

DSC00031.jpg


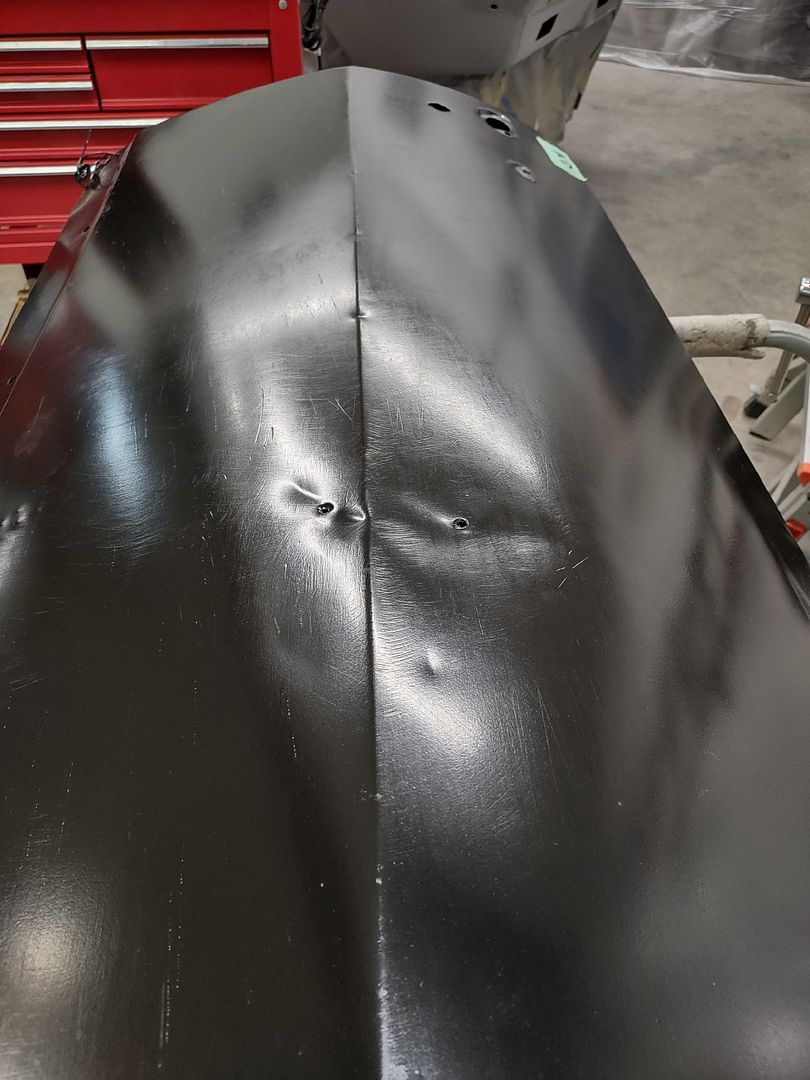
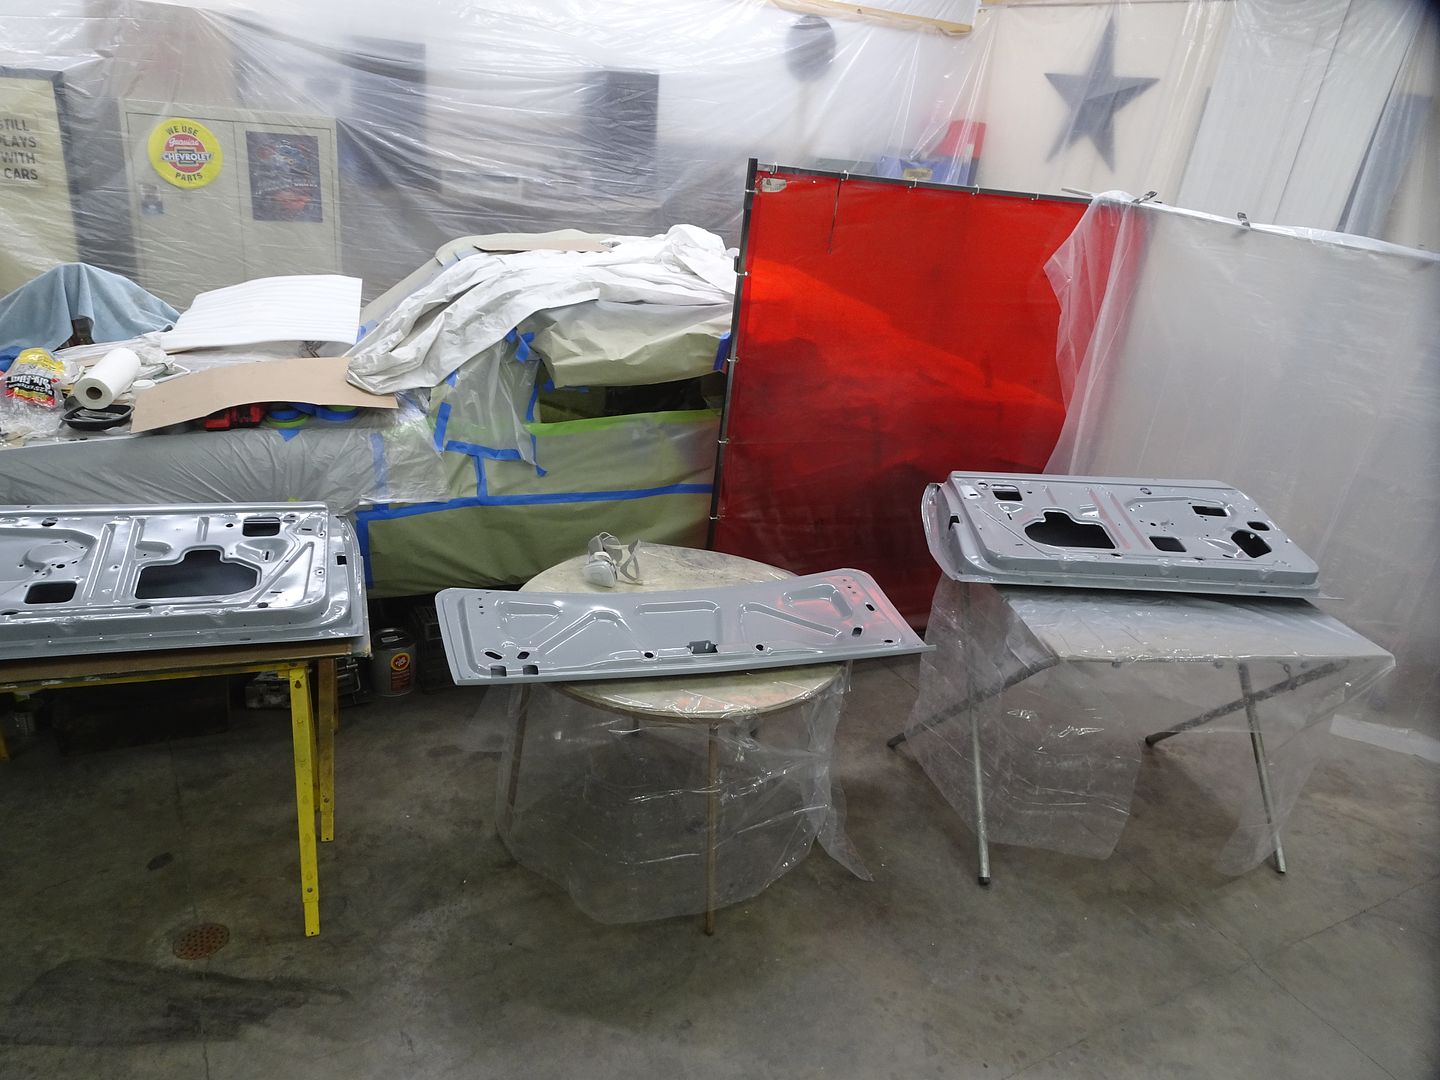
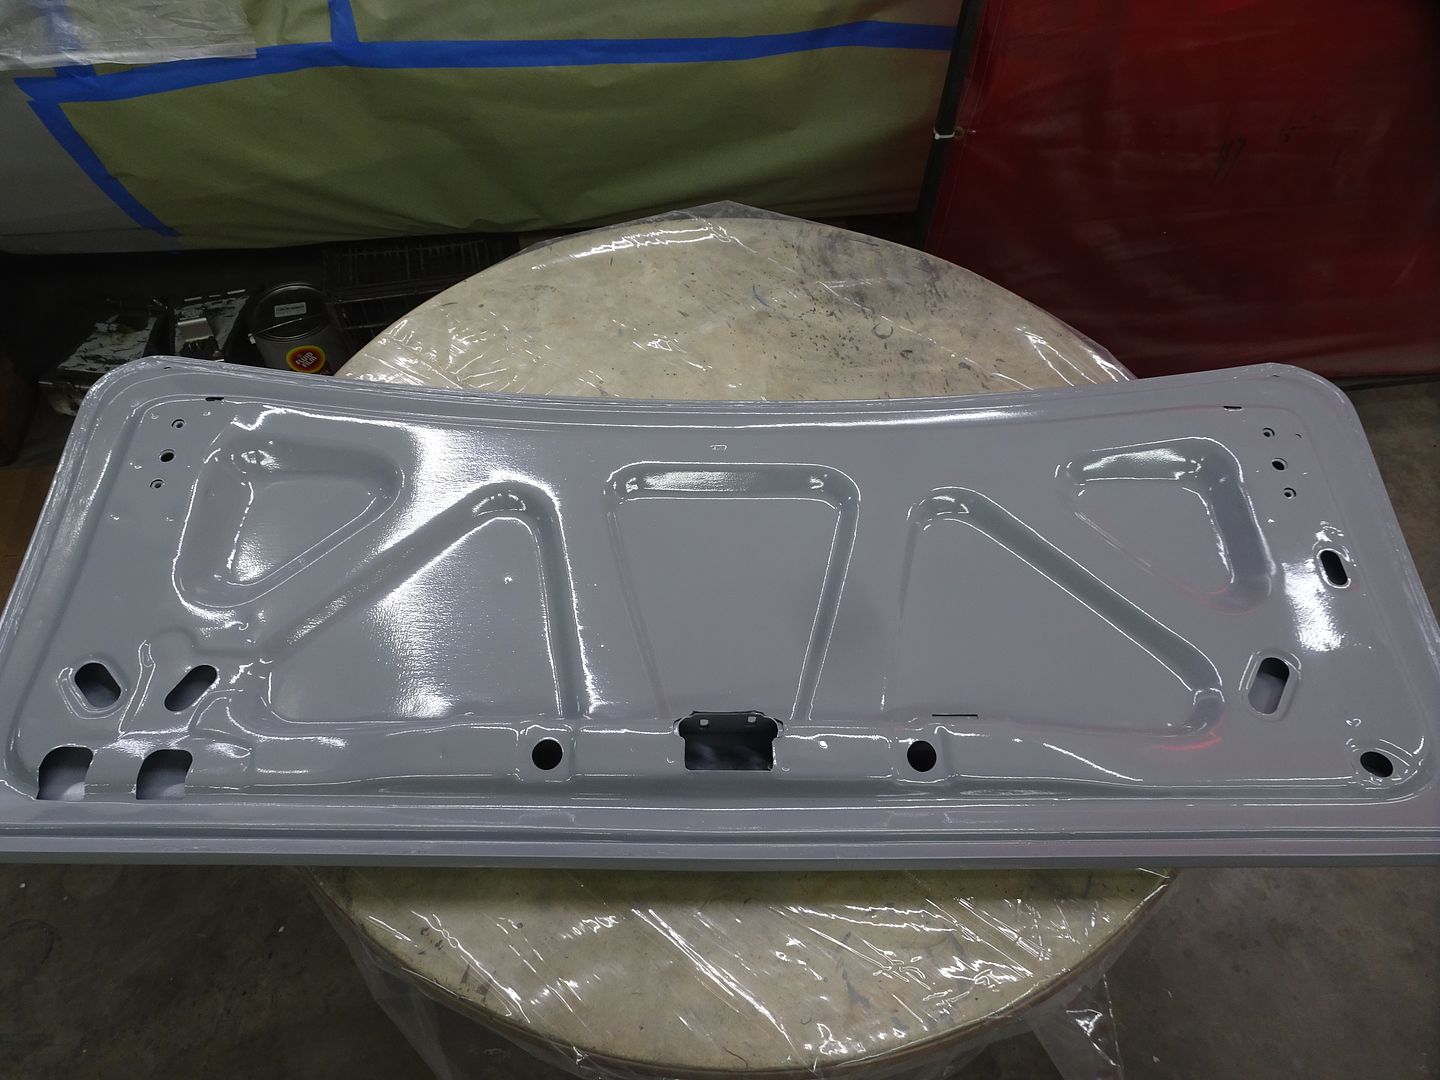
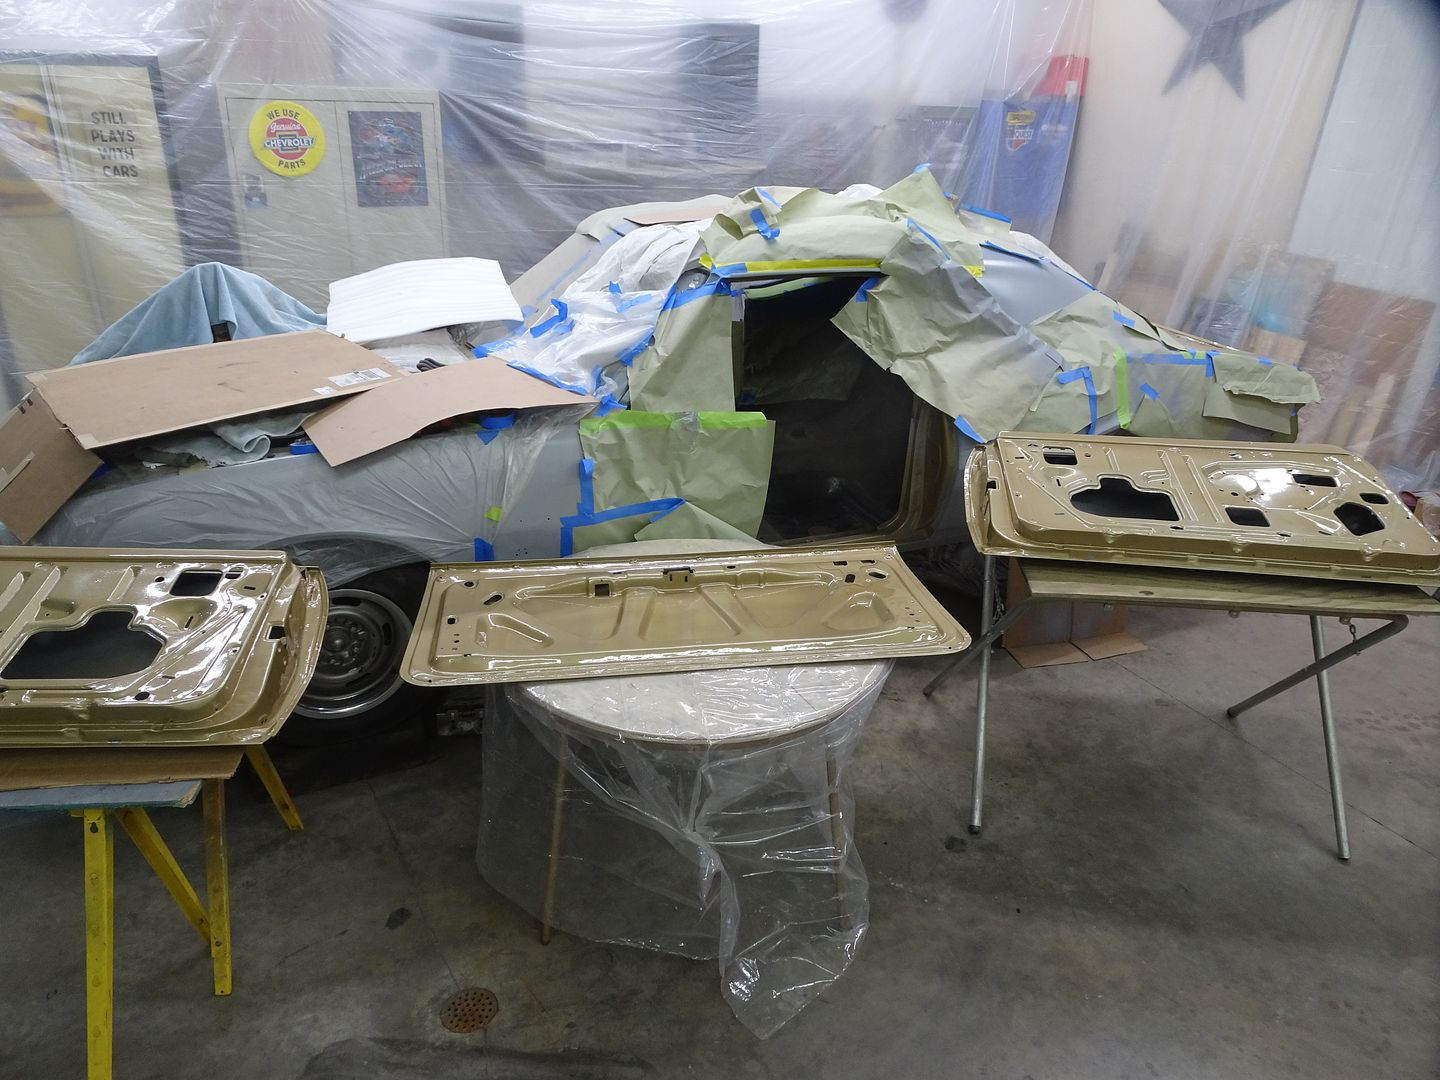
I was so disgusted with their condition, I didn't take any more pics. The left door had a crease nearly on the style line from about the center of the door all the way off the back edge. I had seen that crease in the quarter panel too and it went all the way to the bumper. I used hammer and dolly to get much of it out, but when welding the old puller holes used cold water to shrink the area too. It came out decent enough that it, too, only needed a small amount of filler to finish the repair. Karl, the bodyman was amazed at how well I was able to get the metal back in shape. As any production person knows, spending hours removing dents isn't a method used in collision repair. I'm not really "skilled" at it either, but I have lots of time to work on it and learn, and ordering a new door for a 1967 car isn't an option... :D So, after my time working on them, I shot the outsides with primer and Karl did the filler work. I then scuffed the entire door, as they had been immersed in an EDP tank and are now fulled coated, inside and out. I then sprayed a light coat followed by 2 wet coats all 45 minutes apart and let them sit for 7 days. I use a 75-85 reducer at 20%, as my shop is only about 63 degrees and that slows the curing process and allows the paint to flow out. By laying the parts flat, they looked like glass after a week of sitting like that.

DSC00636.JPG


DSC00634.JPG


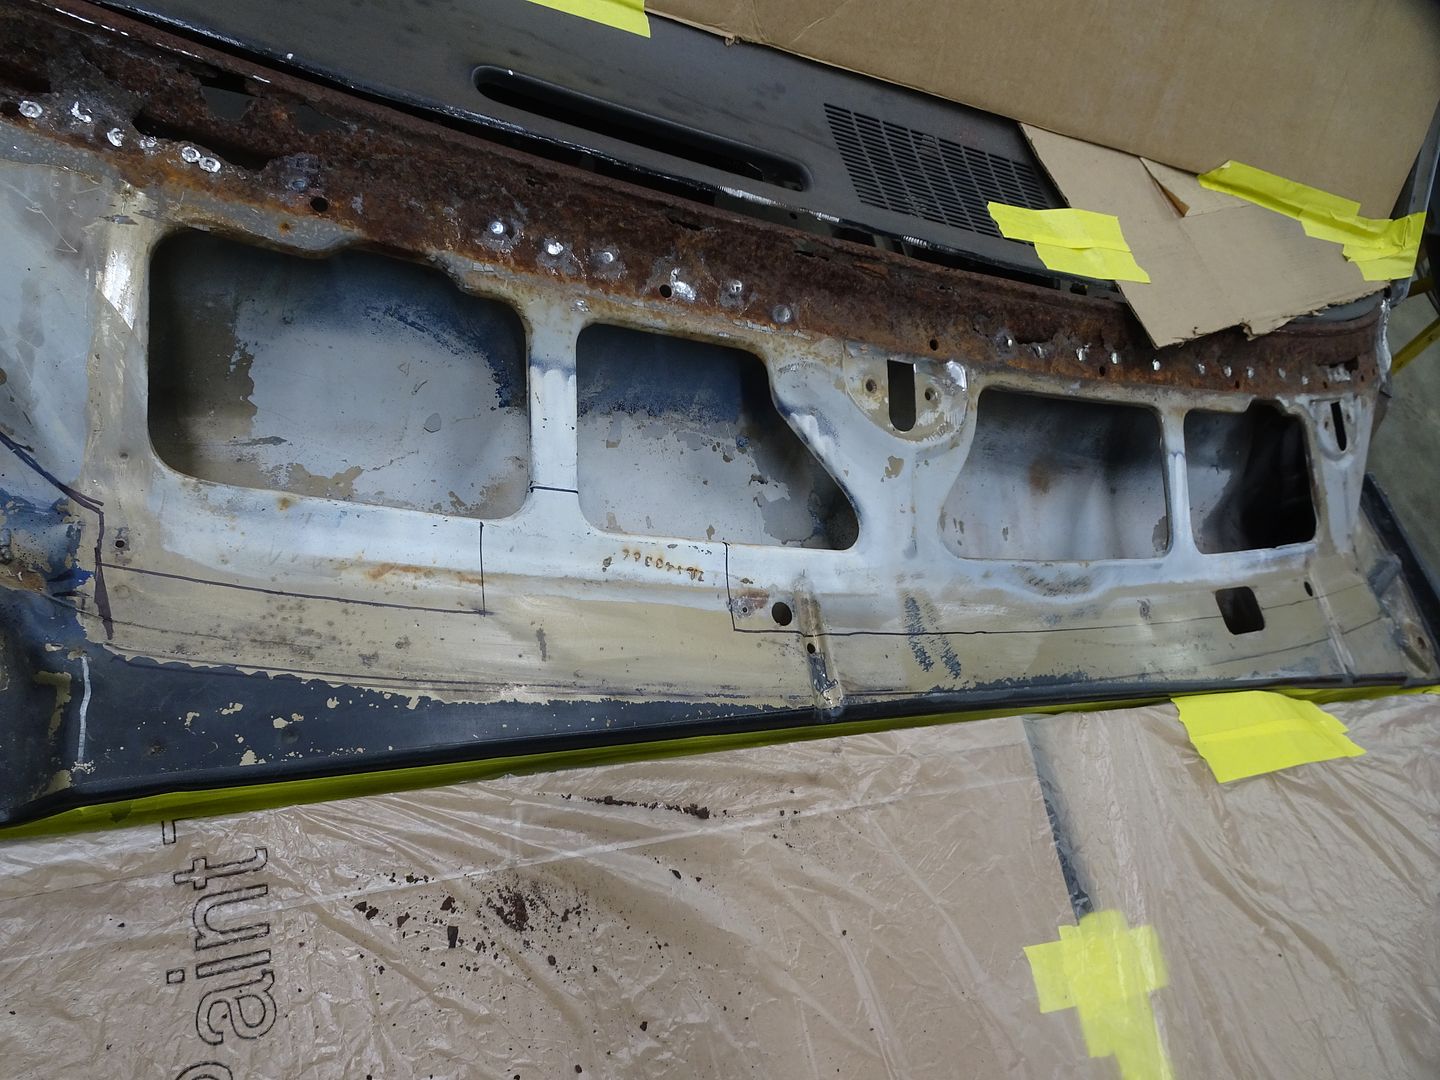
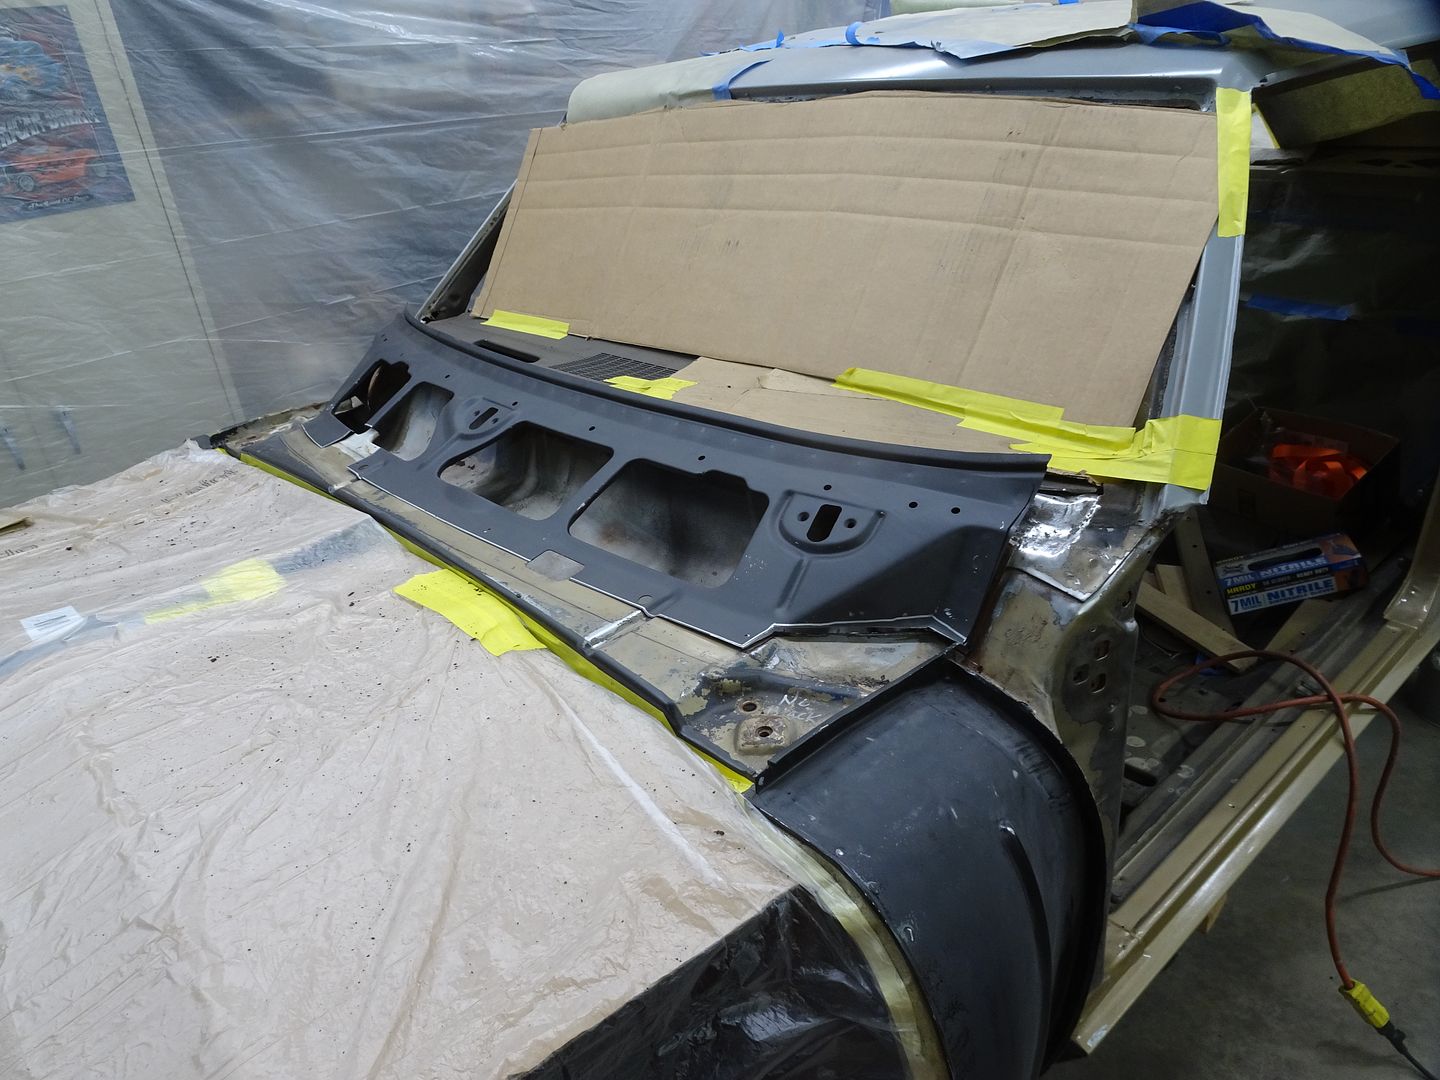
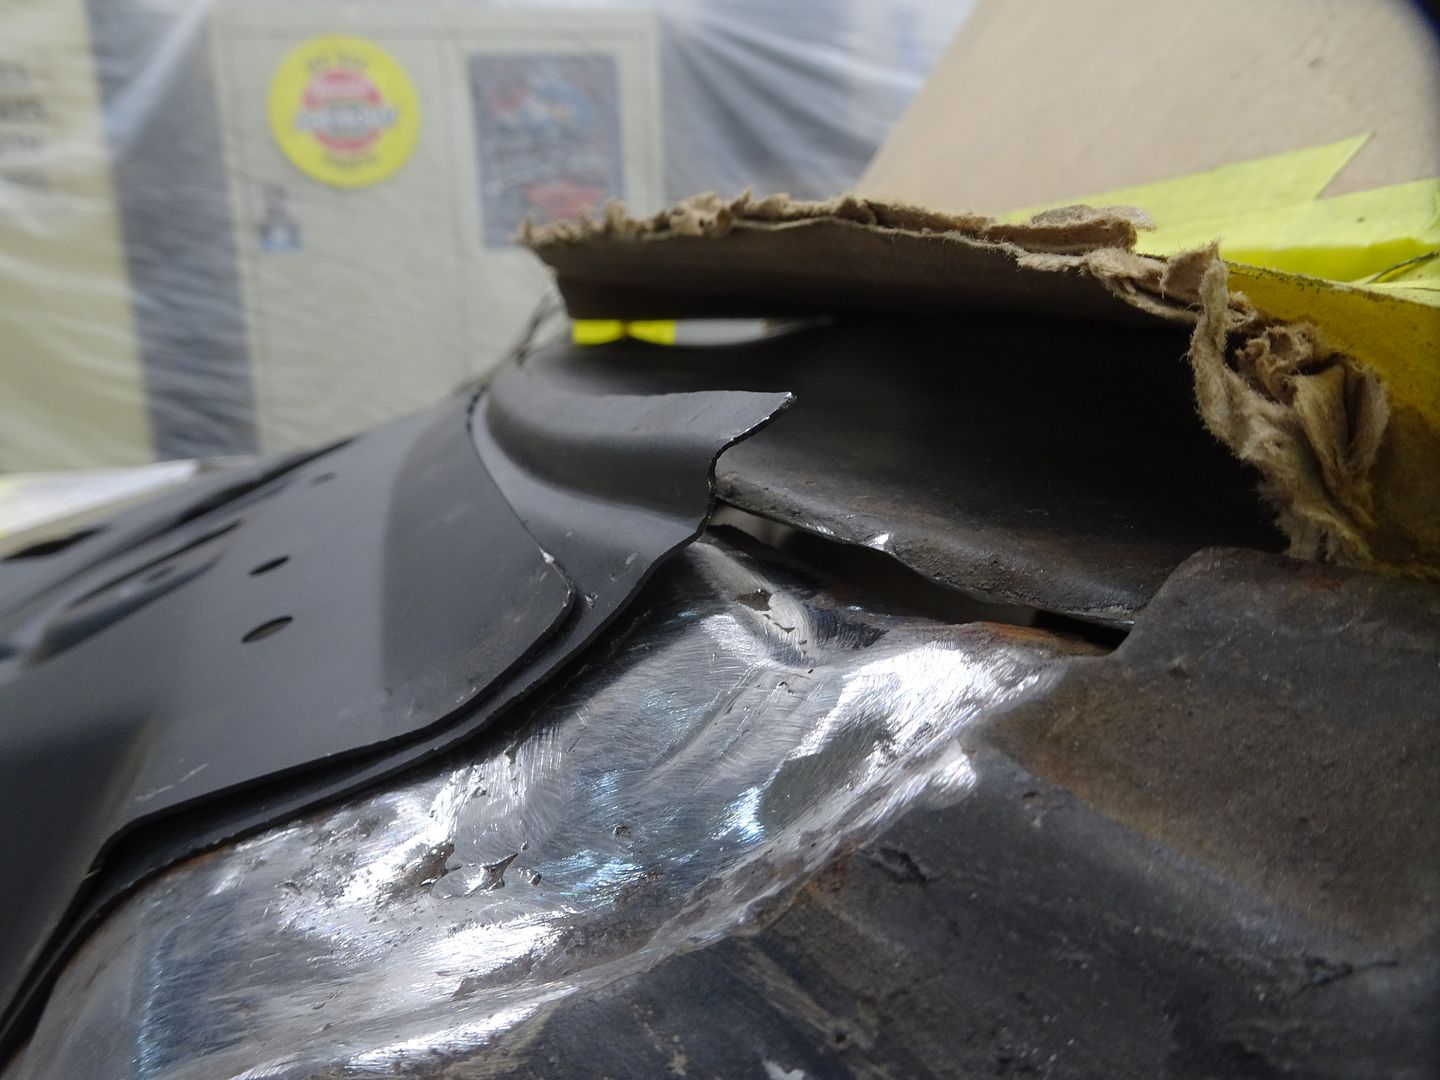
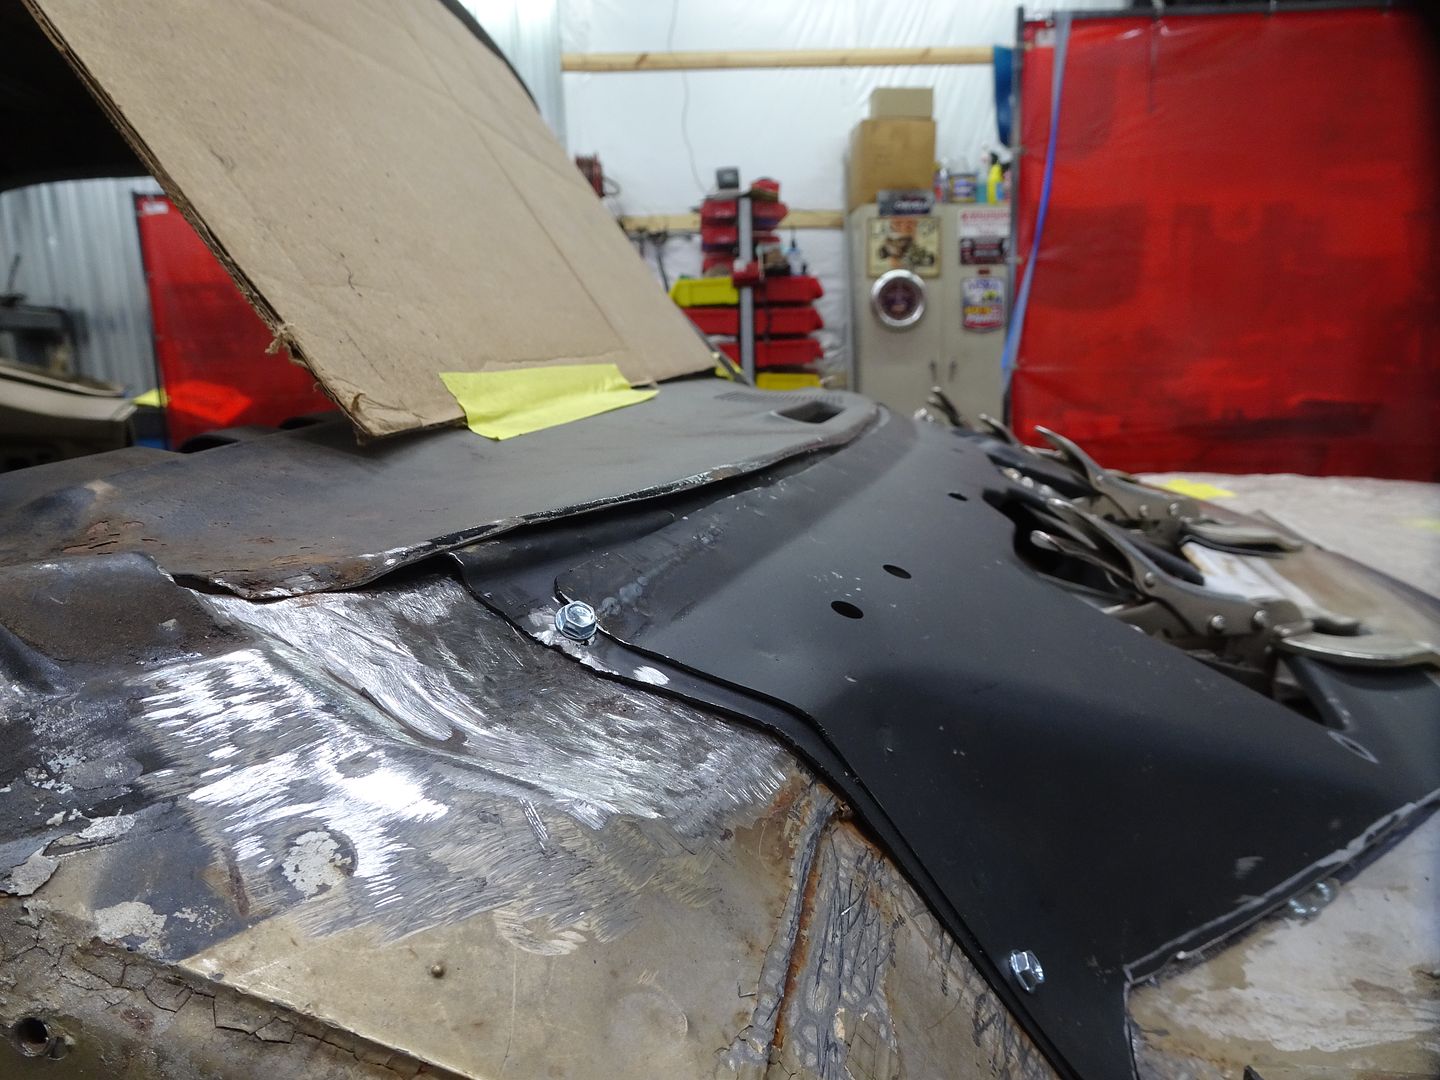
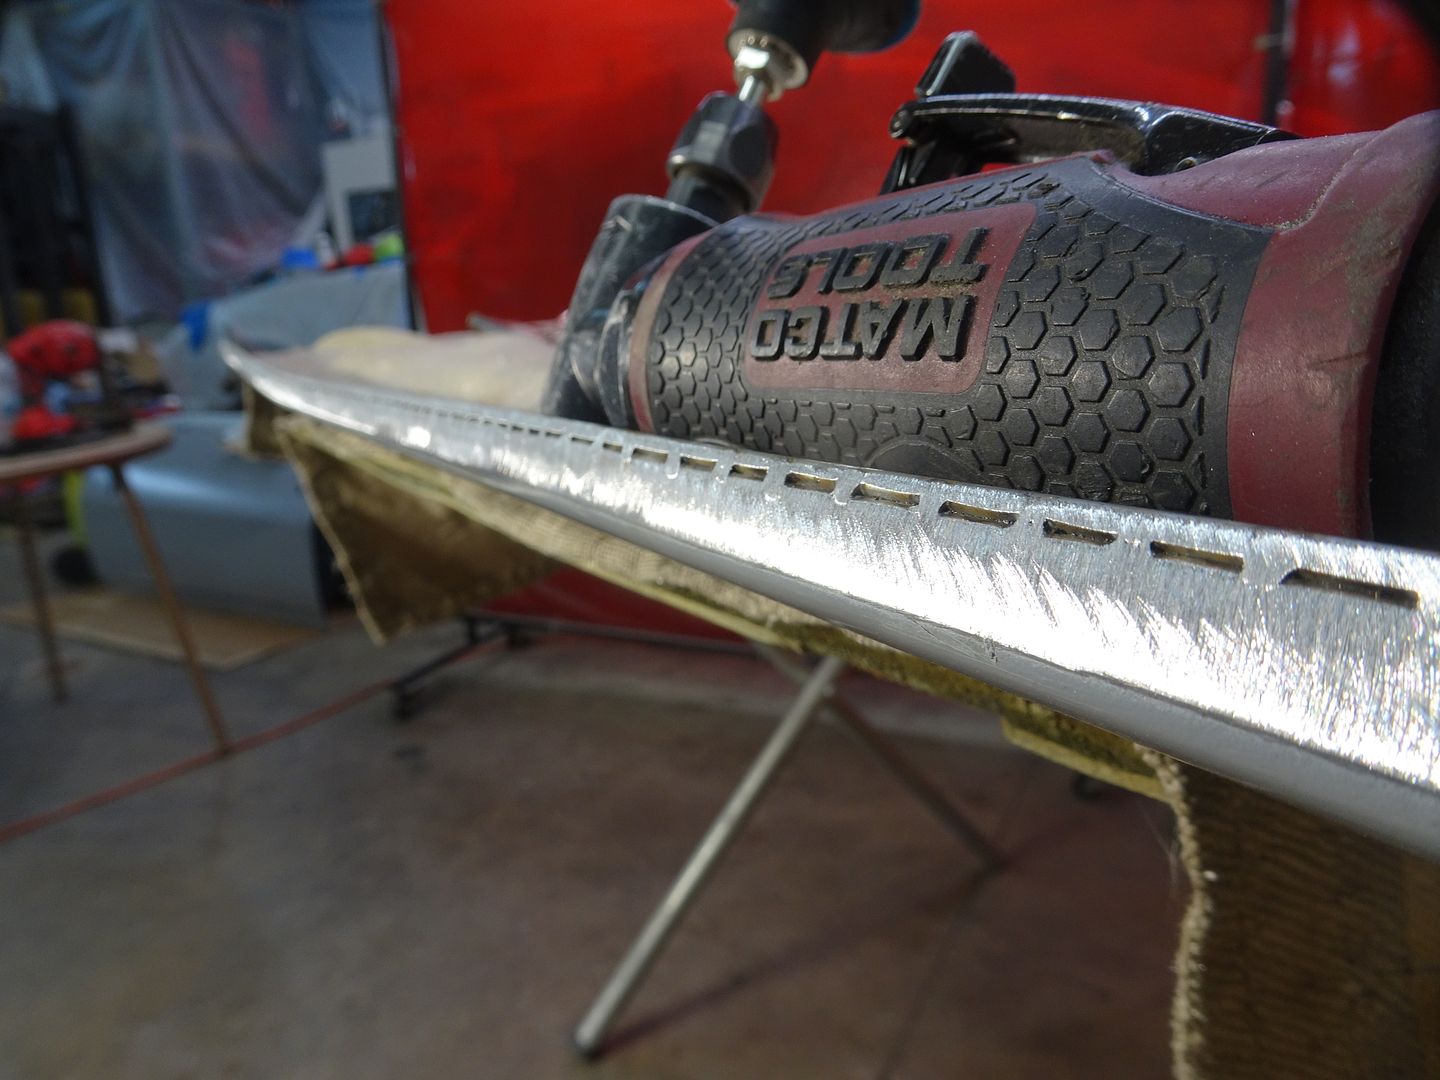
Now we get to my anal side. I've never cared for the large gap the factory left below the trunk lid lip to the tail panel and became of "those" people, who had to weld an 1/8" rod to the lip to close up that gap some.

DSC00603.JPG


DSC00615.JPG


DSC00616.JPG


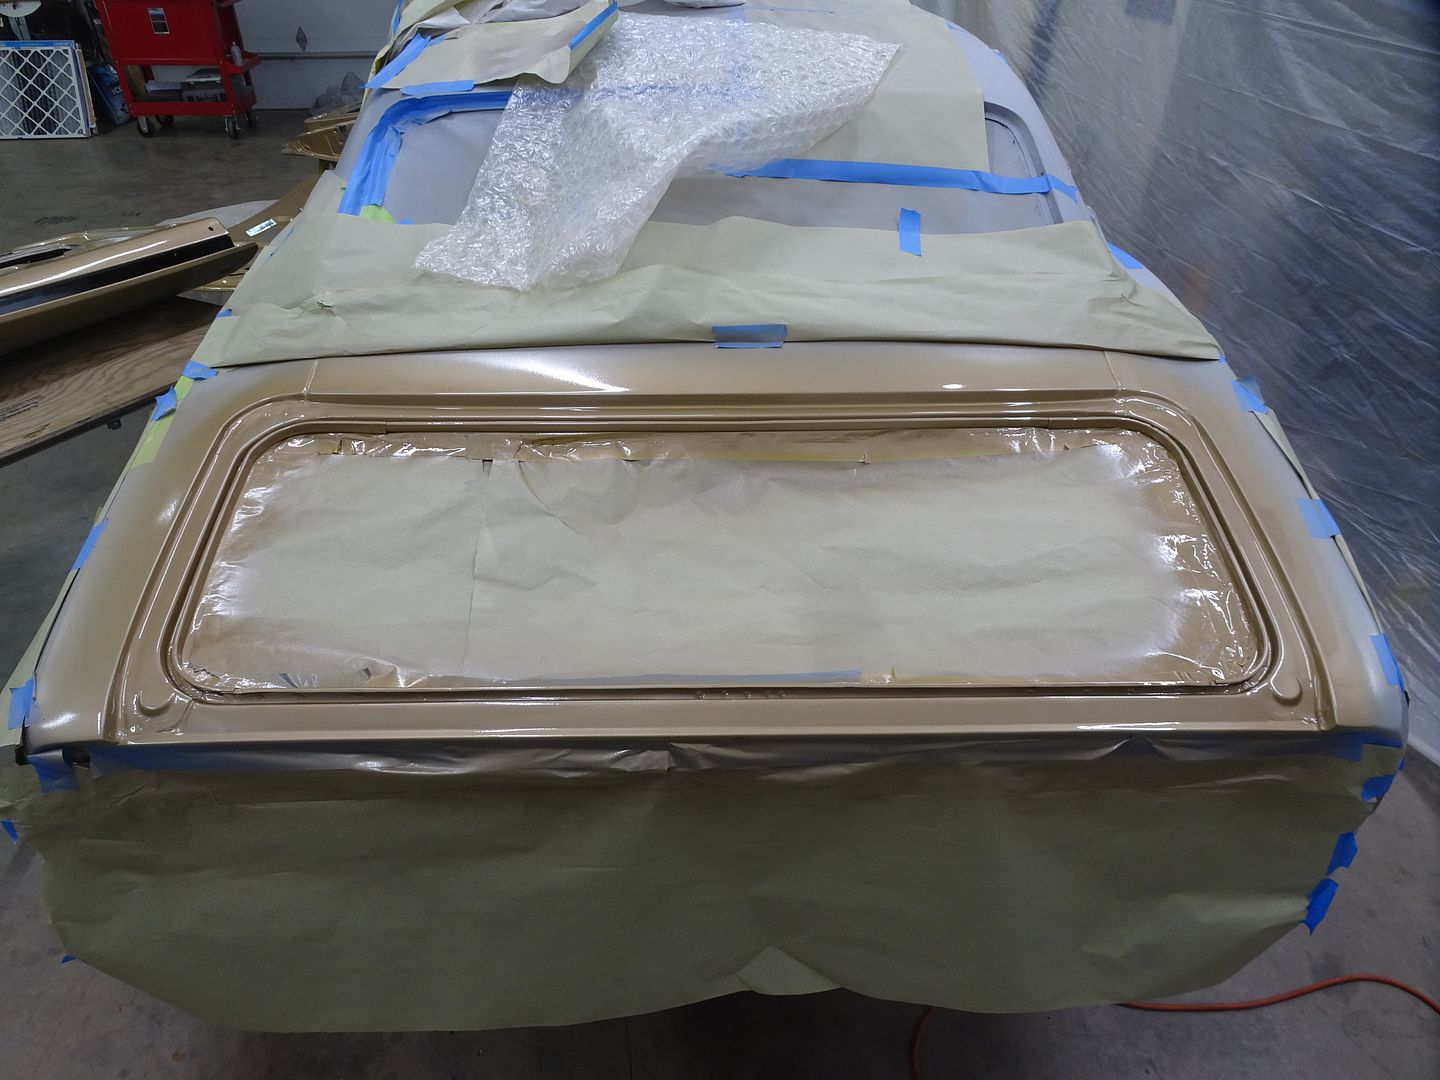
Once the extension was completely welded on and hand filed to shape, the doors and lid were seam sealed and jammed, along with the trunk opening.

DSC00650.JPG


DSC00651.JPG
 
Now, we are in real time. About 3 weeks ago, it was time to remove the fenders and complete the sanding, prepping and priming/jamming of the cowl. Once the fenders were off and I saw the rust in the 2 corners, knew I had to have seen that 5 years prior, but had forgotten about it. Well, the windshield will need to come out so I can repair these 2 areas. Now, I've owned this car for 16 years, had driven it a fair amount the first 5-6 and never had any reason to believe there was an issue with the lower channel. I could see there was some newer paint right along that flange that stopped at the flat area with no indication of an issue. The windshield is a replacement and was urethane in and was a bugger to cut out, as the urethane along the bottom seemed unusually thick... well, I found the reason it was so thick. I've seen some amazing filler work done by "bondo artists" and the person who installed the glass was certainly a "urethane artist", as seen by the friggen mess he had disguised.

DSC00691.JPG


Gonna take a little more work than just repairing the 2 corners.....:eek:

DSC00692.JPG


DSC00693.JPG


DSC00694.JPG


I ordered a complete OER lower/upper cowl assembly from Jeg's and ground off the rust around the hole in the left side, made a patch and welded that in. The right side cleaned up enough with the stone wheel and doesn't need a patch.

DSC00702.JPG


DSC00705.JPG


Marked and cut out the upper cowl.

DSC00709.JPG


Clamped that on the new part, as well as guessing how much I needed of the lower and cut that all out in one piece.

DSC00711.JPG


DSC00716.JPG


I layed in on to get an idea of how all the stampings would line up with the original and was very pleasantly surprised that they are very nearly identical !!. I still need to cut out the lower cowl on the car and that necessitated removing the column and everything from the dash, which a few days before, I had NO intention of doing...:(

DSC00717.JPG


Once the lower cowl was cut out, it layed in quite nicely, but the flange that goes under the dash panel is angled much too straight to do that. Some hammer and dolly work later and I had the dash panel laying flat on the window channel.

DSC00727.JPG


DSC00735.JPG


I did slice and lower the flange on both sides, as it extended too far under the dash panel.

DSC00730.JPG


DSC00734.JPG


Since these were taken, I have been cleaning and sanding inside the cowl area to seal, prime and jam it, as long as I have such good access. I need to get out there today and finish that process and scuff the replacement for the paint process too. I want to have all the painting done before we go south for a few weeks in Feb. so it can cure while we are gone. I have a dash panel on order and waiting at Camaro Central that I will pick up on my way home. Shipping has gotten absolutely stupid. $80 to ship an 8# box because it's "oversize". I have a whole laundry list of other stuff I wanted but haven't been willing to pay the crazy shipping, so it will be worth it to make a slight detour for all of it.
 
Hey Mitch. Good to see you posting your progress on the Camaro. I enjoyed catching up but even more enjoyed you and Pugsy being back on the same forum. Lots of good memories from back when.
 
I have had that shock of seeing extensive rust a few times before. What looks like a quick fix turns into a major project.
Also, very few of the patch panels are exact fits. Nearly all of them take some modification in order to fit properly.
My personal experience working on restorations is that AMD produces the best fitting panels. Goodmark are some of the worst, in my experience anyway, and LMC Truck parts were decent.
 
I'm glad Mitch is here and posting progress during the winter months. We used to have a member (moparjim) who we counted on to get us thru the winter months with his progress updates.

For whatever reason he's abandoned us leaving us with having to deal with cabin fever and sorrow.

The detailed repairs being made on the Camaro have been well done. I'm glad I've gotten the opportunity to follow along with the restoration.

Another thing I find fascinating is, Pugsy actually has an internet friend ? :)
 
I have had that shock of seeing extensive rust a few times before. What looks like a quick fix turns into a major project.
Also, very few of the patch panels are exact fits. Nearly all of them take some modification in order to fit properly.
My personal experience working on restorations is that AMD produces the best fitting panels. Goodmark are some of the worst, in my experience anyway, and LMC Truck parts were decent.

That good to know about AMD. The 68 Dart I 'm doing next is in need of a few panels.
 
That good to know about AMD. The 68 Dart I 'm doing next is in need of a few panels.
Look at Dynacorn for Moparts too. They have been doing it far longer than AMD. Many of the parts AMD sells now aren't their own. They sell other brands as well, to be a one stop order house. I would bet some of the Mopar parts they sell are from Dynacorn, or their supplier. The cowl assembly I bought is a CHL part that is sold to and packaged by all the other retailers. Jeg's had it listed as an OER part, but it came in a CHL box and their sticker on it.

John, how ya doing', ya old fart :) I logged onto the Hot Rod forum today for the first time in a long time. I found your reply about a heart transplant..... in Precious. About time you got over "frugal", you can't take it with you when you go.

As for Pugsy having an internet friend, he, John and I go back 12 years ?? on the hot rod forum. We watched John drag Precious home and over the next 8 years, or so, hand form nearly every panel he replaced on that car. Absolutely astounding to me, then and now. I still need to buy preformed panels to start with, even if it means cutting them into pieces and welding them together the way they belong. In fact, John is the influence for me to start using SPI products, so send him a free calendar, or something..:D
 
Well, I had to come back from FL to warm up in WI. Temps most of the 3 weeks we were down there weren't much warmer than home... I did make the detour to Richmond KY for all the Camaro parts and now have a decent dash top panel to work with. Also, got a new dash pad, wheel opening moldings and misc small parts to go with these.

IMG_20240225_140433379_HDR.jpg


IMG_20240225_141234113.jpg


I did make one, other, little detour before KY.... I went to Hilton Head SC and picked up some NOS sheetmetal for my '70 Chevelle. Left Quarter panel and both front fenders... None of these had been out of the cartons in the 34 years the owner had them. We took the quarter out to make certain there was no significant rust from all those years in storage and I couldn't believe what I saw. Absolutely ZERO rust on these parts. Fenders are packaged to store standing up, so I left them in the cartons.

IMG_20240225_110802000.jpg


IMG_20240225_111103895.jpg


IMG_20240225_112003724.jpg


IMG_20240225_111931156_HDR.jpg


IMG_20240225_112318250_HDR.jpg
 
The dash gets two thumbs up from the condition it was seen earlier. What a transformation, if I'm relieved to see it, you must be doing back flips, lol. Those NOS quarters are mint, they'd fetched lot of money to the die hard Chevy guys.

I bet you could sell the empty quarter panel box's.
 
Thanks, it looks good in the pics and initial mock up. I need to get the windshield back in the shop and use as final fitment. It's in the back storage shed and it's 15 friggen degrees this morning. Not a lot of motivation to go fetch it. We'll be in the 50's by tomorrow afternoon. Plenty of prep ahead of that. Hope to finish prepping inside the cowl and seal that with epoxy later today. I WAS on a roll with that yesterday afternoon, but I wanted to use the crud thug on all the contoured areas. I plugged it into the hose, squeezed the lever and.....nothing. It worked just fine the last time I used it a month ago, now what ?? Long story short, I used the exploded parts view it came with to figure out how to disassemble it enough to free up the stuck vanes on the rotor to cylinder and get it working again. Must have had a little moisture in it and the vanes corroded to the cylinder wall. That took up the last 1.5 hours of time I had. 45 minutes of that was just to get the *!&^* friggen roll pin out of the lever !! I need a set of really small punches. Turned the heat up in the shop a while ago and will be back at this shortly.
 
Got the primer/sealer on 3 hours ago. Thinking about going out around 6:30 and throw the color on.

DSC00854.JPG
DSC00855.JPG
DSC00856.JPG
DSC00857.JPG
 
I got the original dash top off yesterday and the new one initially fitted. I use my stone grinding wheel to cut out around the spot welds and not cut into the panel below it that I don't want damaged. Spot weld drills always leave a dimple hole and remove some metal before the spot pops. This way, I grind off the metal around the spot and pop the panel off with a screw driver. After the panel was off, I came back with a 2" disc with 120 and removed any left over material to blend the area flat.

DSC00841.JPG
DSC00843.JPG
DSC00844.JPG
DSC00847.JPG
DSC00848.JPG
 
Then remembered I needed to weld the brace for the dash panel and pedal bracket back in. Burned my purdy new paint, dang it.. Mixed up a small amount of SPI epoxy and applied with a brush. I'll try to get some color back down there later.

DSC00872.JPG
DSC00877.JPG
DSC00878.JPG
DSC00879.JPG
 
Then the dash top. I was able to use my spot welder across much of the front. I THOUGHT I had taken pics of this, but I didn't notice the tiny message on the camera screen blinking "NO CARD". Not the first time this has happened with this camera. In the process of sanding the entire instrument panel for paint now.

DSC00895.JPG
DSC00892.JPG
DSC00896.JPG
 
Back
Top