1961 Austin Healey 3000 Restoration

C

Chris

I don't have any decent pictures of the car, but i will get some shortly as soon as i can move the car out of the corner of the garage. Im not sure how i will find the time to restore this car, but i guess i will try to work in one piece every week until its finished.
This isn't my car, but my mother's. My father purchased it for my mother back in 2009 i believe while we were attending barrett-jackson. It was raining, we had a few cocktails, and he decided that my mother should have it since she had always wanted one. Long story short, the car turned out to have issues with the steering, suspension, and engine, so it has only been driven about 100 miles since he bought it. We can't sell the car as is and even if we could, it wouldn't bring a lot of money. So, we decided it best to send the steering box off to be repaired, to pull the engine and have it rebuilt/upgraded to higher compression and better cam, and change the exterior and interior color.
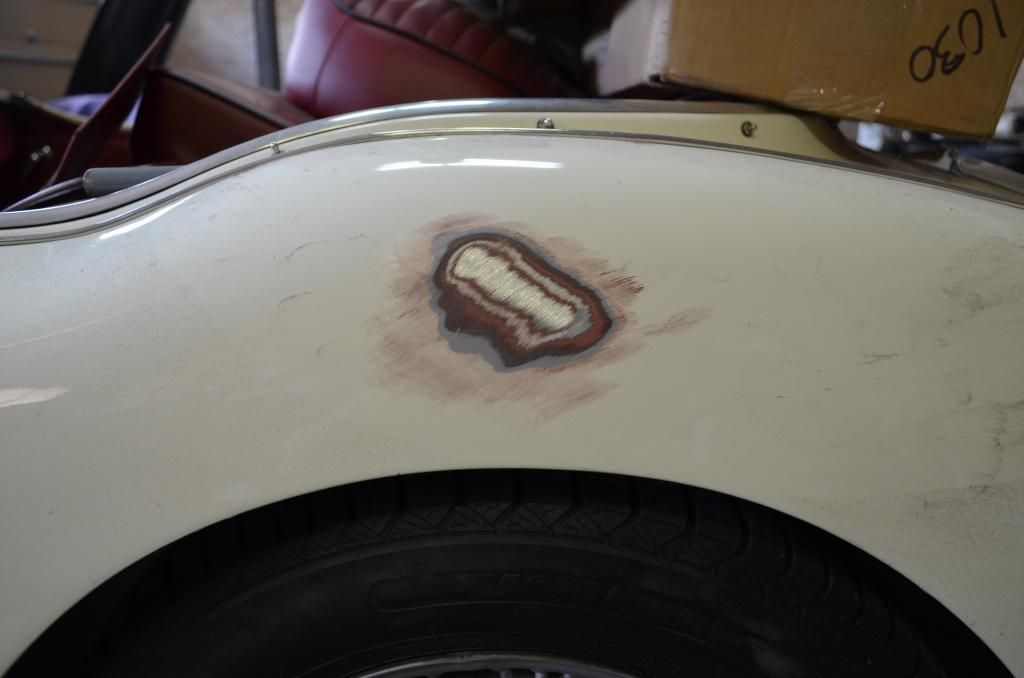
Initially I thought i was going to be able to simply scuff and respray the car, but after closer inspection, it quickly became obvious that it needs to be completely stripped. The car had a major amount of filler in the front driver's fender and rear quarter. It also has some rust issues in the lower doors and rear fender skirts where a previous owner or shop decided it best to stuff filler into the rust holes instead of repairing the metal. Joy!

The car will be repainted a silver blue with possibly a white cove and the interior will be black leather.

I found around 6 layers of paint and primer, from what i can tell. The fenders, trunk and hood are steel, while the mid section of the body is aluminum. I am debating whether or not to have the entire thing dipped and e coated. OR, should i have it blasted?


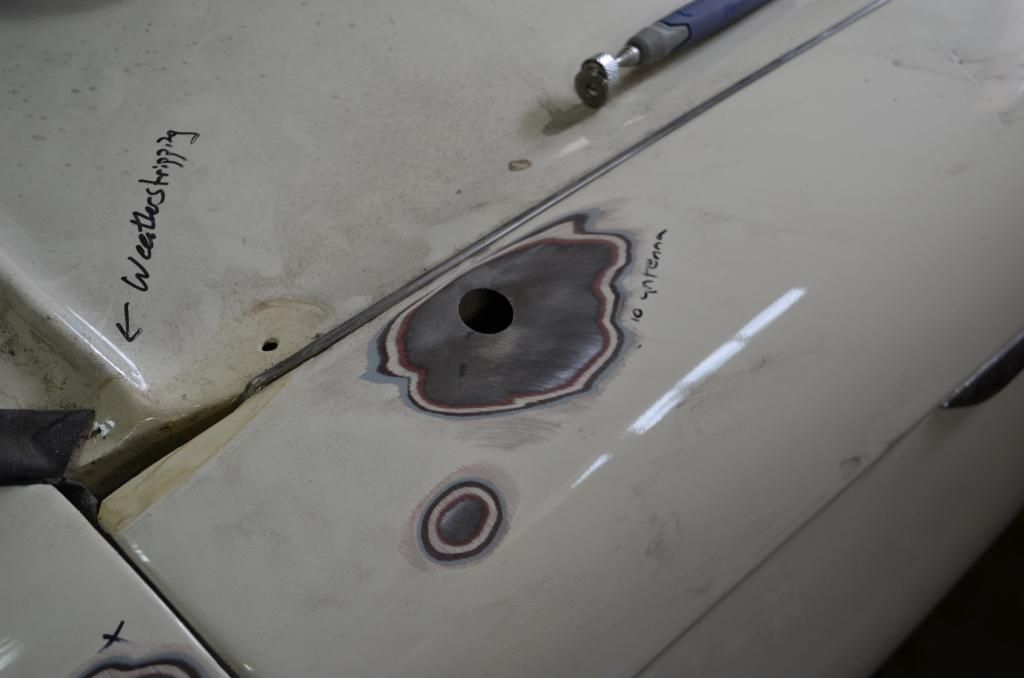
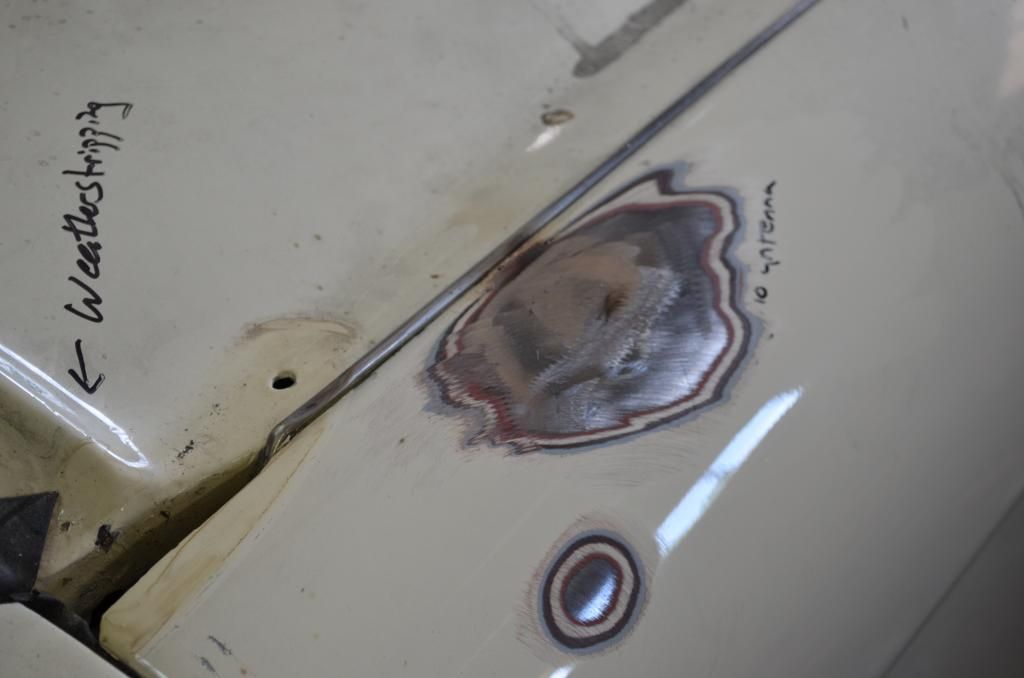
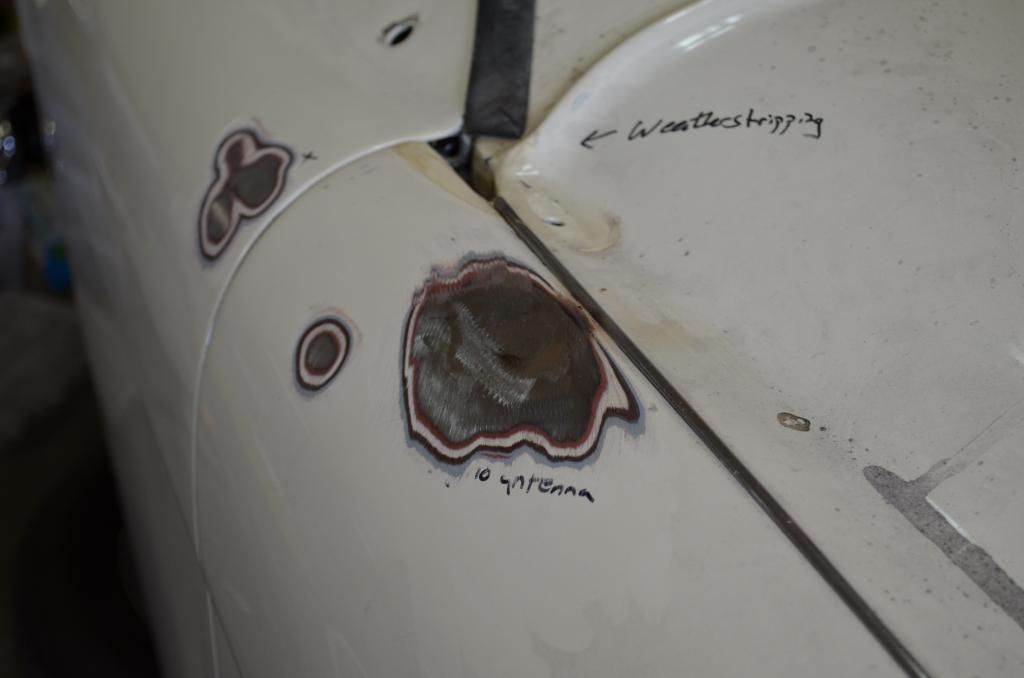
Incorrect antenna hole repair. Somebody actually drilled 6 holes through the cockpit metal to hook up the coaxial cable.


Does anybody have advice for stripping aluminum? I was told not to strip it with a grinder/sander because the heat from the friction will warp the metal. Considering the amount of paint on the body, should we just have the entire thing blasted or dipped? There is a place not too far from me that will dip the entire car (in a non acid bath) to strip the metal for around 1000.00 They will e coat it for another 1000.00. Thoughts?
 
If they really do a good job of e-coating, that is actually a steal, and I'd do it in a heartbeat. But the process they use has to be top notch, or in 5-10 years you will have a real mess. if done well, there is nothing that can touch an e-coat job because it is full immersion, and penetrates all the seams.
 
They take the cars and frames to a local Nissan plant and have them ecoated at the factory. So, i assume it is just as good as a new factory production Nissan.
 
Wow, that is very interesting! I heard there was a place down there that did that, but figured the transportation costs made it prohibitive.

I think it is a no-brainer, but I doubt you will find many with direct experience with this process. If you do, could you invite them on here to talk about, please? Full immersion e-coat is like the holy grail of corrosion protection, imo.
 
That's interesting, I figured that stuff would be done in house by the manufacturer and not allowed to be used for general public work..
 
I didnt realize they were aluminum body cars. I actually thought they were steel. Beautiful cars! Learn something new everyday.. Good luck!
 
The center section is aluminum, but nothing else. The 100 series used an aluminum hood and trunk, but the 3000 series is made up of steel fenders, steel quarters, steel trunk lid, and steel hood. The center sections and the quarters and fenders have a flange and they bolt together in the wheel wells. The seam is then covered with a piece of trim that slides down into the void.
 
Managed to strip a few panels last week and start on the hood. I probably won't really have time to touch this car again for several months, but i am going to attempt to work on one panel a week for at least a couple of hours.

I actually thought i was going to be able to just respray this car initially, so that is why there is a guide coat on the front driver's fender and door. The driver's fender has a patch on the lower section and it was installed correctly, but then they didn't bother to straighten the metal where there was a dip due to welding in the patch and instead stuffed it full of tons and tons of filler. Once i stripped the fender the rest of the way i found where someone jabbed several holes in the top portion with a round object like a screwdriver. My guess is that it was either vandalized or someone lost their temper while working on the car and decided to stab it with their screwdriver 4 times. The holes were not fixed, but instead filled in with body filler. I can't believe they were not showing through the paint.


Hood This hood was a mess and i had to tap out several dents and fix the hole in the front that was previously repaired with Bondo. Again, I cannot believe a hole stuffed fill of crappy filler wasn't showing.


I went ahead and put metal to metal filler on the hood to smooth it out without spraying epoxy primer first. Ill need to slow down and follow the proper procedure for the rest of the panels.

 
maybe those holes wered intentionally drilled to "anchor" the filler?
 
I dont think so since there arent any dents around them and the original paint was underneath the filler. One is twice as big and almost looks like a bullet hole.
 
12/03/13

She is officially completely naked. All panels were dropped off for soda blasting. I have to say, this car was even more of a polished turd than I initially thought.


Raymond is correct, the tool is a telescoping magnet I was using to hold the piece of metal that was welded into the incorrect antenna hole.
 
Christopher;34133 said:
Raymond is correct, the tool is a telescoping magnet I was using to hold the piece of metal that was welded into the incorrect antenna hole.

Thanks,

I was hoping it was some type of tiny grinder used in tight places. :)

Steve
 
The car would lock up when going into left hand turns, which made for a very interesting and horrifying driving experience. I found out why it was locking up last week when I pulled the steering box apart.
The rear ball bearing assembly had come apart and was eating the seat on the worm gear. The cage on the bearing assembly failed and I found one of the ball bearings in the grease. I'm going to guess that the loose ball bearing in the grease was getting wedged between the worm gear and pin, causing the steering to lock up.


- - - Updated - - -

We had to order a new worm gear/column for the steering box from Dennis Welch. Im amazed at how expensive parts are for the Austin Healeys! The worm gear was $520.00, bearings were 40.00 a piece, and if you want a new steering box, that will cost you $3,000. :greedy_dollars: We are in for about 700 in parts just to repair the original box. Fortunately, I could do the rebuild on my own to save money.

I tore the entire box down, cleaned it, installed new bearing races/seats, bearings, seals, gaskets, column felt, and the specified pinrite grease. Works like a charm now!


I had one major problem during the tear down. the rear bearing race had become fused with the box due to the ball bearing assembling eating the race and part of the cast iron in the same place. The bearing race would not come out, regardless of what I tried... I had to drill two holes in the rear of the housing in order to insert a punch and knock it out. I plugged the two holes with panel bond. Once the box is sanded and painted the repair will not be visible.


The hinge pillar panel and side reinforcement were in bad shape at the bottom. The metal came in from Moss motors, so I decided to go ahead and remove the rotten pieces. I ended up removing the newer rocker panel as well. It had been poorly seam welded in place and whoever did the repair welded the rotten metal at the bottom of the pillar to the new rocker panel. the only way to get to the rust behind it and to remove the portion of old metal welded to it was to remove it and cut it off. I will properly spot weld the rocker back in place after the door channel/pillar is repaired.


Im going to need to fab up a repair piece for the bottom portion of the bracket pillar.


I now have easy access to repair the area where some special person drilled holes in the kick panel to gain access to the fender for the installation of a crappy aftermarket antenna.

 
Went by and checked out the panels the other day. They soda blasted them back in December and they are starting to work the metal back into shape.

One quarter panel repaired.


Here is the passenger quarter panel. There is a dent the size of a fist in the back that was previously stuffed full of filler. I can't believe how much filler was put on these panels or the fact that it was not cracking or flaking.


The front end is a bit of a mess. Somebody really hammered the crap out of it in an attempt to knock out damage from a front end collision. You just never know what is lurking under paint. I will never again buy, or let a friend or family member buy a "reconditioned" car without proof of the bodywork.

 
Back
Top