Patching holes in bed floor of 2003 Chevy composite bed

UAmember

Promoted Users
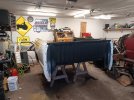
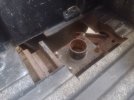
I had made a post about this previously, but there was an issue with the previous thread so here we go again. I had been looking for a rust free box for my 2001 GMC Sierra. My buddy came across a parts truck with a 1 year only composite box. Only problem is the previous owner cut a hole in the bed floor to replace a fuel pump. There's another hole in the back they cut to weld a jump seat to the frame.
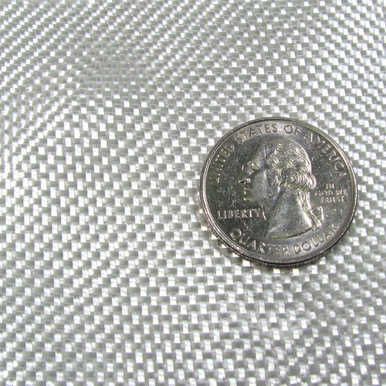
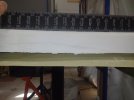
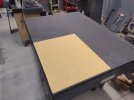
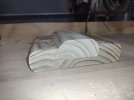
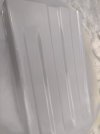
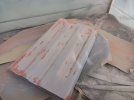
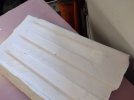
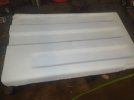
Chris Hamilton posted a video of SEM showing how to do a patch on SMC with a 2 component panel bond product. This number was discontinued, I called SEM's tech line and got the new part #40887. I made a plaster cast of the driver's side front, hopefully I can use this to replicate the missing section at passenger rear. I attached some pictures to show what I have going on.
 

Attachments

  • IMG_20230916_112203070.jpg
    IMG_20230916_112203070.jpg
    137.2 KB · Views: 188
  • IMG_20230916_112226330.jpg
    IMG_20230916_112226330.jpg
    132.9 KB · Views: 106
Here's a picture of the rough plaster cast I made of the front passenger side.
 

Attachments

  • IMG_20230923_150206219.jpg
    IMG_20230923_150206219.jpg
    95.8 KB · Views: 99
I haven't ordered any fabric yet. SEM warned against CSM, or chopped strand matt. I believe that may be due to the sizing. From my research CSM typically used a sizing only compatible with polyester resin. I don't know if I can harness the energy of any Corvette gurus or Orangejuiced. Looking for best practices on a structural repair. CSM, biaxial mat, boating cloth, woven roving. I believe I know the answer, but I am looking to see what the crowd says.
 
I would use extra to bridge the repair piece to the existing bed. Underside would be ideal as it will not be seen. Then V and slightly feather the top side where your new piece and the existing bed meet.
 
I was planning on trying to repair from the bottom. I had planned on feathering, could you explain what you mean by v-ing? My local jobber doesn't have P-17. Could anyone suggest reputable alternative sources?
 
could you explain what you mean by v-ing
When you get your repair section made, you would V, grind at an angle the repair section edges and the edges of the bed that border it. Joined together it would form a V. AKA beveling. Its just a trough to allow some material to fill it to better secure the repair and help keep that area from mapping. You would also feather out the borders of the two pieces on top some as well to give some space for more adhesive/repair material to fill, to strengthen and keep it from mapping. But your strength is going to come from bridging it on the underside.

As for the Adtech, there are lots of places online that sell it. This place is known.

 
I had some time to work on this today. I was concerned this would be an issue, the plaster cast appears to have shrunk in the middle considerably.
 

Attachments

  • IMG_20231015_144832630.jpg
    IMG_20231015_144832630.jpg
    76 KB · Views: 82
  • IMG_20231015_144820114.jpg
    IMG_20231015_144820114.jpg
    102.5 KB · Views: 82
I mounted some cheap 220 grit to my surface plate with some 3m super 77 to flatten down the plaster cast. I might have to dress up the "low" ribs which will actually be the "high" ribs.
 

Attachments

  • IMG_20231015_145329401.jpg
    IMG_20231015_145329401.jpg
    124.7 KB · Views: 91
I've been following this thread from when it was first started. I commend you on your attention to detail. It'll all be worth it in the end.
 
I've been following this thread from when it was first started. I commend you on your attention to detail. It'll all be worth it in the end.
Been watching your work on your Barracuda as well. My Dad used to drag race, so I spent a lot of time at the strip. He's had his 1968 Chevy II since 1976 if I remember correctly. Anyways guys like us may be weekend warriors, but a keen eye and attention to detail will take you a long way. Having all the knowledge at your fingertips certainly helps as well. I feel blessed to have found this company and this forum.
 
Been trying to clean up the plaster cast, I can't really see what is happening. Also , I think I might be doing damage in some areas while making progress in others. I decided to spray some epoxy and take it from there
 

Attachments

  • IMG_20231029_171339467.jpg
    IMG_20231029_171339467.jpg
    61 KB · Views: 102
I wanted to take some time and share a picture of the world's worst "paint booth". While I was at it, I decided to work on this some tonight. My race car and home improvements have been taking up all my free time, this has been neglected. I sanded the lacquer glazing putty I applied several weeks ago. I plan on spraying epoxy tomorrow, this thing is approaching the "good enough for who it's for" territory.
 

Attachments

  • 20231218_175556.jpg
    20231218_175556.jpg
    77.1 KB · Views: 74
  • Love
Reactions: MJM
I shot some epoxy on this mold and I also hit a few parts for Dad's LeBlond tonight. I forgot to take pictures so you'll have to take my word for it.
 
Well, it has been a long time since I have messed with this. A friend came over today and we moved the truck out, pulled the bed and put the parts truck in the barn. I want to flip the bed upside down eventually, but at least we got it onto sawhorses. Excuse the mess in my small garage.
 

Attachments

  • 20240302_170835.jpg
    20240302_170835.jpg
    168.6 KB · Views: 38
Back
Top