Mustang Doors will be the death of me...

jtfx6552

Member
Right now I have 5 used doors and 4 repro doors to choose from.

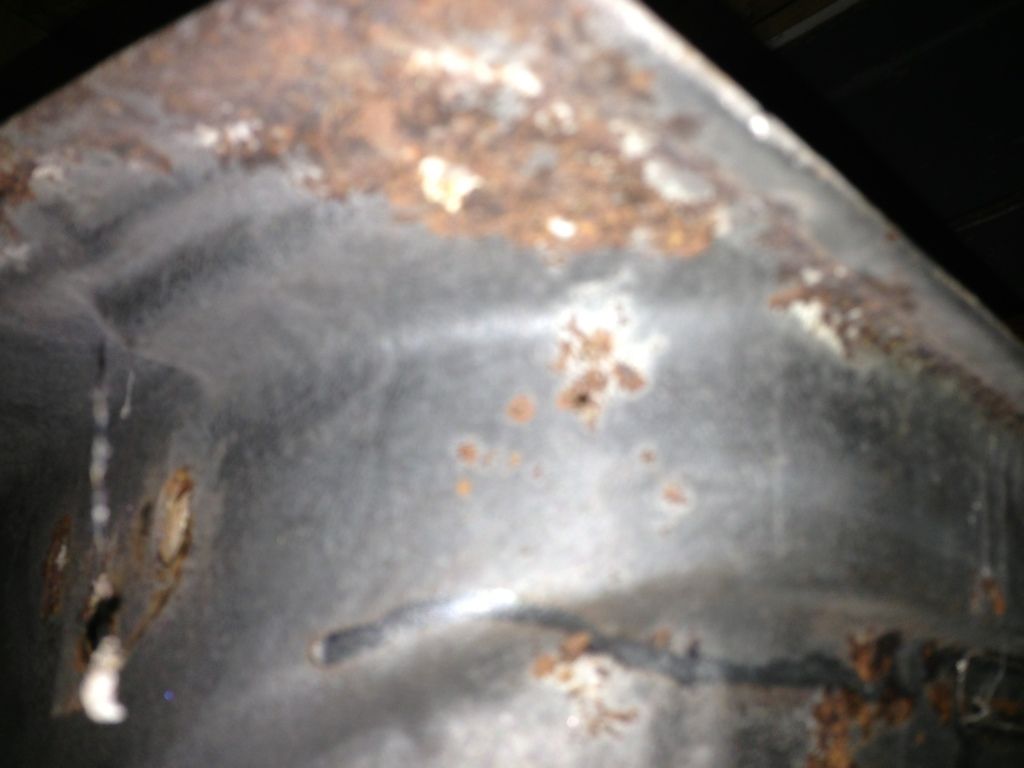
If I had a magic wand, and could combine parts of the used doors, I'd be in good shape. They all have issues where the interior 'grain" is, so I don't know how I could weld them up and recreate the grain.

Of the repro doors, one pair has the exact look of the factory grain, but less pronounced. I'm not sure how I could scuff them, let alone prime and paint them without washing out the grain.

The importer of the other repro doors says his grain was chosen to eliminate that problem, and that if I prime them, they'd look fine. But as they come the grain looks totally different. I can still send these back, but not so if I prime them and don't like them.

Here are some pictures:

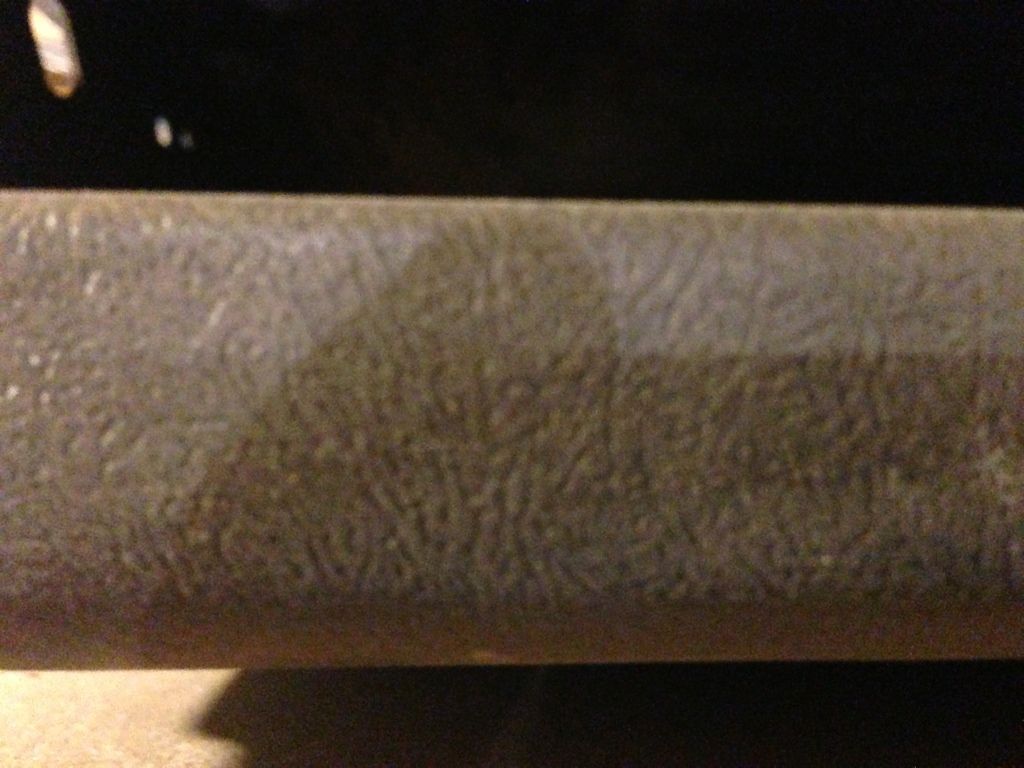
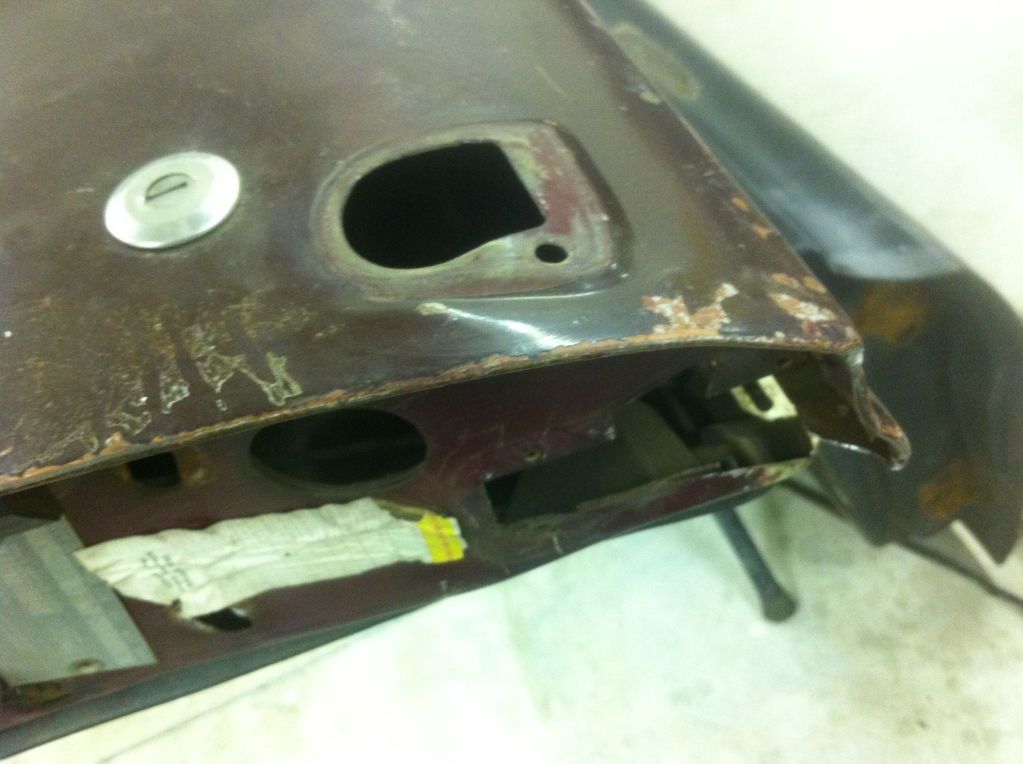
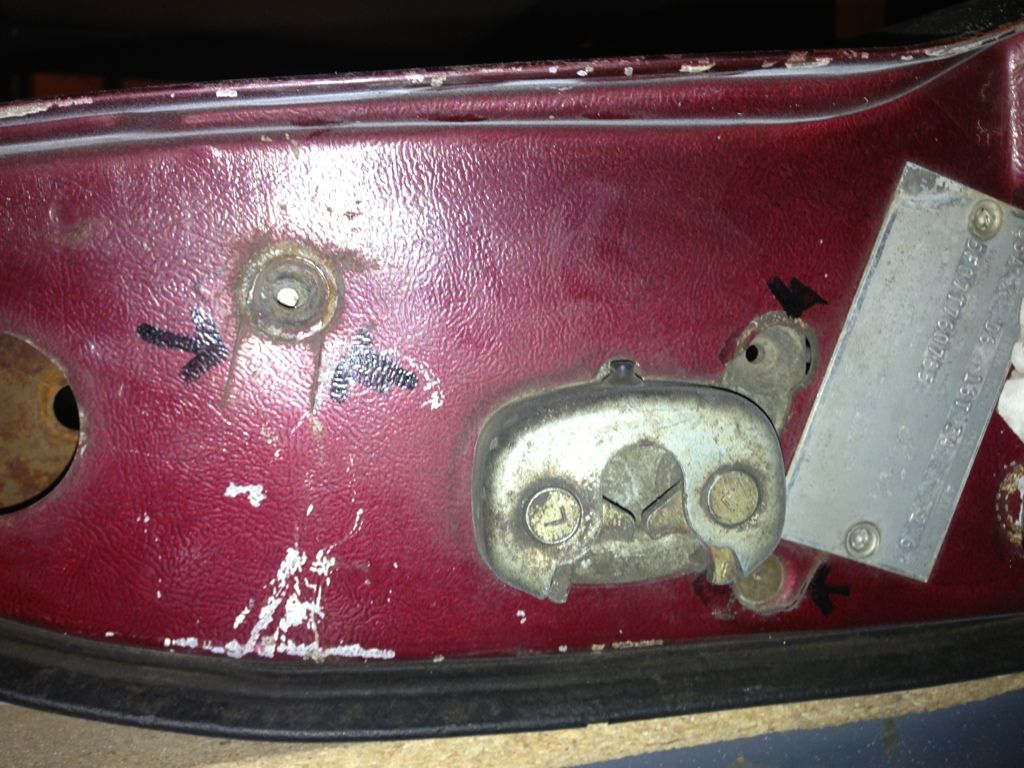
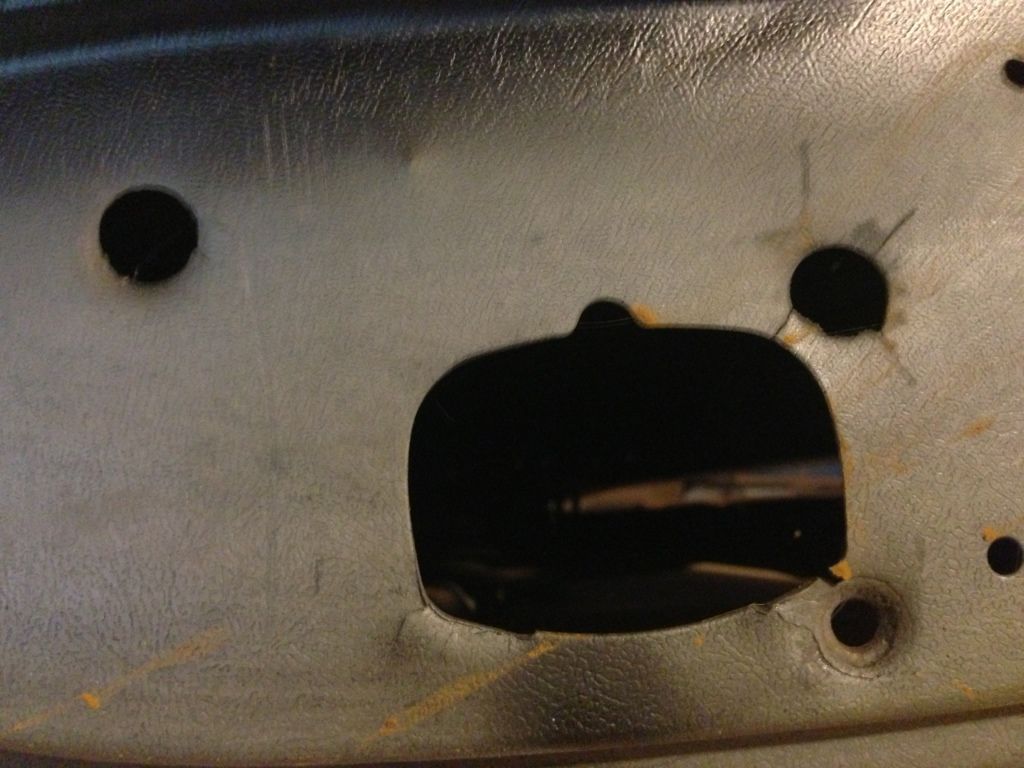
Factory grain, dipped door:
AA702BA3-4372-4C9E-9773-E5E81D5FDB6D-500-0000002418C3A2EA.jpg


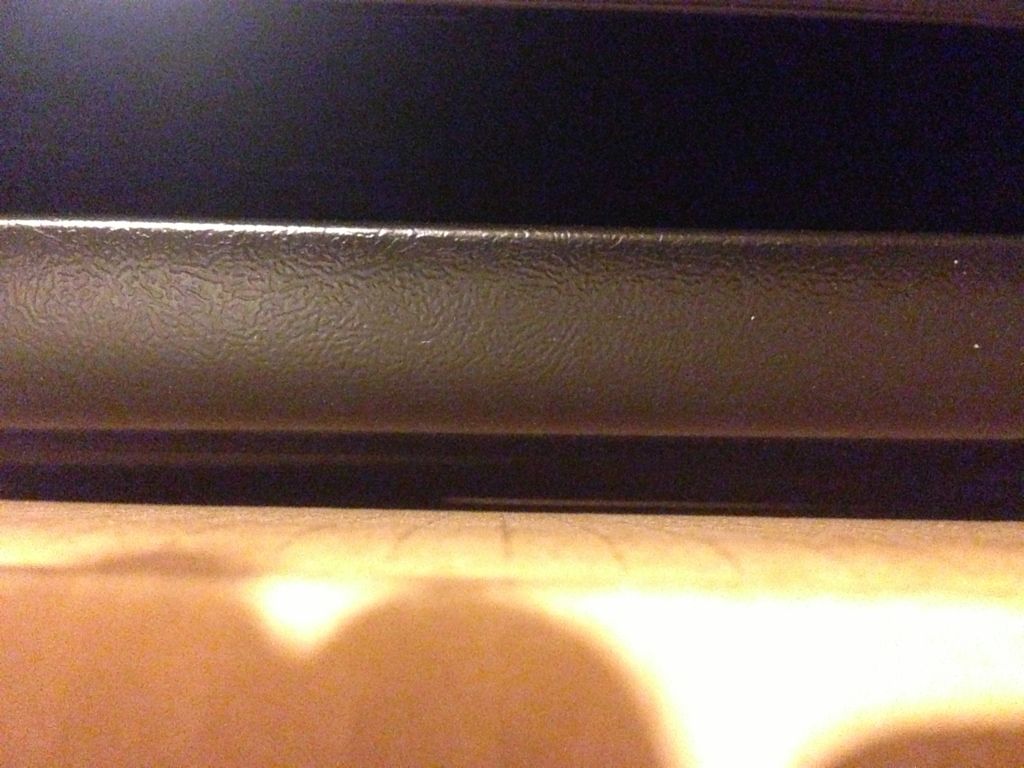
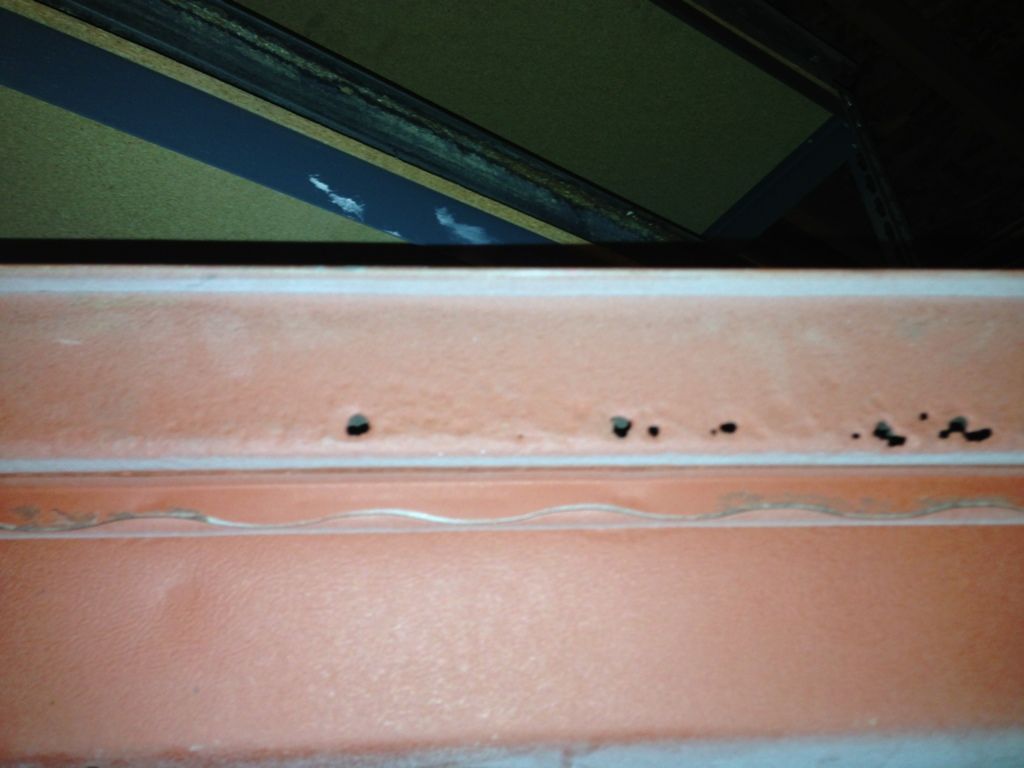
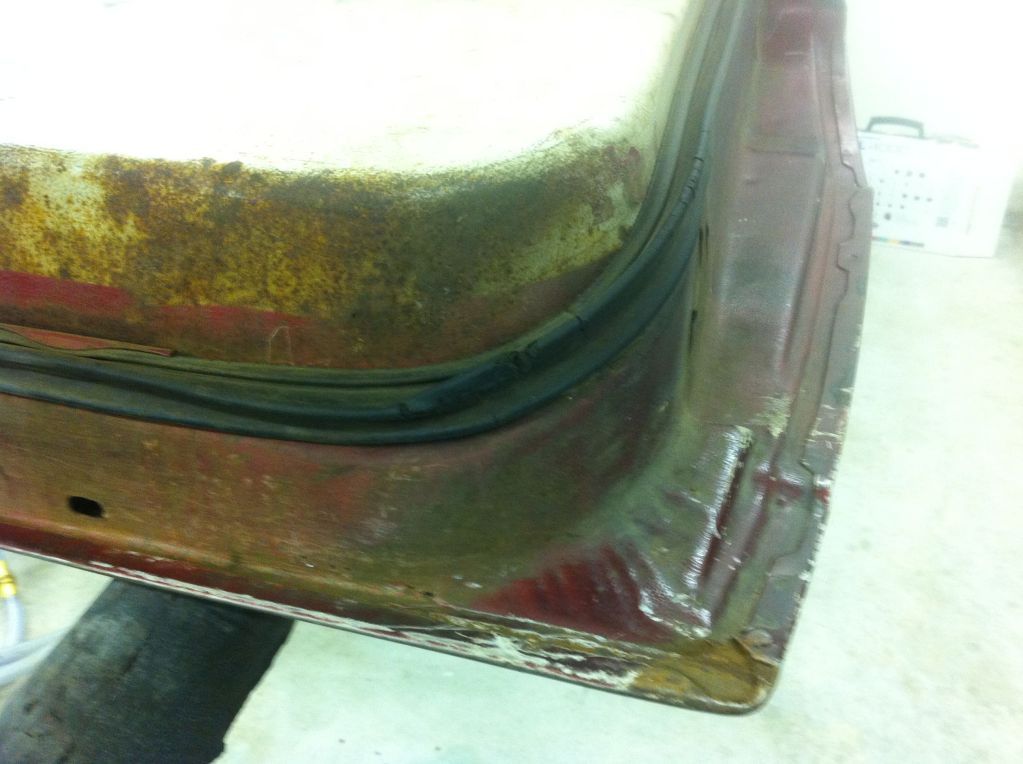
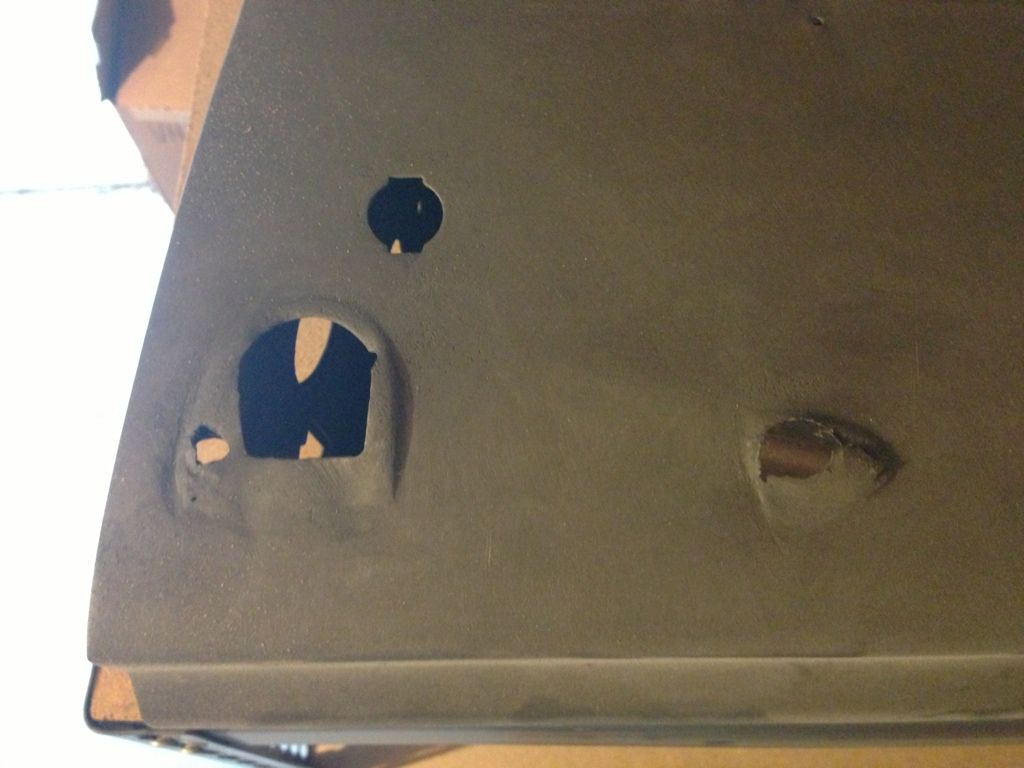
Repro pair 1, same grain, but more subtle:
EBC57C5E-8D7E-4B5F-91E5-F7E8FDB13D69-500-000000242435F487.jpg


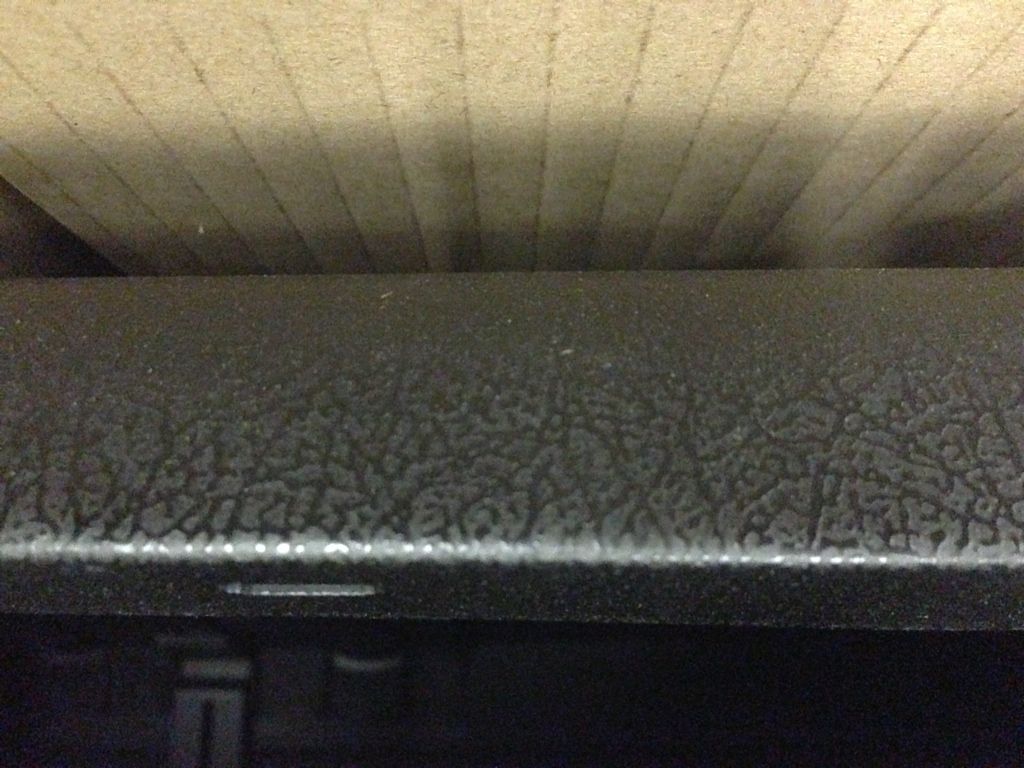
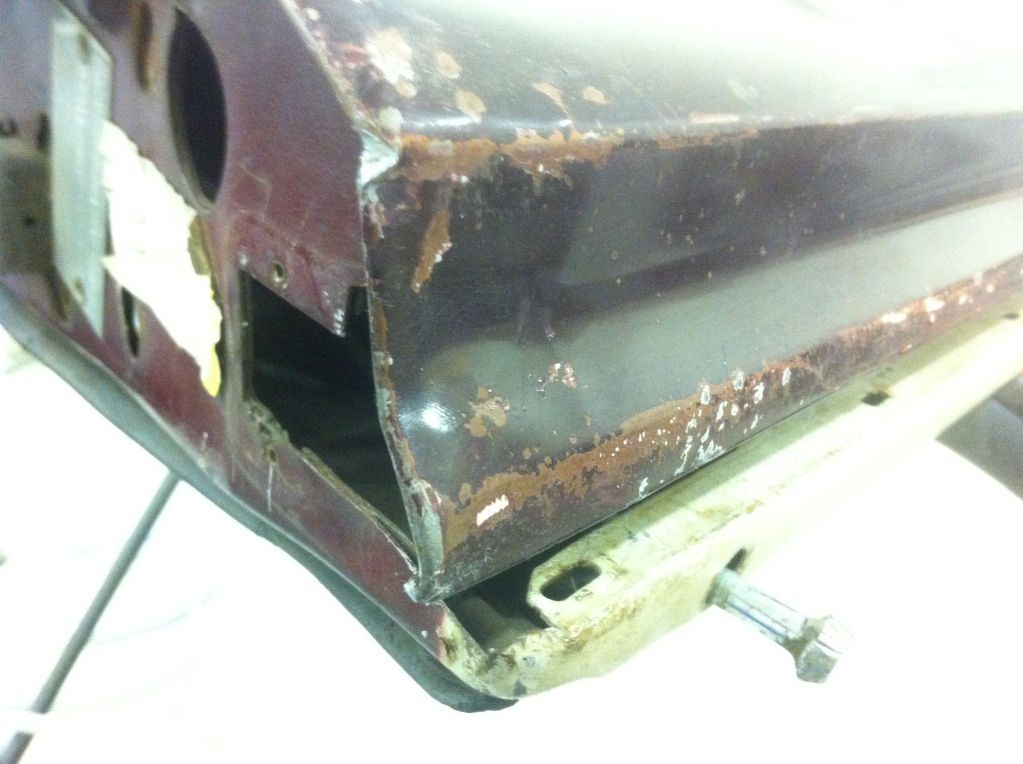
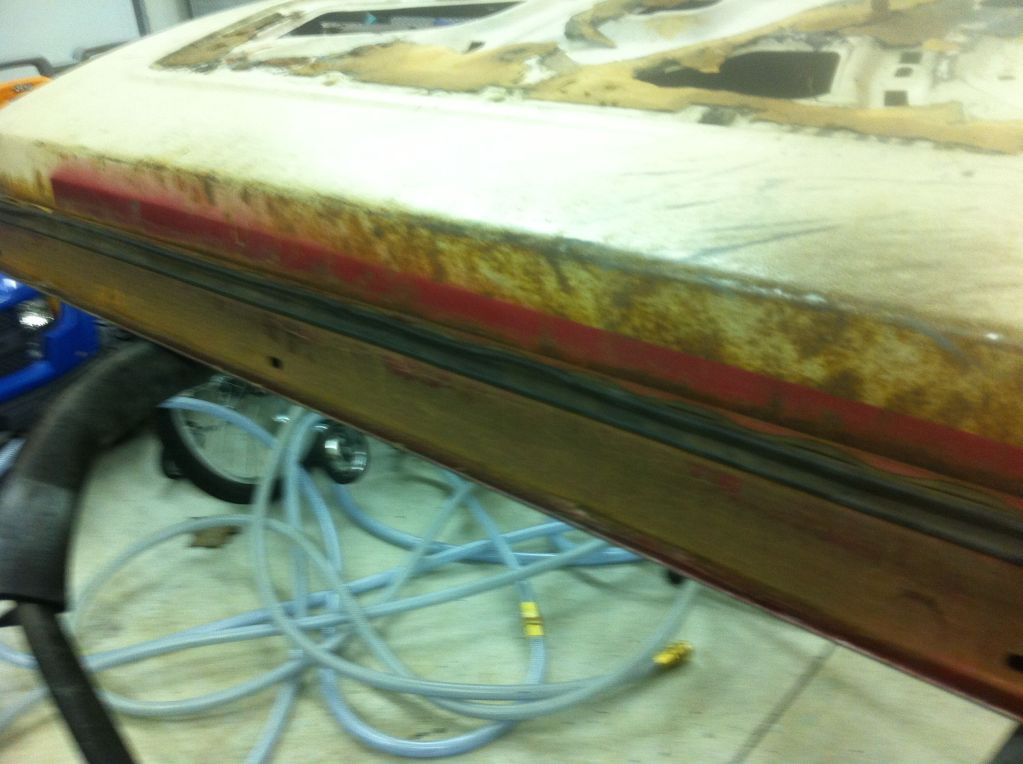
Repro pair 2, different grain, supposedly looks the same primed:
16312F6D-1DC0-4BBF-8750-D1A772C1D9C6-500-00000023EB4E6FD9.jpg


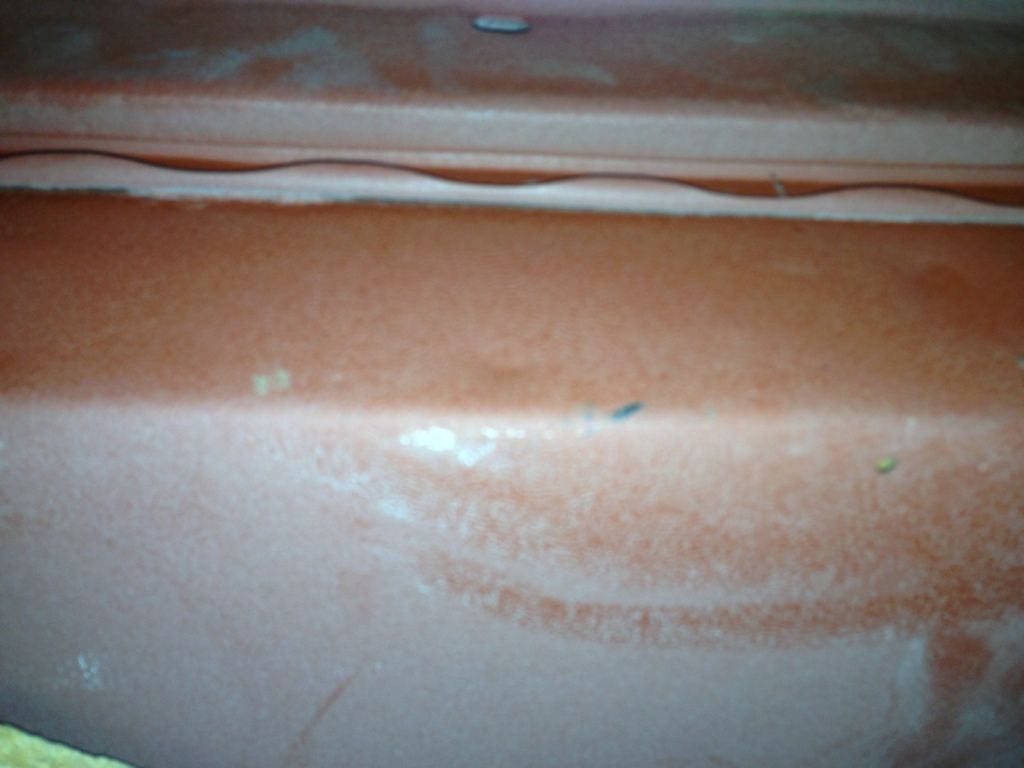
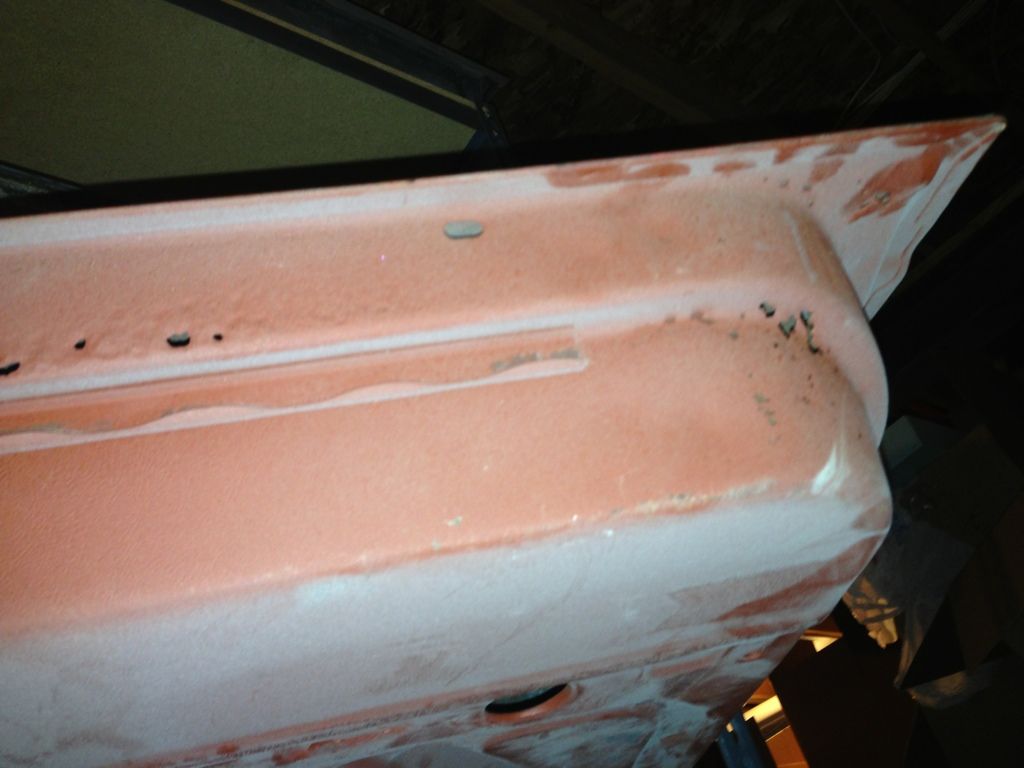
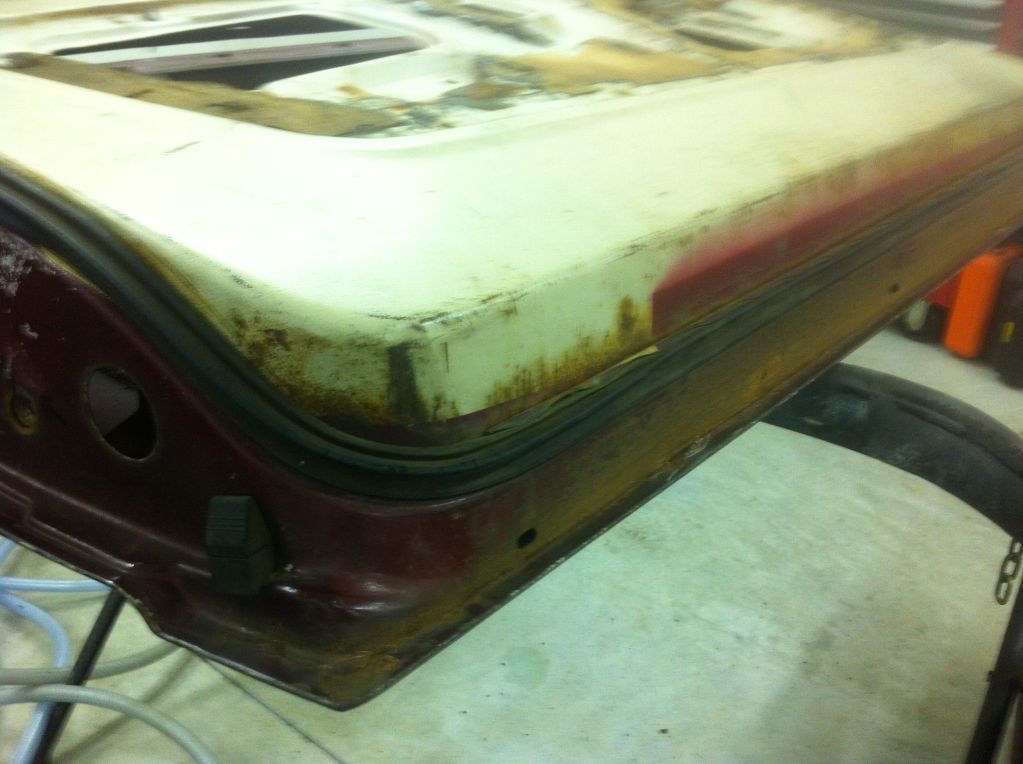
Picture from importer, showing one of the above doors primed:
5F52D434-E7A3-46AA-8D22-BC0B4A2A1A66-500-0000002494A16075.jpg


what do you think?
 
I just recently did the factory doors on my 68. I stripped them with chemical stripper, washed them really well and let them dry. I sprayed a thin coat of epoxy reduced 1:1:1, just enough to cover the bare metal, then sprayed my base, then clear. My expoxy was black and so was my basecoat so it didn't take much to cover, but they came out just fine. No adhesion problems at all. I don't see a need for putting any other primer on the doors than the epoxy. Depending on the look you want you might stop at that if the sheen is to your liking.
 
What color? light metalics will help show the grain but the clear needs to be applied thin to save the texture, solid colors it will be easy to lose the grain. One thin coat of epoxy on that bare metal is all you need on an interior piece. That primed example looks bad IMO. What areas are damaged on the original doors? If the repair areas are small I'd find a way to reproduce the texture in those repair areas rather than use a repro. The repro doors rarely fit and then when you assemble them the hardware usually doesn't fit without modifications-at least that's been my experience...
 
I could write about a 1000 words on each of my used doors. Most are either rusted on the bottom frame and lower front frame corner, pretty complex places to fab patches. I do think I am capable of fixing any of them with a lot of time, but I worry that with all the nooks and crannies and internal structure, I'll miss some rust in there and they'll "pop" a rust bubble a year or three from now...


The door with the best frame I have is actually rusted through on the inside face about an inch below the door panel? Not sure how that happened.
2239BB34-8C92-417A-B346-AED077E23A5D-500-0000002C58F5EC1B.jpg

19023712-40E0-4F44-A2F7-C07AE69A4C16-500-0000002C500FBFD5.jpg

40E56C72-65A7-461A-A99A-0CF4380404BC-500-0000002C480827E3.jpg


All the drivers doors I have are broken where the latch mounts. Not sure how to weld that up without ruining the grain there.

Of the repro doors with the correct grain, fit is ok and workable, except, I don't know how to fix this?
IMG_2617.jpg


I also have this used door I "like", but the UPS man bent it in places that me, as a crappy bodyman, don't know how to fix. especially near the door handle raised part? I'm good a fixing rust, but subtle hammer and dolly work is different. I'm sure I can fix the edge, but how do I maintain that boss for the door handle that stands proud?

IMG_2487.jpg

IMG_2488.jpg

This door also is completely broken where the bear claw latch screws in:
FFCC29AE-5EF4-4E70-817E-EE40DDB13CE8-500-0000002C2E33C505.jpg


But the bottom frame sure is nice!
IMG_2490.jpg


IMG_2491.jpg


IMG_2492.jpg


My original drivers door has latch issues,
9B6194F6-BFCD-4F2D-A0B8-FBA6A6490EFF-500-0000002DF1E684E6.jpg


and handle issues, which I think I'd need a whole skin. From what I read, the door skins aren't all that great, and lining them on the frame can be troublesome:
C1357B68-C8BD-4CCA-A147-070C4F69DB72-500-0000002C7F9C5564.jpg


Also, the frame isn't all that great:
D6554261-2238-47DC-A42C-6AA1CED6E4E7-500-0000002C87F4D2E6.jpg

3229A302-C743-40E2-99B7-50D28AEAD26D-500-0000002C65CD6ABE.jpg
 
It looks like the repro doors are going to be your easiest route, make sure you align and test fit everything before paint. If it was just a few small areas to repair on the factory doors it would be worth the detail work needed but replacing numerous sections would be a big challenge. I've used pieces of refrigerator shell for grain repair pieces and custom panels but when you get into compound curves that require shaping...
 
Looking at the photos,the grain on the repro door 1 looks closest, and the door with the primer looks like it was sprayed too thick and has overfilled the grain, On Mustangs, I have the doors media blasted and only spray one thin smooth coat of (best shade to match the final color) epoxy, ( let dry for an hour) and then spray two coats of single stage interior color (normally an activated base coat)for the proper semi gloss look.

On the aftermarket door fit issue, sometimes I have to cut and reweld things to get them fit correctly. You may need to take a piece of pipe or heavy impact socket, lay it in that upper curve of the door and hit with a big hammer a couple times. That entire top edge is only held at the vent window area and the rear part of the door shell. If that is not possible to move it all the way, adding a little body filler to the top of the quarter panel (done well it would not be seen) would finish it off.66 Mustang reflections (3).jpg

1966 Mustang assembly (2).jpg

Bob is correct about fully assemble the door once before paint, as there seems to be "something" wrong with most of these aftermarket doors.
Scott
 
Ok, I think my door are done,

I was going to use the repos with the good grain, but based on other posts on the board I thought I'd need to install the guts to make sure I could get the windows and vent windows to line up. BUT, my shell has none of the side door molding in place and that stuff is somewhat problematic to take on and off repeatedly, so I'd have nothing to make sure the windows sealed against. Sure I could guess , but, it lead me to trying with two of the best used doors I had lying around.

After sand blasting, and poking with an awl, those doors weren't too good, but I soldiered on.

Drivers door


Passanger door, decided I could cut the back corner of another drivers door and make it the front corner of the passenger door


I think they will be rust free long after I depart, but maybe not.

I blasted them inside and out,. Poured epoxy into the door and rolled them around until it was oozing out the seams. Let them sit standing up so the epoxy dried thick in the bottom and on the inside of the front edge.

Then I painted them. I used white epoxy so I can see in there when it becomes time to assemble them.


And, as much as I hate stink bugs, I feel bad for this one.


Now my question, when I put these on the car to do the finish blocking on the exterior do I install the door latch and the post the patch connects to? Looking at some of Rusty's threads it looks like the doors are just on the hinges and kinda held closed with a little piece of tape?
 
I install the striker and latch, if the jambs are painted they can stay installed, if not then they can be removed before paint.
 
Just an idea : Look into ' Rustbusters ' , I had that same rust on the bottom of some mustang doors (small pinholes ) and had the rustbuster system sprayed on and saved me alot of work!
Great idea on painting the inside of the door white for better visibility!
Bob, thanks for sharing the refrigerator skin idea.
 
Back
Top