Inner body parts advice

A

Ash

I was hoping to ask for some opinions on what you would do with preparing the inner quarters and inner frame rails. I've stripped my car back, a 69 Mustang Mach 1, and have removed the drivers side floor due to some pretty shonky repairs done by the previous owner. Anyway, I'm not too sure which way to go with the inner of the rear quarters and the inner of the frame rails before I dive in and start putting in place new floor pans and etc.

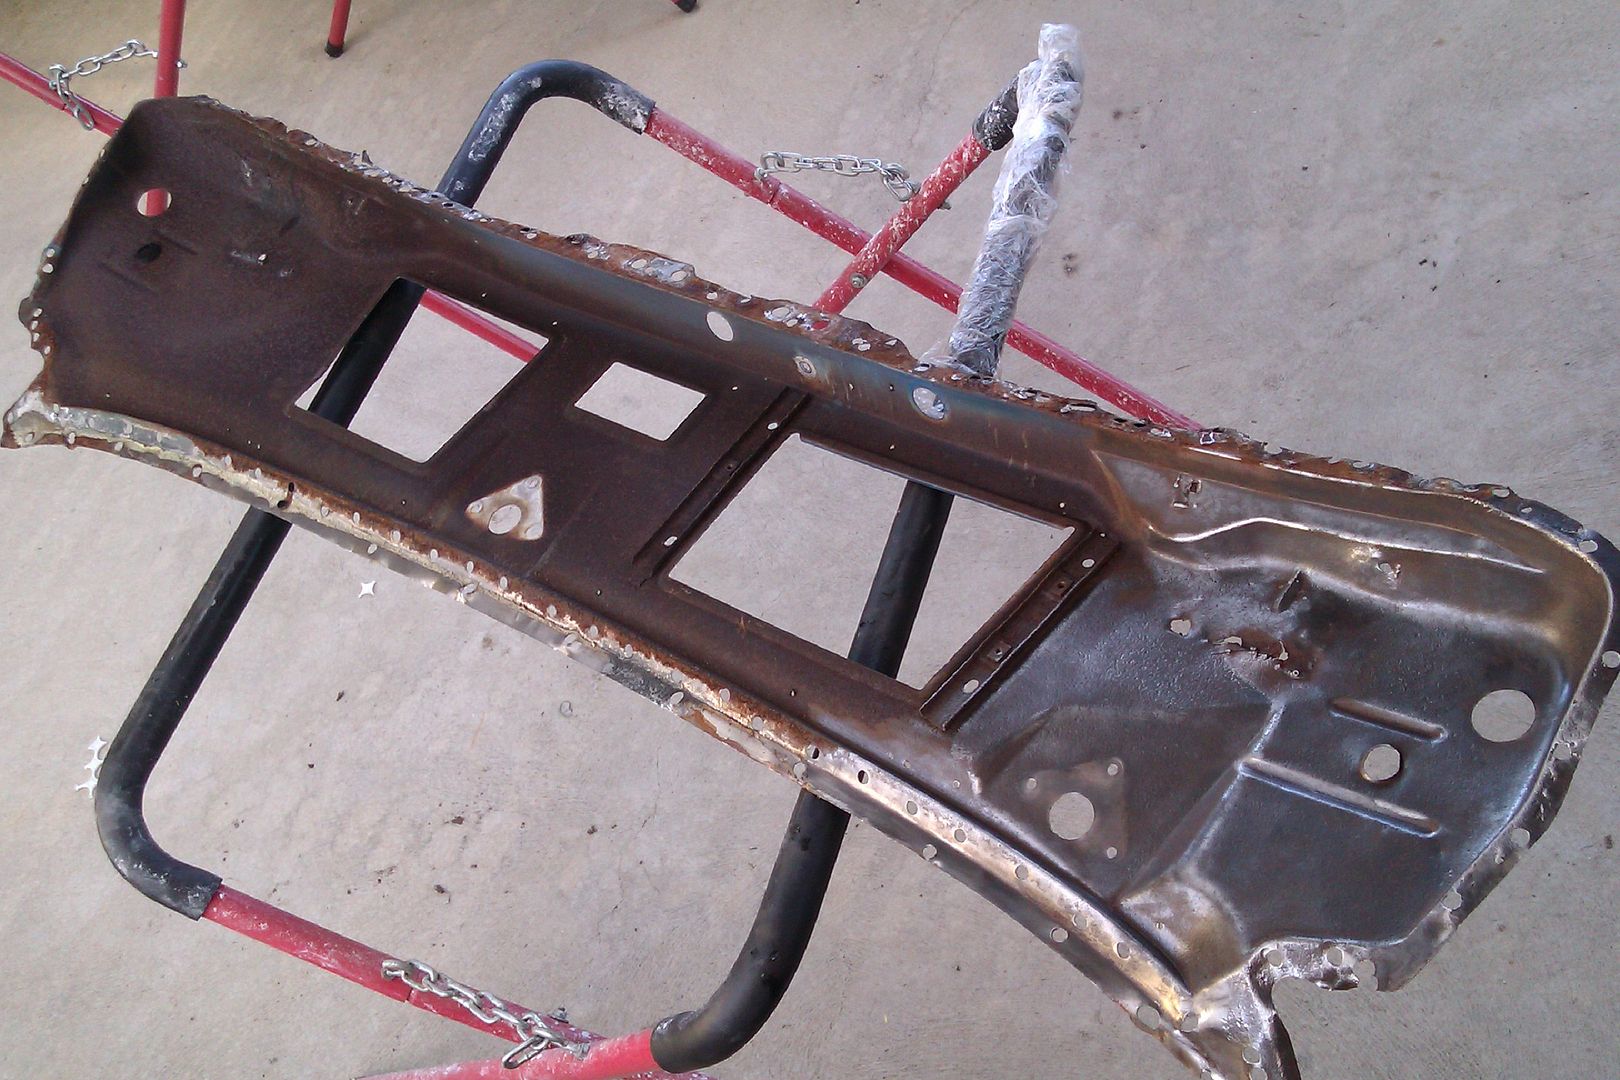
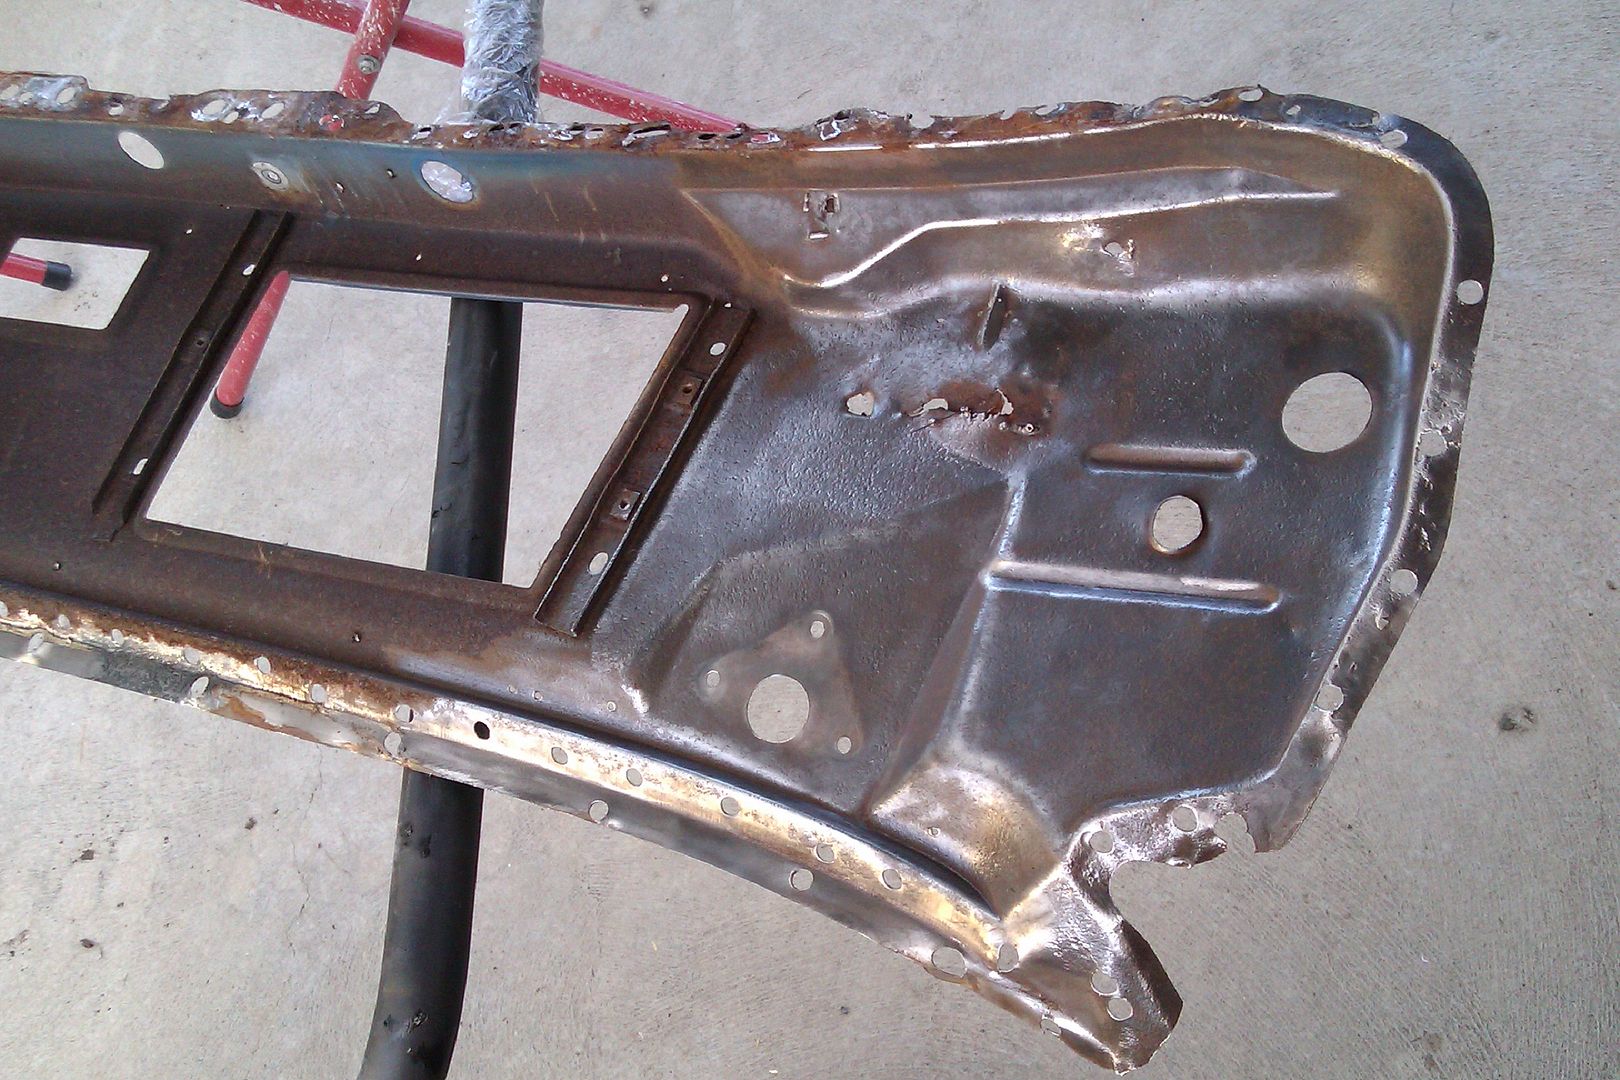
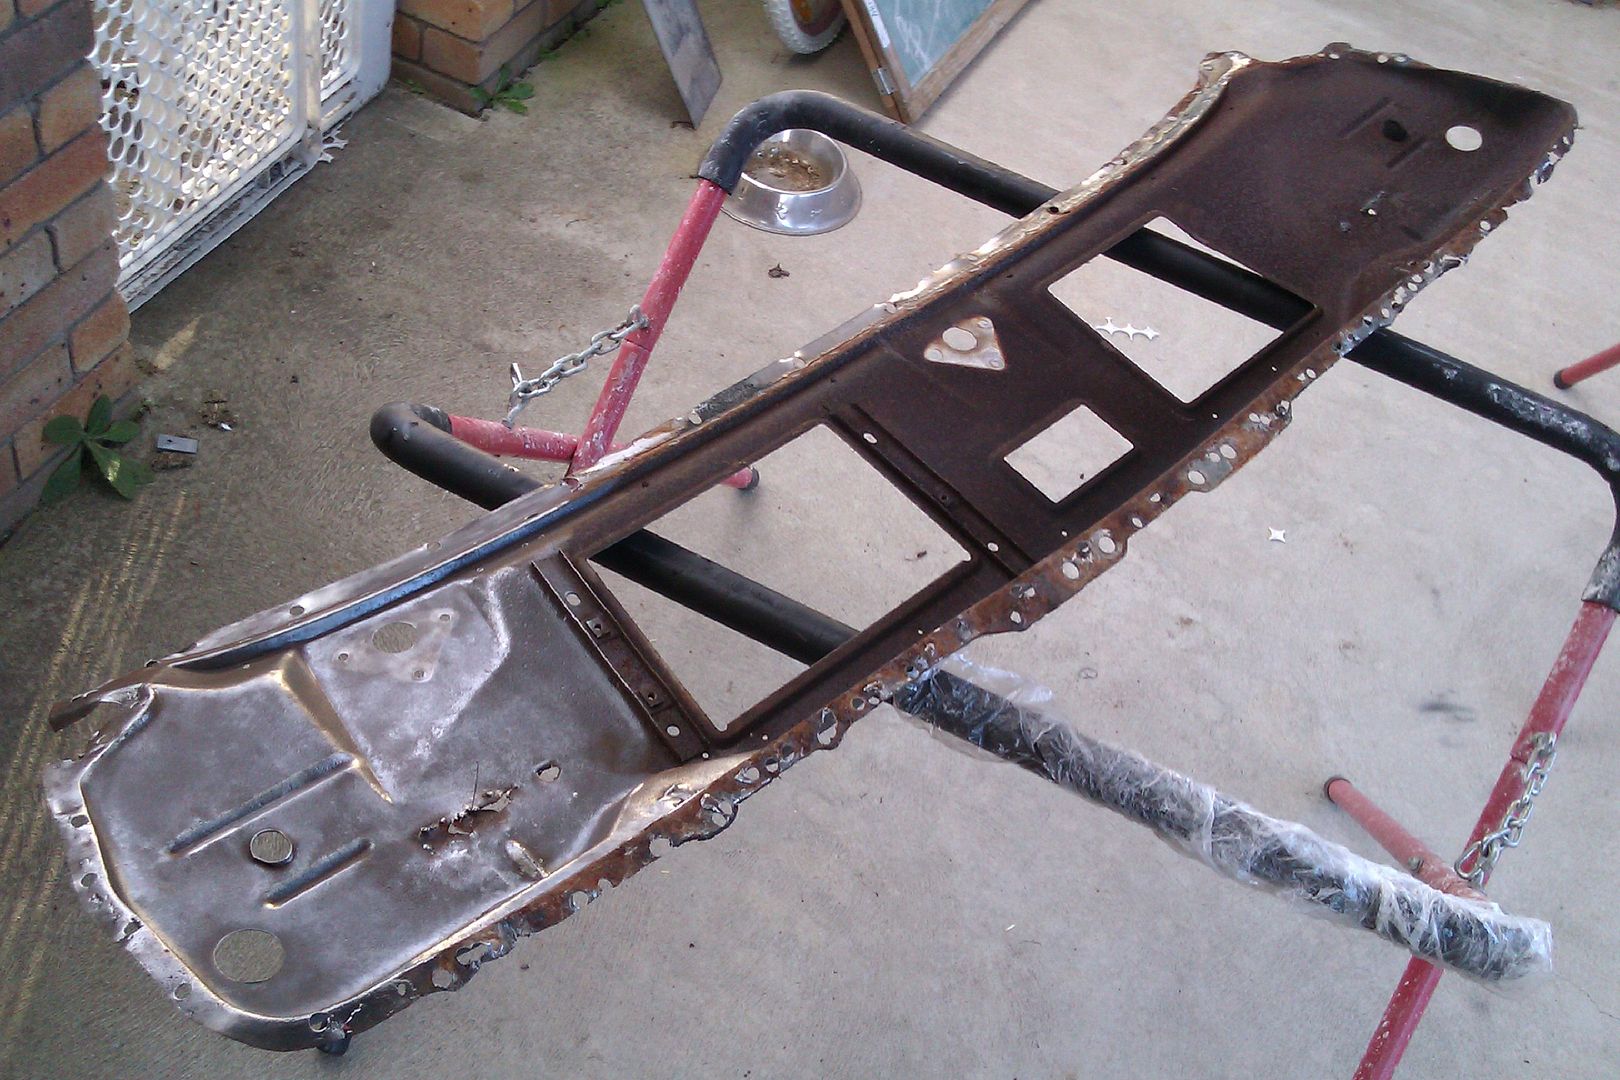
Here are some pics, you can see the surface rust on the under side towards the top of the quarters. Obviously access for power tools is pretty restricted, I'm not sure which way to attack is best.

P5170023.jpg


P5170028.jpg


P3290012.jpg


The inner of the front rails is much the same. Oh, and that thing laying in the rail was some type of impact attachment left behind by the PO. Also the bondo and expander foam was really all that was holding the pan and filling the large gaps. There was only 2 x 1 inch welds towards the rear of the rail holding the rail the to floor, that was it!

IMAG0303.jpg


IMAG0305.jpg


I have my SPI epoxy here now so wish to brush on any surfaces before they are sealed up again by new steel. I know I can't put it over rust, but wanted to check in you the experts here for what to do.

Thanks guys!
 
Thanks for the link, 68! I have read and followed several of Rusty's threads but hadn't seen that one.

After reading it all today, and having a closer look up into mine, it looks like mine could be the start of the direction the 65 in Rusty's thread is going. It's no where near as bad as that, but still a start of worse to come. I'm a bit worried about the rust right up the top of the quarter, behind all the bracing. Also the A-pillars don't look very positive either. I think my plan now is to build a trolley/dolly for the body, and to dig further. I don't plan to sell this car, it'll be passed onto my kids when that day comes, so I wish to to my best at doing it right now and not redoing it later.
 
Bondoskimmer;21714 said:
ZZ Top sang.... "I'm nationwide"....Look at Barry! :cool:

http://www.youtube.com/watch?v=PLQnRFKHZR8

Barry is more than nationwide.
All the way from Australia!

You got it Bondo ;) I had ordered some SPI gear earlier in the year and it arrived not long back. Here's my first shipment and now the new black basecoat is here, I'll be putting another order in as soon as my wallet fattens up a little more.

P5180033.jpg
 
The 69 Mach 1 is only going to go up in value. You are wise to take the time and do it right. Be sure your support frame is built to hold the car true and square so that there is no chance of flexing or movement while dismantling and reassembling. In Rusty's threads you always see extra bracing and reinforcements as they are working. Of course Brian makes it look much easier than it is I suspect.

Good luck with it.
 
Brian sure does make it look easy like you said, amazing work!

My 69 is n R-code too, but I'm not going for concours. I just want it to be good for a long time, I don't plan to sell this car.

I need to get some more RHS steel and I'll start mocking up the trolley with bracing.

Thanks!
 
I have just picked up some new steel to make a trolley to brace the shell to before I remove any more body panels. Before I make this up, I just wanted to verify, the preferred points to fix the car? I've looked over Rusty's 65 tang thread and it looks like the main points are at each corner in line with centre of the wheels. Is this correct? Obviously there is more bracing along the rockers, but wanted to ask this first.

Thanks all!
 
The unibody is stout when it's assembled but once you start removing or cutting structural parts it can move around. If you build your cart to attach in the suspension areas that is the best for simulating what the car will be like on it's tires, additional supports can be put in as needed when parts are removed. I sometimes use screw jacks, scissor jacks, bottle jacks, blocks, stands, as needed to add underside support when and where needed. Pre-cut measurements for reference are a good idea, panel test fitting is also a necessity.
 
Thanks, Bob! I will do just that, simulate the car as if it were on its tyres. Cheers!
 
I've just made a up a frame and have followed your guys instructions and carefully looked over Rusty's work as a quality example. I used the 69/70 dimensions from the drawing at the top of the page in Rusty's 65 Mustang thread to create a datum line to work to.

http://www.spiuserforum.com/showthread.php?297-1965-Mustang-rust-repair/page7

I added 6 inches to space the car higher from the frame, therefore 18.5 inches @ point B, and 20 and 7/8 inches @ point C.

When I sit the car on these points though, the rear of the car is sitting 1 inch lower then the drawing. At the front rail where X = 6inches between rail and datum line, I am correct (mine now being 12 inches due to the 6 inch increase). But at the rear where x = 6.5 inches, I am short 1 inch. I should have 12.5 inches, but I have 11.5 inches. Should there be a reason for this, would there be any variances at all between this drawing and 69's? Mine is also an R-code but I would not think there should be a variation?

Should I add an inch to the rear at point C to raise it so the rails are level to the datum line? Or what would you recommend?

I hope this makes sense. And I apologise if my terminology in imperial is not quite correct, everything we do is metric and I'm still learning the imperial lingo.
 
In the absence of ill-fitting panels or apparent structural damage, the datum heights on the chart can be ignored for now. The most important aspect is to make sure the vehicle is square (cross measurements equal) and level, meaning that both rocker panels get mounted parallel and equidistant to the datum plane, and the height of matching points along the left of the underbody are the same height as the right, especially the ends of the frame rails, these should agree from left to right when the rockers are level or there is likely structural damage.

Note that this advice only covers symmetrical vehicles, of which your Mustang is one.
 
Sure, I hope I wasn't being too obvious. Funny thing about datum heights from charts like that, sometimes they are the only thing you really need to know, and yet in my experience they are the most likely figure to contain an inaccuracy.

The best policy on an older vehicle is to ensure square and level while checking fit of known good parts, imo. For instance, if your frame rails and front end are "sagging," or low, good fenders will have a small gap at the bottom and a big gap at the top, and so on.

BUT, all bets are off when it comes to aftermarket parts...
 
Apart from some inner surface rust, my frame and major components all look pretty good and solid. I don't believe I have any sagging. I do have a good load of work to do to repair the previous owners effort. But what can I do about that except put in the time to get it how I want it.

We don't have a great deal of choice here in Aus for aftermarket body parts. There are guys who carry the usual stuff like floor pan parts and the common patch parts. But the big stuff isn't usually in stock and when it is it is crazy dear to what you guys pay. Unless I import it myself and wait for the long boat ride, it isn't worth the price they are asking. And even if I take the slow boat, the costs of the parts increase a lot. So I'll do what I can to keep the original stuff in it. I will need to use some aftermarket stuff, but apart from the floor, I should be good.

I removed the cowl this week and had a quick go this arvo at removing some of the surface rust. But before I go much further, I wanted to ask if I'm on the right track for preparing for epoxy. I know I have a lot more work to do in regards to some patches and tidying up the edges but I just wanted to ask adivce on the rust. I've hit it with a wire wheel and it appears to be lifting quite easily. There is some pitting in the steel though but it looks like it is cleaning up ok. Is this where I want to be heading for it to be ready for epoxy? As long as the rust is gone, is that ok for the epoxy?

IMAG0559.jpg


IMAG0558.jpg


IMAG0560.jpg
 
I dropped these cowl pieces off today to a sandblaster company. He's going to blast them back for me but at the same time he said he coats them straight after. I asked what coating product was and he said it was an acid based product but was also neutral. Not sure exactly how this works but as soon as he said it was acid based I asked to not have it coated. He wasn't to happy to do this for me but I stated that what ever he put on, I'd have to only remove again. Just wanted to confirm that this was the right thing to do? I know I've read a lot on here and have read over and over to not treat any metal with any rust treatments and if they were, it would have to be neutralised. Did I do the right thing in objecting to the coating? I'm aware that surface rust can start straight after, and he warned me of this, but I said this was better then having to treat it to neutralise.
When he asked what paint product I was using and why I wanted this, he looked at me blankly when I said SPI. He said the product was safe to use with POR-15 or KBS type products but I know from reading here just what you all think of them. I didn't say anything to him about the use of POR-15 or similar, just that SPI required a completely neutral surface and that is what I wanted. Am I on the money and done the right thing?
 
Just tell him it's a "direct-to-metal" or DTM epoxy primer. You are doing the right thing, but try to make sure time and handling are minimised prior to priming. Avoid touching sandblasted metal with bare hands.
 
Good stuff. Thanks for confirming that, Crash!

And will do. By the time I pick them up, I'm hoping to have prepared some other parts to prime at the same time.

Cheers!
 
Back
Top