You can apply as many coats as you want for build. Just keep in mind that the more you apply at once, the longer it will take to dry enough to sand well. Normally when using it for build, I apply 3 wet coats with an hour or more in between. Use a 1.5-1.8 tip gun and mix the epoxy the night before. It will dry sand best after at least 48 hours when doing this. 72 hours even better.After this next round of epoxy how long should I let it dry before blocking? How many coats should I do for building on it?
You are using an out of date browser. It may not display this or other websites correctly.
You should upgrade or use an alternative browser.
You should upgrade or use an alternative browser.
Porsche 911 backdate project
- Thread starter getto822000
- Start date
getto822000
Promoted Users
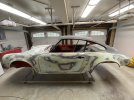
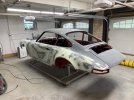
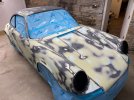
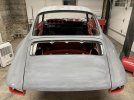
Just blocked it out to 180. I can see a couple of low spots and some small imperfections. But I think I’ll go ahead and shoot it with 3 coats of epoxy. Need to clean out the shop first and mask it up.
Attachments
getto822000
Promoted Users
Getting ready for an early morning spray session this weekend. 3 wet coats of epoxy, 1 hour between each.
How long should I wait to block? What grit do you recommend starting with?
I’ve got a spare 911 hood to use as a test panel to dial in the gun. I’m going to try using a 1.3 tip for the Fuji turbine rather than the 1.5 tip I used last time. It seemed too heavy and dumped epoxy on a bit heavy.
How long should I wait to block? What grit do you recommend starting with?
I’ve got a spare 911 hood to use as a test panel to dial in the gun. I’m going to try using a 1.3 tip for the Fuji turbine rather than the 1.5 tip I used last time. It seemed too heavy and dumped epoxy on a bit heavy.
Attachments
-
 D4BACD98-2FE9-458B-9D88-D22D7604A259.jpeg150.5 KB · Views: 132
 -
 6DC52F28-8BC1-416A-97C3-F4DCA08A9BB4.jpeg168.3 KB · Views: 124
 -
 B0CE9F79-24CE-4855-B984-8186B3CE92AC.jpeg160.3 KB · Views: 123
 -
 703D20E6-B70B-4A88-A71E-F3587D2D517B.jpeg162.2 KB · Views: 128
 -
 C7EDCE46-05A2-4178-8335-D8F9D7488C37.jpeg181.2 KB · Views: 130
getto822000
Promoted Users
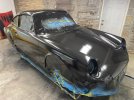
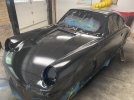
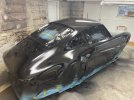
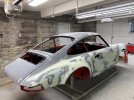
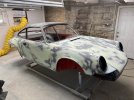
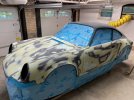
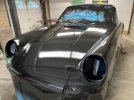
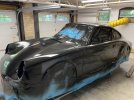
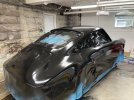
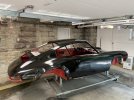
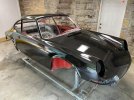
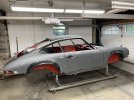
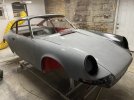
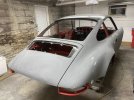
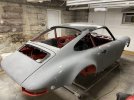
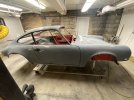
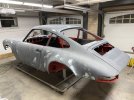
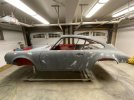
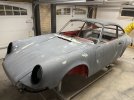
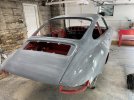
I got it sprayed this morning. I had mixed up about 4.5 quarts and sprayed nearly all of it. I did two medium to heavy wet coats about 75 minutes apart. I’m very happy with the results. I got a couple of small runs where I coated the window frames but otherwise it looks great. I’ll let it dry for a week or two. Very happy with SPI epoxy! And happy with the bodywork I did. It will need touch ups on that but overall it’s looking good.
Attachments
-
 0C36EAC4-ECEE-49B0-AEAF-751106C59657.jpeg170 KB · Views: 141
 -
 69045E71-F856-46DB-86A8-493B808C7BBF.jpeg172.2 KB · Views: 137
 -
 D1502F78-F298-4404-87B8-3659B3637A2B.jpeg185.7 KB · Views: 139
 -
 FEC51A78-A2BB-4B5C-9FC5-CEC659476C5C.jpeg173.8 KB · Views: 128
 -
 74506544-8390-4648-810E-D94D3EA5976B.jpeg167.3 KB · Views: 133
 -
 2597B344-0BC5-4DE7-AB41-A2E7B6DCEB6C.jpeg197.4 KB · Views: 156
getto822000
Promoted Users
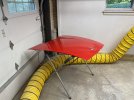
Unmasked. Very happy with the 1.3 tip and wider fan on the Fuji turbine.
Attachments
getto822000
Promoted Users
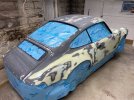
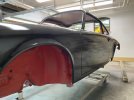
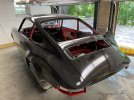
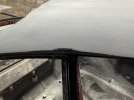
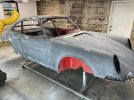
Ok it has been 10 days at 72 degrees and around 28-30% humidity. The epoxy seems well cured. I started sanding it out with 120 grit and right away I can see the problem areas. One high spot and many lows. But I’m starting with the toughest area where the door meets the body and here I fixed rust and patched the quarter panel. It’s looking okay. I’ll work my way around the whole car, tap in any isolated highs, and use glaze putty to fill in lows. Then I’ll epoxy again with 3 coats.
Attachments
getto822000
Promoted Users
getto822000
Promoted Users
getto822000
Promoted Users
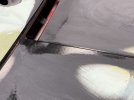
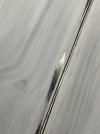
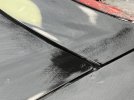
Ok I’ve blocked down the whole car with 120 grit, stopping anytime metal started poking thru. There are a lot of little low spots. Most are pretty shallow and some are deeper. I could use some advice here. My gut tells me to glaze putty all of them and then sand them down with 120 grit. Then remove those scratches with 180 grit and epoxy again with 3 build coats. However, where do I draw the line with glazing them? Some look like primer alone could fill them in. Any good words of advice here from your experience?
Attachments
-
 F2537FEF-E7A2-44CB-BDB3-D86E72BFDD52.jpeg147.8 KB · Views: 129
 -
 0F871EA4-ABF0-4E18-ABCA-4AEF8D71982B.jpeg135 KB · Views: 118
 -
 28467AA6-CAFB-4C03-97C9-5F23EE0ACAAB.jpeg174.8 KB · Views: 119
 -
 CF31AF6A-85EB-4F03-A782-23C6AC52A759.jpeg139.9 KB · Views: 114
 -
 9211EC28-BDF1-4832-8FC3-E3D3A8351E87.jpeg154.4 KB · Views: 123
 -
 29F4F4B4-925E-4DD1-8556-9AF09D5E3563.jpeg178.6 KB · Views: 115
 -
 D203595D-48A5-4D87-B599-3C7A9C905D01.jpeg148.7 KB · Views: 112
 -
 F8A1598B-D133-4193-9655-3DD19934B1E1.jpeg134 KB · Views: 114
 -
 CD661234-62BE-402A-8B8C-C22A1746DCA5.jpeg140 KB · Views: 118
 -
 9013BC6B-83AC-4223-8030-1208A28A72F3.jpeg177.2 KB · Views: 122
")
getto822000
Promoted Users
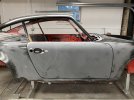
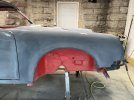
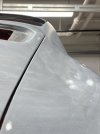
I took your advice and started panel by panel. This morning I spent 2 hours on just this fender. Filled all the tiny spots, blocked them with 120, then blocked the fender with 180 and a red scuff pad (using a block). It don’t look like much in the photos but it is smooth!
Now just need to repeat this on all other panels….
Now just need to repeat this on all other panels….
Attachments
The pro painters on here may have missed this, but that sounds like a metallic color. Also, is one gallon enough to paint everything you want to, and still some for touch ups later? You asked for suggestions in your current post, so it seems like you are going all out on this so are you going to be happy with the panel gaps after its painted? Its a personal decision when doing your own car, so I'm not suggesting anything, just asking.I'm going to try to paint it with Glasurit 22 single stage with my turbine sprayer. I have a gallon of it in Aubergine purple which was an original color from 1973.
getto822000
Promoted Users
From what I’ve read about turbines and Glasurit single stage, one gallon should be plenty. I’ll do two coats per instructions and then a third with 50/50 color and clear. Probably will use a 1.0 tip and about 7-8psi. But little room for error if I do something wrong. The color is a solid, non metallic so theoretically should blend well. I’m happy with the gaps but need to touch up the lower door opening edge inside the door jambs. They a bit unfinished in there. I was hoping to block down the whole exterior of the car to 220 grit after another round of primer, then disassemble it and finish up the jams and interior touchups, and then finally wet sand out each panel to 320 and 400.The pro painters on here may have missed this, but that sounds like a metallic color. Also, is one gallon enough to paint everything you want to, and still some for touch ups later? You asked for suggestions in your current post, so it seems like you are going all out on this so are you going to be happy with the panel gaps after its painted? Its a personal decision when doing your own car, so I'm not suggesting anything, just asking.
getto822000
Promoted Users
Yeah good question. I’ve read where people have done it successfully with the same setup. But I’m gonna test a spare hood I have first and only mix up a little to try out. If I can’t dial it in then I’m going to have someone else spray it with their setup.None of my business, but yes, your gun will spray epoxy and base fine, but do you know if it will spray a single-stage or a clear, same item but one with color.
Just hate to see you buy the material and not have any luck laying right.
getto822000
Promoted Users
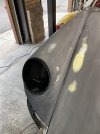
I’ve been working the spot putty and blocking down to 180 grit and then final block scuffing with a red pad. I almost finished but ran out of putty. The car is getting very smooth. I’ll keep working on it this week until I spot treat every imperfection that I can find. Then maybe this weekend I can do a second round of primer. The car is pretty straight so I think there is a possible chance that one more build round of epoxy primer will do it.
Thinking about letting it cure for 2-3 weeks and starting with 180 grit next time. Any feedback on that is welcome.
Thinking about letting it cure for 2-3 weeks and starting with 180 grit next time. Any feedback on that is welcome.
Attachments
-
 51A7F3D4-C852-45D0-A5FF-3DB3654FBAD4.jpeg164.2 KB · Views: 119
 -
 4749E56D-34E8-4CC0-AD6D-FF53B27ED704.jpeg134.5 KB · Views: 107
 -
 5C0478A6-6D11-46F0-9F66-A0A0165554F7.jpeg156.5 KB · Views: 110
 -
 8FE7BDF2-6F4C-48D4-BE5E-1730C5C5DD09.jpeg207.8 KB · Views: 105
 -
 2BEB640F-A606-4C4E-A129-6FD01AF5F5CE.jpeg190.4 KB · Views: 107
 -
 6F7541A3-9B74-4263-B49B-65A750DA2AC8.jpeg91.1 KB · Views: 127
Set the hood on edge do not test when laying flat.Yeah good question. I’ve read where people have done it successfully with the same setup. But I’m gonna test a spare hood I have first and only mix up a little to try out. If I can’t dial it in then I’m going to have someone else spray it with their setup.
I have heard all these posts people read how it work with good quality clears and then the guy that bought one cant make it work, unless he reduces it down to a low solids spot repair clear.
getto822000
Promoted Users
Will do. I'm not in a big rush so will take my time and experiment. I'm using the same Fuji Q5 setup that another guy used and it worked well with your production clear based on the thread. I've still got lots to do to spot treat this car, then another build round of epoxy, followed by interior and undercarriage cleanup and epoxy as well. Planning to clear over the black epoxy in those areas, and just keep the purple Glasurit on the outside and jambs like an original 1972 911 look. I've got a lot of time to get this done, so will take it slow and learn as I go. If I cannot dial in the clear then I'll leave the car in epoxy, ready for it until I can find the right paint shop who will spray the Glaso for me.Set the hood on edge do not test when laying flat.
I have heard all these posts people read how it work with good quality clears and then the guy that bought one cant make it work, unless he reduces it down to a low solids spot repair clear.
getto822000
Promoted Users
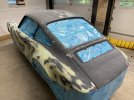
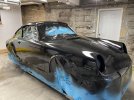
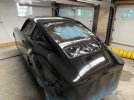
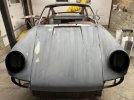
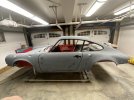
Ok I got her coated again. This time 4 wet coats, spraying about 7.5 quarts of material in total! It’s thick, but that’s what I was going for. Hoping that this will block out to 400 and be ready for paint. Going to let it cure for a month while I switch gears and address the bumpers, interior, trunk, engine compartment and underside of the car. The first coat was too wet, but I then widened the fan a bit and that fixed it. Turbines are weird creatures. You have to have just the right tip and fan width combo to get good atomization with the turbines lower pressures. At least that what I think was going on. I’m happy with how it turned out. There’s a lot of material on that car. Just a couple of runs but will sand them out later.