You are using an out of date browser. It may not display this or other websites correctly.
You should upgrade or use an alternative browser.
You should upgrade or use an alternative browser.
Need some help with urethane wave.
- Thread starter LITJOHN
- Start date
Jim C
Oldtimer
if your cutting and buffing then you want a med orange peely surface. if you put the clear on really wet so it flows out and looks great then when you sand and buff you are left with the urethane wave that you got. what your looking for is that ford truck clearcoat job. if your going to spray and its done then its fine to spray it wetter so it flows out more. now that you have sanded the clear, when you recoat be sure to add some reducer to the clear so you are able to put thinner coats on. you can easily add 10% reducer to almost any clear without negative results. some clears you can add a little more.
Thanks Jim, I was reading the spec sheet on the clear coat I have and didn't really see if or how much it can be reduced. Spec sheet attached.
That and I have aprox 1/2 gal (give or take ) and a qt of activator / reducer left. Using Chromabase G2-7779S with 7775S act/redu. Not sure if that's going to be enough to shoot all the panels again...... This crap is expensive....
That and I have aprox 1/2 gal (give or take ) and a qt of activator / reducer left. Using Chromabase G2-7779S with 7775S act/redu. Not sure if that's going to be enough to shoot all the panels again...... This crap is expensive....
Attachments
Chris_Hamilton
Trying to be the best me, I can be
Nowhere near enough on a Chevelle. Not even close. Get some SPI Universal or Euro 2020. Half the price and better quality than what you are using. Text Barry on the Tech Line and he will get you sorted.Thanks Jim, I was reading the spec sheet on the clear coat I have and didn't really see if or how much it can be reduced. Spec sheet attached.
That and I have aprox 1/2 gal (give or take ) and a qt of activator / reducer left. Using Chromabase G2-7779S with 7775S act/redu. Not sure if that's going to be enough to shoot all the panels again...... This crap is expensive....
I was thinking the same thing!! I stopped in at a local jobber and they had some but it was pushing $500 for a gal and a qt of acti/reduc. After the sticker shock they pushed me towards Evercoat and that was half as much. Looked the specs up on it after I got home and could find only limited info on it so I'll be taking it back. I bought some SPI 2201-4 flat black a while back and shot the front inner fenders and the motor brakects. They turned out nice.Nowhere near enough on a Chevelle. Not even close. Get some SPI Universal or Euro 2020. Half the price and better quality than what you are using. Text Barry on the Tech Line and he will get you sorted.
This is a pic of the front assy. and a couple others. My son and I pulled it out for it's 1st start 2 years ago. Then I tore the dash out and went through everything on that and repaired a few things. Put new firewall insulation in and dyna mat on the floor, doors / quarters where i could reach and the top.
.
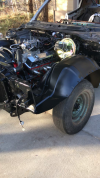
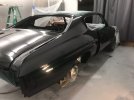
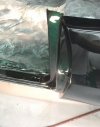
Been a while since I've did an update, got side tracked with life, so here I go. Fairly disguested at the moment but oh well.
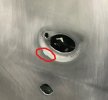
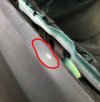
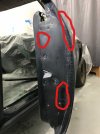
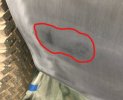
I blocked all of the car using 600 and 800 in some places. It flatten out pretty good buttttttttt burned through in a few places. Looking for advice on how to best proceed.
A couple of places ( 2 ) I went through to the sealer, the others to the base. It is a metalic base....
I was reading a thread by Dean Jenkins on the 02 Suburban looking for insite and found a couple of things.
Chris Hamilton wrote : "Nor done unless you have trash or really excessive texture. If you do sand you want to spray some more base over the sanded area before you clear. Looks like you got away with it though. You wouldn't have, had it been a metallic"
Is the best practice on a metalic base to reseal the whole panel and reshoot the base and clear or are there other alternatives?
Any help would be great!!


Chris_Hamilton
Trying to be the best me, I can be
John, those areas you will need to hit with more base. Hopefully you have some base left from the job.
You just need to cover those areas, not the entire panel. Do a search here with my username and keywords "blender" "blending". I go into a lot of detail on what to do and gun technique.
Ask any questions you may have and I'll try to answer them..
You just need to cover those areas, not the entire panel. Do a search here with my username and keywords "blender" "blending". I go into a lot of detail on what to do and gun technique.
Ask any questions you may have and I'll try to answer them..
Ok, been reading for a while now and from what I get is
Mix the base with blender ( Metalux 1056 ) at 1:1 and add slow reducer ( Melalux 1158 ) at 2:1. Adjust the fan and fluid down as much as possible and feather it in and out on those areas. Letting it flash and then extending out on each pass afterwards. 2-3 coats. Is that correct?
Using an Iwata AZ3 HTE 2 HVLP base gun 1.3 tip
I've never done any blending or used a wet coat on something like this.
Thanks again for the help cuz boy I need it!!!
crashtech
Combo Man & Mod
I'm not familiar with Metalux, but generally you want to use full strength base to cover areas that are sanded through to that you won't see through the paint when you are done. Tricky colors may need special treatment but I don't think your color is one of those. I would just use base as you normally prepare it, don't use a faster reducer or anything different. Cover your bad areas and flick your wrist out to the side every time you stop your gun travel, that helps fade the metallic blend away from the repair area. Go a few inches past your previous coat each time, but my guess is you may not need more than two coats with that color. If you have done a test panel, you will know how many coats it takes. If you have not done one, now might be a good time. Free sprayout cards with high contrast printing provided by your jobber can tell you quickly how many coats are required to get true coverage. It's easy to carry a test panel out into full sun, usually that can't be done with a whole vehicle in the middle of a paint job.
Chris_Hamilton
Trying to be the best me, I can be
Blender isn't really necessary in your situation as you are using the same base as is on the car. Main concern is spraying it correctly so that you don't have noticeable start stop areas.
Reduce your base as normal. When you spray you want to do light medium coats. You don't want hard start.stop areas. Practice moving your gun slightly before pulling the trigger and letting off on the trigger while still moving the gun. Applying your coats like this will keep you from getting those hard stop/start areas that can be noticeable. Black is easy though so it should not be too hard. Extend each coat out slightly. You do not want to spray wet, only medium at most. Practice on some masking paper the technique I described above.
Reduce your base as normal. When you spray you want to do light medium coats. You don't want hard start.stop areas. Practice moving your gun slightly before pulling the trigger and letting off on the trigger while still moving the gun. Applying your coats like this will keep you from getting those hard stop/start areas that can be noticeable. Black is easy though so it should not be too hard. Extend each coat out slightly. You do not want to spray wet, only medium at most. Practice on some masking paper the technique I described above.
Ok, sorry since you mention reading the posts on using a blender I figured thats what you were refering too. So basicly refering to blending the base and reducer only and feathering it in.
The base was not activated with a hardener so do I need to worry about blistering or should the light starter coats eliminate that issue.
Thanks again
John
The base was not activated with a hardener so do I need to worry about blistering or should the light starter coats eliminate that issue.
Thanks again
John
Chris_Hamilton
Trying to be the best me, I can be
The blender is used when trying to blend Color, OEM or otherwise already on a vehicle. I referred to it in the search cause I knew the posts that I went into a great amount of detail about the whole process would show up in the search. You don't need t worry about it as you are using the same batch of color that is on the car. You just need to be concerned about how you spray it.
As for the fact it is non activated, yes that can make it more prone to blistering, but you will lessen the chance if you apply it lightly. Especially the first coat of color. Quick in and and feathering on and off on the trigger. Let each coat flash completely before applying your next coat. Don't get in a hurry. Stop when the problem area disappears. I would also recommend that you tack between coats (after it flashes) the whole area to avoid any dry spray buildup and trash. Practice the technique I described above, very similar to what Crash wrote about wristing it off. In a small area wristing it is easier.
If you find you are having trouble doing this then we can discuss using a blender to help. Shouldn't be necessary though. Practice it on paper before you do it on the car.
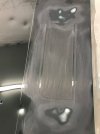
Ran a test yesterday on the hood and it seems to have turned out very well using both of you're guys suggestions/instuctions. I hit the hood with 600 and burned through in some places to the metal. Wiped it down and shot it with no other prep. Had no blistering and no haze around the 2 areas I reshot with base. I then put 2 coats of cleared on the whole area. Heres a few pictures. I feel that I can do the places on the car now that I screwed up with out having issues thanks to you guys. Maybe I can finally start putting this thing back together!!! Oh yea, those are hail dents...
I'll post more pictures when I get the panels shot.
Thank Again!!!
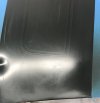
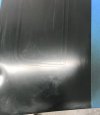
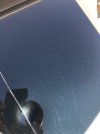
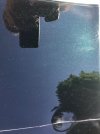
I'll post more pictures when I get the panels shot.
Thank Again!!!


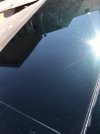
Well I bended the spots yesterday morning and then shot 4 coats of clear. The areas that I reshot with base turned out nice. The Sata was a little touchy getting set up and ended up with a few runs on the first coat of clear. Ended up setting the fluid at 2 turns out and it settle in ok after that, had the psi at 28-30 at the gun and full fan. Still need to cut and buff but here's a couple pic's.
One question, how critical is it to get it out in the sun right away? Can it be as much as 2 days later or it that pushing it?
Thanks again for all the help
John
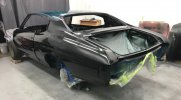
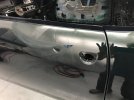
One question, how critical is it to get it out in the sun right away? Can it be as much as 2 days later or it that pushing it?
Thanks again for all the help
John


Thanks Jim!!
It's about 97 and been cloudy most of the day, tomorrow is suppose to be better for UV rays with about 98 and sunny. That and I've some stuff to move to get the car out and knock a pine tree down, it's dripping sap and dropping cones. Don't want that crap on it.
Thanks
John
It's about 97 and been cloudy most of the day, tomorrow is suppose to be better for UV rays with about 98 and sunny. That and I've some stuff to move to get the car out and knock a pine tree down, it's dripping sap and dropping cones. Don't want that crap on it.
Thanks
John
