Drip Rail Sealer

123pugsy

Member
I will be SPI'ing (is this a word? It is now..) my roof and drip rails soon.
I like 2K stuff and have a 3M gun to apply it with. Small manual model.
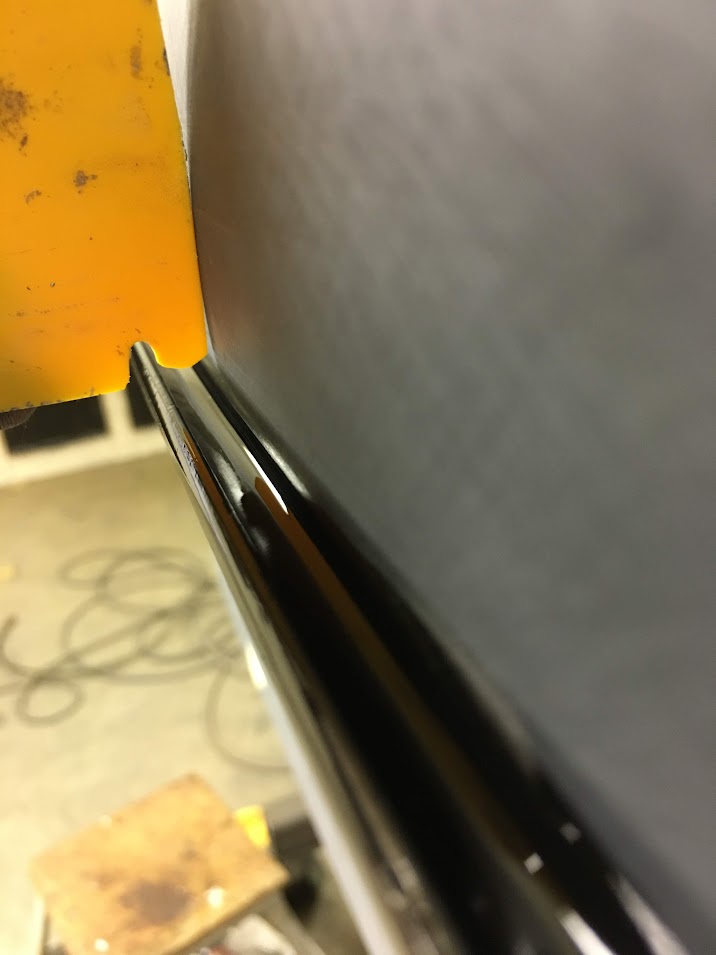
Is there a good 3M product to lay down in the drip rails of my 41 Chrysler?

I saw the Fusor self leveling, but don't believe something like that can work as it will run down the A and C pillars.

How long after applying SPI should I wait to apply goop? Next day OK?
 
I always use self leveling in drip rails. Just put a paper cup on the ends to catch what runs. Will require a little cleanup on the ends, but better than trying to smooth the entire length, IMO. I wait 24 hrs. or more after epoxy.
 
Pugsy, here's the seam sealer we applied in the wagon's drip rail. I had tried a few different brands over the years and have to say I really like the Norton 97121 epoxy sealer. Really smooths out well. Uses your 3M style applicator gun..


WXy-33StVdh-Kjots-LJyvATnSbeFp5fkgqvKHGbJsjIk0SIZ1Ks-NkgwCRQEjaiVKG9xF7a6Fqi1sQND7-uniUQBWjx-nbuS8bRsFFTiTNgEj2xOrM1o_AeEcTb0Ga1zBZOzbO8IbAZklvEGiPB6a1ccMaIHQ_2qQHHyRprJO3L814uA4rd6x9LovaN7gxth47enlGwl0h6OIAVUns-JOjOoNaVaZvw5W-9I08FCjs0JWi11g68diflfS248_6Imb9n3tUkQLWcBT-qszViGJXnSmMG1Uey5cIdgSn7OBHGcN3mpdw8q7U4XAXUOXON6djajKPjfUVFZHSlOzh9_Gu5BdiKoj4aANPy2J9vAX5DTzfF4VRwFLkLjndPqRC8dhvA6owTjrLjL6awdphj2w2H78rAhsK7KXO7IzwvpJHjFeozhNvmgEuZWNEgxHjzgAM3l3C2ZAmGRwqKppFZ7PMOFVTtYFLf6bPL8U50AzHl1ydOov6yQBK_GJB1U8h9K8dDHTeec7cYsUFTZPzMjDSYrTliicVEXwvhV0MXX4SZ27MirlgsbmA71zMqOVjInbd7M7U-Nr0zlfV43VifoMvzTUz_Q-_Zg4uhjiJdi2M5nibiO9T1KAi7tXauBREq9awl3PXIoGOCxH25ZcPQUYLZjjVfiKraAPwHqzn37u8AAmM1FvD2oa_T=w717-h955-no


Spreader was modified to help get things consistent, as well as pull the sealer up into the hemmed edge to seal out the elements...


wj6D6kA8zYCStz3yfDpGZGCuPOs6mz2hSKI_5snbfIQcsARGTE5dhwsTR6G5Spc3dQmEoCfx2cgdarJx-RM6Ug7AVCUl3XgIulk-vKh8TDirVQbLs_p3FLFY5offRamkx3IeZH8jiVkF2-cBSQLf5O8B5jMe4QKBJysIeNIh927QkMzm1d7AtBZAAm0Ep-TgtKzQCkYQdQTPYK6IP9ta06rCFKCquAfTZP2vOq-jLBKG--oadJTdAp48rQvayuoiLZ9GVuaMbMALc_O-EywFzFN_xqy5xEckV2KpUWKRZ7L4u_GSnbbe4latgrTBRzsjcWSGU0llv0tYz-GfiNzvN6eBQQyOQv2RmWBD6h5Uh4bk9ZfA-PZu9dc7orxSbnuzXpKodBj81y8PbE9L2Y1IDE8h8F7nW2Cu85WXYViYeGjfU0_KSC4MoaheUm9NqKKkQNZnVZEx54yYtKfnt__v76M-cuWu3I919nXBr9h1rIejOocW-9Fgdu_z-vAOvZubOL_uXSqt4_--X4-GVHulrkGtVcZ7iGHSN-p2ZfyiSVISIojA6EEn4yEmdh2Qq5J4napTeVw152eigahNeeZWqfNZIWDwd7CFqmkbAh8QAIAjUbsfn7IwS7rVq-cT7dPEW-xWeJeU5U6SCWfX330c1rEVEl8hY-SG34IggFyKb4ign15ifW_0g97J=w717-h955-no
 
Thanks Guys, but self leveling will not work downhill. The crack is about 3/16" up from the bottom of the gutter, and with it just running down, I can't see how it could get high enough up into the gutter to fill the seam.

Robert, I read it has a 3 minutes time frame.
Does it thicken up enough to be pushed around allowing it to be worked and held back from running?
Or, by that time, it's too late, too fast?

Anyone use a thicker 2K sealer? I don't like the idea of it either, as it will never be perfect, but the self leveling just looks impossible in this case.
 
Situation like yours Pugs, I will use the regular 2 part, along with a small detail type paint brush that I've cut off about half the length of the bristles, and some urethane reducer. Will try to apply it as smoothly as possible, then smooth it out further with the brush soaked in reducer. Reducer works to smooth the edges off for us mere mortals, I've never been able to do anything as pretty as what Robert showed without using some reducer.
 
I used 8307 / self leveling on the horizontal part of the seam and then at the transition to vertical used 8308 / non flowing. My process was to start with 8307 and finish what I could with it, then switch to 8308 and finish the vertical part. By the time I finished with the 8307 and switched the cartridge to 8308 I was able to apply the 8308 and work it without disturbing the 8307.

I was a little concerned using two different products, but both are epoxy based and I figured since they weren't fully cured when overlapping it would bond.

Make sure which ever you use you run through a plan, try to stick to the plan and have all tools you might need, including towels or rags to aid in cleanup, and a spreader. I used a spreader like Robert mentioned on parts of my second attempt. You wont have time to mess around, if it starts to set up and you aren't ready you are in for a bad time.

I'll show my failure to highlight my points above. I tried to put too much on at once without a good way to smooth it. I figured out quickly that my finger was way to small to smooth it into the wide drip rail that I had. End result, a disaster.

20171115_113158.jpg


After some guidance on here and a better plan, a lot better outcome. This was just about 4 years ago now, I can still remember being absolutely deflated after that first attempt. I felt like I won the lottery after my second attempt.

20171118_192831.jpg
 
Last edited:
Duramix had three seam sealers, and my favorite was the semi flow one
And got it down to a science as I would start 2 inches above the lowest end and let it flow.
I think the only company now that has it is sem.
 
I used 8307 / self leveling on the horizontal part of the seam and then at the transition to vertical used 8308 / non flowing. My process was to start with 8307 and finish what I could with it, then switch to 8308 and finish the vertical part. By the time I finished with the 8307 and switched the cartridge to 8308 I was able to apply the 8308 and work it without disturbing the 8307.

I was a little concerned using two different products, but both are epoxy based and I figured since they weren't fully cured when overlapping it would bond.

Make sure which ever you use you run through a plan, try to stick to the plan and have all tools you might need, including towels or rags to aid in cleanup, and a spreader. I used a spreader like Robert mentioned on parts of my second attempt. You wont have time to mess around, if it starts to set up and you aren't ready you are in for a bad time.

I'll show my failure to highlight my points above. I tried to put too much on at once without a good way to smooth it. I figured out quickly that my finger was way to small to smooth it into the wide drip rail that I had. End result, a disaster.


After some guidance on here and a better plan, a lot better outcome. This was just about 4 years ago now, I can still remember being absolutely deflated after that first attempt. I felt like I won the lottery after my second attempt.

Damn, I mean dam. Good idea with two types. If I did the verticals first, they would dam up the self leveling long top run.
Then again, at nearly100 bucks a shot up here, the thicker one for the whole run is looking more appealing.

Man, that second attempt has an awesome result.

Robert's job is fantastic. One thing I do know is if Robert shows it, I have no chance of getting anywhere close, ha...
 
Situation like yours Pugs, I will use the regular 2 part, along with a small detail type paint brush that I've cut off about half the length of the bristles, and some urethane reducer. Will try to apply it as smoothly as possible, then smooth it out further with the brush soaked in reducer. Reducer works to smooth the edges off for us mere mortals, I've never been able to do anything as pretty as what Robert showed without using some reducer.

If I was to use the thicker epoxy based sealer, 8308, could I brush with my SPI reducer?
 
Yes that is the name of it not semi like i said.

3M # 08329. 2K urethane.
It says it will flow 1 - 2" on a 45° angle.
3 minute work time.

Still nervous about using this one.
I was looking earlier and it's about 1/4" from the bottom of the rail to the seam.
I'm seeing it run downhill but not seeing it get deep enough to get up to the seam.

I'm thinking the heavy bodied epoxy #08308 would be safest. I believe I could sand the mess created to smooth out.
 
Here is what is excellent with the controlled flow, the more you play with it, the more tricks you can do with it.
Like said earlier, if, say, a drip rail angles down, I will put a piece of tape at the bottom end and start about 2 inches up and lay a regular bead.
If the bottom 2 inches is too thin
In 15 to 30 minutes, go to that spot 2 inches up lay another
Bead, and it will blend right in
Like blending a base.

It's like practicing with a blending agent; the more you use it, the better you get, and it's a moneymaker.
Sounds like a plan I want to try.
 
Back
Top