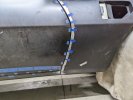
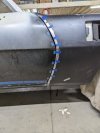
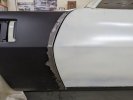
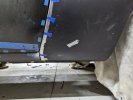
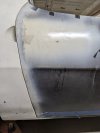
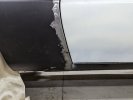
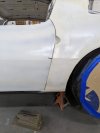
Can't get DS door gapped and aligned properly- gap is too big or body lines don't match.

On the passenger door once I got the body lines set up I could stick my hand through the gap to the rocker so I had to add some tig wire and make it. It was fully welded on the outside, rehung the door and painfully ground in the correct gap. then bodyworked the inside.

View attachment 24340


View attachment 24341

Thanks so much for taking the time to type this all up and share the images here. Did you slowly tack to the edge of the folded over door skin flange? Did you have to do anything else like keep a piece of copper behind the weld or blow off every TIG tack after you did it?

Adding an angled piece thicker at the back than at the of the door/rocker gap (DRG) would be my preferred method to fix this. It's what I tried first and led to this second attempt at skinning. I MIG'ed on an 1/8" thick piece of stock jumping around here and there tacking it in place while it was on the car. I thought that between the door skin, its folder over flange, and the inner door frame itself there was a lot of metal to absorb and dissipate heat. I was wrong. The lower half of the door warped like crazy with massive oil cans. It was all kinds of messed up. I couldn't correct the oil canning on the panel with its vast area and fairly low amount of crown. I'm a no metal working expert. The overhead MIG welding on the thin metal with paint on the inside of it causing some issue was just too much and I messed it up.

So how'd you keep the heat down and prevent oil canning on the outside of the door skin? You're making me want to try again. This time I'd get the body line between the door and quarter right, get the gaps as best I could, measure the massive DRG, determine the amount of stock I have to add based on that measurement, remove the door, strip the paint on the inside and outside back as best I can (it'll still be in the bent over flange and burn and smoke like crazy) , and TIG tack the filler piece on, and blow off each tack with air making sure to skip around like crazy on these to limit heat input in any single area. This will take forever but way less time then having to do the skin A THIRD time because I destroy it with excessive heat. This method wouldn't involve much messing with the body line.


The 2nd option is to do what we've been discussing all day prior to this post which is leave the door with gaps that are workable between the quarter and rocker. I'm using the DRG as the base line and hopefully the only modification would be the the door/rocker gap. In this fix the body line on the quarter gets cut and moved. The body line on the door gets hammered and dollied to whatever extent possible with the crash bar being behind the door body line. The peak in the door skin and frame gets hammered (hard) and tapped up a little bit. The rear of the body line gets faded up over the length of the door with filler / body work. This last method is a combination of all these things: a little here a little there as I called it earlier today.


What's the best?
 
I ran into a similar problem with the body line on a Goodmark quarter panel for my signature car.

The line was to run from the front of the quarter to the center of the side marker light. The drivers side was fine, the passenger side was 1 1/4" low.

Followed the basic guidelines given above by first working the metal to get the line to the center of the side marker hole.
I then ran a string along the body line and put a couple of layers of masking tape along the top edge. The tape was to set the maximum depth of the filler and provide a straight edge.

Put filler along the bottom of tape and carefully sanded it smooth to the tape and feathered into the panel. Once it was done to my satisfaction I removed the tape.

Then taped up to the edge of the filler I had just applied. This tape was to protect the edge I had just created and the sanded filler. Applied filler to the top side, carefully sanded to the tape.

Removed tape and lightly sanded to remove the small ledge and shape the body line.

Rear Cleared.JPG


Right Rear Quarter.JPG


The Goodmark quarter panels were very bad. Not only was the body line off but the side marker light locations were also off one to the other by 3".
Switched to AMD reproduction panels after this and never looked back.
 
Last edited:
Followed the basic guidelines given above by first working the metal to get the line to the center of the side marker hole.
I then ran a string along the body line and put a couple of layers of masking tape along the top edge. The tape was to set the maximum depth of the filler and provide a straight edge.

Put filler along the bottom of tape and carefully sanded it smooth to the tape and feathered into the panel. Once it was done to my satisfaction I removed the tape.

Then taped up to the edge of the filler I had just applied. This tape was to protect the edge I had just created and the sanded filler. Applied filler to the top side, carefully sanded to the tape.

Thanks for the reply, pics, and info. When you say you "Followed the basic guidelines given above by first working the metal to get the line to the center of the side marker hole." Did you do this with hammer and dolly prior to having permanently installed the quarter on the car? I do have access the the back of the quarter body line for dolly work. I can get behind it through the door jamb vent. I can not get behind the door skin line although I don't think I need to. Again. The problem sure seems to be on the quarter.

I'll wait for more thoughts and your reply until I these things up. I'll be spending the weekend putting the wheels on, putting the front end on, and gapping panels as best I can. I'll get that stuff done before I go tear into this too far.

Thanks again for the reply and pics. The car looks great.
Yes, I had access to the rear of the quarter panel through the trunk. When you run your string or laser light, you will see the portion that needs adjustment.
If you're like me, your metal working skills aren't anywhere near some of the pros on here. So I focused more on the finishing point of the body line that needed adjustment. This keeps filler away from the edge.
 
I went through this on my el Camino project.
Did very similar to what @orangejuiced86 and @'68 Coronet R/T explained.
Took a lot of time and patience! But got it worked out.

The only thing I would add is that door alignment isn't correct until the striker post, latch, seals and any rubber bumpers are installed and the door is closed and latched. The door changes shape a bit when it seals. Learned this the hard way :confused:
I had the seals on and off so many times they ended up getting too worn to use and I had to buy a new set.

Also, I wouldn't call anything final, or make major changes until the hood is fit, in addition to the fenders. It all has to work.
A small change of the door affects the fender, which over three or four feet can have a big impact at the front of the hood.

Good luck!

Yup, understood. I have the entire front end on the car now and this includes the hood. I've been fighting it a couple hours each night since my last post here. The fenders are new OER fenders. I already had about 100 hours in the OEM fenders, but I didn't like how there was some rust on, between, and all over the surface of them. It's that black rust that's embedded into the metal. It seemed like a risk to use and just as much work to correct as it's gonna be to cut and modify aftermarket fenders.

There is gonna be a lot of work here. The DS OER fender is pretty good. The PS side one is archer too high at the body line. I'm gonna have to cut it and its inner structure to stretch it out and make it flatter, so that its surfaces are planar with the door skin surfaces . I'll need to weld a TIG rod on the leading edge of the door or trailing edge of the fender for a good fender to door gap on both sides. Again, there's a lot of work here. It'll be a few weeks at best before I post here unless I can't figure something out and have a few questions. Thanks guys.
 
I'm having a heck of a time getting the fender to door gap right on the DS. What do you guys do on this gap when it's too tight?
I was gonna die grind the leading edge of the door down. This will break through the door skin flange just like when replacing the door skin itself. After gap was widened in the proper spot i'd re-weld the door skin to its flange that remained.

Alternatively, I could cut a slit with a cutoff wheel in the outer face of the fender about 1“ ahead of the tailing edge. Next id lightly hammer that tailing edge forward to make the cur-off wheel cut close up. This would bring the railing edge of the fender forward and increase the gap between the fender and door.

I prefer the first method. There are some concerns with method two that might make it a little more work. It might expose hardware between the door and fender that would require additional work to hide again. There is an sinner structure behind the fender skin. I'd be welding on the fender skin with that behind it, so I couldn't be able to get a dolly behind it. I don't have one the spot welder dent pullers either. I don't like of not being able to get back there and coat the area with paint after having worked on it especially given that's a known rust point on these cars.
Disclaimer: All of this is a guess as I haven't seen your car and what is going on.
Before you do all that, see if you can move the fender forward. If nothing else is going on and you replaced the fenders with aftermarket ones, then one could assume the fender bolt holes may be off. Open them up to allow you to move the fender forward. Now that may cause it's own set of new issues but if its the fender that is off then it should be the fender that you do the modifications to.
Before you do anything, I would study the car and try to determine why the gap is too tight. There is a reason and when you find it that will help you do the correct thing, rather than just cutting and moving stuff just to make it fit. You can quickly end up with a real mess going that route.

Thanks. It is aftermarket from OER. I have opened the holes up BIGLY for the fitment process. I have a giant washer there to buy able to grab the hole at all with the 3/8" bolt. The plan has always been to make a patch panel to make the fender mount points enclosed holes as opposed to the factory slots anyway. I saw Detroit speed started doing this too. It looks quite nice and I'm sure is much friendlier for final install and shimming.
 
Another thing I'm actually spending time on is whether or not there's a concave curve/body line that starts as a "cup" shape on the fender, goes the length of the entire door (or maybe just the front part of the door), and then extends onto the quarter.

I have a '70 firebird and the curve is there. I've scoured the internet and it seems a lot of cars don't have it. The curve is soooooo subtle I think it's getting submerged in paint and is being sanded over. The OER aftermarket panel doesn't have it at all. I hammered the area in and am going to have to make a little saw cut on the edge to hammer it in and reweld to get the edge flange to have the contour like the face of the panel has. Here are the best pics I've found where it looks like the car has the concave body line/curve.

What's going on here? Is this being filled in with paint and filler on restored cars? I'd say most pics on the internet show cars that DON'T have this body line or it's so faint that you can't even tell it's there. I'm tempted to paint over and fill myself because it'd be about 1/16" deep. The body line doesn't add much and almost looks more sleek when not there. The car looks more smooth. Alternatively I know it's best to leave the line if it's part of the original body.

The line seems to be more visible on light cars. It's usually not perceivable on dark cars, but that could just be due to the lighting in the pics on the internet. I found one TA pictures here. It's so shiny you can see the bottom half of the carz and I think the body line is there, but I'm still not sure. It's so faint I'm just wondering if it's actually supposed to be there. What's on your guys' cars and cars you've worked on?

R (2)~2.jpeg
R~2.jpeg
R (1)~2.jpeg
 
There is definitely a shape in that area from the factory. It is non-existent mostly on the car I'm working on due to the door skin barely having any shape in that area and frankly the very faint shape that was there(which was not even close to the factory shape) disappeared once bodywork started. Is what it is I guess.
 
There is definitely a shape in that area from the factory. It is non-existent mostly on the car I'm working on due to the door skin barely having any shape in that area and frankly the very faint shape that was there(which was not even close to the factory shape) disappeared once bodywork started. Is what it is I guess.
Alright. I'll keep what I can. It may be a lot of work for nothing as you've found that it disappears after very little body work. The shape is very faint. Even on my factory fenders on the '70 the shape is very faint. I have to lay on the ground and long down the length of the car and feel with my hand to even determine that it's there. Most of the cars you look at online and on other forums show cars that have lost the shape - undoubtedly from repairs, metal replacements, and body work. The car looks better without the curve in my opinion, but I'll shoot to keep it.

You've given me my sanity check. The body line is there. You can't imagine how much time I've spent looking at my own cars and cars online to determine that. I'm about to embark on efforts and journeys to retain it, but that work may not yield fruit!
 
Does anyone use a contour gauge to help with this kind of issue? They may not be a large enough tool to be effective.
 
Does anyone use a contour gauge to help with this kind of issue? They may not be a large enough tool to be effective.

I actually do use a contour gauge quote often throughout this build. I certainly could use it when body work comes to determine how much I have to go on sanding. It wasn't helpful here though because the question was not what the exact contour was but whether or not it's supposed to be there period. Googling "pro touring 1977 trans am", "1977 trans am", and looking through different forums like this or groups on social media platforms will show plenty of examples where the slight contour is clearly, objectively NOT present. Other examples seem to show it but it's so slight and since it's of course in a picture and not in front of me I was driving myself nuts trying to determine if it was there at all.

Now that we've determined it's real and not a figment of my imagination when it comes time to create and finish this line I will indeed use a contour gauge with the sample count our coming from the door that's in the car and the fender that's on my '70 bird.
 
It's not so much that it's concave as much as it is there is a subtle bodyline near the base of the door. The door has crown/curve/convex down to that area then it flares out. It's a subtle area but you can see it in some of the pics you posted. Relatively large radius bend. It should match the bodyline in the fenders and 1/4's if my memory serves. Been a while since I did one.
S
I agree, the bodyline should be there as Chris stated, fenders, doors and quarters. All my original sheet metal firebirds have it, the ones that have been worked, not so much. Some replacement panels have it better than others. You can actually see it pretty good on the door shells if you have the skin off it.
 
Thanks for the replies, guys. I'll be working to keep the body line as Pontiac intended.
@Chris_Hamilton, I was having runnel vision and you pulled me out of it. Thank you. I loosened all the front end bolts including the nose and bumper as as reassembly is fastened to the subframe was has the fenders bolted to it. I pulled the fenders and whole front end ahead by hand. It moved about 2.5mm - 4mm. It made all the difference. Things still will need a lot of work, but there better. Now I'm going to either split the fear edge of the fender and pry it back as needed or I will weld some TIG rod onto its rear edge. It's not great. I think it's as good as I'm gonna get with these pieces. They're planar with the door skin too. Which of the two options are best? Split and wedge the skin apart or just weld a rod to the back edge? At the top where it really widens out ill need to add about 4mm-5.5mm.

What's the best bet on the back edge of the door though? Grind off the back edge of the door skin flange and weld shut? The front edge of the doors line up the front edge of the rockers, so I didn't think I should move the doors further forward. If I have to do that it means pulling the fenders and hood off again
PXL_20230317_005735684.jpgPXL_20230317_005725995.MP.jpgPXL_20230317_005801376.jpgPXL_20230317_005744916.jpgPXL_20230317_005931267.MP.jpgPXL_20230317_005806537.jpgPXL_20230317_005859904.jpg
 
I went through this on my el Camino project.
Did very similar to what @orangejuiced86 and @'68 Coronet R/T explained.
Took a lot of time and patience! But got it worked out.

The only thing I would add is that door alignment isn't correct until the striker post, latch, seals and any rubber bumpers are installed and the door is closed and latched. The door changes shape a bit when it seals. Learned this the hard way :confused:
I had the seals on and off so many times they ended up getting too worn to use and I had to buy a new set.

Also, I wouldn't call anything final, or make major changes until the hood is fit, in addition to the fenders. It all has to work.
A small change of the door affects the fender, which over three or four feet can have a big impact at the front of the hood.

Good luck!
I have a 69 El Camino numbers matching SS 396. It is at a body shop for quarters and a roof panel(vinyl top ate the roof). They tell me the quarters and the roof panel doesn't fit correctly. They are not offering to tell me what is wrong. They are Goodmark Panels. Could that be the problem. I am going to see it tomorrow. The panels are not attached to the Camino to my knowledge. I know this is presumptuous but anything I should be looking for. I may just pull the car and learn on my own.
 
Back
Top