Buffing edges, reveals and difficult areas

LOL Shine!

I tried not to let the small areas bother me and leave them alone but, after all the work I put into this paint job, I couldn't bring myself to leave them alone and call them good enough. I ended up sanding and polishing every square inch of this car.

Slammed; I used the same method on the small details as I did on the rest of the car. Cut it all flat with 1000-grit using plexiglass and then refined the scratches with 1500, 2000 and then 3000 trizact. You can get the details on the restoration thread here.

1964 Buick Riviera

On the small detail work like the side vents, just go slow with the 1000 and mind your edges working with the hard block. After that, it gets a bit easier/ less worrisome with the finer grits working with the foam block or even a finger tip in the small areas.

I wanted to get a smaller tool to do these areas but just couldn't justify the cost so the 2-inch extension and 2-inch pads on my polisher worked just fine. It's a work out ....but it worked great. :p
 
A silver sharpie marker on dark paint will work as guide coat on edges to show you when you've sanded enough to get the texture out. It will possibly swell really fresh paint- do a test to make sure the paint is cured enough. Do your initial cut with 600/1000 or whatever you start with, watch the sharpie marks and stop as soon as the marks are gone, then switch to white Mirka dry guide coat to work up to at least 2500 grit. It's better to go up to 3-5k on tough areas so you don't have to buff as aggressively. It's easier to control where and how much you're sanding vs controlling how much the buffing pad is cutting unless you have a really precise way to buff.

M3zMjKih.jpg


U73PGHzh.jpg


yH7XTCFh.jpg


DGbLv4Sh.jpg
great method. thank you
 
Foam only. The defined edges of the foam allowed me to get right up to an edge and see what I was doing and avoid burning an edge.

Sanding up to 3000 was a big help too since you really didn't need to buff much to get it back up to a shine. I used the 2-inch orange heavy foam pad from Autogeek with the 3D ACA 500. Finished it off with ACA 520 and the black 2-inch foam pad. Here are the pads:

https://www.autogeek.net/searchresu...submit=Go&.autodone=https://www.autogeek.net/

And this is the extension for the buffer:

https://www.amazon.com/TCP-Global-E...d=1651198019&sprefix=buffer+ext,aps,67&sr=8-5
 
  • Like
Reactions: MJM
A helpful hint for buffing around edges.. When your buffing pad is rotating and IF it travels across an edge, you want it to rotate off the edge (like the right arrow shows) rather than into an edge (left arrow). The left arrow would dig in as it hits the panel crease, burning the paint. So for the example shown, lifting slightly on the left side of the pad would help to eliminate the pad cutting into the crease. Always best to stay away from the edges as much as you can, but when you do need to venture close, this hint may help...


IMG_0757.jpeg.jpg
 
this is why you need a DA list in your booth . jambs , body revels , peaks and edges need to be shot slick. the panels dont matter but those spots need to be shot and left alone .
 
Foam only. The defined edges of the foam allowed me to get right up to an edge and see what I was doing and avoid burning an edge.

Sanding up to 3000 was a big help too since you really didn't need to buff much to get it back up to a shine. I used the 2-inch orange heavy foam pad from Autogeek with the 3D ACA 500. Finished it off with ACA 520 and the black 2-inch foam pad. Here are the pads:

https://www.autogeek.net/searchresults.html?catalog=autogeek&query=flex-555&submit=Go&.autodone=https://www.autogeek.net/

And this is the extension for the buffer:

https://www.amazon.com/TCP-Global-Extender-Adapter-Polishers/dp/B016ANXVLA/ref=sr_1_5?crid=1RCMXYKOLCLKD&keywords=buffer+extension+shaft+5/8&qid=1651198019&sprefix=buffer+ext,aps,67&sr=8-5
thanks bud i appreciate it
 
this is why you need a DA list in your booth . jambs , body revels , peaks and edges need to be shot slick. the panels dont matter but those spots need to be shot and left alone .

What does "DA" mean?
 
I know this thread is a few months old, but can you guys @64Rivi and @sprint_9 who use the 2 and 3 inch pads on a full sized buffer with the extension let me know if you change the rpm's you cut/polish at when using the little pads?
 
I didn't change the rpm's on the buffer for the small pads. Kept it the same depending on whether working with the cut or polish compounds.
 
I painted my TR6 late summer but got most of it cut and polished by early autumn. Two questions though:
1. I can’t get in close with my buffer, 10”,6”, and 3” near tight corners. How do I polish by hand in those areas?

2. I was a fanatic at mixing my ShopLine single stage Urethane paint (never again!) but there are areas in the engine compartment that after it shines up really nicely I have very very fine scratches. What to do? It just seems that the paint is soft but as I said I was religious about mixing the product. Is there a “filler wax” that would hide these almost microscopic buggers?
 
Dremel tool with Foam or the white cotton buffing wheels with your same compounds if you want to get small.
What I use on my 1/64th slot car body's.
20220911_140342.jpg
 
There are finish glazes like3M Ultrafina, Swirl Remover used with a Black foam pad that are filler products as your describing but will wash off eventually.
 
Thanks for the ideas. I won’t worry about them washing away as it’s in the engine compartment and the Drexel sounds intriguing...

But like I said the paint seems kind of soft because if I wipe down with a micro fibre cloth little microscopic scratches appear.
 
Thanks for the ideas. I won’t worry about them washing away as it’s in the engine compartment and the Drexel sounds intriguing...

But like I said the paint seems kind of soft because if I wipe down with a micro fibre cloth little microscopic scratches appear.
Have you tried putting it out in the sun with the hood up or better yet hood off? That might harden it.
 
Yeah,if it's scaring with a microfiber by now some Sun is in order. Hopefully that does it.
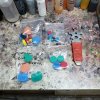
I got these off Amazon last year and they are great for tight,tight areas. I have the flexible cable drive extension for better close access.
 

Attachments

  • 20230216_093959.jpg
    20230216_093959.jpg
    326.6 KB · Views: 57
Sun, heat? LOL. It’s February in Vancouver BC! I will try it though when it heats up around. It’s been around 40* during the day lately but it’s going to get a wee bit more chilly in the next few days.

Those tiny polishing pads look interesting. I suppose the extension is available on Amazon as well?
 
Back
Top