68 el Camino Resto-Mod

When you mentioned the stance, I started looking at that.
I know "rolling" was what a lot of guys did. If I remember, a baseball bat was the tool of choice.
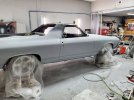
I looked and the interference in the wheel well is a pretty limited part of the assembly.
It looked, at quick glance, like I could cut that area out and weld in a different shape that would eliminate the problem.
All with the fenders and inner fenders on the car.
I've put that on the "investigate further" list.
I do like the way it looks and would love to keep it.

Modern technology has put the baseball bat technique to rest. Here is a tool designed to push out wheelwell lips. Many youtube videos showing the tool in action.

 
FYI.... the link I provided was for visual knowledge of what the tool looks like. I'm not promoting that particular brand. It's what popped up first when I did an internet search.

I was actually surprised at the price seeing as when they first hit the market, they sold in the $200 dollar range.

When using a tool like this, it's best to sneak up on the amount you want to push the fender lip out. Small increments at a time for longevity of the tool.
So, your idea intrigued me and I fell into the YouTube black hole for nearly an hour.
Reviews on the $50 tool on Amazon are that it works but is poorly make and takes some massaging.
The Eastwood tool (that was knocked off) is only about $120 and gets rave reviews.

It seems like the tool is for the "fender lip," not the inner fender.

The fender lip is not my point of contact.
Also, on the 68-72 GM A-Body cars, the inner fender mounts under the fender, so the inner fender covers the fender lip and would be the first contact with the tire, not the fender.
This mounting was counter intuitive and and looks kinda crappy, but it is absolutely correct. I checked the factory assembly manual and several threads on the Chevelle forum. Some guys mount the inner fender above the fender lip, but that ends up causing other problems with fit.

And, my contact point isn't at the lip/edged.
In the picture you can see the inner fender and how it mounts and that I have plenty of clearance from the lip to the tire.

Fender lip clearance.jpg


Here is a picture of the inner fender and my contact point marked in red

Inner fender.jpg


I think that the suggestion of tall upper ball joints and/or camber adjustment from @dhutton01 may solve the problem.
And maybe some gentle "heat and beat" on that area.

Interesting topic and I appreciate the ideas!
 
So, your idea intrigued me and I fell into the YouTube black hole for nearly an hour.
Reviews on the $50 tool on Amazon are that it works but is poorly make and takes some massaging.
The Eastwood tool (that was knocked off) is only about $120 and gets rave reviews.

It seems like the tool is for the "fender lip," not the inner fender.

The fender lip is not my point of contact.
Also, on the 68-72 GM A-Body cars, the inner fender mounts under the fender, so the inner fender covers the fender lip and would be the first contact with the tire, not the fender.
This mounting was counter intuitive and and looks kinda crappy, but it is absolutely correct. I checked the factory assembly manual and several threads on the Chevelle forum. Some guys mount the inner fender above the fender lip, but that ends up causing other problems with fit.

And, my contact point isn't at the lip/edged.
In the picture you can see the inner fender and how it mounts and that I have plenty of clearance from the lip to the tire.

View attachment 23215

Here is a picture of the inner fender and my contact point marked in red

View attachment 23216


I think that the suggestion of tall upper ball joints and/or camber adjustment from @dhutton01 may solve the problem.
And maybe some gentle "heat and beat" on that area.

Interesting topic and I appreciate the ideas!

YouTube black hole, lol.....I gotta remember that, too funny.
I understand your situation better with your last reply and attached pictures. Don's suggestion, and your suggestion of massaging the inner fender should fix the issue.
 
Passenger side and hood ready for final blocking. Never "perfect," but overall I'm pleased with my backyard hack results. God, the metalwork and time I put in to get it to this stage.
How 'bout them gaps? Bring your calipers. Well maybe not, but not bad for an amateur, I think.
20221201_165646.jpg

20221201_165646.jpg
 

Attachments

  • 20221201_165646.jpg
    20221201_165646.jpg
    140.5 KB · Views: 54
Good gaps and line up.
My sail panels don't line up nice like yours at the top.
Don't know why, but I just shot it anyways.

Forgot what the color will be. Black?
 
Don't forget to fix that one thing before you shoot it...
JK, it looks GREAT!
Thanks.
There's always "one last thing."
In my 20's I painted a few cars in acrylic enamel. Couldn't wait to finish the prep and spray some color. I rushed it and the results showed that.
At 60 I dither around and put off color as long as possible. It is so final . . . and I hate looking at a spot and thinking "that would be better if I'd just taken more time."
So, I take my time on the 10,000 one last things.
 
A few years ago I made friends with the owner of a local high end restoration, paint shop.
He offered to mentor me a bit and has been very generous with his time and advice.
He came by yesterday, at my invitation, to review progress and offer feedback.
He said "keep doing what you're doing, and hurry up so I can buy it when you're done." Humbled, grateful and speechless. This guy is a high end craftsman with a 2 year waiting list to get in his shop.

I contrast that with the guy I had do my floors and quarter skins.
He did quality work for me but when I said I was thinking of finishing and painting it myself, he made fun of me and was really derisive. It kind of hurt.
Can't wait to drive the finished car by his shop. Or not, maybe best to let it go, he'll probably just nit pick it. Some guys are classy, some are just dicks. Not my fault, not my problem.
 
Ya, there are a lot of arseholes these days.
But ya, drive it by, make sure you stop, don't forget to say something like, "damn glad I didn't leave it here for paint. I doubt it would have come out this good"
Buddy deserves it.
 
$128 for a gallon of Rage Ultra filler. And most of it ends up on the floor.
I gotta get better at this.
Maybe the positive way to look at it is that you only really pay for what stays on the car, and if done minimally, and well, it is worth it for a great end result.

20221220_155757.jpg
 
Back
Top