You are using an out of date browser. It may not display this or other websites correctly.
You should upgrade or use an alternative browser.
You should upgrade or use an alternative browser.
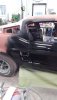
1967 mustang fastback
- Thread starter NextGen Classics
- Start date

NextGen Classics
Floor sweeper
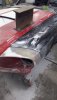
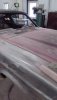
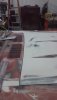
So the hood never fit right. It was humped up along the cowl and the middle of both fenders. So I flipped it over an made about 30 cuts in the bracing in those areas,flattened it and reglassed it. Now it is flush with those areas.
I also had to cut the nose cone in half to get it to fit properly.
The hood was also about a half inch too short so I added to that too.
I also had to cut the nose cone in half to get it to fit properly.
The hood was also about a half inch too short so I added to that too.
Attachments
NextGen Classics
Floor sweeper
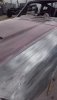
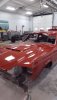
Yesterday I started fitting the rear glass. When I first built the car I used 68 taillights because I thought I liked the more symmetrical look.
This time I am using the correct 67 (cougar style) lights. I measured those suckers about 10 times cause they look off but they are right on. LOL
Now I am up to speed on the build and will post as progress is made...
This time I am using the correct 67 (cougar style) lights. I measured those suckers about 10 times cause they look off but they are right on. LOL
Now I am up to speed on the build and will post as progress is made...
Attachments
'68 Coronet R/T
Oldtimer
Very nice. I have always wanted to do either a '67 fastback or '69 Mach 1. Just never had the perfect storm of finances and opportunity.
NextGen Classics
Floor sweeper
NextGen Classics
Floor sweeper
NextGen Classics
Floor sweeper
NextGen Classics
Floor sweeper
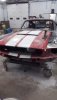
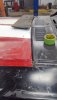
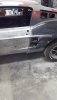
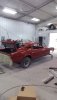
I worked my way to the front nose cone. To get it fit right I narrowed it about a half inch.
Then I got it where I wanted it and clamped it together using aluminum plates on the backside glued on with 3m panel bond adhesive. I went over that with a couple layers of glass.
On the top I veed it out real wide and used VPA followed by epoxy and filler
Then I got it where I wanted it and clamped it together using aluminum plates on the backside glued on with 3m panel bond adhesive. I went over that with a couple layers of glass.
On the top I veed it out real wide and used VPA followed by epoxy and filler
Attachments


NextGen Classics
Floor sweeper
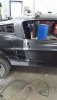
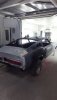
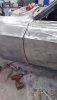
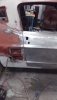
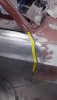
I started working the passenger fender and door and noticed the door had a funny bulge in it.I used the spline contouring gauge (thanks MP&C) and found it was off from the driver's side door.
The bond let loose from the reinforcement bar in the door which was once apparently dented.
I gave up on that and bought another Dynacorn door. It fit well with some welding and grinding to adjust the gaps.
Then I got it in epoxy.
The bond let loose from the reinforcement bar in the door which was once apparently dented.
I gave up on that and bought another Dynacorn door. It fit well with some welding and grinding to adjust the gaps.
Then I got it in epoxy.
Attachments
NextGen Classics
Floor sweeper
")
NextGen Classics
Floor sweeper
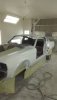
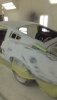
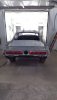
So I need your input on what color I should paint this. Here are some examples. My wife wants black with gunmetal stripes and I am leaning towards the white supersnake replica. It was red for 17 years so that is out......
Attachments


NextGen Classics
Floor sweeper
You guys are killing me with the black LOL. I'm a little worried about the fiberglass showing mapping/ghosting with the black easier. I do like the blue also.
NextGen Classics
Floor sweeper
I agree but white is more forgiving. I am not in the final stages of blocking just yet so we will see